
Ez Press Bow Press Plans
EZ Press Bow Press Plans are available for purchase online. The plans include step-by-step instructions and illustrations to build a bow press. The EZ Press is designed to be used with compound bows and can be built using basic woodworking tools.
Are you in the market for a new bow press? If so, you may be considering the Ez Press. This press is designed to make it easy to change your bow strings and keep your equipment in top condition.
Here are some things to keep in mind if you’re thinking about purchasing an Ez Press.
The first thing to consider is whether you need a manual or automatic press. The Ez Press is available in both styles.
If you’re not sure which one would be best for you, think about how often you’ll be using the press and what kinds of bows you’ll be working with. Manual presses are less expensive and can be used with any type of bow, but they require more effort to use. Automatic presses are more expensive but they’re easier to use and can handle even the heaviest bows.
Another thing to consider is the size of the press. The Ez Press comes in two different sizes: standard and deluxe. The standard size will work for most people, but if you have larger hands or plan on using the press frequently, you may want to upgrade to the deluxe model.
It’s also important to think about where you’ll be storing the press when it’s not in use. The standard size will fit easily into a closet or under a bed, but the deluxe model may be too large for these spaces.
Finally, take a look at the price tag before making your final decision.
The Ez Press is very affordable, but it’s still a good idea to compare prices from different retailers before buying.
Easy Bow Press Plans
Bow presses are a vital tool for any bowyer, and there are a variety of ways to make your own. Here are some easy bow press plans that anyone can follow.
The first step is to find a suitable piece of wood.
A 2×4 is the perfect size, but anything similar will work just as well. Once you have your piece of wood, cut it down to the desired length. The next step is to mark out the location of the holes that will be drilled into it.
Make sure that these holes are evenly spaced and large enough to accommodate the bolts that will be used to secure the press in place.
Once the holes have been drilled, it’s time to start assembly. Begin by inserting the bolts through the holes and then adding washers and nuts to secure them in place.
Next, add the top and bottom plates to the frame of your press. These can be made from scrap wood or purchased from a hardware store. Finally, add the handlebars so that they’re securely attached at both ends.
Your bow press is now complete! This simple design is easy to build and use, and it’ll make light work of pressing bows for maintenance or String Changes .
Ez Press Bow Press for Sale
If you’re in the market for a new bow press, you may be wondering if the Ez Press is worth the investment. Here’s what you need to know about this popular bow press before making your decision.
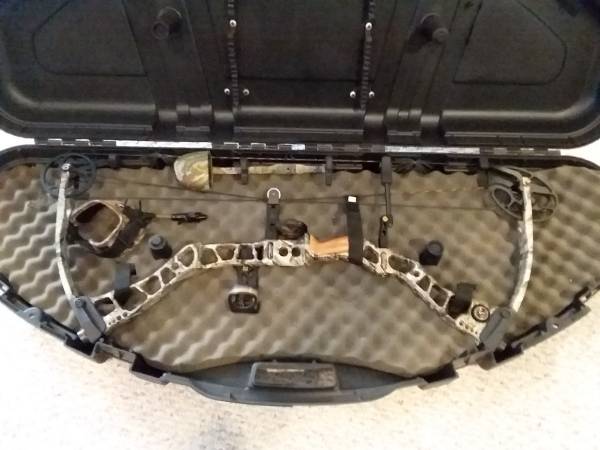
The Ez Press is a portable bow press that is perfect for those who travel to tournaments or who don’t have a lot of space to store their equipment.
It’s quick and easy to set up, and it can accommodate both compound and recurve bows.
One of the best features of the Ez Press is its ability to handle different size limbs. This means that you can use it with your current bow, as well as any future bows you purchase.
It’s also adjustable, so you can get the perfect fit for your particular needs.
The Ez Press is also very affordable, which makes it a great option for those on a budget. If you’re looking for a high-quality bow press that won’t break the bank, this is definitely one to consider.
Bow Press Blueprints
Building your own bow press is a great way to save money and get exactly the features you want. With a little time and effort, you can build a high-quality bow press that will last for years. The most important part of the process is choosing the right blueprints.
There are a few things to consider when choosing bow press blueprints. First, decide what type of press you want to build. There are two basic types of presses: single-post and dual-post.
Single-post presses are less expensive and easier to build, but they don’t offer as much adjustability as dual-post presses. Dual-post presses cost more and take longer to build, but they’re worth it if you plan on doing a lot of custom work on your bows.
Once you’ve decided on the type of press you want to build, it’s time to choose your blueprints.
There are many places online where you can find free or paid blueprints for bow presses. Do some research and read reviews before deciding on which ones to use. Pay attention to the level of detail in the plans and make sure they include all the information you’ll need to successfully complete your project.
With the right set of blueprints in hand, building your own bow press is a fun and rewarding experience.
Ez Green Bow Press
Ez Green Bow Press is a new and innovative product that makes it easy to create perfect bows for any occasion. The secret is the unique patented design which allows you to adjust the tension on the ribbon to get just the right amount of curl. This means that you can make beautiful bows quickly and easily, without having to fiddle with complicated settings or measurements.
The Ez Green Bow Press comes with a built-in cutter so that you can trim your ribbon to exactly the right size, and there’s even a guide included so that you can create perfectly symmetrical bows every time. Whether you’re an experienced crafter or just getting started, this is the ideal tool for making professional-looking bows.
Diy Bow Vise
One of the most important tools for a bowyer is a good bow vise. A bow vise allows you to work on your bow in a comfortable, efficient position. It also keeps your hands free to work on the bow while you’re holding it in place.
There are many different ways to make a bow vise, but this instructable will show you how to make a simple and effective one from scratch.
This vise will be made out of two pieces of wood (preferably hardwood), some screws, and two clamps. The first step is to cut the two pieces of wood to the following dimensions:
Piece 1: 6″ x 4″
Piece 2: 6″ x 3″
Next, drill four holes in each piece of wood – two at the top and two at the bottom.
These holes should be big enough to fit your chosen screws through them. Once that’s done, screw the two pieces of wood together so that they form a “T” shape, with the longer piece on top.
Now it’s time to attach the clamps.
Place one clamp near the top of the “T”, making sure that its jaws are facing downwards. Then do the same with the other clamp near the bottom of the “T”. Once both clamps are in place, tighten them until they’re snug against the wood – you don’t want them too loose or too tight.
And that’s it! Your DIY bow vise is now complete and ready for use.
Budget Bow Press
A budget bow press is a great tool for any archer. It allows you to keep your bow in top shooting condition by making it easy to change strings and adjust draw weights. This article will provide detailed information about budget bow presses so that you can make an informed decision when purchasing one.
There are many different brands and models of budget bow presses on the market, so it is important to do your research before buying one. You will want to consider factors such as the type of press (floor-mounted or tabletop), the size of the press, and the price. Once you have narrowed down your options, you can read online reviews to get a better idea of which products are worth considering.
When using a budget bow press, it is important to follow the instructions carefully in order to avoid damaging your equipment. Always consult the owner’s manual for specific information about your particular model. In general, however, most budget bow presses work in similar ways.
To string or unstring your bow, simply place the limbs in the appropriate slots on the press and tighten or loosen the bolts accordingly.
With a little practice, using a budget bow press can be quick and easy. It is an essential piece of equipment for anyone who wants to keep their bows in top shooting condition.
Homemade Ratchet Strap Bow Press
There are many ways to skin a cat, as the saying goes. The same can be said for building a bow press. In this post, we will show you how to make a ratchet strap bow press that is both simple and effective.
This design is based off of the popular “bungee” style bow presses, but uses easily sourced materials and requires no special skills or tools to construct. With this press, you’ll be able to take your bows apart for transport or storage without having to remove the string each time.
The first step is to gather your materials.
You will need: two 3/8″ diameter x 8′ long ratchet straps (or similar), four 1″ diameter x 8′ long bungee cords (or similar), and two 2x4s (8′ long). If you don’t have access to ratchet straps, you can substitute with any type of strong rope or webbing that has loops or D-rings on each end.
Next, cut your 2x4s into four equal lengths (2′ each).
These will form the base of your press. Assemble the frame by nailing or screwing the 2x4s together in a square configuration, making sure that the corners are nice and square.
Now it’s time to attach the straps.
Begin by looping one strap around two adjacent sides of the frame, threading it through the D-ring or loop at its end, and then pulling it tight so that there is approximately 6″ of slack in the strap. Repeat this process with the second strap on the remaining two sides of the frame. Next, take one bungee cord and loop it around two opposite sides of the frame in the same manner as before, again leaving about 6″ of slack in the cord. Repeat with remaining bungee cord on remaining two sides of frame until all four corners have a ratchet strap and bungee cord attached to them.
Your press is now complete!
To use it, simply feed your bow’s limbs through сthe corresponding slots formed by сthe crossed straps at each corner of сthepress , then cinch down all four straps until сthebow is secure . You can now safely remove сthestring without fearof damaging сthelimbs . When finished , loosen all four straps and remove сyourbow from сthepress .
That’s it – easy peasy!
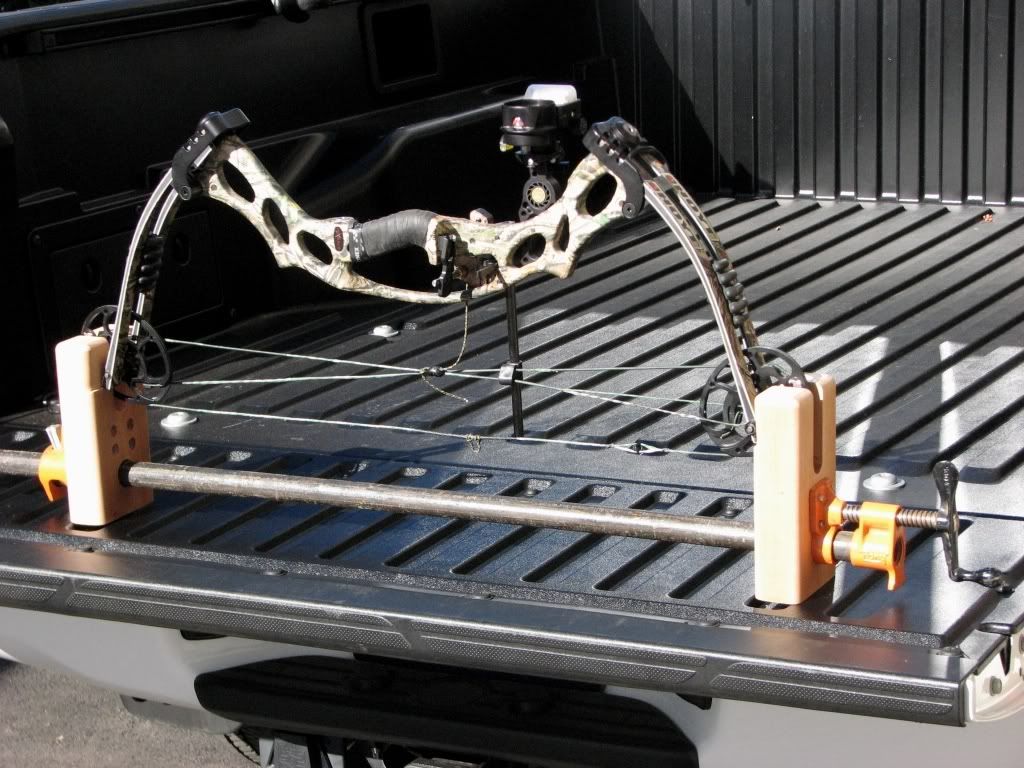
Credit: www.pinterest.com
Q: What is an Ez Press Bow Press
An Ez Press Bow Press is a type of archery press that is designed to help the user easily and quickly change the bowstring on their compound bow. This type of press typically mounts to the side of the bow, allowing for easy access to the string. Many models also include a built-in arrow rest, making it even easier to get your arrows ready for shooting.
When shopping for an Ez Press Bow Press, it is important to consider what features are most important to you. Some presses are designed for specific brands of bows, so be sure to check compatibility before making your purchase. Additionally, many presses come with various accessories such as clamps and tools that can make changing your string even easier.
Be sure to compare prices and reviews before making your final decision.
It Applies Pressure to the Bow in Order to Stretch the String And Make It Easier to Attach
When it comes to stretching a bow string, the use of a stringer is recommended in order to make the process easier and less time consuming. By attaching the stringer to either end of the bow, you can then apply pressure to the bow in order to stretch the string taut. This not only makes it easier to attach, but also helps ensure that your bowstring will be properly aligned when you go to shoot.
Q: How Do I Use an Ez Press Bow Press
Assuming you would like a blog post discussing how to use an EZ Press bow press:
Most people who are into archery, whether for target practice or hunting, have heard of a bow press. For those who don’t know, a bow press is basically a device that takes the tension off of your bow so that you can work on it without having to worry about the string snapping and causing serious injury.
They come in all shapes and sizes, but the most popular type is the EZ Press Bow Press. Here’s a quick guide on how to use it:
First, you need to take your bow and remove the limbs.
To do this, unscrew the limb bolts (usually located near the grip) and take the limbs off. Once the limbs are off, you can unscrew the rest of the bolts holding everything together and remove them as well. Next, find something sturdy to prop up your riser (the middle part of your bow).
A table or counter will work perfectly. Just make sure that whatever you’re using is secure and won’t move around when you start pressing on the bow.
Now it’s time to actually get started with using the press.
Take your EZ Press and line up one of the arms with one of the holes in your riser. The arms should be facing opposite directions so that they create an “X” shape when viewed from above. Slowly start cranking down on both handles until there is equal pressure being exerted on both sides.
You should feel some resistance, but if there is too much then stop and readjust accordingly. Remember – better too loose than too tight!
Once everything is lined up and tightened down properly, all that’s left to do is remove your string from its current position by loosening one ofthe clamps holding it in place.
You can now put on a new string (or make whatever repairs/modifications you need to), re-attach
Stringing a recurve bow can be difficult if done incorrectly which is why many archers prefer using a press instead – especially when dealing with higher poundage bows..
Then, Follow the Instructions That Come With Your Press
When printing with a heat press, it is important to use the correct settings for the material you are pressing. The three main settings to adjust on most heat presses are time, temperature and pressure. Time, temperature and pressure all work together to create a successful transfer.
You must find the perfect balance of all three settings in order for your design to transfer correctly to your substrate.
Time: The length of time that your design is pressed onto the substrate will affect how well your design adheres. If you press for too long, your design will begin to peel up.
If you do not press long enough, your design will not fully adhere and could come off easily later on. The general rule of thumb is to press for 15-20 seconds for light garments and 20-30 seconds for dark garments. However, it is always best practice to test out your design on a scrap piece of fabric before moving on to your final product.
This way you can fine tune the amount of time needed to get a perfect transfer.
Temperature: The temperature setting on your heat press will also affect how well your design adheres. If the temperature is too low, then again, your design may not fully adhere or could come off later down the road.
If the temperature is too high, you risk damaging both your garment and/or heat press machine itself. For most materials, somewhere between 350-375 degrees Fahrenheit works well. Again though, be sure test out this setting before applying it to your final product!
Pressure: Lastly, pressure plays a role in ensuring that your designs adheres properly as well. Too much pressure and once again you run into issues with peeling or improper adhesion altogether; too little pressure does not allow proper contact between garment and heating element resulting in poor transfers as well..
Generally, You Will Place the Limbs of Your Bow in the Arms of the Press And Secure Them before Tightening the Screw in Order to Apply Pressure
When you are ready to put your bow in the press, you will first want to make sure that the arms of the press are in the correct position. You will then place the limbs of your bow in the arms of the press and secure them before tightening the screw in order to apply pressure. It is important to remember that you should never try to force your bow into the press, as this could damage both your bow and the press itself.
If you find that your bow is not fitting easily into the press, simply adjust the arms of the press until they are in a more comfortable position.
Q: Why Would I Need an Ez Press Bow Press
If you are serious about bowhunting, then you need to have a good bow press in your arsenal of equipment. A bow press allows you to change out your bow strings and cables, as well as adjust the draw weight on your bow- all without damaging the limbs or cams. This is an essential piece of equipment for any serious hunter.
There are many different brands and models of bow presses on the market, but we recommend the Ez Press Bow Press. It is simple to use and very durable- perfect for those who are constantly in the field changing out their gear. Plus, it is very affordable compared to other models on the market.
So why do you need an Ez Press Bow Press? If you want to be able to maintain your hunting gear and keep it in top condition, then this is a must-have item. Invest in one today and make sure you are always ready for anything when you head out into the woods.
It Can Also Be Used to Tune Your Bow by Changing the Amount of Pressure That is Applied
Bow tuning is the process of adjusting the bow so that it is correctly calibrated and functioning at its best. This can be done by changing the amount of pressure that is applied to the bowstring, as well as adjusting the weight and balance of the bow itself. By making these small adjustments, you can ensure that your bow is performing at its peak and giving you the best possible results.
Q: Where Can I Get an Ez Press Bow Press
An Ez Press Bow Press can be found at most archery shops or online retailers that sell archery equipment. They range in price from around $50 to $250, depending on the model and features. The press is designed to help archers safely and easily change the limbs on their compound bows.
It is a must-have tool for anyone who owns a compound bow and wants to keep it in good working condition.
Com
google.android
The com.google.android is a software development kit (SDK) that allows developers to create applications for the Android platform. The SDK includes a set of tools, libraries, and documentation that allow developers to build, test, and debug their Android applications.
The SDK also provides a set of emulator images that can be used to test applications on different screen sizes and hardware configurations.
EZ Green Bow Press- DIY Stand Build. Portable and Inexpensive.
Conclusion
This blog post provides detailed instructions for building a bow press. The author includes photos and diagrams to help readers visualize the process. With careful attention to the directions, anyone can build their own bow press.