How To Fletch Arrows Without A Jig
Are you an archery enthusiast looking to enhance your skills? If so, you may have wondered how to fletch arrows without a jig. Fletching arrows is the process of attaching feathers or vanes to the shaft, which greatly impacts the arrow’s stability and accuracy during flight. While a jig is commonly used to ensure precise placement, this article will provide you with alternative methods to fletch arrows without a jig. With a bit of patience and practice, you’ll be able to fletch your arrows like a pro in no time.
Types of Arrow Fletching
When it comes to fletching arrows, there are various options to choose from depending on your preferences and shooting style. The three main types of fletching are feather fletching, plastic fletching, and natural materials fletching. Each type offers its own advantages and disadvantages, so let’s take a closer look at each one.

Feather Fletching
Feather fletching is perhaps the most traditional and widely used type of fletching in archery. Feathers are often sourced from birds such as turkeys or ducks and are carefully shaped and attached to the arrow shaft. Feather fletching provides excellent stability and accuracy in flight, as the individual feathers can bend and flex, helping to steer the arrow on its path. It is also worth noting that feather fletching tends to be lighter than other types, which can be beneficial for achieving greater arrow speed. However, feather fletching does require more maintenance compared to other types, as feathers can be more prone to damage and wear over time.
Plastic Fletching
Plastic fletching, often made of materials like Mylar or nylon, has gained popularity in recent years due to its durability and consistency. Plastic fletching is available in various shapes and sizes, allowing archers to customize their arrow flight characteristics. Unlike feather fletching, plastic fletching tends to be more resilient and less affected by weather conditions such as rain or humidity. It also holds its shape well, providing a consistent flight pattern. Plastic fletching may not offer the same level of natural aesthetic appeal as feather fletching, but it is a reliable and low-maintenance option for many archers.
Natural Materials Fletching
For those looking for a more unique and traditional touch, natural materials fletching offers a great alternative. This type of fletching utilizes materials such as leaves, plant fibers, or other natural resources to create fletchings. Natural materials fletching can be a fun and creative way to personalize your arrows and connect with nature. However, it is important to note that natural materials may not provide the same level of durability or consistency as feather or plastic fletching. They may require more frequent replacement due to wear and tear, and their performance in adverse weather conditions can vary.
Preparing the Arrow
Before applying fletchings to your arrow, it is crucial to prepare the shaft properly. This ensures that the fletchings adhere securely and that the arrow performs optimally during flight. The preparation process involves inspecting the arrow, cleaning the shaft, and measuring and marking the fletching positions.
Inspect the Arrow
Start by inspecting the arrow for any signs of damage or wear. Look for cracks, splinters, or any other structural issues that may compromise the arrow’s integrity. It is essential to use arrows that are in good condition to ensure safety and accuracy while shooting. If you notice any problems, it is best to replace or repair the arrow before proceeding.

Clean the Arrow Shaft
Cleaning the arrow shaft helps create a clean and smooth surface for the adhesive to adhere to. Use a clean cloth or paper towel to remove any dirt, debris, or residue from the shaft. Pay close attention to the area where the fletchings will be applied, as any particles remaining on the shaft can affect the bond between the fletching and the arrow.
Measure and Mark the Fletchings
To ensure proper alignment and spacing of the fletchings, it is important to measure and mark their positions on the arrow shaft. Use a ruler or measuring tape to determine the desired distance between each fletching, as well as the distance from the nock to the first fletching. Mark these measurements lightly with a pencil or marker, ensuring that they are evenly spaced and aligned.
Applying the Fletchings
Once you have prepared the arrow, it’s time to apply the fletchings. This process involves applying adhesive to the fletchings, attaching them to the arrow shaft, and securing them in place.
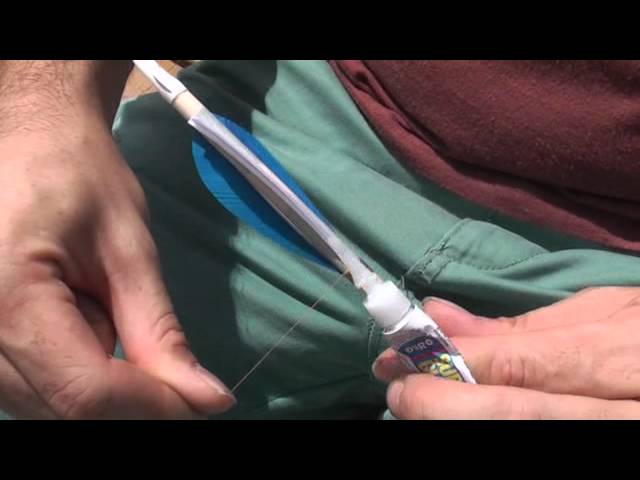
Apply Adhesive to Fletching
Start by applying a small amount of adhesive to the base of the fletching. The type of adhesive used may vary depending on the fletching material and personal preference. Consider using specialized fletching glue or a strong adhesive that is compatible with the materials you are working with. Be careful not to use too much adhesive, as it can create a messy application.
Attach Fletching to Arrow Shaft
Once adhesive is applied to the fletching, carefully position it on the marked spot on the arrow shaft. Press the fletching firmly against the shaft, ensuring that it adheres evenly. Repeat this process for each fletching, following the marked measurements and maintaining consistency throughout.

Secure the Fletching in Place
To secure the fletching in place while the adhesive dries, you can use methods such as fletching tape or clamps. Wrap the tape tightly around the fletching and shaft, making sure it holds the fletching securely. If using clamps, gently apply pressure to hold the fletching in position until the adhesive sets. This step is crucial to prevent the fletchings from moving or shifting during the drying process.
Trimming and Shaping the Fletchings
After the adhesive has dried, it’s time to trim and shape the fletchings to optimize arrow flight and clearance. This step involves removing any excess material and creating a clean and streamlined profile.
Trimming the Fletchings
Using sharp scissors or a fletching cutter, carefully trim the fletchings to the desired length. It is advisable to make small increments while trimming to avoid removing too much material at once. Pay close attention to maintaining the same length for each fletching to ensure consistent arrow flight.
Shaping the Fletchings
In addition to trimming the length, shaping the fletchings can further enhance arrow performance. This step involves tapering or rounding the edges of the fletchings to reduce drag and improve arrow stability. Use a shaping tool or sandpaper to achieve the desired shape, ensuring that all fletchings have a symmetrical and smooth profile.
Drying and Curing
After trimming and shaping the fletchings, it is important to allow the adhesive to dry and cure fully. This ensures that the fletchings remain securely attached to the arrow shaft during use.
Allow the Adhesive to Dry
The drying time for the adhesive will depend on the specific product used. Follow the manufacturer’s instructions to determine the appropriate drying time. It is crucial to avoid handling or disturbing the fletchings during this period to prevent any movement or misalignment.

Curing the Fletchings
Curing refers to the process of allowing the adhesive to fully set and strengthen. Even after the drying time has passed, it is advisable to give the fletchings additional time to cure before shooting them. This helps ensure maximum bond strength and longevity. Be patient and allow the fletchings to cure undisturbed for the recommended duration.
Checking for Alignment
Once the fletchings are dry and cured, it’s important to inspect their alignment and make any necessary adjustments. Proper alignment is crucial for accurate arrow flight and consistency.
Inspect Fletching Alignment
Carefully examine the fletchings from different angles to check for any misalignment or unevenness. Look for any gaps or overlaps between the fletchings. It is essential for them to be aligned and positioned correctly to achieve optimal arrow stability.
Adjust if Necessary
If you notice any misalignment or issues with the fletchings, you can make small adjustments to correct them. Gently heat the adhesive using a heat source such as a hairdryer to slightly soften it. This will allow you to reposition the fletchings without causing damage. Use caution and make precise adjustments, ensuring that the fletchings are aligned according to your desired specifications.
Testing and Fine-Tuning
Once the fletchings are properly aligned, it’s time to test your arrows and make any necessary adjustments to achieve the desired performance.
Shoot Test Arrows
Take your newly fletched arrows to a suitable shooting location and test their performance. Pay attention to factors such as arrow trajectory, arrow grouping, and overall accuracy. Evaluate how the arrows fly and adjust other aspects of your archery setup if needed.

Make Adjustments if Needed
If you encounter any issues during the test shots, consider making adjustments to your fletching configuration or other variables. This can include changing the fletching type, altering the fletching angle, or experimenting with different arrow weights. It may require some trial and error to achieve the desired arrow flight, but with patience and persistence, you can fine-tune your fletching setup for optimal results.
Alternative Methods
While the traditional methods of fletching arrows involve using adhesive, there are alternative methods that can be used in certain situations or emergencies. These methods can be particularly useful when a fletching jig or specialized equipment is not available.
Tape Fletching
Tape fletching involves using strong adhesive tape directly on the shaft to create temporary fletching. Although it may not provide the same level of durability or consistency as traditional fletching, it can be a quick and temporary solution for emergency situations. It can also be helpful for testing different fletching configurations before committing to permanent fletchings.
Glue Stick Fletching
Glue stick fletching is another alternative method that can be used in a pinch. By applying a layer of melted glue stick material directly on the shaft, you can create a makeshift fletching. However, it is important to note that this method is not as reliable as traditional fletching and should only be used as a temporary solution.
Duct Tape Fletching
Similar to tape fletching, duct tape fletching involves using duct tape strips to create makeshift fletchings. This method is quick and easy, making it suitable for temporary fletchings. However, it is important to remember that duct tape fletchings may not provide the same level of performance or durability as traditional fletchings, especially for repetitive use.
Troubleshooting and Common Issues
While fletching arrows can be a straightforward process, it is not without its challenges. Here are some common issues that you may encounter and tips for troubleshooting them.
Fletching Misalignment
If you notice that the fletchings are misaligned or not positioned correctly, it is important to address this issue before shooting the arrows. Carefully inspect the fletchings and make the necessary adjustments as discussed earlier. Utilize a heat source to soften the adhesive for repositioning if needed, ensuring that the fletchings are aligned and secured properly.
Weak Adhesive Bond
In some cases, the adhesive may not create a strong bond between the fletching and the arrow shaft. If you experience weak adhesive bonding, consider using a different adhesive that is specifically designed for fletching. Additionally, ensure that the arrow shaft is clean and free from any residue that may hinder the adhesive’s effectiveness. Properly preparing the shaft and using a suitable adhesive can help enhance the bond and prevent the fletchings from coming loose.
Fletching Damage
Over time, fletchings can become damaged or worn out due to repeated use or exposure to environmental factors. If you notice any cracks, tears, or other forms of damage, it is advisable to replace the fletchings. Damaged fletchings can negatively impact arrow flight and accuracy, so maintaining them in good condition is essential for optimal performance.
Tips and Tricks
To enhance your arrow fletching experience, here are some tips and tricks to keep in mind:
Practice and Patience
Fletching arrows can take time and practice to master. Be patient with yourself and allow for some trial and error as you refine your technique. With practice, you will become more comfortable and proficient in fletching arrows.
Choose the Right Fletching Material
Experiment with different fletching materials to find the one that suits your shooting style and preferences. Consider factors such as weight, durability, and performance in different weather conditions. Each material has its own unique characteristics, so finding the right balance is key.
Experiment with Different Fletching Configurations
Don’t be afraid to try out different fletching configurations to see how they impact arrow flight. Consider factors such as fletching angle, fletching size, and the number of fletchings. Experimenting with different setups can help you find the configuration that works best for your shooting needs.
In conclusion, fletching arrows without a jig is a rewarding process that allows you to personalize your arrows and optimize their performance. By understanding the different types of fletching, properly preparing the arrow shaft, applying the fletchings correctly, and fine-tuning the setup, you can create arrows that fly true and accurately hit their target. Remember to be patient, practice, and have fun as you embark on this archery endeavor.