How to Make a Treestand Lifeline
A treestand lifeline is a device used to help prevent hunters from falling out of their tree stands. It consists of a length of rope or cord that is attached to the stand at one end and to the hunter at the other. The hunter wears a harness that is connected to the lifeline, which allows them to move around freely while remaining tethered to the stand.
If they fall, the lifeline will catch them and keep them from plummeting to the ground.
To make your own treestand lifeline, you will need:
-Rope or cord (at least 10 feet long)
-Harness
-Carabiner or similar connector
-Tree stand
First, attach one end of the rope or cord to the tree stand using a carabiner or similar connector. Make sure that it is securely fastened and will not come loose if pulled on. Next, put on the harness and clip it to the other end of the rope or cord.
Once you are clipped in, test it by pulling on the line to make sure that it is secure before climbing into your stand. Now you can relax and enjoy your hunt knowing that you are safely tethered to your stand!
- Cut a length of rope that is twice the height of the tree you will be climbing
- Fold the rope in half and tie a loop in the middle
- Put one end of the rope through the loop to form a lark’s head knot
- Wrap the other end of the rope around the tree trunk several times and tuck it under itself
- Pull on both ends of the rope to tighten it around the tree trunk
- Tie a second lark’s head knot with the other end of the rope, using the loop you created in step 2
- Clip one end of your lifeline to your harness, and clip the other end to your belay device
D.I.Y. How to make a lifeline with a prusik knot | treestand safety |
How Do You Make a Lifeline for a Tree Stand?
If you’re an arborist, chances are good that you know how to make a lifeline for a tree stand. But just in case you don’t, here’s a quick rundown. First, find a suitable anchor point for your rope.
A large tree or boulder is ideal. Next, tie one end of the rope to the anchor point and secure it with a clove hitch or similar knot. Now take the other end of the rope and loop it around the trunk of the tree you’ll be standing in.
Make sure the loop is big enough to fit comfortably over your head and shoulders. Finally, tie this end of the rope to the anchor point as well, using another clove hitch or similar knot. And that’s it!
Your lifeline is now ready to use. Simply clip your safety harness into the loop before ascending into your tree stand, and you’ll be safely secured should you fall out.
What is the Best Rope for Lifeline?
There are a few different types of rope that can be used for a lifeline, but the best option is polypropylene rope. This type of rope is strong and durable, yet lightweight and easy to handle. It also has a high resistance to abrasion and chemicals, making it ideal for use in harsh environments.Polypropylene rope is also relatively inexpensive, so it is a good choice for budget-conscious consumers.
Another option that is worth considering is nylon rope. Nylon rope is slightly stronger than polypropylene rope, but it is also more expensive.
How Do You Tie a Lifeline Knot?
A lifeline knot is a type of knot that is used to create a loop in the middle of a rope. This loop can be used for attaching devices or for clipping the rope to another object. The lifeline knot is also known as a figure-eight loop knot and is considered to be one of the strongest knots.
To tie a lifeline knot, start by folding the rope in half to create a bight. Then, thread the end of the rope through the bight to form a loop. Next, take the end of the rope and make a small loop around the standing part of the rope.
Finally, pass this end through the first loop and pull tight.
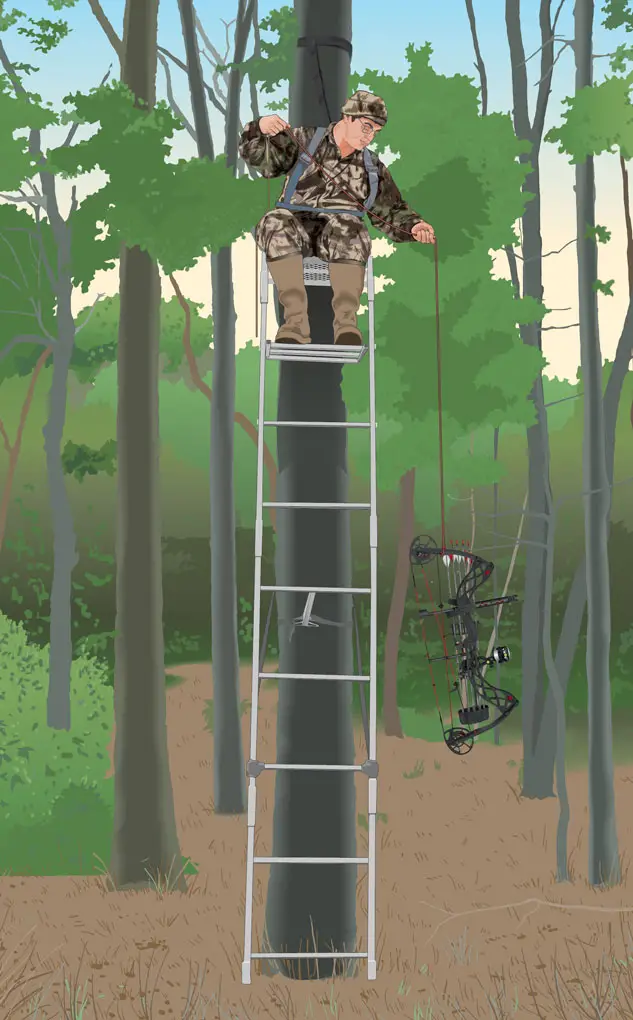
How Do You Make a Tree Stand With Climbing Sticks?
When it comes to tree stands, there are many different types and designs that you can choose from. However, one of the most popular and effective ways to set up a tree stand is by using climbing sticks. Here’s a quick guide on how you can do this:
1. Start by finding a suitable tree for your stand. It should be tall enough so that you’ll be able to get a good view from the top, but not too tall that it will be difficult to climb.
2. Once you’ve found the perfect tree, attach your climbing sticks to the trunk.
You can either use straps or screw them in place – whichever method you feel more comfortable with.
3. Now it’s time to start climbing! Place your feet in the stirrups and slowly make your way up the tree, using the sticks for support as you go.
4. Once you reach the desired height, secure yourself in place with a safety harness or rope system before settling in for some hunting action!

Credit: archeryrob.wordpress.com
Treestand Lifeline 3 Pack
If you’re an avid hunter, then you know how important it is to have a good treestand. After all, your treestand is what keeps you safe and secure while you’re up in the tree, waiting for that perfect shot. But even the best treestands can be dangerous if they’re not used properly.
That’s why it’s so important to have a lifeline.
A lifeline is a rope or cable that is attached to your stand and then anchored to the ground. This way, if you happen to fall out of your stand, you will be safely tethered to the ground.
Lifelines are absolutely essential for anyone who uses a treestand, and we highly recommend that everyone uses one.
To make sure that you’re always safe while using your treestand, we recommend getting a Treestand Lifeline 3 Pack. This pack includes three different lifelines, each of which is made from high-quality materials and can support up to 350 pounds.
With this pack, you’ll always have a backup lifeline on hand in case of an emergency.
Lifeline Rope Knot
When it comes to rope knots, the lifeline knot is one of the most important. This knot is used to tie a rope around a person in order to provide them with a safe line to hold onto in case they need it. The knot itself is simple, but extremely strong and secure.
In this blog post, we’ll go over how to tie a lifeline knot step-by-step so that you can be prepared for anything.
First, take the end of the rope and make a loop. Next, thread the end of the rope through the loop and pull tight.
You should now have a small loop at the end of the rope.
Next, take the middle of the rope and make a larger loop. Thread this loop through the small loop at the end of the rope and pull tight.
You should now have two loops – a small one at the end of the rope, and a larger one in the middle.
Finally, take both loops and put them over your head so that they sit comfortably around your neck. Pull on both loops until they’re tight against your skin – but not so tight that they’re uncomfortable!
And that’s it – you’ve tied a lifeline knot!
Muddy Safety Line
A muddy safety line is a rope or chain that is placed across a wet or muddy area to help prevent people from slipping and falling. This type of safety device is often used in construction zones, around swimming pools, and in other areas where there is a potential for slippery conditions.
Hawk Safety Line
Hawk Safety Line is a new product that promises to keep you safe while hiking and camping. It is a rope with a built in sensor that will detect when you fall and automatically deploy an airbag to cushion your fall. The company behind Hawk Safety Line, Black Diamond, claims that their product can reduce the severity of injuries sustained in a fall by up to 80%.
So how does it work? The Hawk Safety Line is attached to your harness at two points – one near your waist and one near your chest. If you were to fall, the sensors in the line would detect the sudden change in acceleration and deploy the airbag.
The airbag is designed to inflate quickly and cushion your fall, absorbing some of the impact.
Black Diamond has been making climbing gear for years, so they are no strangers to safety products. However, the Hawk Safety Line is their first foray into personal protection devices.
And they are not alone – there are several other companies developing similar products. But Black Diamond believes that their experience in designing climbing gear gives them an edge in creating a effective and reliable safety system.
Only time will tell if the Hawk Safety Line lives up to its promise of keeping hikers safe.
But it certainly seems like an innovative idea that could make a big difference for anyone who enjoys spending time outdoors.
Arborist Life Line
If you’re an arborist, or someone who works with trees, then you know that having a good life line is essential. A life line is a rope that is attached to your harness and anchors you to the tree. It’s there to catch you if you fall, and to help you get back up if you need to.
There are a few things to consider when choosing a life line. First, it needs to be made of strong material that can hold your weight. Second, it needs to be long enough to reach from the ground to where you’ll be working.
And finally, it needs to be able to attach securely to both your harness and the tree.
There are many different types of life lines available on the market today. Some are made of nylon, while others are made of polyester or Kevlar.
There are also different thicknesses available, so you can choose one that best suits your needs. Ultimately, the best life line is the one that will keep you safe while you’re working in the trees.
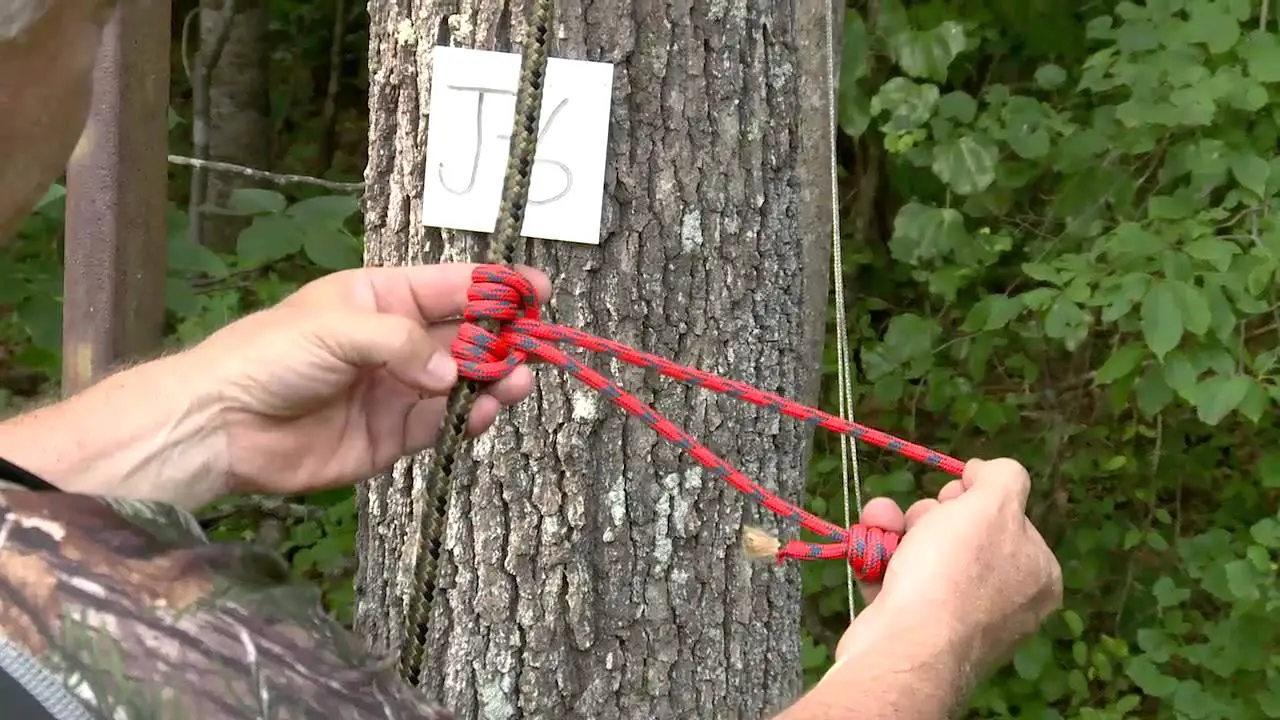
Prusik Knot Safety Line
A prusik knot is a friction hitch used to attach a loop of cord around a rope, and is commonly used in climbing and canyoneering. It is named after Karl Prusik, an Austrian mountaineer who invented the knot in 1931. The prusik knot is simple to tie and very versatile, making it a popular choice for climbers and canyoners alike.
However, because the prusik knot relies on friction to work, it can fail if not tied correctly or if the rope is not the right diameter. For this reason, it is important to know how to tie a prusik knot correctly and to use it only on ropes that are appropriate for the job. Here are instructions for tying a basic prusik knot:
1) Take a length of cord and double it over so that you have two loops of equal length.
2) Tie an overhand loop in one end of the cord (this will be your “prusiking” loop).
3) Run the other end of the cord through your “prusiking” loop (the doubled-over part), then around the rope you want to attach it to.
Make sure that this wraps around the rope at least three times; more wraps will create more friction and make your prusik more secure.
4) Now run the end of the cord through your “prusiking” loop again (the doubled-over part), then back through the first part of the wrap you made around the rope. This forms a second wrap around the rope, which helps keep your prusik from slipping.
Climbing Lifeline
Climbing Lifeline is a popular rock climbing gym in the city of Los Angeles. The gym offers a variety of climbable surfaces, including an indoor and outdoor bouldering area, top rope and lead climbing, as well as auto belays. There are also yoga and fitness classes available to members.
The staff at Climbing Lifeline is friendly and welcoming, always happy to help new climbers get started. The gym offers beginner-friendly classes as well as more advanced clinics. Whether you’re just getting started or you’ve been climbing for years, there’s something for everyone at Climbing Lifeline!
Conclusion
In this blog post, the author describes how to make a treestand lifeline. A treestand lifeline is a rope that is attached to the top of a tree and used to help prevent falls from height. The author provides detailed instructions on how to tie the knots needed to create the lifeline, as well as how to attach it to the tree.