How to Replace Arrow Nocks
To replace arrow nocks, start by removing the old nock using a small screwdriver. Next, clean out the inside of the shaft where the nock was seated. To do this, you can use a small wire brush or a cotton swab dipped in rubbing alcohol.
Once the shaft is clean, dry it off completely before seating the new nock. To install the new nock, simply press it into place until it is snug. You may need to use a small amount of glue to keep it in place.
- Unstring the bow and remove the old nocks from the arrows
- Clean the ends of the arrows with a cloth or paper towel to remove any residue
- Place the new nocks on the arrows, making sure they are facing the correct way
- String the bow and test the new nocks to make sure they are secure
How To Remove and Replace Arrow Nock
Arrow Nock Removal Tool
An arrow nock removal tool is a small, lightweight tool that is used to remove the nock (the plastic or metal tab at the back of an arrow) from an arrow shaft. This tool is essential for anyone who wants to replace their own arrows or perform routine maintenance on their equipment.
The first step in using this tool is to find the right size for your particular nocks.
Arrow nocks come in a variety of sizes, so it’s important to select a removal tool that will fit snugly around the base of the nock. Once you’ve found the right size, simply place the tool over the nock and twist it counter-clockwise until the nock pops off.
If you’re having trouble getting the hang of it, don’t worry – there are plenty of instructional videos online that can help walk you through the process step-by-step.
With a little practice, you’ll be removing and replacing arrow nocks like a pro in no time!
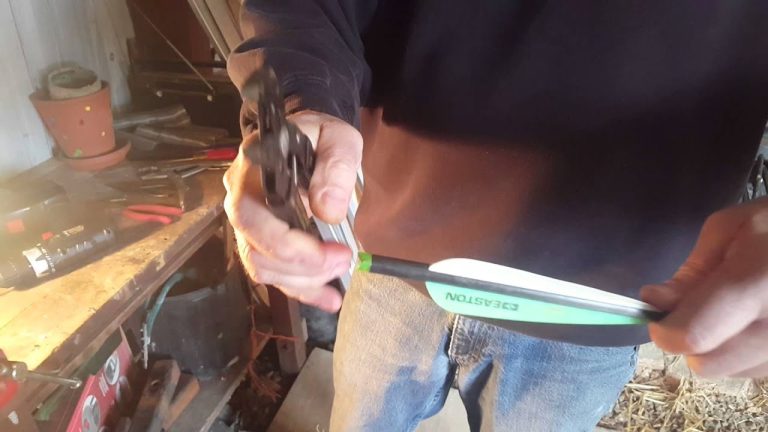
How to Remove Easton Arrow Nocks
If you find yourself in need of removing an Easton arrow nock, there are a few things you’ll need to do. First, unscrew the limb bolts and remove the limbs from the riser. Next, use a pair of needle nose pliers to carefully remove the old nock from the shaft of the arrow.
Once the old nock is removed, simply thread on the new nock (being careful not to cross-thread it) and screw the limb bolts back in place. That’s all there is to it!
How to Remove Glued in Nocks
Are you sick of your old nocks falling out and getting lost in the grass? Well, there is a permanent solution- glued in nocks! This guide will show you how to remove glued in nocks from your arrows so that you can get back to shooting without worry.
First, start by heating up the end of the arrow with a lighter or match. You want to heat up the metal so that the glue will melt and release the nock. Next, take a pair of pliers and grip the base of the nock.
Apply pressure and twist the nock until it pops off. If it does not come off easily, reheat and try again.
Now that you have removed the old nock, it is time to prepare the arrow for a new one.
First, sand down the end of the arrow until it is smooth. Next, apply a generous amount of glue to the end of the arrow (we recommend epoxy for its strength). Finally, press on the new nock until it is secure.
Allow plenty of time for the glue to dry before shooting!
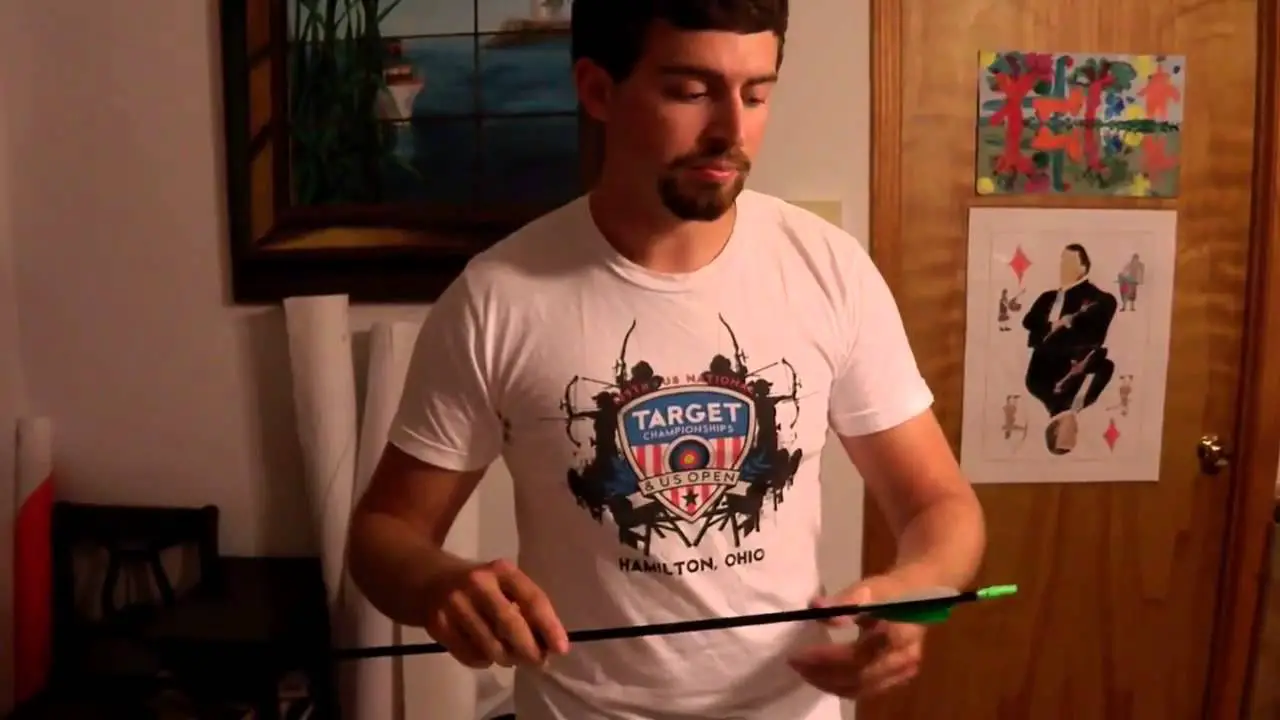
How to Remove Nock from Carbon Arrow
If you’re a hunter or archer, chances are you’ve had to remove a nock from your carbon arrow at some point. If not, you will eventually. Here’s a quick and easy guide on how to do it:
Start by removing the arrow from the bow. Next, find the nock (the plastic piece that sits at the back of the arrow and is used to attach it to the string). The nock should be easy to see and identify.
Once you’ve found the nock, gently twist it counter-clockwise until it comes loose. If it’s stubborn and doesn’t want to budge, try using a pair of pliers or an Allen wrench (if there’s a small hole in the center of the nock). Once the nock is loose, pull it off of the arrow.
That’s all there is to it! Now you can reattach your arrow to the string and get back to shooting.
How to Remove Alpha Nock Insert
If you’re like most archers, you’ve probably had to deal with a stuck alpha nock insert at one point or another. Here’s a quick and easy guide on how to remove them:
1. Start by heating up the area around the insert with a lighter or heat gun.
This will help loosen up the adhesive that’s holding the insert in place.
2. Next, use a small flathead screwdriver or similar tool to pry the insert out of the arrow shaft. Be careful not to damage the shaft in the process.
3. Once the insert is loose, you can pull it out completely by hand. If it’s still being stubborn, try using a pair of needle-nose pliers to grab and pull it out.
That’s all there is to it!
With these simple steps, you’ll have that pesky alpha nock insert out in no time flat.
How to Remove Nocks from Crossbow Bolts
If you’ve ever shot a crossbow, then you know that the nocks (the plastic or metal piece at the back of the bolt that you cock the bowstring into) can sometimes come loose and fall off. This can be frustrating, especially if it happens in the middle of a hunt or competition. But don’t worry, there are a few easy ways to remove nocks from crossbow bolts.
The first method is to simply use your fingers to twist and pull the nock off of the bolt. This works best with plastic nocks, but metal nocks can also be removed this way if they’re not too tight.
If the nock is really stuck on there, you can try using a pair of pliers to grip and twist it off.
Just be careful not to damage the shaft of the bolt in the process.
Another option is to use a nail file or sharp knife to carefully scrape away at the base of the nock until it comes loose. Again, be very careful not to damage the shaft of the bolt while doing this.
Once you’ve removed the old nock, you can replace it with a new one by following these same steps in reverse. Just make sure that the new nock is securely tightened before shooting your crossbow again.
How to Put Lighted Nocks on Crossbow Bolts
Taking your crossbow hunting to the next level with lighted nocks is easy when you follow these simple steps. Lighted nocks provide better visibility for tracking your shot in low-light conditions and can also help prevent lost bolts. Most importantly, they make your crossbow hunting safer by helping you avoid shooting at game that may be out of range.
1. Purchase lighted nocks that are compatible with your crossbow bolts. Be sure to get the correct size and weight for your specific model of crossbow.
2. Remove the existing knock (the plastic piece that holds the string in place) from your bolt using a small screwdriver or punch tool.
3. Screw the new lighted knock into place, being careful not to over-tighten and strip the threads.
4. Insert the bolt into your crossbow and cock it as usual. The lighted nock should now be activated and will illuminate when the bow is fired.
How to Remove Lighted Nocks
If you’re like most archers, you probably don’t give much thought to your nocks. But if you’re shooting with lighted nocks, it’s important to know how to remove them properly. Here’s a quick guide on how to remove lighted nocks:
1. Start by unscrewing the cap at the back of the nock. This will expose the batteries.
2. Next, use a small screwdriver or other tool to gently pry out the positive and negative terminals from the side of the batteries.
3. Once the terminals are removed, you can simply pull the batteries out of the nock body.
4. To reinstall new batteries, simply repeat steps 1-3 in reverse order. Be sure to screw the cap on tight so that water and moisture cannot get inside and damage the electronics!

Credit: charlesarcheryblog.wordpress.com
Should Arrow Nocks Be Glued In?
Most archers will tell you that it is important to glue your arrow nocks in place. This helps to ensure that the nock does not come loose during shooting and potentially damage the bow. Glue also provides a more secure connection between the nock and the shaft, which can help to improve accuracy.
There are a few different types of glue that can be used for this purpose, but most archers prefer to use hot melt adhesive or cyanoacrylate (CA) glue. These glues provide a strong bond and set quickly, making them ideal for use on arrow nocks.
To apply hot melt adhesive, simply place a small amount of glue on the end of the arrow shaft and insert the nock into place.
The heat from the adhesive will cause the nock to expand slightly, creating a snug fit. CA glue can be applied in a similar manner, but it will take longer to set (usually around 24 hours).
Some archers choose not to glue their nocks in place, instead opting to press them onto the shafts using only friction.
While this method may work for some people, it is generally not recommended as it is not as secure as using glue.
How Do You Remove a Nock from an Arrow?
If you need to remove a nock from an arrow, the first thing you’ll need to do is find a suitable replacement. Nocks come in all sorts of shapes and sizes, so it’s important to find one that will fit your arrow shaft snugly. Once you’ve found a replacement nock, gently push it onto the end of the arrow shaft until it’s seated firmly.
To remove the old nock, start by gently pushing on one side of it with a small screwdriver or similar tool. Work your way around the circumference of the nock until it pops free from the shaft. If the nock is stuck fast, you may need to use a bit more force.
Just be careful not to damage the end of the arrow shaft in the process.
With the old nock removed, simply slide your new nock into place and give it a firm push until it’s seated properly. That’s all there is to it!
How Do You Install Nocks in Arrow?
Installing nocks in arrows is a relatively simple process that can be easily accomplished with just a few tools and a little bit of know-how. First, you’ll need to gather your supplies. For this project you will need: an arrow, nocks (either plastic or metal), glue, and clamps.
You will also need access to a drill and either a small saw or file.
Once you have all of your supplies gathered, the first step is to mark where you want the nocks to be installed on the arrow shaft. It’s important to make sure that the nocks are installed at the same depth on each side of the shaft, so that the arrow is balanced when it’s shot.
Use a pencil or other sharp object to make small marks on the shaft at the desired location for each nock.
Next, using either a saw or file, carefully cut or file notches into the shaft at each mark. These notches don’t have to be very deep, but they should be wide enough to accommodate the width of the nock.
Be careful not to damage any other parts of the arrow while doing this.
Now it’s time to glue the nocks into place. Apply a generous amount of glue into each notch, being sure to get it onto all sides of the notch.
Then insert each nock into its respective notch until it’s flush with the surface of the shaft. Clamp each nock in place and allow plenty of time for the glue to dry completely before proceeding further – overnight is usually best.
Once dry, your arrows are now ready to use!
How Do You Remove a Broken Nock from a Carbon Arrow?
If you have a broken nock on your carbon arrow, there are a few different ways that you can remove it. One way is to use an archery tool to score the inside of the nock so that it can be pried out with a small screwdriver. Another way is to use a sharp knife to carefully cut the nock off of the arrow shaft.
Whichever method you choose, be careful not to damage the arrow shaft when removing the nock. Once the nock is removed, you can either replace it with a new one or simply leave the shaft empty.
Conclusion
In conclusion, it is important to know how to replace arrow nocks in order to keep your equipment in good condition. By following the simple steps outlined in this blog post, you can easily and quickly replace nocks as needed.