What Does A Bow Stabilizer Do How To Make A Bow Stabilizer
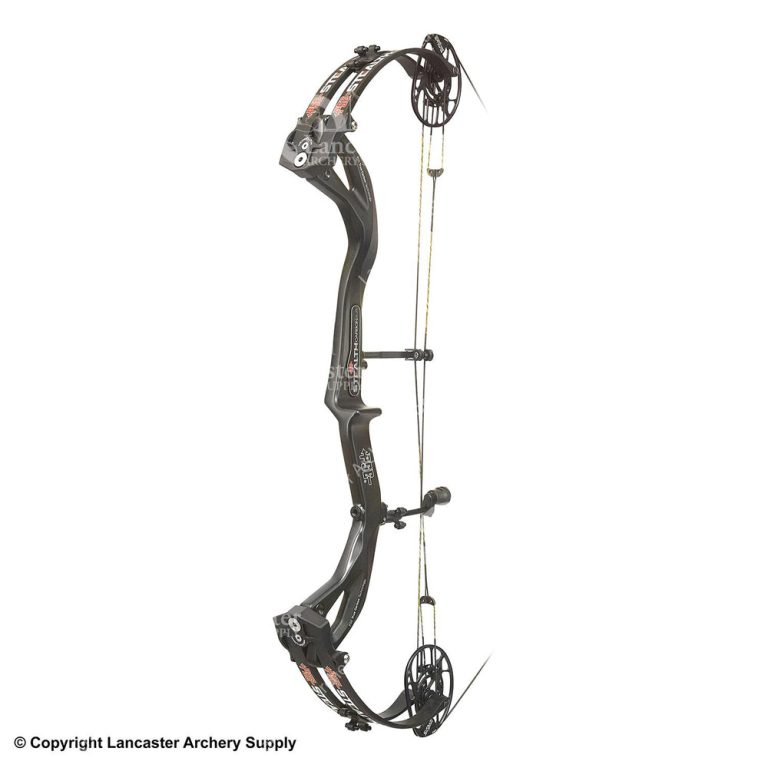
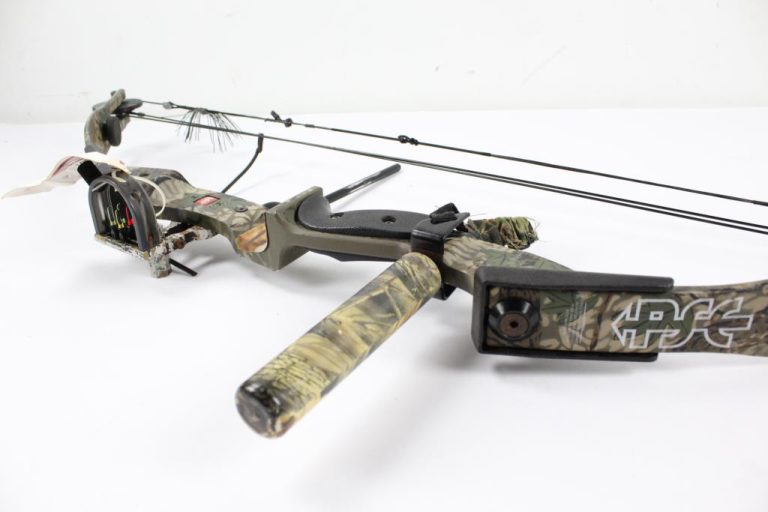
In the world of archery, the compound bow has made its mark as a blend of tradition and innovation. With its system of cables, pulleys, and cams, the compound bow allows for a higher poundage at full draw, making it easier for archers to aim. This guide explores the key components of a compound bow, its advantages, and offers tips on choosing the right one for you. Additionally, it emphasizes the importance of maintenance, safety, and provides a brief overview of what a bow stabilizer does and how to make one. Whether you’re an experienced archer or a beginner, the compound bow offers a thrilling experience that bridges the gap between ancient hunting tools and modern-day technology.
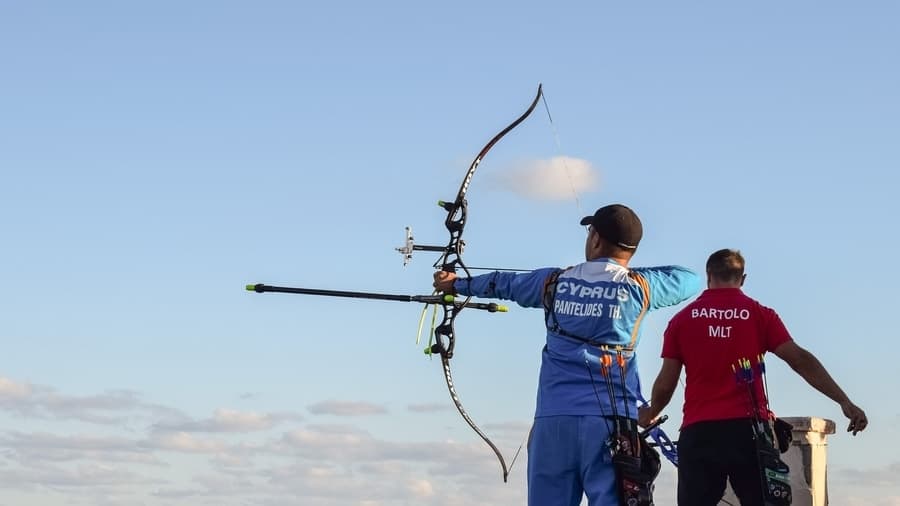
What Does a Bow Stabilizer Do?
Introduction to Bow Stabilizers
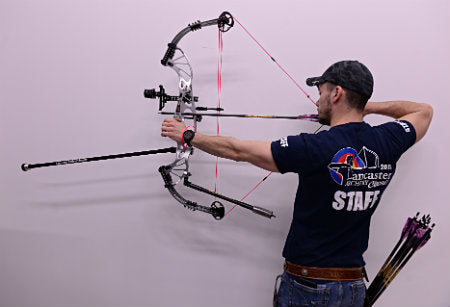
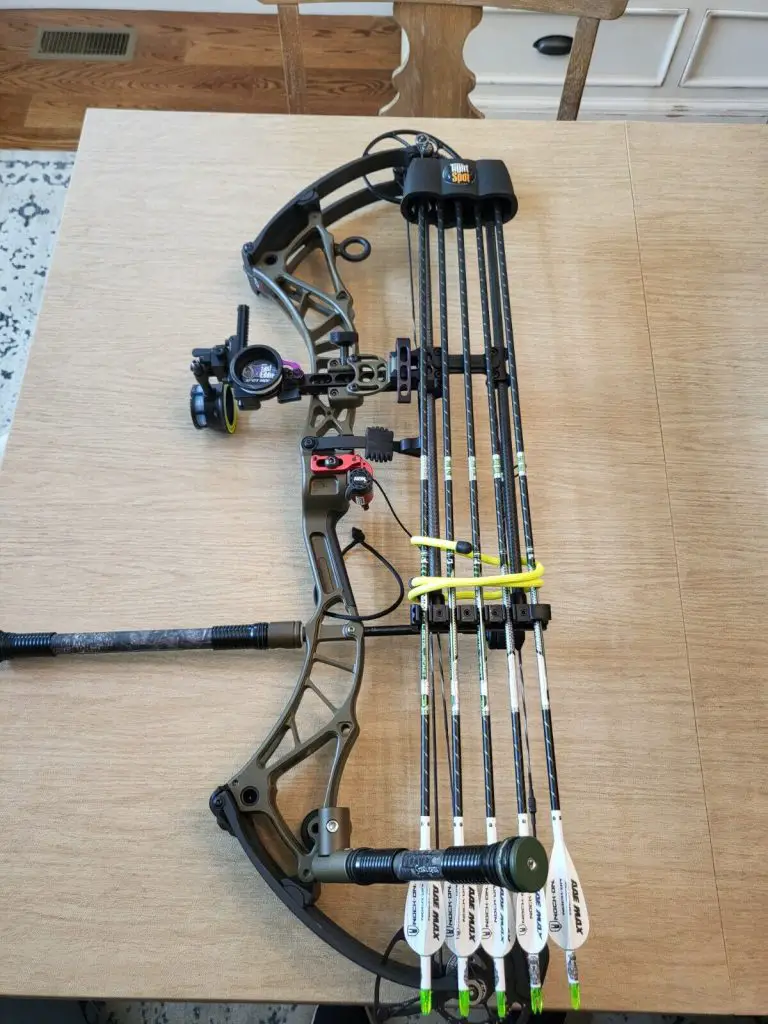
When it comes to archery, accuracy and stability are key. That’s where bow stabilizers come in. A bow stabilizer is an accessory designed to improve the balance, stability, and overall performance of a bow. It attaches to the riser of the bow and helps counteract any unwanted movement or vibrations that can affect accuracy. In this article, we will explore the various functions of a bow stabilizer, the different types available, factors to consider when choosing one, as well as how to make your own if you’re feeling crafty.
Improving Balance and Stability
One of the primary functions of a bow stabilizer is to improve the balance and stability of the bow during shooting. When you draw back the string and aim at your target, there can be a natural tendency for the bow to lean forward or backward due to the weight distribution of the limbs and accessories. This can throw off your aim and make it harder to maintain a steady hold.
A bow stabilizer helps to counterbalance the weight of the bow, making it easier to hold steady and reducing any unwanted movement. By redistributing the weight towards the front of the bow, the stabilizer helps to keep the bow in a more balanced position, resulting in more accurate shots.
Reducing Bow Torque
Bow torque refers to the lateral twisting motion that can occur when the bow is fired. This torque can be caused by a number of factors, such as uneven string pressure, grip variation, or improper alignment of the limbs. When torque occurs, it can cause the bow to veer off target and negatively impact accuracy.
A bow stabilizer plays a vital role in reducing bow torque by absorbing some of the lateral forces generated during the release of the arrow. The added weight and length of the stabilizer act as a counterbalance, minimizing the bow’s tendency to twist and allowing for a more controlled and accurate shot.
Minimizing Hand Shock
Hand shock refers to the recoil or vibration felt in the shooter’s hand upon releasing the bowstring. This vibration can be uncomfortable and, more importantly, can affect the accuracy of subsequent shots.
A bow stabilizer is designed to help minimize hand shock by absorbing and dampening the vibrations that occur when the arrow is released. By reducing the amount of vibration transferred to the shooter’s hand, the stabilizer allows for a more comfortable shooting experience and helps maintain consistency in shot placement.
Absorbing Vibration and Noise
In addition to reducing hand shock, a bow stabilizer also helps to absorb and minimize overall vibration and noise produced by the bow. When the bow is fired, there is a natural release of energy that can create unwanted vibrations and noise. These vibrations can affect the bow’s overall stability and accuracy.
By incorporating materials such as rubber or dampening compounds, a bow stabilizer can effectively absorb and dissipate these vibrations, resulting in a quieter shot and a more controlled shooting experience. This is particularly important for hunters who rely on stealth and minimizing noise to avoid spooking their prey.
Enhancing Accuracy
At the end of the day, the main goal of a bow stabilizer is to enhance accuracy. By improving balance, reducing torque, minimizing hand shock, and absorbing vibrations, a stabilizer helps shooters maintain a steady hold and deliver consistent, accurate shots. The added stability and control provided by a bow stabilizer can make a significant difference, especially in high-pressure situations such as competitions or hunting scenarios.
Different Types of Bow Stabilizers
Bow stabilizers come in various shapes, sizes, and designs. The most common types include:
-
Short Rod Stabilizers: These are compact stabilizers that attach directly to the bow’s riser. They are lightweight and ideal for shooters who prefer a minimalist setup or require maneuverability in tight spaces.
-
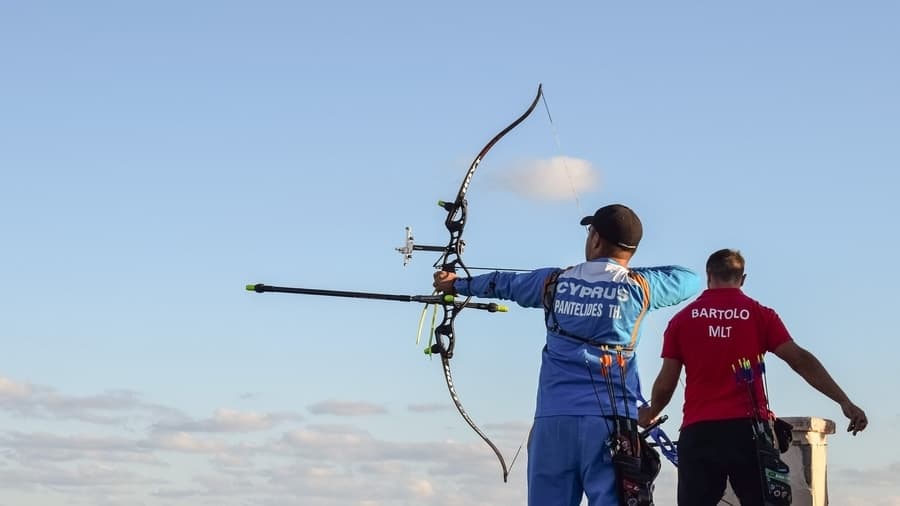
Long Rod Stabilizers: Long rod stabilizers consist of a main rod that attaches to the bow’s riser and an adjustable weight system at the end. They offer an extended length, allowing for increased stability and vibration dampening. These stabilizers are popular among target archers who prioritize maximum stability and precision.
-
Side Bar Stabilizers: Side bar stabilizers, also known as offset stabilizers, are designed to optimize balance by attaching to the side of the bow. They are often used in conjunction with either short rod or long rod stabilizers to create a balanced system that reduces torque and enhances stability.
Each type of stabilizer offers different benefits, and the choice ultimately comes down to personal preference and shooting style.
Factors to Consider When Choosing a Bow Stabilizer
When selecting a bow stabilizer, there are several factors to consider:
-
Weight: The weight of the stabilizer can affect the balance of the bow. Generally, a heavier stabilizer will provide more stability but may be more challenging to hold steady for extended periods. It’s essential to find a weight that strikes a balance between stability and shot endurance.
-
Length: The length of the stabilizer can impact the effectiveness of vibration dampening and balance improvement. Longer stabilizers offer greater stability and damping but may limit maneuverability, especially in hunting situations. Shorter stabilizers provide more flexibility but may not dampen vibrations as effectively.
-
Material: Stabilizers can be made from various materials, including aluminum, carbon fiber, or a combination of both. Each material has its own unique properties, such as weight, stiffness, and dampening capabilities. Consider the benefits of each material and choose one that aligns with your shooting preferences and needs.
-
Compatibility: Ensure that the chosen stabilizer is compatible with your specific bow model and design. Check the mounting options and compatibility requirements before making a purchase.
Proper Installation and Adjustment
Once you have chosen a bow stabilizer, it’s crucial to install and adjust it correctly to maximize its effectiveness. Here are some steps to follow:
-
Prepare the bow: Ensure that the bow is clean and free from any debris. You may need to remove any existing accessories attached to the bow’s riser to make space for the stabilizer.
-
Mount the stabilizer: Attach the stabilizer to the bow’s riser using the provided mounting hardware. Follow the manufacturer’s instructions for proper placement and alignment.
-
Balancing the stabilizer: Adjust the weight distribution of the stabilizer until the bow feels balanced and comfortable in your hand. Experiment with different weight configurations and positions to find the optimal balance for your shooting style.
-
Fine-tuning: Once the stabilizer is mounted and balanced, fine-tune its position and settings to suit your preferences. This may involve adjusting the angle, length, or weight of the stabilizer to achieve the desired shooting characteristics.
Maintaining and Caring for a Bow Stabilizer
To ensure the longevity and optimal performance of your bow stabilizer, it’s essential to provide regular maintenance and care. Here are some tips to keep in mind:
-
Cleaning: Regularly clean the stabilizer to remove any dirt, debris, or moisture that may accumulate. Use a soft cloth or brush to gently wipe down the stabilizer, paying attention to hard-to-reach areas.
-
Inspecting for damage: Periodically inspect the stabilizer for any signs of wear, damage, or loose parts. Check the mounting hardware, weight system, and dampening materials for any issues. If you notice any defects or damage, contact the manufacturer for assistance or consider replacing the stabilizer if necessary.
-
Lubrication: If applicable, lubricate any moving parts or adjustable components of the stabilizer as recommended by the manufacturer. This will help maintain smooth operation and prevent unwanted squeaking or resistance.
-
Store properly: When not in use, store the bow and stabilizer in a cool, dry place away from direct sunlight or extreme temperatures. Avoid placing heavy objects on top of the stabilizer to prevent any potential damage.
By following these maintenance tips, you can ensure that your bow stabilizer remains in excellent condition and continues to enhance your shooting experience.
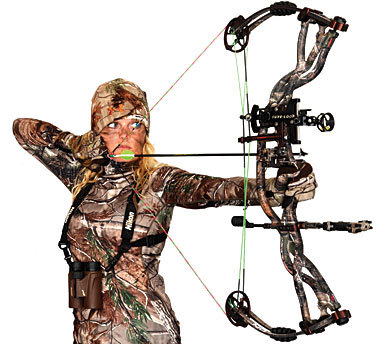
How to Make a Bow Stabilizer
Understanding the Basics of Bow Stabilizers
Making your own bow stabilizer can be a rewarding and cost-effective option for archers who enjoy DIY projects. Before diving into the process, it’s essential to have a solid understanding of the basic principles behind bow stabilizers.
A bow stabilizer typically consists of a rod or tube with weights or dampening materials at the end. The rod absorbs and redirects vibrations while the weights help balance the bow and reduce torque. By replicating these fundamental elements, you can create your own customized stabilizer to suit your shooting needs.
Choosing the Right Materials
To make a bow stabilizer, you’ll need to gather the necessary materials. Here are some key components you’ll need:
-
Rod or Tube: Select a strong and lightweight rod or tube that can withstand the forces exerted during shooting. Common materials used for stabilizer rods include aluminum, carbon fiber, or fiberglass. Consider the length and diameter of the rod, as well as its intended purpose (target shooting, hunting, etc.), when making your selection.
-
Weights or Dampening Materials: Depending on your preference and shooting style, you can choose to incorporate weights or dampening materials at the end of the stabilizer rod. Weights can be made from various materials, such as lead, steel, or tungsten, and can be easily attached or removed based on your desired stabilizer configuration. Alternatively, you can explore using rubber dampeners or other materials that absorb vibrations effectively.
-
Mounting Hardware: Determine the type of mounting hardware you’ll need to attach the stabilizer to your bow. This may include screws, washers, nuts, or threaded inserts.
Gathering the Necessary Tools and Supplies
In addition to the materials, you’ll also need various tools and supplies to construct your bow stabilizer. Here’s a list of some essential items:
-
Drill and drill bits: Depending on the type of mounting hardware and materials you’re using, you may need a drill to create holes in the stabilizer rod or other components.
-
Screwdriver or Allen wrench: These tools will be necessary to tighten and secure the mounting hardware.
-
Weights or dampening materials: If you’re incorporating weights into your stabilizer, gather the appropriate materials and tools to attach them securely to the rod. This may include screws, epoxy, or other adhesive substances.
-
Measuring tape or ruler: Accurate measurements are essential when cutting the stabilizer rod and positioning the weights. Use a measuring tape or ruler to ensure precise dimensions.
-
Safety equipment: It’s important to prioritize safety when working with tools and materials. Wear safety goggles, gloves, and any other protective gear necessary to prevent injuries.
Once you have all the necessary materials, tools, and safety equipment, you’re ready to begin constructing your own bow stabilizer.
Step-by-Step Guide to Making a Bow Stabilizer
Here’s a step-by-step guide to help you make your own bow stabilizer:
-
Measure and cut the stabilizer rod: Use a measuring tape or ruler to determine the desired length of your stabilizer. Mark the measurement on the rod and carefully cut it to size using a saw or other appropriate cutting tool. Ensure that the cut is clean and straight.
-
Prepare the weights: If you’re using weights, attach them securely to the end of the stabilizer rod. This can be done by drilling holes into the weights and using screws or adhesive substances to fix them in place. Make sure the weights are evenly balanced and properly aligned to maintain stability and reduce torque.
-
Mount the stabilizer to the bow: Attach the stabilizer to the bow’s riser using the appropriate mounting hardware. Ensure that it is securely fastened and properly aligned. Take into consideration the weight and length of the stabilizer, as well as your shooting preferences, when determining the optimal positioning.
-
Test and adjust: Once the stabilizer is mounted, take your bow to the range or an open outdoor area and test its performance. Pay attention to any vibrations, torque, or stability issues that may arise. If necessary, make adjustments to the weight distribution, length, or positioning of the stabilizer to achieve the desired shooting characteristics.
Testing and Adjusting the Homemade Bow Stabilizer
After constructing your homemade bow stabilizer, it’s important to thoroughly test its performance and make any necessary adjustments. Here are some steps to follow during the testing and adjusting process:
-
Shoot some practice arrows: Start by shooting a few arrows without any pressure to observe the stabilizer’s impact on your shooting. Notice any changes in balance, stability, and recoil.
-
Assess vibration and noise: Pay attention to any vibrations or noise generated during the shot. If you notice excessive vibrations or unwanted noise, consider adding additional dampening materials or adjusting the stabilizer’s weight distribution.
-
Evaluate stability and torque: Assess the stability of the bow during the shot. Notice if there is any lateral twisting motion or torque. If so, experiment with different weight configurations or repositioning the stabilizer to reduce torque and improve stability.
-
Fine-tune as needed: Based on the observations and feedback from your practice shots, make any necessary adjustments to fine-tune the stabilizer’s performance. This may involve adding or removing weights, changing the length of the stabilizer, or modifying the placement.
By taking the time to test and adjust your homemade bow stabilizer, you can optimize its performance to suit your specific shooting style and preferences.
Additional Tips and Recommendations
Here are some additional tips and recommendations to keep in mind when making your own bow stabilizer:
-
Experiment and iterate: Creating a homemade bow stabilizer is a process of trial and error. Don’t be afraid to experiment with different weight combinations, materials, or lengths to find the setup that works best for you. It may take several iterations and adjustments before achieving the desired results.
-
Seek advice and guidance: If you’re new to making bow stabilizers or have any uncertainties, consider seeking advice from experienced archers or professionals. They can offer valuable insights and guidance to help you create an effective stabilizer.
-
Document your adjustments: During the testing and adjusting process, keep a record or journal of the changes you make to the stabilizer and their effects on your shooting. This documentation will serve as a reference for future adjustments or if you decide to make another stabilizer in the future.
-
Personalize your stabilizer: Have fun incorporating personal touches or designs into your homemade stabilizer. You can paint or decorate the rod, or add accessories that reflect your individual style and personality. Just ensure that any additions do not affect the functionality or performance of the stabilizer.
Alternatives to Making Your Own Bow Stabilizer
Making your own bow stabilizer can be a fun and rewarding DIY project. However, if you prefer a commercially available option or don’t have the time or resources to create your own, there are plenty of bow stabilizers available for purchase.
When choosing a store-bought stabilizer, consider the same factors mentioned earlier, such as weight, length, material, and compatibility with your bow. Read reviews, seek recommendations, and consult with archery experts or experienced shooters to ensure you find the right stabilizer for your needs.
Purchasing Bow Stabilizers: Pros and Cons
While making your own bow stabilizer can be a fulfilling endeavor, there are advantages and disadvantages to purchasing a commercially made stabilizer. Here’s a brief overview of the pros and cons:
Pros:
- Convenience: Purchasing a stabilizer eliminates the need for gathering materials, tools, and spending time constructing one yourself.
- Range of options: Commercial stabilizers offer a wide range of designs, lengths, weights, and materials to choose from, catering to various shooting styles and preferences.
- Established performance: Established brands and models have been extensively tested and proven effective by archery professionals and enthusiasts.
Cons:
- Cost: Store-bought stabilizers can vary significantly in price, and high-quality models may be more expensive than making your own.
- Limited customization: While commercial stabilizers offer a range of options, they may not provide the same level of customization and personalization as a homemade stabilizer.
Ultimately, the choice between making your own bow stabilizer or purchasing one comes down to your personal preferences, budget, and the level of control you desire over the stabilizer’s design and performance.
Conclusion
A bow stabilizer is a valuable accessory that can significantly enhance your archery experience. By improving balance, reducing torque, minimizing hand shock, and absorbing vibrations, a stabilizer helps you achieve consistent and accurate shots. Whether you choose to make your own stabilizer or purchase one, the key is to find a setup that suits your shooting style, preferences, and individual needs. So grab your bow, experiment with different stabilizer configurations, and enjoy the improved stability and accuracy that a bow stabilizer brings to your archery journey.
