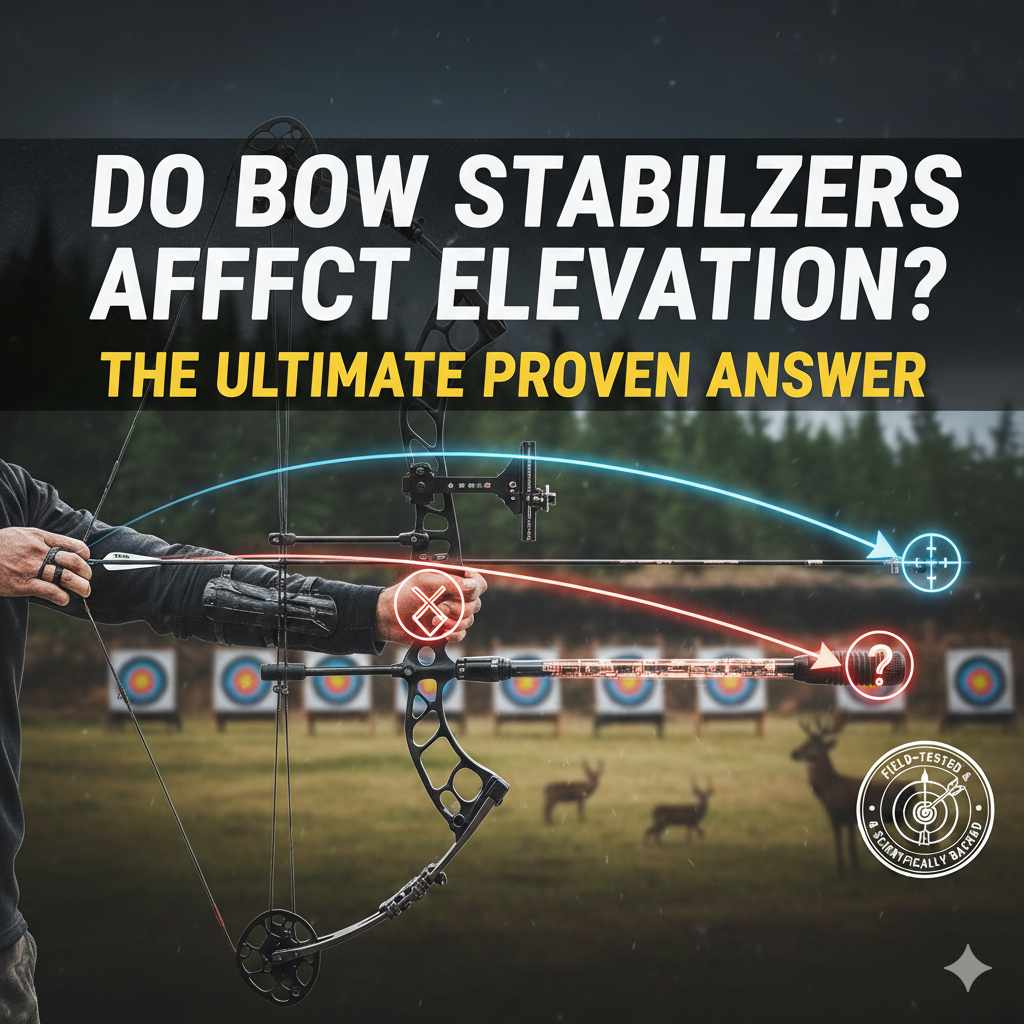
Yes, bow stabilizers can affect elevation, but indirectly. They add weight that changes your bow’s balance, which influences how you hold and aim. This often requires you to re-sight your bow, as your arrows may hit higher or lower until you adjust. The stabilizer itself doesn’t change the arrow’s flight, but it changes how you aim.
Hello, archers! I’m Salman Arfeen, and I’m here to help you get the most out of every shot. Today, we’re tackling a question I hear all the time: “I put a new stabilizer on my bow, and now my arrows are hitting low. What’s going on?” It’s a frustrating problem, but don’t worry, it’s also a very common one.
You bought a stabilizer to improve your accuracy, not to throw it off. The good news is that it’s probably working! It’s just doing its job in a way you might not expect. In this guide, I’ll walk you through exactly why this happens and give you a simple, step-by-step process to get your shots hitting the bullseye again. Let’s get you shooting with confidence.
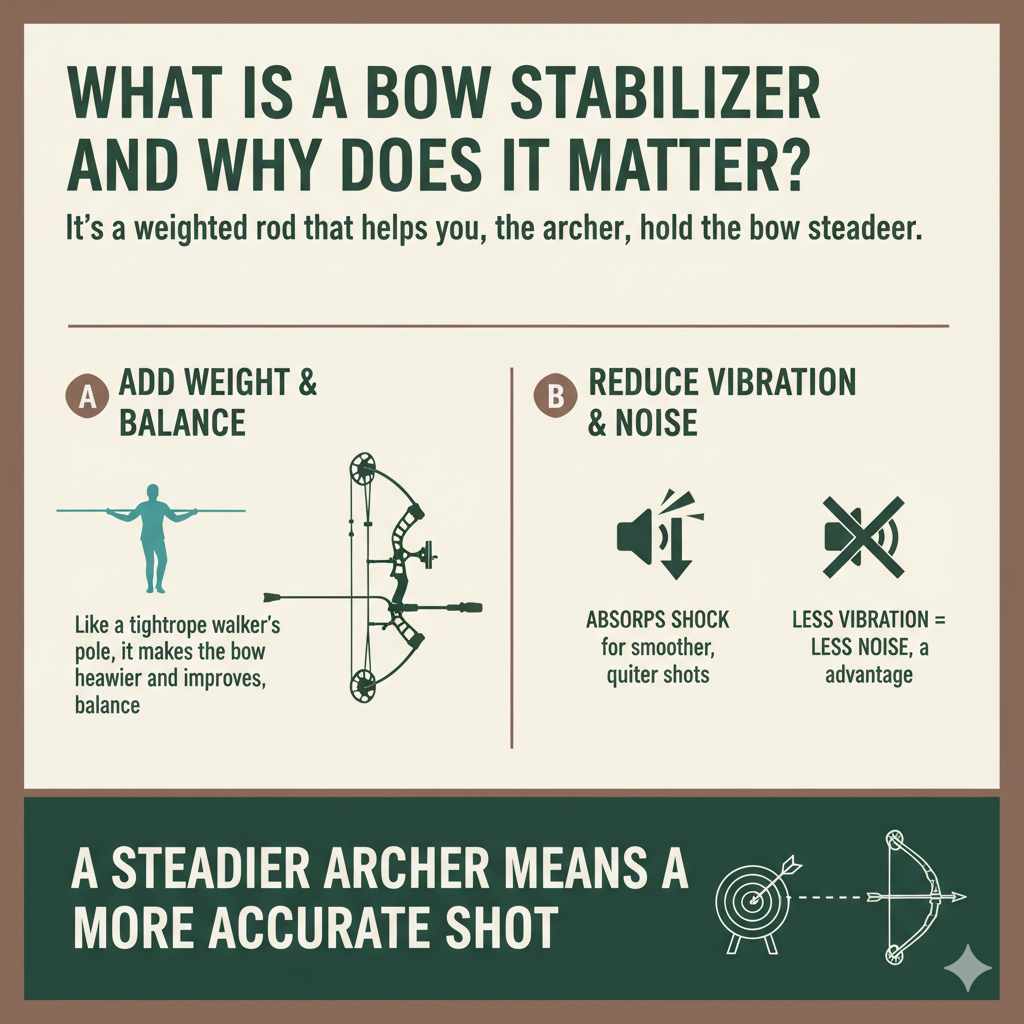
What is a Bow Stabilizer and Why Does It Matter?
Before we dive into the details, let’s make sure we’re on the same page. What is a bow stabilizer? In simple terms, it’s a weighted rod that you screw into the front of your bow’s riser (the main handle section). Think of it like the long pole a tightrope walker uses for balance.
Its main jobs are to:
- Add Weight and Balance: It makes the bow heavier and changes its center of gravity.
- Reduce Vibration: When you release the string, the bow vibrates. A stabilizer absorbs much of that “shock,” making the shot feel smoother.
- Quiet the Bow: Less vibration often means less noise, which is a big plus for hunters.
Many beginners think a stabilizer magically makes the arrow fly straighter. That’s not quite right. A stabilizer helps you, the archer, hold the bow steadier before, during, and after the shot. A steadier archer means a more accurate shot. It’s a piece of equipment that improves your form, and better form leads to better results.
The Direct Answer: How Stabilizers Influence Your Shot
So, do bow stabilizers affect elevation? Yes, they absolutely do, but it’s an indirect effect. The stabilizer doesn’t have a magical power that makes your arrows fly higher or lower. Instead, it changes the physical dynamics of your bow, which in turn affects how you aim and release.
Here’s the simple breakdown of what’s happening:
- You Add a Stabilizer: You screw a weighted rod onto the front of your bow.
- The Bow Becomes “Nose-Heavy”: The extra weight on the front makes the bow want to tip forward slightly.
- Your Body Reacts: To counteract this forward tilt, your bow arm has to work a little differently to hold the sight pin steady on the target.
- Your Aim Point Shifts: This slight change in how you hold the bow can cause your point of impact to shift. Most often, archers find their arrows start hitting lower than before.
It’s a simple chain of events. The stabilizer changes the bow’s balance, which changes your form, which changes where your arrow hits. So, if your arrows are hitting low after adding a stabilizer, it’s not a sign that something is wrong. It’s a sign that the stabilizer is doing its job by changing the bow’s feel and forcing you into a more stable hold.
The Key Factors at Play
Let’s look a bit closer at the specific ways a stabilizer influences your shooting. Understanding these concepts will make it much easier to diagnose and fix any issues.
1. Improved Balance and Bow Hold
An unbalanced bow is flighty. It’s hard to hold steady. Adding a front stabilizer moves the center of gravity forward, away from your grip. This forward weight helps the bow resist movement. It’s like trying to wiggle the end of a long stick versus a short one—the long one is harder to move quickly. This stability makes it easier for you to keep your sight pin from floating around the target.
However, this same weight causes the bow to naturally want to dip down. Your muscles have to adapt to hold it up. Until they do, you might subconsciously let the bow drop just a tiny bit at the moment of release, sending the arrow lower than intended.
2. Better Follow-Through
Follow-through is one of the most critical parts of an accurate shot. It’s what your body and bow do in the split second after the arrow has left the string. A good follow-through means you stay aimed at the target until the arrow is well on its way.
A stabilizer helps this immensely. Because it makes the bow front-heavy, it encourages the bow to tip forward and down upon release, which is the ideal motion. A bow without a stabilizer might jump sideways or even up. This consistent “falling away” motion makes your shots more repeatable. But again, until you adjust your sight for this new, consistent motion, your groups might form in a new spot (usually lower) on the target.
3. Reduced Bow Torque
Bow torque is the enemy of consistency. It’s the subtle twisting motion you apply to the bow’s grip with your hand. Even a tiny amount of torque can send your arrow flying wide of the mark. Stabilizers, especially longer ones, increase the bow’s resistance to this twisting. The weight extending out from the bow acts as a lever against your hand’s pressure, forcing you into a more neutral and repeatable grip.
When you reduce torque, your shots become more consistent from left to right. But this change in grip pressure can also slightly alter your vertical alignment, contributing to a change in elevation.
Real-World Scenarios: Cause and Effect
To make this even clearer, let’s look at what you might experience. This table shows common scenarios when adding or changing a stabilizer.
| Scenario | What You Feel | Likely Impact on Elevation |
|---|---|---|
| Shooting with No Stabilizer | The bow feels light and “jumpy.” Your sight pin may float a lot. The bow might kick up or sideways after the shot. | This is your baseline. Shots may be inconsistent, with some hitting high due to the bow jumping up on release. |
| Adding a Short (6-8 inch) Stabilizer | The bow feels more grounded and stable. Vibrations are noticeably less. The bow wants to tip forward slightly after the shot. | Your arrow groups will likely tighten up. You’ll probably see the whole group shift lower on the target. |
| Adding a Long (10+ inch) Stabilizer | The bow feels very front-heavy. It takes more effort to hold up, but the sight pin feels “locked” on the target. | Your arrow groups might shift even lower. It requires a significant sight adjustment to bring them back to the bullseye. |
| Adding a Back Bar Stabilizer | The bow feels perfectly balanced, neither tipping forward nor backward. It feels “dead in the hand” after the shot. | This creates the most neutral reaction, but will still require re-sighting your bow to fine-tune your point of impact. |
How to Test and Adjust for Elevation Changes: A 5-Step Guide
Okay, so you understand why your elevation has changed. Now, let’s fix it. This is a simple process called “sighting in” or “tuning,” and it’s something every archer needs to know. All you need is your bow, a few arrows, and a target.
Step 1: Establish Your Baseline (No Stabilizer)
First, you need to know where your arrows are hitting without any changes. Go to a safe shooting range and stand at a comfortable distance, like 20 yards.
- Shoot a group of 3-5 arrows, aiming at the center of the target each time.
- Don’t worry about perfection. Just focus on your normal shooting form.
- Take a picture of your arrow group or make a note of where it is. This is your starting point.
Step 2: Install Your New Stabilizer
Now, securely screw your new stabilizer into the front of the bow. Make sure it’s hand-tight. You don’t need to use a wrench or over-tighten it.
Step 3: Shoot a Second Group
Go back to the 20-yard line. Using the exact same aiming point (the center of the target) and the same sight pin, shoot another group of 3-5 arrows.
Pay attention to how the bow feels. Does it feel steadier? Does it feel heavier? Notice how it reacts after the shot. This feedback is valuable.
Step 4: Analyze the Results
Walk up to the target and compare your two arrow groups. You will likely notice two things:
- Your second group is tighter. This means the stabilizer is working! It’s helping you be more consistent.
- Your second group has moved. Most likely, it has moved down. The entire cluster of arrows is now hitting lower than your baseline group.
This confirms it: the stabilizer has changed your point of impact. Now it’s time for the final, simple fix.
Step 5: Adjust Your Sight
This is where the magic happens. To correct your elevation, you need to adjust your bow sight. The rule for adjusting sights is simple and universal: “Chase the arrow.”
This means you move your sight pin in the same direction that your arrows are hitting. Here’s how:
- If your arrows hit LOW: You need to move your sight pin DOWN.
- If your arrows hit HIGH: You need to move your sight pin UP.
It seems backward, but it works. By moving your pin down, you force yourself to raise the bow slightly higher to get the pin back on the target, which makes your arrow hit higher. Make small adjustments at a time. Move the pin a tiny bit, shoot another group, and see where it lands. Repeat this process until your arrows are consistently hitting the bullseye. For more detailed information on bow tuning, the Archery GB tuning guide offers excellent resources.
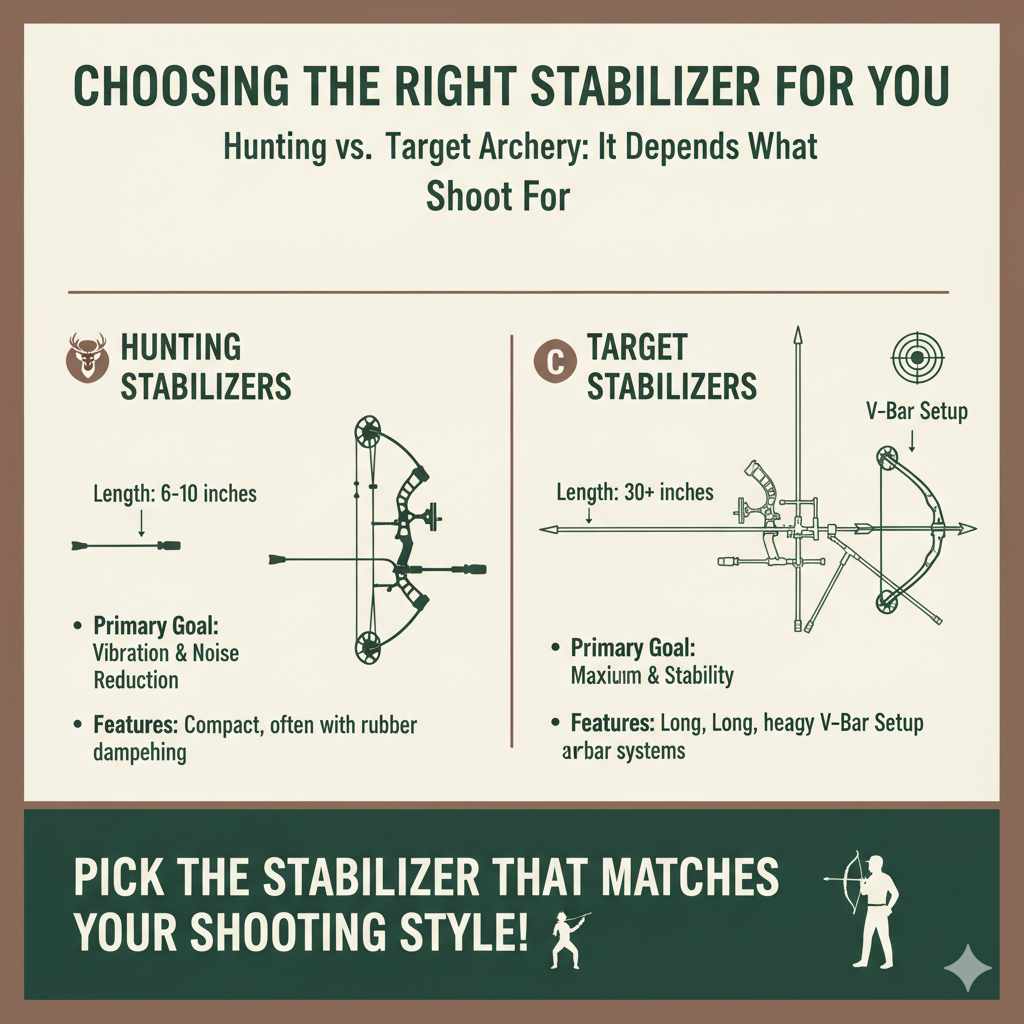
Choosing the Right Stabilizer for You
Not all stabilizers are created equal. The right one for you depends entirely on what you use your bow for. The two main categories are hunting and target archery.
Hunting Stabilizers
When you’re in the woods, you need a setup that is compact and maneuverable. You don’t want a long rod getting caught on branches. For this reason, hunting stabilizers are typically short and relatively light.
- Length: 6 to 10 inches.
- Primary Goal: Vibration and noise reduction. They provide some balance but are mainly designed to make the bow quiet and comfortable to shoot.
- Features: Often made of rubber or have rubber components to absorb as much vibration as possible.
Target Stabilizers
In target archery, the only goal is maximum precision. Maneuverability doesn’t matter. Target archers use very long and heavy stabilizer setups to make the bow as stable as a rock.
- Length: Can be 30 inches or even longer!
- Primary Goal: Maximum stability and balance. They add a lot of weight far away from the bow to resist movement.
- Features: Often a complex system with a long front bar and one or two shorter back bars (called a V-bar setup) to achieve perfect balance.
Here is a simple comparison to help you decide:
| Feature | Hunting Stabilizer | Target Stabilizer |
|---|---|---|
| Typical Length | 6-10 inches | 12-36 inches |
| Main Purpose | Vibration/Noise Dampening | Aiming Stability |
| Weight | Light (3-8 ounces) | Heavy (can be several pounds) |
| Best For | Moving through woods, shooting from a blind or treestand. | Shooting at known distances on a flat range. |
For most beginners and hobbyists who do a bit of everything, a good starting point is a stabilizer in the 8-12 inch range. It offers a great blend of stability and practicality.
Frequently Asked Questions (FAQ)
1. Will a stabilizer automatically make me more accurate?
Not automatically. A stabilizer is a tool that helps you hold the bow steadier. It can reveal flaws in your form and will almost always require you to re-adjust your sights. Your accuracy will improve once you pair the stabilizer with good form and a properly sighted-in bow.
2. How long should my stabilizer be?
For general archery and bowhunting, a stabilizer between 6 and 12 inches is a great choice. Longer stabilizers (over 12 inches) provide more stability but can be clumsy to carry. Start with something in the middle, like an 8-inch model, and see how it feels.
3. Do I need a back bar stabilizer too?
For beginners, absolutely not. A back bar is an advanced tuning tool used to achieve perfect side-to-side and front-to-back balance. Master shooting with a single front stabilizer first. You’ll know when you’re ready for a more complex setup.
4. Can a stabilizer make my aim worse?
Temporarily, yes. If a stabilizer is too heavy for you, you will struggle to hold the bow up, and your aim will suffer. It’s important to choose a weight that allows you to hold steady without straining. If your arm gets shaky after a few seconds, you may have too much weight.
5. How do I know if my bow is balanced correctly?
A simple test: hold your bow loosely by the grip with your fingers open. With a front stabilizer, it should tip forward slowly. It shouldn’t feel like it wants to “fall” out of your hand, nor should it feel like it’s tipping back toward you. The balance should feel comfortable and controllable.
6. Does the brand of stabilizer matter for a beginner?
Not really. While high-end brands offer advanced carbon technology and weight systems, the most important factors for a beginner are length and weight. Any reputable brand will offer a stabilizer that can help you improve. Focus on finding the right size and weight for you, not the logo on the side.
7. What’s the difference between a stabilizer and a dampener?
A stabilizer’s main job is to add weight and leverage to help you aim (stabilize). A dampener’s only job is to absorb vibration (dampen). Most modern stabilizers are a hybrid—they are weighted for stability but also include rubber or other materials to act as dampeners.
Conclusion: Embrace the Adjustment
So, let’s circle back to our original question: Do bow stabilizers affect elevation? The proven answer is yes, they do—by changing the way you and your bow work together. The shift in your arrow’s impact isn’t a problem; it’s proof that the stabilizer is influencing the bow’s balance, just as it’s designed to do.
Think of it like getting new tires on your car. The car is fundamentally the same, but the new tires might require a slight alignment to make sure everything is driving straight. Your stabilizer is a new component in your shooting system, and adjusting your sights is simply the alignment process needed to get everything hitting the mark again.
Don’t get discouraged if you have to spend some time at the range re-sighting your bow. This process is a normal and essential part of archery. By understanding why it happens and following the simple steps to adjust for it, you’ll be on your way to tighter groups and greater confidence. Happy shooting!