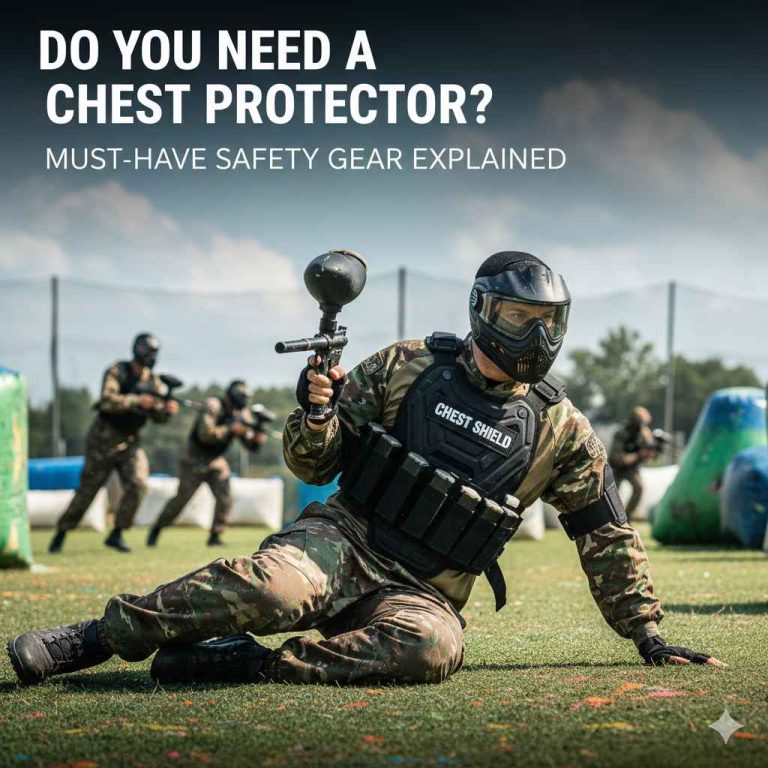
Do I need a chest protector for motorcycling? Yes, absolutely. For beginners and experienced riders alike, a quality chest protector significantly reduces the risk of serious chest, rib, and internal organ injury during a crash, offering crucial impact and abrasion protection that jackets alone often miss.
Getting into motorcycling is thrilling! You’ve got your helmet and gloves, but now you face a heap of protective gear choices. One item that often causes confusion for new riders is the chest protector. Should you really add another layer? Isn’t my jacket enough? These are very common questions when you are focused on learning to ride safely. Don’t worry, it’s easy to feel overwhelmed by all the technical gear descriptions. I’m here to simplify everything for you. We will walk through exactly what a chest protector does, who needs one most, and how to choose the perfect one without breaking the bank. By the end of this guide, you will feel completely confident about your safety choices. Let’s dive into making your ride as safe as possible!
Why Safety Gear Can Be Confusing for New Riders
When you first start looking at motorcycle gear, it feels like learning a new language. Terms like CE-rated, back protector inserts, roost guards, and armor levels fly around. It is easy to skip the chest protection because it seems bulky or unnecessary if you already bought a sturdy textile jacket. However, motorcycle jackets, while great for abrasion resistance, often have very basic padding, or none at all, in the most vulnerable areas—your sternum and ribs.
A chest protector is a specialized piece of equipment designed specifically to absorb and disperse high-impact energy away from your core. Think of it like a sophisticated shield for the part of your body that keeps everything vital in place. Since safety is our top priority, understanding this piece of equipment is key to building confidence on the road or trail.

What Exactly is a Motorcycle Chest Protector?
A motorcycle chest protector is a piece of body armor worn underneath or sometimes over your riding jacket (depending on the style) to guard the torso—specifically the sternum, ribs, and sometimes the upper abdomen—from direct impact.
It is not just a piece of hard plastic; modern chest protectors use advanced materials to manage crash forces effectively. They are engineered to protect you during two main types of motorcycle incidents: sliding/skidding (abrasion) and direct impact (hitting an object or the ground).
The Two Main Types of Chest Protectors
While they all serve the same basic goal, chest protectors generally fall into two main categories based on how they are used:
1. Insert/Liner Protectors
These are flexible or semi-rigid pads designed to fit directly into the dedicated pockets found inside higher-end motorcycle jackets and adventure/touring gear.
Pros: They offer a sleek, integrated look; you often forget you are wearing them.
Cons: They usually offer less overall coverage than standalone units; the protection level depends entirely on the jacket’s capabilities.
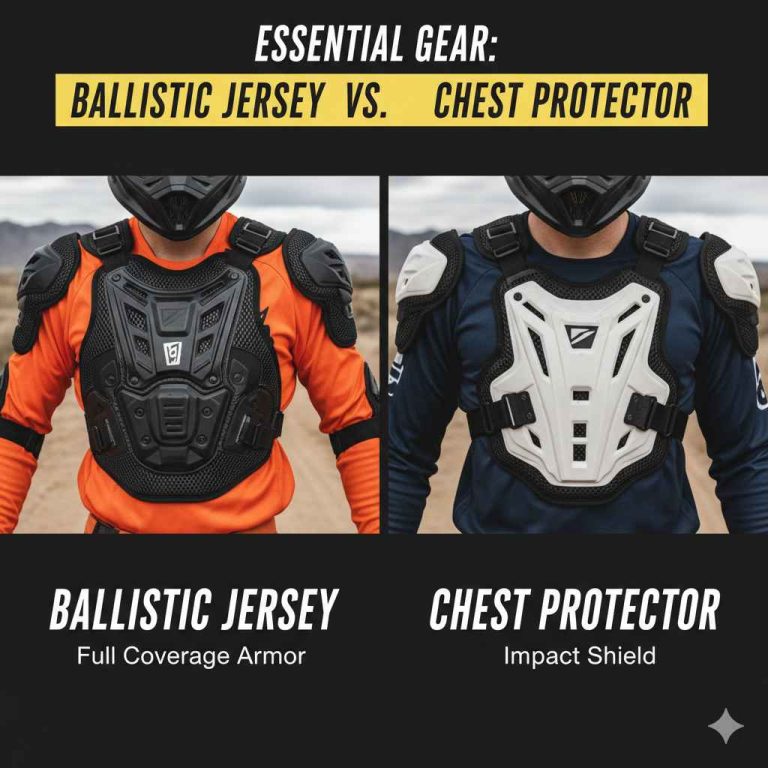
2. Standalone/Over-the-Jersey Protectors (Roost Guards)
These are generally more robust, often used in off-road (dirt biking) scenarios but increasingly popular for street riders who want maximum core protection. They are designed to be worn externally, over a sturdy jersey or under a large textile jacket.
Pros: Superior impact absorption; often feature ventilation channels; provide maximum coverage (including often linking up to back protectors).
Cons: Can feel bulkier; might not fit comfortably under snug street jackets.
Do I Need A Chest Protector Motorcycle? Analyzing the Risks
This is the central question. While some riders argue they are optional for casual street use, safety experts and experienced riders strongly recommend them. Here is a breakdown of why you should strongly consider adding one to your gear setup.
The Dangers to Your Chest Area
Your chest houses several critical structures that are highly vulnerable in an accident:
1. Rib Cage: Ribs are surprisingly easy to break, and broken ribs can puncture lungs or cause severe internal bleeding.
2. Sternum (Breastbone): A direct hit to the sternum can cause fractures or dislocations, leading to extreme pain and difficulty breathing.
3. Internal Organs: Lungs, heart, and major blood vessels are directly behind the rib cage. Impact forces can cause bruising, tearing, or contusions even if the outer bone structure remains intact.
When Is a Chest Protector Most Necessary?
While every ride is safer with one, some riding styles benefit from them more urgently:
Off-Road/Adventure Riding: Essential. Rocks, branches, and high-speed slides are common. These environments necessitate robust protection often referred to as “roost guards” (designed to stop debris kicked up by other bikes).
Track Days/Sport Riding: Highly recommended. Speeds are higher, and crashes are more abrupt, leading to high impact forces.
City Commuting: Crucial. While speeds may be lower, the risk of unpredictable impact (like hitting a car door opening suddenly) is high.
Riding with a Textile Jacket (Without Armor Pockets): If your jacket only has basic foam inserts, upgrading to dedicated, certified armor is non-negotiable.
Understanding Protection Ratings (CE Levels)
When looking at armor, you will see references to CE ratings. This refers to European safety standards set by the European Committee for Standardization. For chest protection, you are primarily looking for:
CE Level 1: Meets the basic legal requirements for impact absorption. It offers good protection suitable for many applications.
CE Level 2: Offers significantly better impact absorption than Level 1. This rating means the protector can handle a much harder hit while keeping the transmitted force below a safe threshold. For core protection, Level 2 is always the preferred choice.
To learn more about how these standards are tested, you can look at resources from official testing bodies, though for beginners, focusing on “CE Level 2” is the simplest rule of thumb. (For example, organizations like the International Organization for Standardization (ISO) often reference the technical standards governing impact testing.)
How to Choose the Right Chest Protector for You
Choosing gear should feel exciting, not stressful! We want something that fits your riding style and makes you feel secure. Follow these simple steps to narrow down your options.
Step 1: Determine Your Riding Environment
Where are you spending most of your time on two wheels?
| Riding Style | Primary Need | Recommended Protector Type |
| :— | :— | :— |
| Street Commuting/Touring | Comfort, Low Profile | High-density foam inserts (upgraded) or thin CE Level 2 inserts. |
| Sport/Aggressive Street | High Impact Absorption | Robust, usually integrated, CE Level 2 armor. |
| Off-Road/Dirt Biking | Ventilation, Hard Shell | Standalone roost guard with full back protection integration. |
Step 2: Check Your Existing Jacket Compatibility
If you already own a good motorcycle jacket:
1. Check for Armor Pockets: Does your jacket have zippered or velcro pockets labeled for chest armor?
2. Measure the Pocket Size: Jackets often require specific shapes (e.g., trapezoidal or rectangular pads). Measure the existing foam insert (if there is one) or the pocket dimensions.
3. Purchase Inserts: Buy CE Level 2 inserts specifically designed to fit those dimensions (brands like D3O or SAS-TEC make universal fitting options).
If your jacket does not have pockets, or you ride off-road, you will need a standalone unit worn over a base layer.
Step 3: Focus on Fit and Comfort
Protection only works if you wear it. A chest protector that pinches, rides up, or restricts your breathing will quickly end up hanging in the garage.
Try Before You Buy: If possible, try the protector on while wearing your jacket. Can you comfortably reach your handlebars and turn your head?
Strap Adjustments: Look for protectors with multiple adjustment points on the shoulders and sides. This allows you to cinch it down so it doesn’t shift during a wobble or emergency maneuver.
Material Breathability: Especially important if you ride in warm weather. Look for protectors with airflow channels or mesh backing.
Step 4: Prioritize CE Level 2 Certification
For chest protection, which deals with major organs, compromise on price before you compromise on safety rating. Aim for CE Level 2 protection certified specifically for impact absorption.
Understanding Chest Protector Materials
The magic behind a great chest protector lies in the material used to absorb the kinetic energy from a crash. You will usually encounter a few common types of padding materials:
Viscoelastic Foams (e.g., D3O, SAS-TEC): These are highly popular. They are soft and flexible when you are moving normally, making them comfortable. However, upon sharp impact, the molecules lock together instantly to absorb and dissipate the energy, then immediately return to their flexible state.
Hard Shell Plastic with Foam Backing: Common in roost guards. These use a tough outer polycarbonate shell to spread the impact force over a wider area, while the interior soft foam absorbs the remaining shock.
Polymer Foams (Standard EVA): Less expensive and often found in lower-rated gear. They provide basic cushioning but are generally less effective at handling high-velocity impacts compared to viscoelastic materials.
Step-by-Step: Integrating Your New Chest Protector
Once you have purchased your gear, here is how to properly wear it for maximum effectiveness.
Scenario A: Integrating Inserts into a Jacket
This is the cleanest setup for street riding.
1. Locate the Armor Pockets: Open the inner lining of your jacket, usually around the chest area. You might need to unzip a mesh layer or peel back a Velcro panel.
2. Remove Old Pads (If Applicable): Take out any existing thin foam pads that came with the jacket.
3. Insert New Armor: Line up the new CE Level 2 chest protector with the pocket. Note that most jackets require a left and right-specific piece. Ensure the broad end faces down toward your abdomen and the narrow end points toward your collarbone.
4. Secure the Armor: Zip or velcro the pocket flap closed. Gently feel the outside of the jacket; the armor should sit flat against your chest without bunching up.
5. Test the Fit: Put the jacket on. Bend over, reach forward, and twist side-to-side. The armor should remain securely in place and not shift away from your sternum.
Scenario B: Wearing a Standalone Roost Guard
This is common for dirt riders or those seeking maximum street protection.
1. Select Your Base Layer: Wear a snug, moisture-wicking shirt underneath. This prevents chafing between your skin and the protector straps.
2. Put on the Protector: Slide the unit over your base layer. Fasten the lower waist strap first—it needs to be snug to keep the unit positioned correctly.
3. Adjust Shoulder Straps: Adjust the shoulder straps so the protector sits high enough that it doesn’t press uncomfortably on your collarbones, but low enough that the bottom edge sits securely over your upper abdomen.
4. Check for Movement: Move your arms widely. The protector should move with your body, not slide up toward your neck or down toward your waist.
5. Layer Your Outer Gear: If wearing it under a jacket, ensure the outer jacket is loose enough that the chest protector isn’t compressed. Compression significantly reduces its ability to absorb impact. If it’s a roost guard, wear it over your jersey.
Common Myths About Chest Protection Debunked
As a beginner, you will hear a lot of well-meaning but incorrect advice. Let’s clear up a few common misconceptions about chest protectors.
Myth 1: “My Jacket Armor is Enough.”
Reality: Most standard jacket armor (especially older or cheaper textile jackets) is designed primarily for elbow and shoulder impact points. Chest padding is often just thin foam that offers minimal protection against crushing forces or high-speed impacts to the sternum. Dedicated chest protectors use high-tech, specialized materials for core safety.
Myth 2: “They Restrict Breathing.”
Reality: Modern, high-quality CE Level 2 protectors are designed to flex and move with your body. If you feel restricted, the protector is likely too large, improperly sized, or strapped too tightly. A well-fitted protector should feel noticeable but should not prevent you from taking a deep breath.
Myth 3: “Only Dirt Bikers Need Them.”
Reality: While dirt bikers need them to stop flying rocks (roost), street riders face different, often more sudden, impacts—hitting stationary objects like curbs, guardrails, or vehicles at speed. The energy transfer in a street accident can be just as high, making the sternum protection essential for everyone.
Myth 4: “They are Too Hot for Summer Riding.”
Reality: While any armor adds heat, manufacturers now focus heavily on ventilation. Look for protectors with numerous vents, mesh backing, or perforated hard shells. Many riders find that wearing a lightweight mesh armor insert is cooler than wearing a fully armored, heavy leather jacket during peak summer months.
Essential Safety Checks Before Every Ride
Gear is only effective if you wear it correctly every single time. This short check takes 30 seconds but can save your life.
1. The Shake Test: Put on your jacket/protector setup. Shake your torso side-to-side. Does the armor shift noticeably? If so, tighten the straps or reposition the inserts.
2. The Reach Test: Reach forward as if you are about to grab your handlebars. Does the protector slide up into your neck? If it does, lower the shoulder straps.
3. The Zip Test: Make sure any pockets holding inserts are securely zipped or fastened. An insert falling out during a crash renders it useless.
4. The Overlap Check: If you are wearing a back protector alongside a chest protector, ensure there is no large gap between the two units. The protective coverage should flow seamlessly from the upper back/shoulders down to the sternum.
Comparing Price vs. Protection Level
It’s tempting to choose the cheapest option, but safety equipment requires a calibrated investment. Here is a general guide on what to expect at different price points:
| Price Range | Typical Features | Who Should Consider This |
| :— | :— | :— |
| $40 – $80 | Basic foam inserts, CE Level 1 rating, limited ventilation. | Riders on a strict budget who need a base level of impact padding in an existing jacket pocket. |
| $90 – $150 | High-quality viscoelastic inserts (D3O/SAS-TEC), CE Level 2 rating available, better articulation. | The sweet spot for most street riders upgrading inserts or buying entry-level standalone protectors. |
| $160+ | Full standalone roost guards, integrated hard shells, maximum ventilation, often designed to work with neck braces. | Off-road riders, track day enthusiasts, or riders prioritizing absolute maximum core coverage. |
Remember, you can often spend $100 to upgrade the stock padding in your existing $400 jacket to Level 2 protection, which provides far better results than relying on stock foam.

Frequently Asked Questions (FAQ) for New Riders
Q1: Do I need a chest protector if I only ride at slow city speeds?
A: Yes. Even low-speed accidents can cause severe trauma to the sternum and ribs if you impact a stationary object. Slow speed does not mean zero impact energy. A chest protector offers essential peace of mind.
Q2: Can I wear my chest protector over my jacket?
A: You can, but only if it is specifically designed as an over-the-jacket (roost guard) style. If you try to wear a low-profile insert protector over a thick textile jacket, the outer jacket layer can compress the armor, making it less effective in a crash.
Q3: How often should I replace my chest protector?
A: If the protector has been involved in any significant impact (even if you don’t see damage), it must be replaced. The materials are designed for one major impact event. Otherwise, replace them every 5–7 years as the foam materials can degrade over time.
Q4: Is there a difference between a chest protector and a back protector?
A: Yes, though they often integrate. A back protector focuses on the spine and kidneys. A chest protector focuses on the sternum and ribs. For complete torso safety, many high-quality systems combine both into a unified armor suit.
Q5: Will a chest protector make my jacket feel too bulky?
A: If you choose the right style, no. For street riding, choosing thin, high-density CE Level 2 inserts designed to slip into jacket pockets offers great protection with minimal bulk.
Q6: Are cheap, unrated chest protectors worth buying?
A: Generally, no. Unrated gear has not passed independent safety testing. When dealing with vital organs, always insist on CE Level 1 or, preferably, CE Level 2 certification.
Conclusion: Making the Confident Choice for Your Core Safety
Welcome to the world where safety gear decisions become second nature! If you were wondering, “Do I need a chest protector motorcycle?” the clear answer is that if you ride regularly, it is one of the wisest investments you can make for long-term health and riding enjoyment.
You are protecting the very engine of your body—your heart, lungs, and ability to breathe. By choosing a CE Level 2 protector that fits well within your current jacket or selecting a comfortable standalone roost guard for off-road adventures, you are taking a huge step in becoming a safer, more confident rider. Don’t let confusion stop you; follow the steps to check compatibility and prioritize quality materials. Gear up correctly, ride smart, and enjoy the journey ahead knowing you have that vital layer of protection secured. Happy and safe riding!