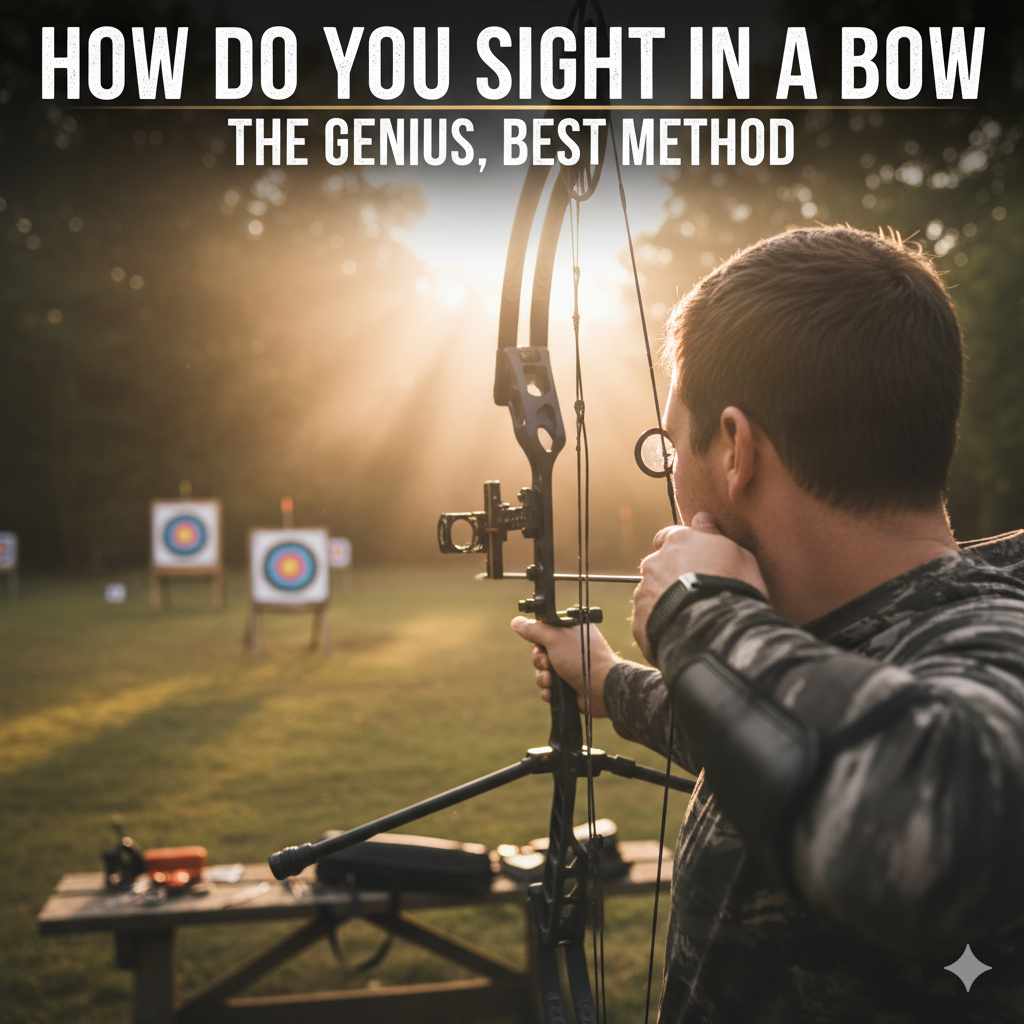
Sighting in a bow means adjusting your bow sight so your arrow hits where your pin is aiming. The best method is to start close (10-20 yards), shoot a group of three arrows, and then “chase the arrow” with your sight pin. If your arrows hit high and left, move your pin high and left.
Hello, I’m Salman Arfeen, your friendly guide in the world of archery. I remember the frustration of watching my arrows sail past the target, nowhere near where I was aiming. It can make you feel like you’ll never get it right. But I promise you, you can.
Sighting in a bow feels complicated, but it’s actually a simple, logical process. Think of it like a conversation between you and your bow. You just need to learn the language. Today, I’m going to teach you that language with a step-by-step method that’s so simple, you’ll wonder why it ever seemed hard. Let’s turn that frustration into confidence and get you hitting the bullseye.
Why Sighting In Your Bow is a Game-Changer
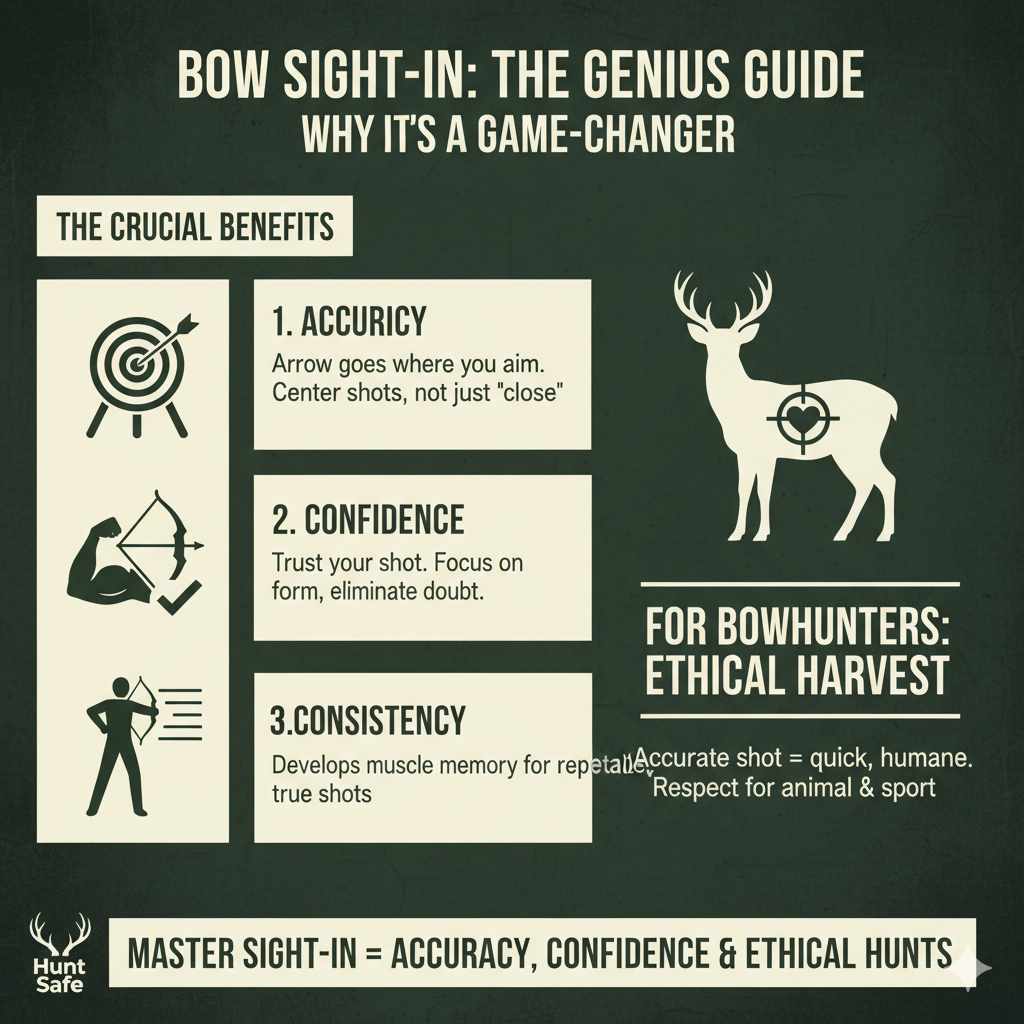
Before we grab our gear, let’s talk about why this is so important. Sighting in your bow isn’t just a technical step; it’s the foundation of all your future success in archery. When your bow is properly sighted in, you build three crucial things:
- Accuracy: This is the most obvious benefit. A sighted-in bow means your arrow will go where you aim it. It’s the difference between hitting the target’s center and just hoping to hit the target at all.
- Confidence: There is no feeling quite like knowing that when you release the string, the arrow will fly true. This confidence removes doubt from your mind, allowing you to focus on your form and enjoy the shot.
- Consistency: Sighting in forces you to develop a consistent shooting form. You can’t properly adjust your sight if you’re shooting differently every time. This process helps you build the muscle memory needed for repeatable accuracy.
For bowhunters, this process takes on an even greater level of importance. An accurate shot ensures a quick, ethical harvest, which is our primary responsibility in the field. Sighting in your bow is a sign of respect for the animal and the sport.
The Essential Gear You’ll Need
You don’t need a high-tech workshop to get this done. In fact, you probably already have everything you need. Let’s gather our tools so we can get started without any interruptions.
- Your Bow: Make sure your bow is set up correctly, with the arrow rest, nocking point, and peep sight already installed and roughly aligned.
- A Bow Sight: This guide works for almost any multi-pin sight. We’ll be focusing on adjusting one pin at a time.
- At Least Three Arrows: Using the same arrows is key. Make sure they are all the same length, weight, and have the same fletchings. Consistency in your equipment leads to consistency in your shots.
- A Large Target: A bigger target gives you more room for error, which is great when you’re starting. A large block or bag target is perfect.
- Allen Wrenches: Most bow sights use small Allen (or hex) keys for adjustments. Make sure you have a set that fits your sight’s screws.
- A Safe Place to Shoot: This is non-negotiable. You need a space with a solid backstop, free from people, pets, or property. Your backyard might work if it’s large and safe, but a dedicated archery range is even better.
- (Optional) Rangefinder: While you can step off the distances, a simple rangefinder ensures your yardages are precise, which makes your sight pins more accurate.
Understanding the Parts of Your Bow Sight
Your bow sight might look a little intimidating with all its knobs and pins, but it’s really quite simple. Let’s break down the main components. Understanding what each part does will make the adjustment process feel intuitive.
| Part Name | What It Does |
|---|---|
| Sight Housing | The round frame that holds everything together. It often has a bright-colored ring to help you center it in your peep sight. |
| Sight Pins | These are your aiming points, usually made of brightly colored fiber optics. Each pin will be set for a specific distance (e.g., 20, 30, 40 yards). |
| Elevation Adjustment | This moves the entire sight housing up and down. Moving it up makes your arrows hit higher; moving it down makes them hit lower. This is a “macro” adjustment. |
| Windage Adjustment | This moves the entire sight housing left and right. Moving it left makes your arrows hit more to the left; moving it right makes them hit more to the right. |
| Individual Pin Adjustment | Most sights have small screws that let you move each pin up or down independently within the housing. This is how you set your different yardages. |
For most of our work today, we’ll focus on the individual pin adjustments and the main windage (left/right) adjustment. The key is to only change one thing at a time!
The Step-by-Step Guide to Sighting In Your Bow
Alright, let’s get to it! This is the core method that has helped countless archers go from scattered shots to tight groups. We’ll take it slow and steady. Remember, the goal is progress, not perfection on the first try.
Step 1: Safety and Setup
Safety is always the first step in archery. Before you even nock an arrow, make sure your shooting area is secure. A good rule of thumb is to have at least 50 yards of clear space behind your target. Ensure no one can walk behind the target while you are shooting. For more information on range safety, you can check guidelines from organizations like USA Archery.
Place your target at 10 yards to start. Yes, just 10 yards! This might feel too close, but it’s the secret to making this process easy and stress-free. At this distance, your form doesn’t have to be perfect, and you are almost guaranteed to hit the target, which builds confidence and prevents lost arrows.
Step 2: Shoot Your First Group (Don’t Aim for the Bullseye!)
Take a deep breath and relax. Stand at the 10-yard line. Nock an arrow, take aim using your top pin, and focus on a spot in the center of the target. Your only goal right now is to execute a good, clean shot. Don’t worry about where it hits.
Shoot three arrows, aiming at the exact same spot each time. The goal here isn’t to hit the bullseye; it’s to create a “group.” A group is simply a cluster of arrows on the target. If your three arrows are all clustered together—even if that cluster is in the top-right corner of the target—that’s a huge success! It means your shooting form is consistent.
If your arrows are scattered all over the target, take a moment to focus on your form. Are you holding the bow the same way? Is your anchor point consistent? Work on getting a tight group before you touch your sight.
Step 3: The Golden Rule: “Chase the Arrow”
This is the most important concept in sighting in a bow. It’s simple, memorable, and it works every time. The rule is: You move your sight pin in the direction you want your arrow to move.
Let’s say your group of arrows hit high and to the right of the bullseye. To correct this, you will move your top sight pin up and to the right. You are literally “chasing” your arrow group with your pin. This might feel backward at first, but trust me, it works.
Here’s a simple chart to help you remember:
| If Your Arrows Hit… | You Move Your Sight Pin… |
|---|---|
| High | Up |
| Low | Down |
| Left | Left |
| Right | Right |
Step 4: Make Your First Adjustment
Walk up to the target and look at your three-arrow group. Let’s use our example where the group is 3 inches high and 2 inches to the right of the center.
- Grab your Allen wrenches and locate the screw for your top pin’s vertical (up/down) adjustment. Loosen it slightly.
- Gently move the pin up. Make a small adjustment. A tiny movement of the pin makes a big difference downrange.
- Tighten the screw. Don’t overtighten it.
- Now, locate the windage screw that moves the entire sight housing left and right.
- Turn it to move the sight housing to the right. Again, make a small adjustment.
You’ve just made your first sight adjustment. Now it’s time to test it.
Step 5: Shoot Another Group and Repeat
Go back to the 10-yard line and shoot another group of three arrows, aiming at the center of the target with that same top pin. Where did they land? Hopefully, they are closer to the center!
If your new group is now just 1 inch high and perfectly centered left-to-right, you’re almost there. You would only need to make one more small upward adjustment to your pin. Keep shooting groups of three and making small adjustments until your arrows are consistently hitting the center of the target.
Step 6: Set Your 20-Yard Pin
Once you’re hitting the bullseye at 10 yards, it’s time to move back. The top pin on most sights is intended for 20 yards. Move your target back to a measured 20 yards.
Shoot another group of three arrows, aiming with your top pin. Because you’ve already made adjustments at 10 yards, you should be pretty close! Now, repeat the “chase the arrow” process. If your arrows are a little low at 20 yards, move your top pin down slightly. If they are a bit to the left, move your sight housing to the left.
Keep making small adjustments and shooting three-arrow groups until you are consistently hitting the bullseye at 20 yards. Congratulations! Your top pin is now officially sighted in.
Step 7: Sight In Your Remaining Pins
Now the fun part begins. The rest of your pins will be much faster to sight in. Move your target back to 30 yards. Now, instead of moving your top pin, you will aim with your second pin.
- Shoot a three-arrow group at 30 yards, using your second pin.
- Observe where the group hits.
- “Chase the arrow” by moving only your second pin. Do NOT adjust the whole sight housing. The windage (left/right) you set for your 20-yard pin should be correct for all other distances.
- If your 30-yard group is low, move the second pin down. If it’s high, move the second pin up.
- Repeat this process until your second pin is hitting the bullseye at 30 yards.
Continue this method for your other pins. Move back to 40 yards and sight in your third pin. Move back to 50 yards and sight in your fourth pin, and so on. You only need to adjust each pin vertically, as the horizontal alignment is already set.
Common Mistakes to Avoid
Even with the best method, small mistakes can creep in and cause frustration. Here are a few common pitfalls to watch out for:
- Adjusting After One Shot: Never adjust your sight based on a single arrow. One bad shot could be due to your form, not the sight. Always shoot a group of three to get a true idea of where your bow is hitting.
- Making Large Adjustments: Be patient. A tiny bump of the sight pin can move your arrow’s impact point by several inches at a distance. Make small, deliberate changes.
- Inconsistent Anchor Point: Your anchor point—the spot on your face where you consistently draw the bowstring back to—is critical. If it changes, your shots will be inconsistent, making it impossible to sight in correctly.
- Gripping the Bow Too Tightly: A tight “death grip” on your bow handle can cause torque, sending your arrows left or right. Hold the bow with a relaxed, open hand. Let the bow rest in the “V” between your thumb and index finger.
- Forgetting to Practice: Sighting in your bow isn’t a one-and-done event. You should check your sight every few weeks and especially before a hunt or competition. Your form can change, or a bump could knock your sight out of alignment.
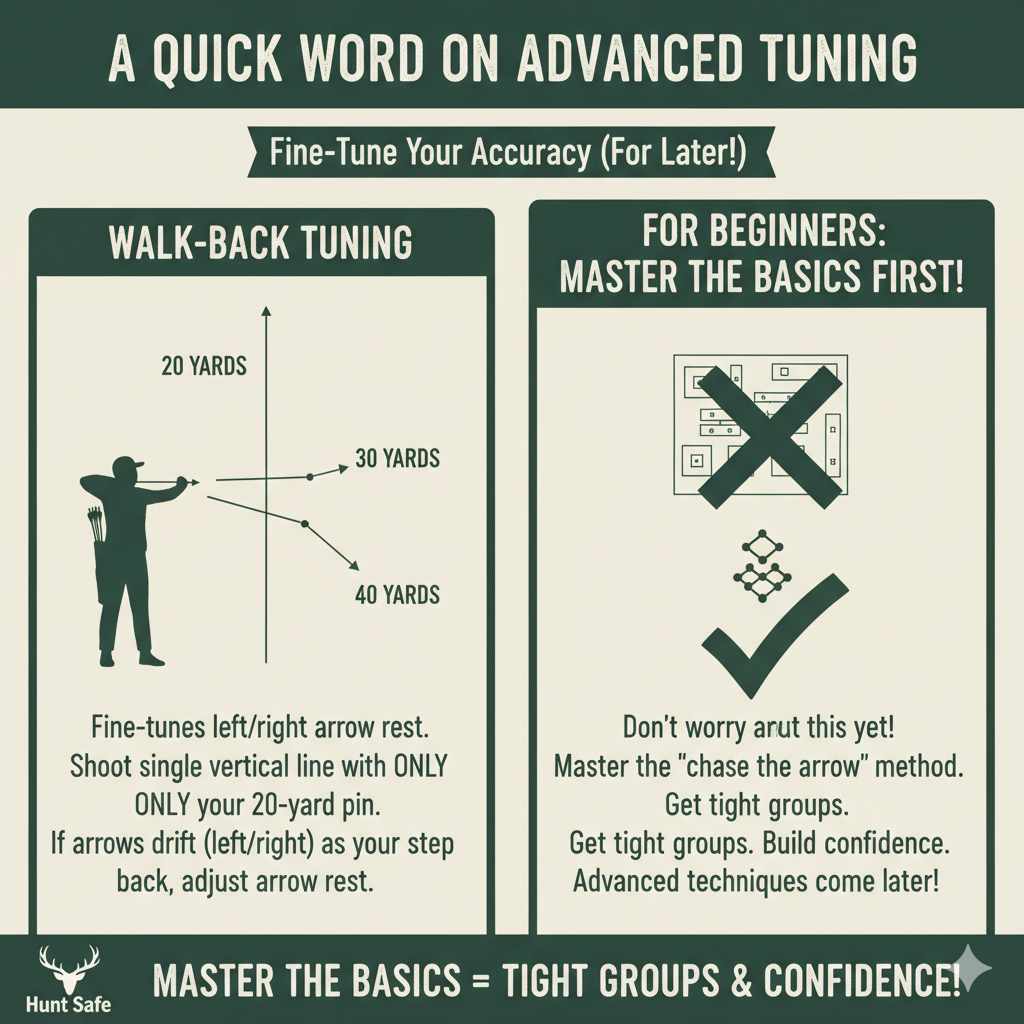
A Quick Word on Advanced Tuning
Once you become comfortable with this process, you might hear archers talk about “walk-back tuning.” This is a more advanced method used to fine-tune your sight’s windage (left/right) settings to perfection. It involves shooting at a single vertical line on a target from various distances (20, 30, 40 yards) using only your 20-yard pin.
If your arrow groups move progressively to the left or right as you move back, it indicates a small tuning issue with your arrow rest. For beginners, this isn’t something to worry about yet. Master the “chase the arrow” method first. Get your groups tight and your confidence high. There will be plenty of time to explore advanced techniques later!
Frequently Asked Questions (FAQ)
1. How often should I sight in my bow?
You should check your sights every few weeks to ensure nothing has shifted. It’s also crucial to do a full check after traveling, if you accidentally bump or drop your bow, or before any hunting trip or competition.
2. What if my arrows are all over the place and I can’t get a group?
An inconsistent group is almost always a sign of inconsistent shooting form, not a sight issue. Stop adjusting the sight and focus on the fundamentals: a consistent anchor point, a smooth release, and a steady follow-through. Go back to 10 yards and just work on putting three arrows close together, no matter where they hit.
3. Do I need to sight in my bow if I buy it from a pro shop?
Yes. A pro shop will do a basic setup, but the final sighting-in process must be done by you. Everyone’s anchor point, draw length, and shooting style are slightly different, so a bow that is sighted in for a pro shop technician will not be perfectly sighted in for you.
4. Why is my 20-yard pin so accurate, but my 40-yard pin is way off?
This usually points to an issue with your peep sight alignment or your anchor point. As the distance increases, small flaws in your form become much more noticeable. Ensure you are looking through your peep sight the same way and anchoring at the exact same spot for every single shot.
5. Can I sight in my bow with broadheads?
If you plan to hunt, you absolutely must. After sighting in with field points, switch to your broadheads and shoot a few groups. Many modern broadheads fly just like field points, but some may hit slightly differently. If they do, you may need to make small, separate adjustments. Some archers even have a dedicated practice broadhead.
6. What is “pin gap”?
“Pin gap” refers to the amount of space between your sight pins. Faster bows will have smaller gaps because the arrow travels on a flatter trajectory. Slower bows will have larger gaps. As you sight in your pins from 20 to 30 to 40 yards, you will see your own bow’s pin gap naturally form.
7. What if my bow is really loud when I shoot?
A loud bow can be a sign of vibration, which can affect accuracy. This is often a tuning issue. You can take it to a pro shop to check the timing (on a compound bow) or add string silencers and limb dampeners to quiet it down. A quieter bow is often a more accurate and pleasant bow to shoot.
Your Journey to Accuracy Starts Now
Sighting in your bow is one of the most rewarding skills you can learn in archery. It’s the moment you take full control over your equipment and truly start on the path to becoming a proficient archer. The process teaches you patience, consistency, and the inner workings of your gear.
Don’t be discouraged if it takes an hour or two. Take your time, enjoy the process, and focus on making one small improvement at a time. The confidence you’ll feel when you see your arrows stacking up in the center of the target is worth every bit of effort.
So grab your gear, find a safe spot, and start that conversation with your bow. Before you know it, you won’t just be shooting—you’ll be aiming with purpose and hitting your mark. Happy shooting!