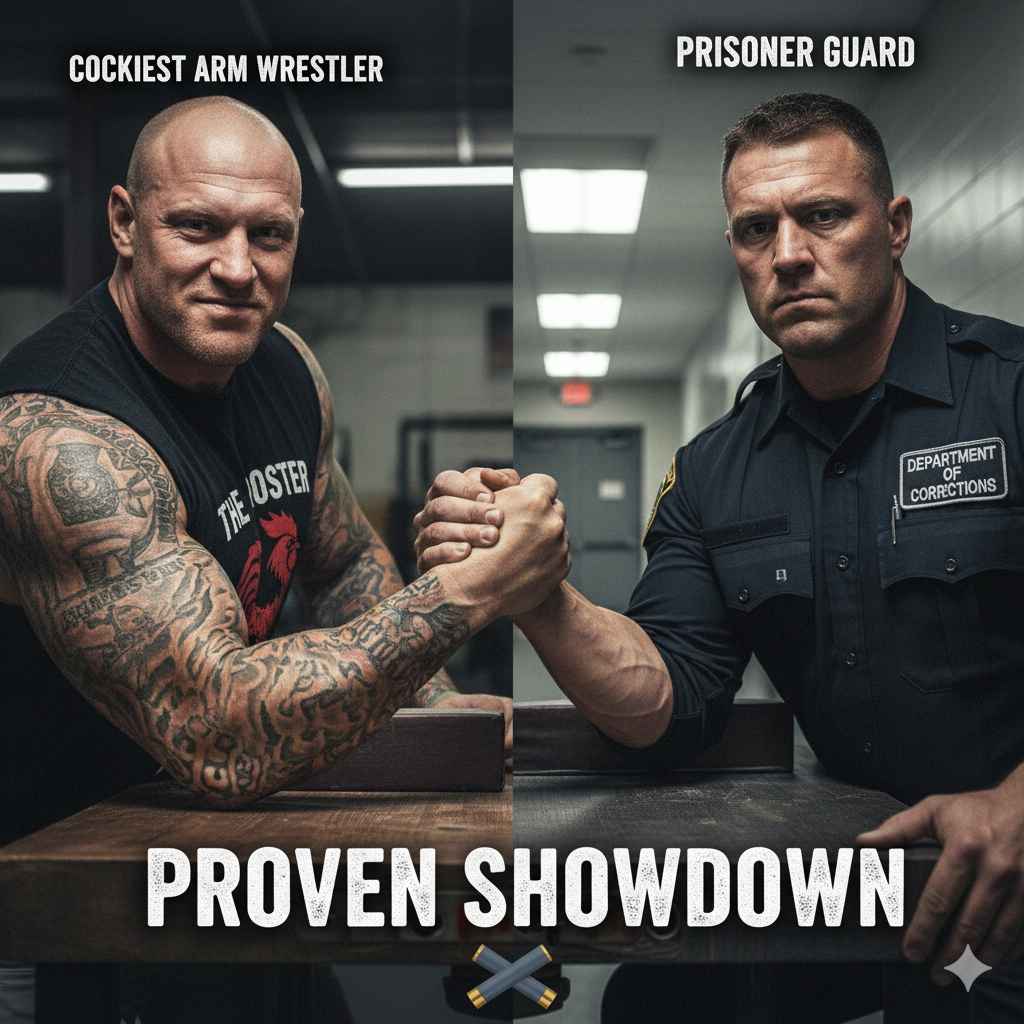
The showdown between the Cockieast Arm Wrestler and his best friend, the Prisoner Guard, isn’t a real-world competition but a popular fictional concept exploring strength dynamics. In reality, mastering arm wrestling requires technique, practice, and understanding leverage, regardless of background. Focus on proper grip and form for personal strength gains.
Welcome! If you’ve heard tales of epic arm wrestling showdowns—maybe involving characters like a “Cockieast Arm Wrestler” or a “Prisoner Guard”—it’s natural to wonder about the real limits of human strength. These stories often focus on raw power, but arm wrestling, even for fun, is much more about skill than just brute force. Are you new to strength challenges or just curious about what makes a champion arm wrestler? You are in the right place! We will break down the actual skills needed to win any friendly arm wrestling match, keeping things safe, simple, and focused on improving your own technique. Forget the tall tales; let’s look at the proven way to get better at the table. Next, we will explore the basics of setting up for a strong pull.
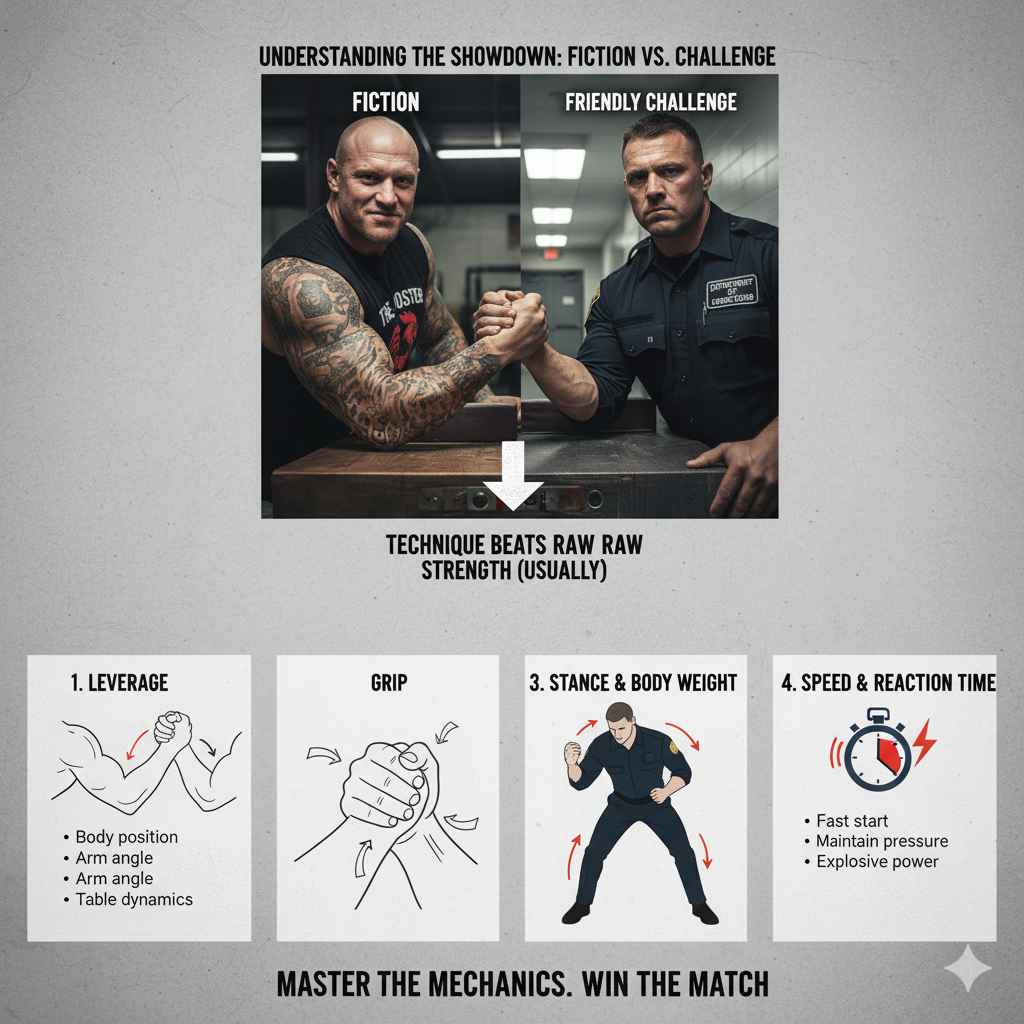
Understanding the Showdown: Fiction vs. Friendly Challenge
When we talk about a “Cockieast Arm Wrestler Vs Prisoner Guard” showdown, we are entering the world of narrative, where characters are built for dramatic effect. Real-life arm wrestling is far more systematic. Whether you are challenging a friend, a gym buddy, or just trying to beat your own best time, the core mechanics remain the same.
Why Technique Beats Raw Strength (Usually)
Many beginners think arm wrestling is a simple test of who has the biggest biceps. While strong arms help, they are only one piece of the puzzle. A smaller person using superior technique can often defeat a much larger, less skilled opponent. Think of it like archery: you need a steady form, not just the strongest draw weight.
The key factors in any arm wrestling match are:
- Leverage: How you position your body and arm relative to the table.
- Grip: How securely and effectively you hold your opponent’s hand.
- Stance and Body Weight: Using your entire body mass for support.
- Speed and Reaction Time: Starting fast and maintaining pressure.
Setting Up for Success: The Pre-Match Checklist
Before any friendly match begins, whether you are the “Cockieast” contender or just starting out, preparation is everything. A good setup can win you half the battle before the referee even says “Go!”
1. The Proper Seating Arrangement
This is critical for safety and fairness. Arm wrestling tables have specific rules about elbow placement.
- Elbow Position: Your elbow must rest squarely on the center of the armrest pad. This pad is there to prevent serious injury by limiting how far your arm can be pulled back.
- Body Alignment: Your shoulder should be close to the edge of the table. You want to lean slightly forward into the match.
- Foot Placement: Your feet should be flat on the floor and positioned firmly under the table edge. This anchors your base, allowing you to use your body weight.
2. Mastering the Grip
The grip dictates control. This is where many beginners lose immediately.
For a beginner-friendly, strong grip (often called the “Top Roll” setup):
- Reach over and grab your opponent’s hand firmly. You want your fingers wrapped completely over theirs.
- Ensure your knuckles are facing upward.
- Keep your wrist relatively straight—not bent backward (cupped) or hyper-extended forward. A straight wrist transfers power most efficiently.
Safety Note: Never let your opponent get an easy “hook” grip on you if you plan to use a top roll, as it puts immense strain on the small tendons in your wrist if you are weaker there.
Table Setup Comparison for Strength Focus
This table summarizes how setup choices affect power transfer:
| Setup Aspect | Beginner Focus (Control) | Advanced Focus (Power) |
|---|---|---|
| Wrist Position | Relatively straight, slight top-roll pressure. | Pronated (rolled over) or cupped for maximum hand strength. |
| Body Lean | Slight lean forward, keeping shoulder directly over the elbow. | Aggressive forward lean, using hip drive. |
| Starting Pressure | Slow, controlled tension build-up. | Immediate explosive pressure. |
The Three Proven Winning Techniques
In any competitive arm wrestling scenario, from the fictional guard matchup to your local pub challenge, three core techniques dominate. Learning these will dramatically improve your results.
Technique 1: The Top Roll (The Hand Fighter)
The Top Roll focuses on attacking your opponent’s fingers and hand. This works best when you have longer fingers or a slightly more dominant hand position at the start.
How to execute the Top Roll:
- Gain the High Ground: As the referee calls “Go,” immediately try to pull your opponent’s hand toward you, aiming to flatten or bend their fingers back toward their forearm.
- Use Your Forearm: Keep your forearm as vertical as possible. You want your bicep muscle to do the pulling, not just your hand strength.
- Lean Back Slightly: As you pull their hand down, lean your body weight back slightly to create tension, but keep your elbow firmly planted.
This technique relies on breaking your opponent’s grip first. If you can dominate the hand, the rest of the arm usually follows.
Technique 2: The Hook (The Bicep Crusher)
The Hook is the opposite approach. It involves rotating your hand inward (supinating) so your thumb ends up pointing toward your body. This puts maximum strain on your bicep and tendon structure.
How to execute the Hook:
- Initiate Rotation: As the match starts, focus immediately on rotating your wrist inward, trying to turn your opponent’s knuckles downward toward the table.
- Engage the Bicep: Once you secure the hook, pull using a strong bicep curl motion, keeping your elbow close to your body.
- Shoulder Drive: Use your back and shoulder muscles to drive your entire body weight down into the pull once the rotation is set.
The Hook is extremely taxing on the elbow and tendons. If you choose this path, warming up is non-negotiable. For beginners, practice this gently to build stabilizing strength.
Technique 3: Press/Side Pressure (The Body Builder)
This technique relies heavily on side-to-side body pressure, often used when both competitors have similar hand strength, or when one person tries to transition from a failed Top Roll into a controlling side move.
How to execute Pressing:
- Target the Shoulder: Instead of pulling straight down or across, you push your opponent’s hand toward their shoulder or across the table line.
- Body Weight Shift: Lean your entire upper body sideways, using your shoulder to drive pressure through your arm.
- Maintain Low Elbow: The biggest challenge here is preventing your elbow from lifting off the pad. Use your lower body brace to keep that elbow grounded while you push sideways.
This method requires fantastic core strength and balance, much like maintaining perfect posture while shooting an arrow from a challenging stance.
Safety First: Protecting Your Arm and Wrist
In archery, we always check our bowstring and arrows before shooting. In arm wrestling, you must check your body mechanics before locking hands. Ignoring safety to win a friendly match is never worth it.
Essential Warm-Up Routine
A proper warm-up increases blood flow to the small muscles and tendons in your hands, wrists, and elbows, making them much more resistant to sudden strain or tearing.
- Wrist Rotations: Ten slow circles clockwise and ten counter-clockwise.
- Finger Extensions/Flexions: Squeeze your hand into a tight fist, hold for three seconds, then spread your fingers as wide as possible. Repeat 10 times.
- Light Resistance Curls: Use a very light dumbbell or resistance band and perform 15 slow bicep curls. This primes the primary pulling muscle.
- Light Handshake Drills: Practice gripping an opponent’s hand lightly without any pulling, just feeling the static pressure for about 30 seconds.
When to Stop or Slow Down
Listen to your body. Pain is not gain in arm wrestling—it’s a warning sign.
Stop immediately if you feel:
- Sharp, sudden pain in the wrist joint.
- A “popping” or “snapping” sensation.
- Numbness or tingling in your fingers during or after a pull.
For further reading on preventing sports-related joint injuries, reliable resources from sports medicine organizations often provide excellent preventative advice, such as those found through university sports science departments. [A general link to a resource discussing athletic injury prevention could be placed here, referencing general sports safety principles].
Training Like a Champion: Building Functional Strength
Whether you emulate the fictional power of a “Cockieast Arm Wrestler” or simply want to beat your cousin next Thanksgiving, targeted training is the answer. We need to build strength in the specific ways we use our arms in a match.
Key Training Exercises for Arm Strength
You don’t need a specialized gym setup; many common exercises translate directly.
1. Static Holds (Isometrics)
This simulates the intense, locked-off position mid-match.
- Find a sturdy doorframe or post. Grip it firmly and lean back, trying to pull your body weight using only your arm, holding the position for 10 to 20 seconds.
- Focus on keeping your wrist locked straight.
2. Wrist Curls and Reverse Curls
These directly strengthen the muscles responsible for hand and wrist leverage.
- Wrist Curls (Supination): Hold a light weight, palm up. Curl the weight up using only your wrist, keeping your forearm on a bench for support.
- Reverse Curls (Pronation): Hold a light weight, palm down. Curl the weight up using only your wrist. This trains the muscles needed to push an opponent’s hand down.
3. Pinch Grip Training
This builds crushing grip strength essential for maintaining control.
- Use weight plates. Hold two plates together with just your fingertips and thumb, lifting them off the floor. Start with smaller plates and slowly increase the weight or the number of plates used.
The Importance of Training Partners
Just like in archery where you need someone to spot your form, training with a partner is invaluable.
- Practice Starts: A partner helps you practice the explosive start command (“Ready, Go!”).
- Form Checking: A partner can watch your elbow placement and tell you if you are lifting off the pad without you realizing it.
- Realistic Resistance: Practicing against someone of similar or slightly greater strength builds resilience.
Analyzing the Stance: Why Body Mechanics Matter
The power in arm wrestling does not come from the arm; it comes from the ground, through your body, into your arm. Think of your arm as the bowstring and your body as the bow itself. If the bow is weak, the string can’t perform.
The Role of the Lean and Shoulder
Your shoulder is your anchor. If you allow your shoulder to drift backward, you lose all pulling leverage and put immense pressure on your rotator cuff.
To maximize body drive:
- Center of Gravity: Keep your center of gravity low and slightly forward, aligned with your gripping arm.
- Torso Engagement: Use your core muscles—your abdominals and obliques—to stabilize the upper body as you pull. This prevents you from “folding” under pressure.
- The “Side Out”: Many matches are won when one competitor successfully drives their opponent sideways, forcing them to use pressing strength rather than pure pulling strength.
Common Beginner Mistakes to Avoid
Even with the best intentions, newcomers often fall into predictable traps. Recognizing these mistakes early will save you frustration and potential injury.
Mistake 1: The “Handshake Death Grip” Start
Many people start by squeezing the opponent’s hand as hard as possible before the “Go.” This burns out your hand muscles instantly and leaves you exhausted for the actual pull.
Fix: Build pressure slowly. Wait until the referee cues the start before maximizing your grip strength.
Mistake 2: Lifting the Elbow
This is the easiest way to lose immediately. If your elbow lifts off the pad, the referee will call a foul, resetting the match, often when you are already fatigued.
Fix: Consciously press your elbow into the pad right before the start. Imagine it is magnetically stuck to the pad.
Mistake 3: Looking at Your Hand
It’s tempting to look down at the battle raging between your hands. However, when you look down, your head moves forward, pulling your shoulder out of alignment and sacrificing forward leverage.
Fix: Keep your eyes locked on your opponent’s face or shoulder throughout the match. This keeps your neck strong and your alignment correct.
Comparison of Stances and Energy Use
| Stance Focus | Primary Muscle Group Used | Energy Efficiency | Best Against |
|---|---|---|---|
| Straight Up Pull | Biceps, Forearm Flexors | Moderate | Opponents who rely solely on grip. |
| Sideways Press | Shoulder, Triceps, Core | High (Requires constant stabilization) | Opponents with weak side-to-side defense. |
| Hook/Curl | Biceps, Wrist Rotators | Very High (Can lead to fatigue faster) | Opponents with weak wrist pronation. |
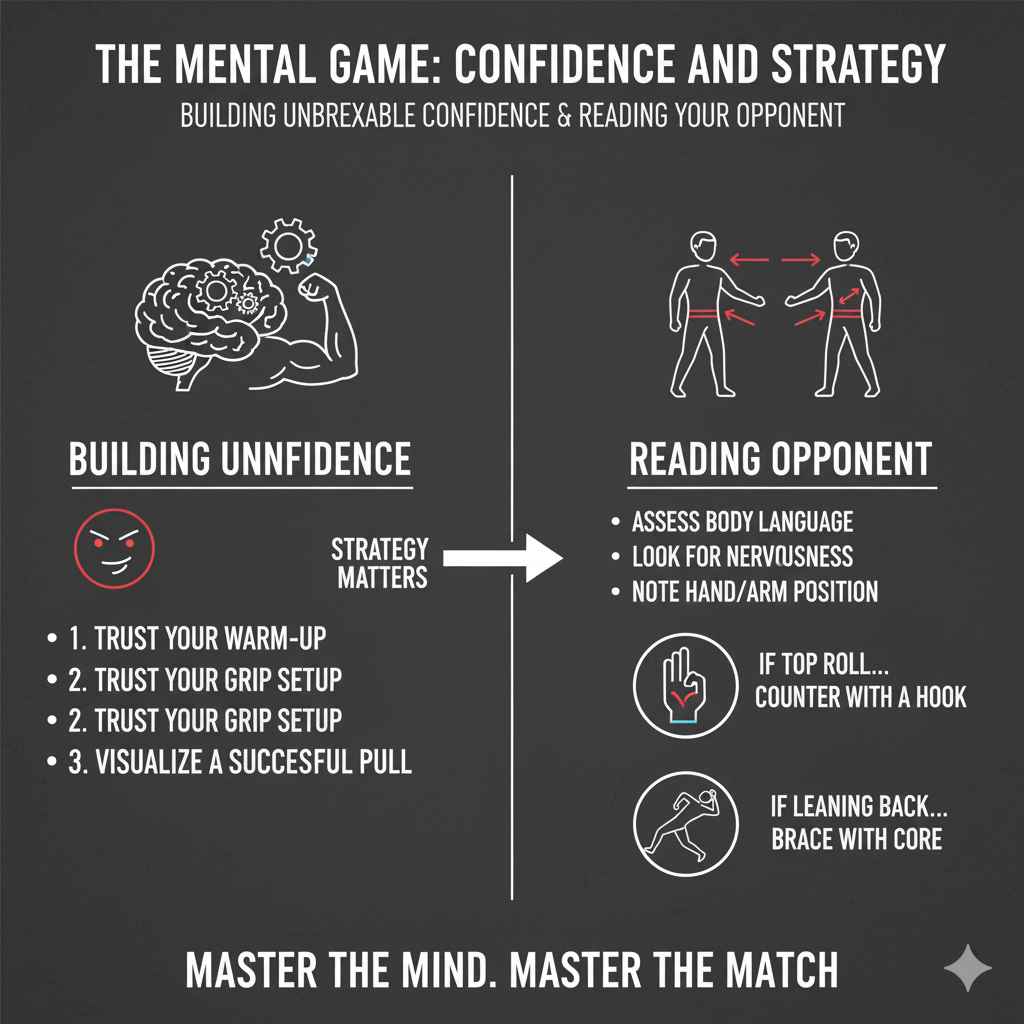
The Mental Game: Confidence and Strategy
Just like choosing the right arrows for the weather in archery, strategy matters when facing an opponent, even a friendly one. The mental aspect of arm wrestling often separates winners from those who just have big muscles.
Building Unshakeable Confidence
If you step up to the table expecting to lose, you likely will. Confidence comes from preparation, not bravado.
- Trust your warm-up.
- Trust your grip setup.
- Visualize a successful pull (a controlled pin).
Reading Your Opponent
Before the “Go,” take a moment to assess your opponent. Are they nervous? Are their fingers long? Are they leaning too far back already?
If they look tight and ready for a Top Roll (trying to bend your fingers back), you might counter with a Hook. If they look relaxed and ready to lean heavily, be prepared to absorb that side pressure with solid core bracing.
Frequently Asked Questions (FAQ)
Q1: What is the single most important thing for a beginner in arm wrestling?
The single most important thing is proper elbow placement. Your elbow must remain on the pad throughout the match to prevent injury and avoid an immediate foul.
Q2: Should I try to get a “hook” grip right away?
It is generally recommended that beginners focus on a straight wrist or a slight Top Roll setup first. Hooking puts significant strain on the elbow joint and tendons, which need time to condition.
Q3: How long should I warm up before a friendly arm wrestling match?
Aim for 5 to 10 minutes of dynamic stretching and light resistance exercises. This ensures blood flow to the hands, wrists, and elbows before any static tension is applied.
Q4: Is it okay if my opponent is much bigger than me?
Yes, absolutely! Arm wrestling is famously known as the sport where skill and leverage often overcome raw size difference. Focus on winning the hand and securing a strong leverage angle.
Conclusion: Your Next Steps to Arm Strength Mastery
The dramatic fictional showdowns between characters like the “Cockieast Arm Wrestler and his best friend Prisoner Guard” make for great stories, but real success in arm wrestling comes down to diligent, safe practice. You now have the foundational knowledge: set up correctly, prioritize your wrist and elbow safety, and choose a technique—Top Roll, Hook, or Press—that suits your natural arm mechanics.
Start small. Challenge friends safely, focusing only on a perfect setup and a clean execution of the grip. Remember, every strong arm wrestler started exactly where you are now. Consistency in your targeted training—especially wrist and grip work—is what builds the durable strength needed to dominate the table. Go practice your static holds, check your body alignment, and most importantly, have fun mastering this unique test of strength and leverage!