
Yes, stabilizers absolutely help on bows. They are a crucial accessory for improving your shooting. A stabilizer adds forward weight to balance your bow, reduces hand shock and vibration after the shot, and helps you hold steadier on the target. This leads to tighter arrow groups and a more comfortable, consistent shooting experience.
Have you ever seen an archer with a long rod sticking out from the front of their bow and wondered, “What is that thing, and do I really need one?” It’s a common question, and you might think it’s just for professional shooters. But that simple accessory, called a stabilizer, can be a game-changer for your accuracy, even as a beginner.
It can feel frustrating when your shots aren’t consistent. One arrow hits the bullseye, and the next one lands wide. Often, tiny wobbles and vibrations are the culprits. A stabilizer is designed to fix exactly that. In this guide, I’ll walk you through everything you need to know about bow stabilizers in simple, clear terms. We’ll cover what they do, how to choose one, and why they might be the surprising essential your archery setup is missing.
What is a Bow Stabilizer, Really?
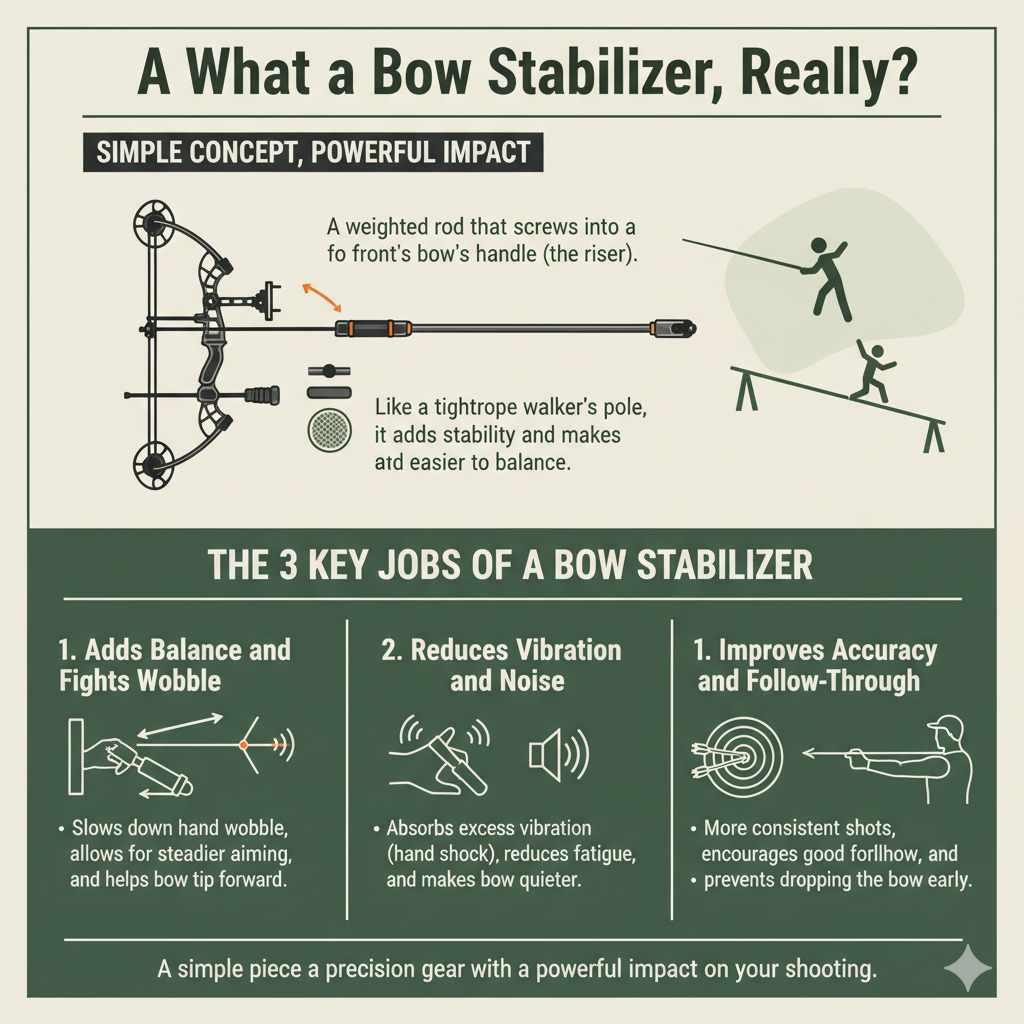
At first glance, a bow stabilizer looks like a simple stick or rod that screws into the front of your bow’s handle (the riser). But it’s a piece of precision equipment designed to do three very important jobs. Think of it like the balancing pole a tightrope walker uses. The pole doesn’t make them stronger, but it adds stability, making it much easier to stay balanced and on target.
A stabilizer does the same thing for your bow. It uses weight and length to make your entire setup more stable before, during, and after the shot. Most stabilizers are made from carbon or aluminum and have a weight system at the far end. Many also include rubber dampening sections to absorb vibration. It’s a simple concept with a powerful impact on your shooting.
The 3 Key Jobs of a Bow Stabilizer
A stabilizer isn’t just dead weight; it’s actively working to make you a better shooter. It accomplishes this by performing three main functions that work together to improve your form and accuracy.
- Adds Balance and Fights Wobble: When you hold your bow, your muscles make tiny, involuntary movements. This can cause your sight pin to wobble around the target. A stabilizer adds weight away from the bow, which slows down this wobble. The added forward mass makes the bow want to stay still, allowing you to aim more steadily and confidently. It also helps the bow tip slightly forward after the shot, which is a key part of good shooting form.
- Reduces Vibration and Noise: Releasing a bowstring unleashes a lot of energy. Much of that energy goes into the arrow, but some of it creates vibration and noise that you feel in your hand—this is often called “hand shock.” A stabilizer, especially one with rubber dampeners, acts like a sponge, soaking up that excess vibration. This makes shooting much more comfortable, reduces fatigue in your bow hand, and makes your bow quieter—a big plus for bowhunters.
- Improves Accuracy and Follow-Through: By steadying your aim and absorbing vibration, a stabilizer directly contributes to better accuracy. But it has another secret benefit: it encourages good follow-through. Follow-through is the act of keeping your bow aimed at the target until the arrow hits. The forward pull of the stabilizer helps keep your bow arm extended and on target, preventing the common beginner mistake of dropping the bow too early. This small change can make a massive difference in your consistency.
Choosing the Right Type of Stabilizer
Stabilizers come in different lengths and styles, each designed for a specific purpose. For a beginner, the choices can seem overwhelming, but they generally fall into three simple categories. Understanding the differences will help you pick the perfect one for your needs.
Hunting Stabilizers (Short and Stealthy)
As the name suggests, these are built for bowhunters. They are short, typically between 4 and 8 inches, to make it easy to move through woods and brush without getting snagged. Their main job is to cut down on vibration and noise to make the bow as quiet as possible. While they provide some balance, their short length limits their ability to dramatically reduce sight pin float.
- Length: 4 to 8 inches
- Primary Goal: Vibration and noise reduction.
- Best For: Hunters or archers who need a compact and maneuverable setup.
Target Stabilizers (Long and Steady)
These are the long, dramatic-looking rods you see on Olympic and competitive archers’ bows. They can be 24 inches or longer! Their length is all about maximizing stability. The farther the weight is from the bow, the more effectively it resists movement, leading to an incredibly steady hold. They are not practical for hunting but are unmatched for pure accuracy on the target range. Many target archers also use side rods (called a V-bar setup) for perfect 3-axis balance.
- Length: 12 to 36+ inches
- Primary Goal: Maximum stability and aiming steadiness.
- Best For: Dedicated target archers focused on precision.
Hybrid Stabilizers (The Best of Both Worlds)
For most beginners and recreational shooters, a hybrid stabilizer is the perfect starting point. These are mid-length, usually between 8 and 12 inches. They offer a great mix of benefits: enough length to noticeably improve your balance and steady your aim, plus excellent vibration dampening. They are long enough to be effective but short enough to not be cumbersome, making them great for backyard practice, 3D archery, and even some hunting situations.
- Length: 8 to 12 inches
- Primary Goal: A balance of stability and vibration control.
- Best For: New archers, recreational shooters, and those who do a bit of everything.
Stabilizer Type Comparison
| Stabilizer Type | Common Length | Main Benefit | Ideal Use Case |
|---|---|---|---|
| Hunting | 4-8 inches | Vibration & Noise Reduction | Bowhunting, navigating dense terrain. |
| Hybrid | 8-12 inches | Good Balance & Vibration Control | Beginners, backyard shooting, 3D archery. |
| Target | 12-36+ inches | Maximum Stability & Aiming Steadiness | Competitive target shooting, long-range accuracy. |
How to Select Your First Bow Stabilizer: A 4-Step Guide
Choosing your first stabilizer doesn’t have to be complicated. By focusing on your personal needs and budget, you can find one that will make an immediate impact on your shooting. Follow these simple steps to make a great choice.
Step 1: Define Your Archery Goal
First, ask yourself: what kind of archery will I be doing most?
- Just for Fun/Backyard Shooting: A hybrid stabilizer (8-12 inches) is your best bet. It provides a noticeable improvement without being too long or specialized.
- Bowhunting: A short hunting stabilizer (6-8 inches) is ideal. It will keep your bow quiet and easy to carry.
- Joining a Target League: If you know you want to focus on pure accuracy, start with a longer hybrid (10-12 inches) or an entry-level target stabilizer (15+ inches).
Your main activity should guide your choice. There’s no single “best” stabilizer—only the best one for you.
Step 2: Consider Length and Weight
As a general rule:
- Longer = More Stable. A longer stabilizer will resist movement more effectively, helping you hold your aim steadier.
- Heavier = More Stable. Adding more weight to the end of the stabilizer also increases stability.
However, there’s a trade-off. A very long or heavy stabilizer can make your bow feel sluggish and tiring to hold. For a beginner, an 8-10 inch stabilizer with 2-4 ounces of weight is a fantastic starting point. Most stabilizers come with removable weights, so you can experiment to find what feels best.
Step 3: Look for Vibration Dampening
Nearly all modern stabilizers incorporate some form of rubber or polymer to absorb vibration. This is a key feature that contributes to a comfortable and quiet shot. When comparing models, check to see that they have a visible dampening component. This feature makes shooting more pleasant and will help you practice longer without your arm getting tired or sore from hand shock.
Step 4: Set a Realistic Budget
You can spend anywhere from $25 to over $300 on a stabilizer system. As a beginner, you absolutely do not need a top-of-the-line model. There are many excellent, highly effective stabilizers in the $40 to $80 range. These models offer great performance and are a smart investment that will grow with your skills. Focus on getting a well-made stabilizer from a reputable brand rather than the most expensive one on the shelf.
How to Install and “Tune” Your Stabilizer
One of the best things about stabilizers is how easy they are to install and adjust. You don’t need any special tools, and you can feel the difference immediately.
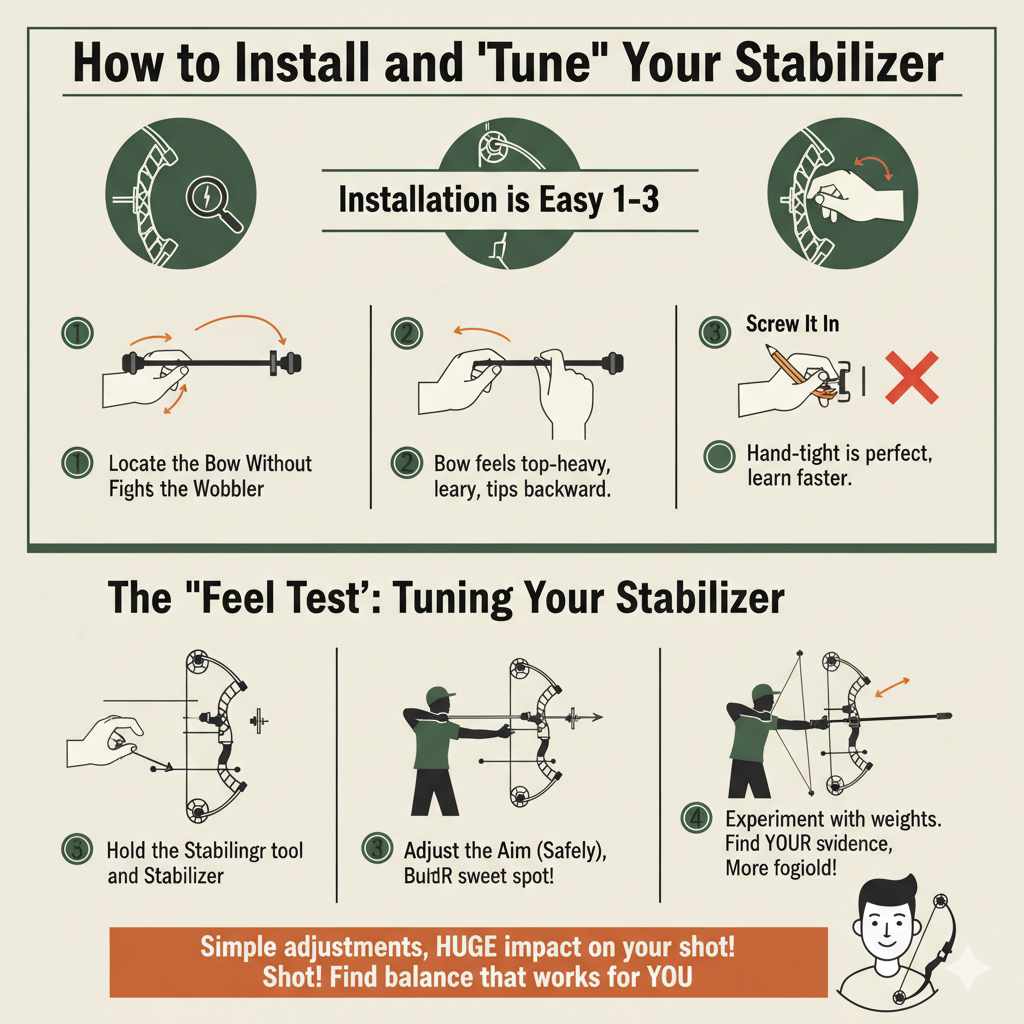
Installation is as Easy as 1-2-3
- Locate the Mount: Look on the front of your bow’s riser, just below the grip. You will see a small, threaded hole. This is the stabilizer mounting hole.
- Screw It In: Take your stabilizer and screw it into the hole clockwise. It should thread in smoothly.
- Hand-Tighten: Continue turning until it is snug. You only need to make it hand-tight. There is no need to use a wrench or overtighten it.
That’s it! Your stabilizer is installed. Now for the fun part: feeling the difference.
The “Feel Test”: Tuning Your Stabilizer
Tuning a stabilizer is all about finding the right balance for you. This simple test will help you find your sweet spot.
- Hold the Bow Without the Stabilizer: Grip your bow as you normally would, with your arm extended but not locked. Let it rest in your hand. Notice how it balances. Does it feel top-heavy? Does it want to tip backward toward you?
- Attach the Stabilizer and Repeat: Now, with the stabilizer installed, hold the bow again. It should feel completely different. A well-balanced setup will have a slight forward tilt, wanting to tip gently away from you. This forward gravity helps you stay on target.
- Draw and Aim (Safely): Following all standard archery safety rules, draw your bow and aim at a target. Pay close attention to your sight pin. The pin’s movement should be slower and less erratic. It should feel easier to keep the pin floating in the center of the target.
- Adjust the Weight: If your stabilizer has removable weights, experiment! Shoot a few arrows. Then, add a weight and shoot a few more. Does it feel even steadier? Or does it feel too heavy? Remove a weight. Find the configuration that makes your bow feel the most stable and comfortable to hold at full draw.
Troubleshooting Common Stabilizer Issues
| Problem | Possible Cause | Simple Solution |
|---|---|---|
| My bow feels too heavy and hard to hold up. | The stabilizer is too long or has too much weight for your strength level. | Remove one or two ounces of weight from the end. If it’s still too heavy, consider a shorter, lighter stabilizer to start. |
| My bow still feels “jumpy” when I shoot. | There may not be enough weight to counteract the bow’s movement, or the stabilizer has poor dampening. | Try adding an ounce of weight to the end. A heavier end provides more inertia to resist movement. |
| The stabilizer keeps coming loose. | Vibrations from shooting can slowly unscrew the stabilizer over time. | Check that it’s hand-tight before each shooting session. You can also use a small rubber washer between the stabilizer and the bow for a more secure fit. |
Frequently Asked Questions (FAQ)
1. Do I need a stabilizer for a recurve bow?
Yes, stabilizers are extremely helpful for recurve bows, both for hunting and target shooting (including Olympic-style). They serve the exact same purposes: adding balance, reducing vibration, and steadying your aim. All competitive recurve archers use them.
2. Can a stabilizer be too long?
Absolutely. A stabilizer is too long if it makes the bow too heavy or cumbersome for your specific use. A 30-inch stabilizer is great for a target range but would be a major problem while hunting in a tree stand or thick woods. Choose the length that matches your activity.
3. How much should I spend on my first stabilizer?
You don’t need to spend a lot. A budget of $40 to $80 will get you a high-quality, effective stabilizer from a trusted brand that is perfect for a beginner. This is a much better investment than buying the cheapest one available, as it will be better built and offer more features like adjustable weights.
4. What are V-bars and do I need them as a beginner?
V-bars are mounts that let you add side stabilizers to your bow, creating a “V” shape. This allows for a perfect front-to-back and side-to-side balance. As a beginner, you do not need them. Master shooting with a single front stabilizer first. V-bars are an advanced tuning tool for competitive archers.
5. Does a heavier stabilizer mean better accuracy?
Not necessarily. More weight can increase stability, but only up to a point. If the bow becomes too heavy for you to hold comfortably, your muscles will get fatigued, and your accuracy will suffer. The goal is to find the heaviest weight that you can easily manage for a steady hold.
6. How do I know if my stabilizer is working?
You will feel and see the difference. Your bow should feel more balanced and dead in your hand after the shot, with less vibration. When you aim, your sight pin should “float” more slowly and stay closer to the center of the target. Over time, you will see your arrow groups get tighter.
Your Next Step to a Steadier Shot
So, do stabilizers help on bows? The answer is a resounding yes. They are far more than just a fancy accessory; they are a fundamental tool for improving balance, comfort, and, most importantly, accuracy. By taming vibration and steadying your aim, a simple stabilizer helps correct the small inconsistencies that can make a big difference downrange.
For any beginner or hobbyist archer looking to build confidence and shoot tighter groups, adding a stabilizer is one of the most effective and affordable upgrades you can make. Start with a versatile hybrid model, experiment with the weight, and pay attention to how it feels. You will be surprised at how much this one piece of equipment can elevate your entire shooting experience. Now, go out there, get steady, and have fun!