Carbon arrows are expertly crafted from high-strength carbon fibers and resin, formed into precise tubes, then fitted with components like nocks, points, and vanes for superior flight and accuracy. Their design balances lightweight strength with aerodynamic efficiency, making them a top choice for archers.
Ever wondered what makes your arrows fly so true? Archery is a sport of precision and excitement, and a big part of that comes down to your arrows. For many archers, especially those stepping into the sport or looking to upgrade, carbon arrows are the go-to choice. But have you ever paused to think about how these sleek, strong shafts are actually made? It’s a fascinating process that combines advanced materials with clever engineering to create a projectile that’s both incredibly durable and remarkably accurate. Understanding this can deepen your appreciation for your gear and even help you make better choices for your shooting style. Let’s dive into the genius design behind how it’s made carbon arrows!
The Magic Behind the Shaft: How Carbon Arrows Are Born
Carbon arrows might look simple, but their creation is a sophisticated dance of engineering and chemistry. They aren’t just sticks with feathers; they are precision instruments designed for optimal performance. The material itself – carbon fiber – is at the heart of their strength and lightness. Let’s break down the journey from raw materials to a finished arrow ready for your bow.
Step 1: The Weaving and Winding of Carbon Fibers
The process begins with what looks like spools of fine thread, but these aren’t your grandma’s knitting yarns. These are carbon fibers, incredibly thin filaments made from polymers like polyacrylonitrile (PAN). These fibers are incredibly strong yet very lightweight – think of them as microscopic strands of pure carbon. They are often woven into a fabric or bundled into rovings.
The magic really happens when these fibers are prepared to form the arrow shaft. Specialized machines carefully wind these carbon fibers around a mandrel, which is essentially a long, cylindrical rod that dictates the inner diameter of the arrow. For the best strength and consistency, the fibers are wound at specific angles. This cross-hatching technique is crucial because it distributes stress evenly across the shaft in multiple directions, preventing it from becoming a weak point.
- Material Preparation: Carbon fibers are derived from polymers, typically PAN, through a complex heating process called carbonization.
- Winding Machines: Automated machines precisely wind the carbon fibers onto a mandrel.
- Angle Control: Winding angles are meticulously controlled to ensure structural integrity and prevent bending or breaking under pressure.
Step 2: Infusing with Resin – The Binding Agent
Once the carbon fibers are wound in their precise pattern, they need something to hold them together and give the shaft its final shape. This is where resin comes in. A special epoxy resin, a type of adhesive, is applied to the wound fibers. This resin acts as the matrix, binding the carbon fibers into a solid, cohesive structure. It’s like the glue that holds everything together, ensuring the shaft doesn’t unravel or delaminate.
The amount of resin used is carefully controlled. Too much resin can add unnecessary weight and make the arrow less stiff, while too little might not provide enough binding strength. High-quality arrow manufacturers use specific resin formulas designed to cure into a hard, durable material that can withstand the immense forces experienced during a shot.
- Resin Types: Epoxy resins are commonly used for their strength and adhesive properties.
- Application Methods: Resin can be applied through dipping, spraying, or automated impregnation systems.
- Ratio Control: Maintaining the correct carbon-to-resin ratio is vital for arrow performance and durability.
Step 3: Curing – The Transformation to a Solid Shaft
After the fibers are wound and infused with resin, the mandrel, along with the resin-coated fibers, is placed into an oven for the curing process. This controlled heating causes the resin to harden and cure, permanently bonding the carbon fibers together around the mandrel. Think of it like baking a cake – the heat transforms the liquid batter into a solid, firm structure.
The curing temperature and time are critical. If it’s too hot or too long, the resin can degrade the carbon fibers or create brittle spots. Too cool or too short, and the resin won’t cure properly, leaving the shaft weak. This stage is where the raw, pliable material solidifies into the rigid, strong arrow shaft we recognize.
- Controlled Heating: Curing is done in specialized ovens with precise temperature and humidity controls.
- Chemical Reaction: The heat initiates a chemical reaction in the resin, causing it to cross-link and harden.
- Structural Integrity: Proper curing is essential for the arrow shaft’s strength, stiffness, and durability.
Step 4: Stripping the Mandrel and Straightening
Once the curing process is complete and the arrow shafts have cooled, the mandrels are carefully removed. This is often done using specialized machinery that can either pull the mandrel out or cause it to expand slightly, releasing its grip. The goal is to remove the mandrel without damaging the newly formed carbon shaft.
Even with the most precise winding and curing, sometimes the shafts can develop slight imperfections or bends. Therefore, after the mandrel is removed, the shafts undergo a straightening process. This is typically done using machines with rollers that apply precise pressure to gently bend out any imperfections, ensuring the shaft is straighter than a well-aimed arrow.
- Mandrel Removal: Techniques vary, but the aim is always gentle extraction to preserve the shaft.
- Straightness Testing: Arrows are tested for straightness using laser alignment systems or mechanical gauges.
- Precision Straightening: Machines apply controlled pressure to correct any minor deviations, ensuring optimal flight.
Step 5: Cutting to Length and Adding Inserts
Arrows need to be the correct length for the archer’s draw length and bow. So, the long, straight carbon tubes are then cut to precise lengths according to industry standards and specific customer orders. This cutting must be done cleanly to avoid fraying the carbon fibers at the ends.
At one end of the arrow shaft (the back end), an insert is typically installed. This is a small piece of aluminum or composite material that is glued into the shaft. The insert provides a stronger, more durable connection point for the nock, which is the part that attaches to your bowstring. Without a robust insert, the stress of the bowstring could damage the carbon shaft.
- Precision Cutting: Automated saws ensure exact lengths and clean cuts.
- Component Gluing: High-strength adhesives are used to secure inserts and other components.
- Tolerance Standards: Manufacturers adhere to strict tolerance standards for length and straightness.
Step 6: Attaching the Nock, Point, and Fletching
The final assembly involves adding the critical components that interact with the bow and the air. The nock is securely glued into the back end of the shaft, onto the insert. Nocks come in various styles and colors, and their precise alignment is crucial for consistent arrow release.
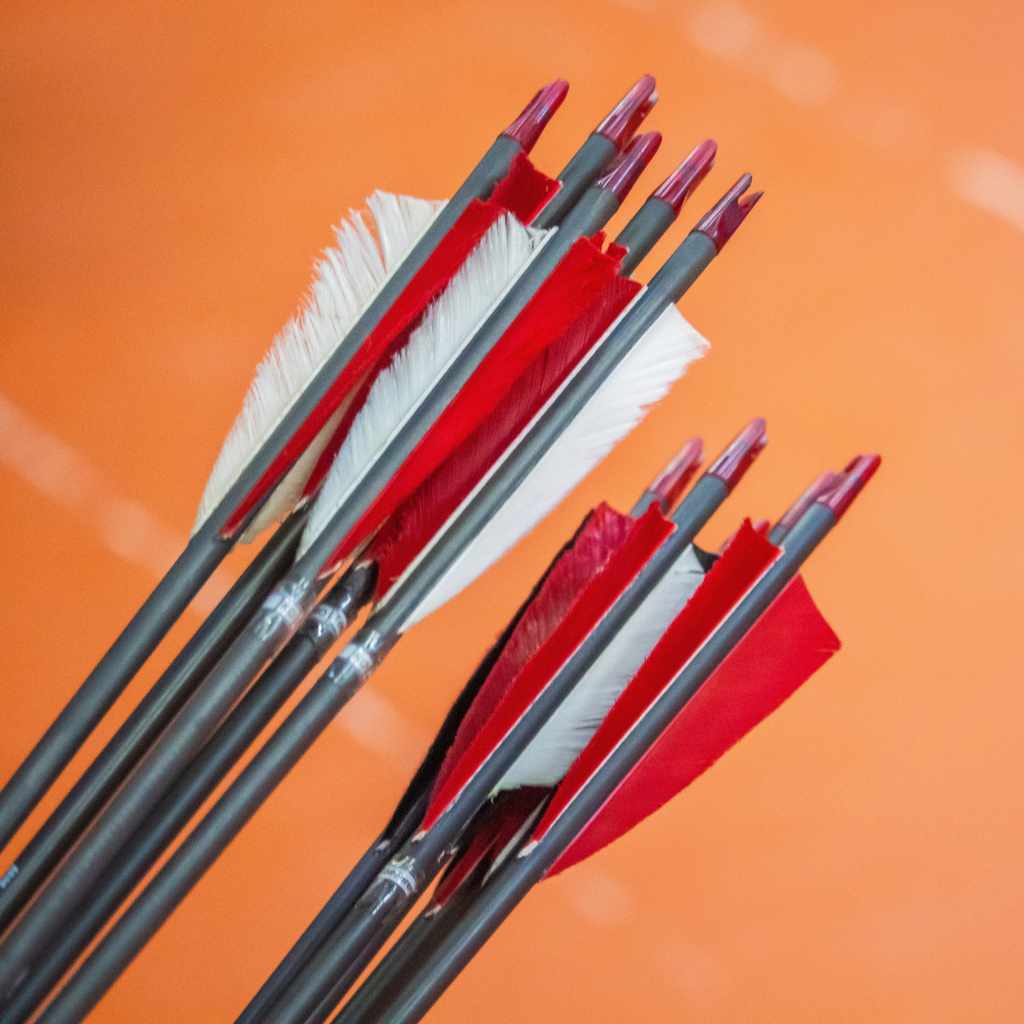
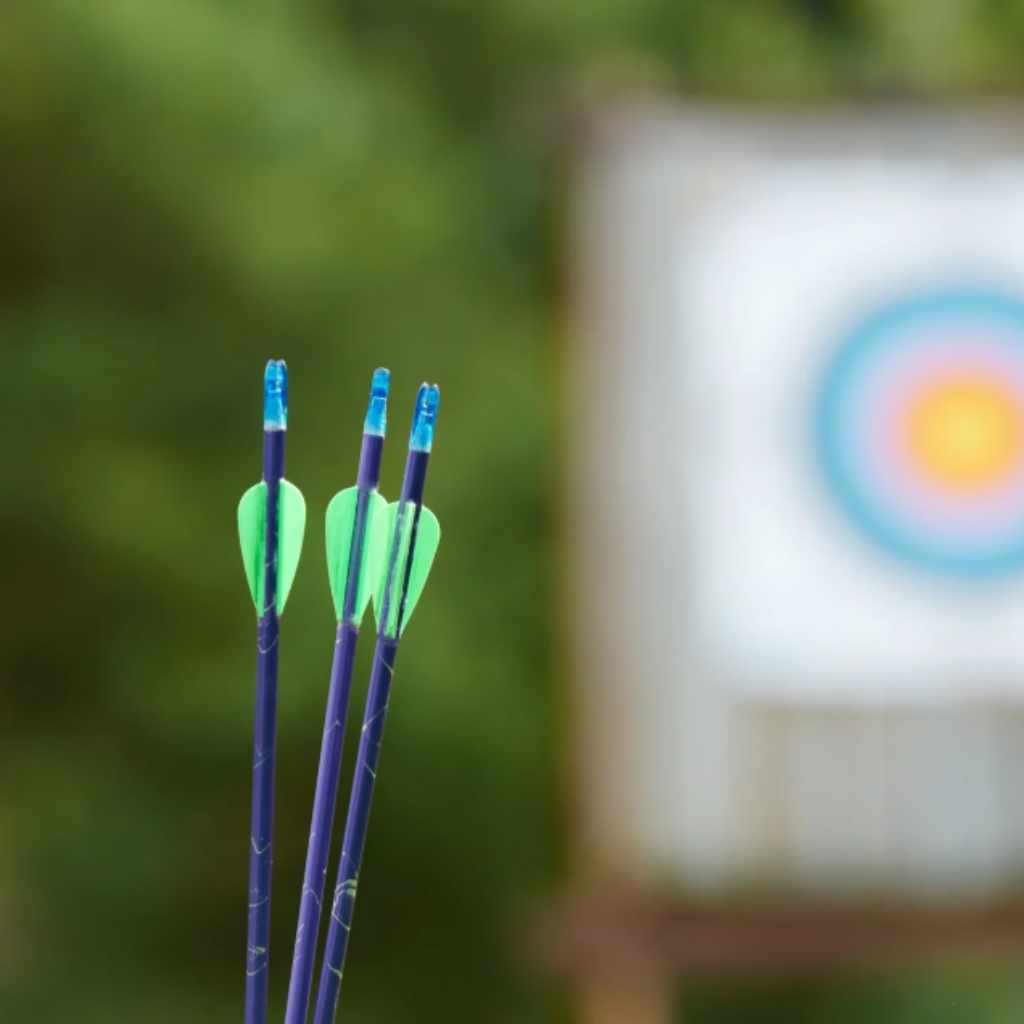
At the front end, the arrow point, or “field point” for practice or “broadhead” for hunting, is threaded or glued into a compatible insert. Finally, vanes or feathers (fletching) are attached to the rear of the shaft. These aerodynamic surfaces stabilize the arrow in flight, ensuring it flies straight towards the target. The precise placement and angle of the fletching are critical for this stability.
- Nock Installation: Glued or pressed-in nocks ensure a secure connection to the bowstring.
- Point Attachment: Field points, judo points, or broadheads are attached to the front.
- Fletching Adhesion: Vanes or feathers are precisely attached using specialized jigs and glues for optimal flight.
The Genius Design of Carbon Arrows: Why They Work So Well
The “genius” in carbon arrow design isn’t just in the manufacturing process, but in how the material properties and components come together to create such effective projectiles. They are a testament to modern material science and engineering.
Unmatched Strength-to-Weight Ratio
This is perhaps the most significant advantage. Carbon fiber is incredibly strong and stiff, meaning it can withstand high bending forces without breaking. Yet, it’s remarkably lightweight. This allows for faster arrow speeds, flatter trajectories (meaning less hold-over for distance), and less energy loss during flight. For archers, this translates to greater accuracy and efficiency. You can learn more about the physics of archery from resources like The Physics of Archery from the University of Toronto.
Durability and Resilience
Compared to traditional arrows made from wood or even aluminum, carbon arrows are far more durable. They are less prone to bending, cracking, or shattering on impact. While they aren’t indestructible, a well-made carbon arrow can take a beating and keep flying true, which is a huge plus for practice sessions and hunting scenarios where arrows might hit various surfaces.
Consistency and Straightness
Modern manufacturing processes, like the ones described above, allow for incredible consistency. Carbon shafts can be produced with very tight tolerances for straightness and weight. This consistency means that every arrow in your quiver will react similarly when shot, leading to a more predictable and accurate shooting experience. Organizations like the ATA (Archery Trade Association) often set standards for equipment, contributing to this consistency.
Customization for Performance
The way carbon arrows are made also allows for a high degree of customization. Manufacturers can adjust the winding patterns, resin types, and wall thickness to create shafts with different spine flex (stiffness), weight, and straightness. This means archers can choose arrows that are perfectly matched to their bow’s draw weight, draw length, and shooting style.
Here’s a quick look at how different arrow materials compare:
| Arrow Material | Pros | Cons | Typical Use |
|---|---|---|---|
| Carbon | Lightweight, strong, durable, consistent, fast. Excellent straightness. | Can be brittle on extreme impact, more expensive than aluminum. | All-around (target, hunting, competition). |
| Aluminum | Less expensive, good precision when new. | Can bend or dent easily, heavier than carbon, less durable long-term. | Entry-level target, some older hunting setups. |
| Wood | Traditional look and feel, inexpensive. | Least durable, prone to warping, less consistent, requires frequent replacement. | Traditional/historical archery, backyard fun. |
| Composite (e.g., Carbon-Aluminum Hybrid) | Combines benefits of both materials, often very accurate and durable. | More expensive, can be heavier than pure carbon. | Advanced target, competition, high-end hunting. |
Common Carbon Arrow Components and Their Role
The shaft is just one part of the arrow system. The genius design extends to how each component works harmoniously with the shaft and your bow.
- Nock: The small, grooved piece at the back that clips onto the bowstring. It must be perfectly aligned with the shaft for a clean, consistent release.
- Insert: The piece (often aluminum) glued into the front of the shaft that provides a strong point to screw in the arrow tip.
- Arrow Point (Tip): The projectile end. Field points are blunt for practice, while broadheads have sharp blades for hunting.
- Vanes/Feathers (Fletching): The fins at the back that stabilize the arrow in flight, ensuring it flies straight. Modern vanes are typically made of plastic or rubber.
Maintaining Your Carbon Arrows for Peak Performance
Understanding how your carbon arrows are made also gives you insight into how to care for them. Proper maintenance ensures they perform consistently and last longer.
- Check for Damage: Before each shot, inspect your arrows for cracks, splintering (especially around the nock and point), or deep gouges. A damaged carbon arrow can fail explosively, posing a serious safety risk.
- Inspect Nocks: Ensure the nocks are not cracked and are securely installed. A loose or cracked nock is a major safety hazard.
- Ensure Straightness: Spin your arrows on a flat surface or use an arrow spinner. If they wobble significantly, they might be bent.
- Keep Them Clean: Wipe down shafts to remove dirt and debris.
- Store Properly: Store arrows in an arrow quiver or case to protect them from impact and extreme temperatures.
If you ever find a damaged carbon arrow, it’s best to err on the side of caution and replace it. Refer to safety guidelines from organizations like the National Shooting Sports Foundation (NSSF) for safe archery practices and equipment care.

FAQ: Your Carbon Arrow Questions Answered
Q1: Are carbon arrows better than aluminum arrows for beginners?
Yes, generally. Carbon arrows are more durable and lighter, meaning they can withstand an accidental impact better than aluminum arrows, which tend to bend or dent. Their lighter weight also contributes to a faster arrow speed, which can be more forgiving for beginners learning to aim.
Q2: How do I know if my carbon arrow is damaged and unsafe to shoot?
Always look for visible signs of damage. This includes hairline cracks, splintering (especially around the nock area), deep gouges, or a distorted shape. Gently flex the arrow; if you hear any creaking or cracking sounds, or if it feels unusually flexible in certain spots, it’s likely damaged. A quick spin test can reveal bends.
Q3: Can I shoot target arrows for hunting?
It’s not recommended. Target arrows typically have field points, which are blunt. Hunting arrows use broadheads, which have sharp blades designed to ethically dispatch game. Also, hunting arrows are often built to be extremely durable and sometimes heavier or stiffer to achieve the necessary kinetic energy. Always use arrows specifically designed and equipped for hunting.
Q4: What does “spine” mean for carbon arrows?
“Spine” refers to the stiffness of an arrow shaft. It’s measured by how much the arrow deflects when a specific weight is applied to its center when supported at both ends. An arrow needs to be matched to your bow’s draw weight and length; a correctly spined arrow will straighten out in flight for the best accuracy. Too stiff or too weak, and your arrows won’t fly as straight.
Q5: How are carbon arrows made to be so perfectly straight?
The genius design and manufacturing process are key. Carbon fibers are tightly wound around a precise mandrel, and the entire assembly is cured under controlled conditions. After curing, advanced machinery uses lasers and rollers to test and gently straighten any minor inconsistencies, ensuring a very high degree of straightness right from the factory.
Q6: Do carbon arrows get heavier over time?
No, carbon arrows do not typically get heavier over time with normal use. The carbon fibers and resin are a stable composite material. Any perceived weight change might be due to dirt or debris accumulation, or damage, but the core material itself doesn’t gain mass through oxidation or absorption of moisture.
Q7: Why are carbon arrows more expensive than some other types?
The cost comes from the advanced materials used (carbon fiber is relatively expensive to produce) and the sophisticated manufacturing processes required. The precision winding, specialized resins, controlled curing, and rigorous testing all contribute to a higher price point, but this is offset by their superior performance, durability, and consistency.
Conclusion: The Arrow of Precision
From the intricate winding of carbon fibers to the final, precise placement of vanes, the creation of a carbon arrow is a remarkable feat of modern engineering. It’s this blend of advanced materials, meticulous manufacturing, and smart component design that makes carbon arrows the powerhouse they are for archers of all levels. When you nock a carbon arrow, you’re not just shooting a shaft; you’re launching a product of innovation designed for accuracy, speed, and durability.
Understanding the “how it’s made” behind your arrows can elevate your appreciation for the sport and help you make informed decisions about your archery gear. Whether you’re hitting the target at the range or making a crucial shot in the field, know that thousands of hours of research and development, and countless precise manufacturing steps, are behind every perfectly flying carbon arrow. Keep practicing, stay safe, and enjoy the journey!