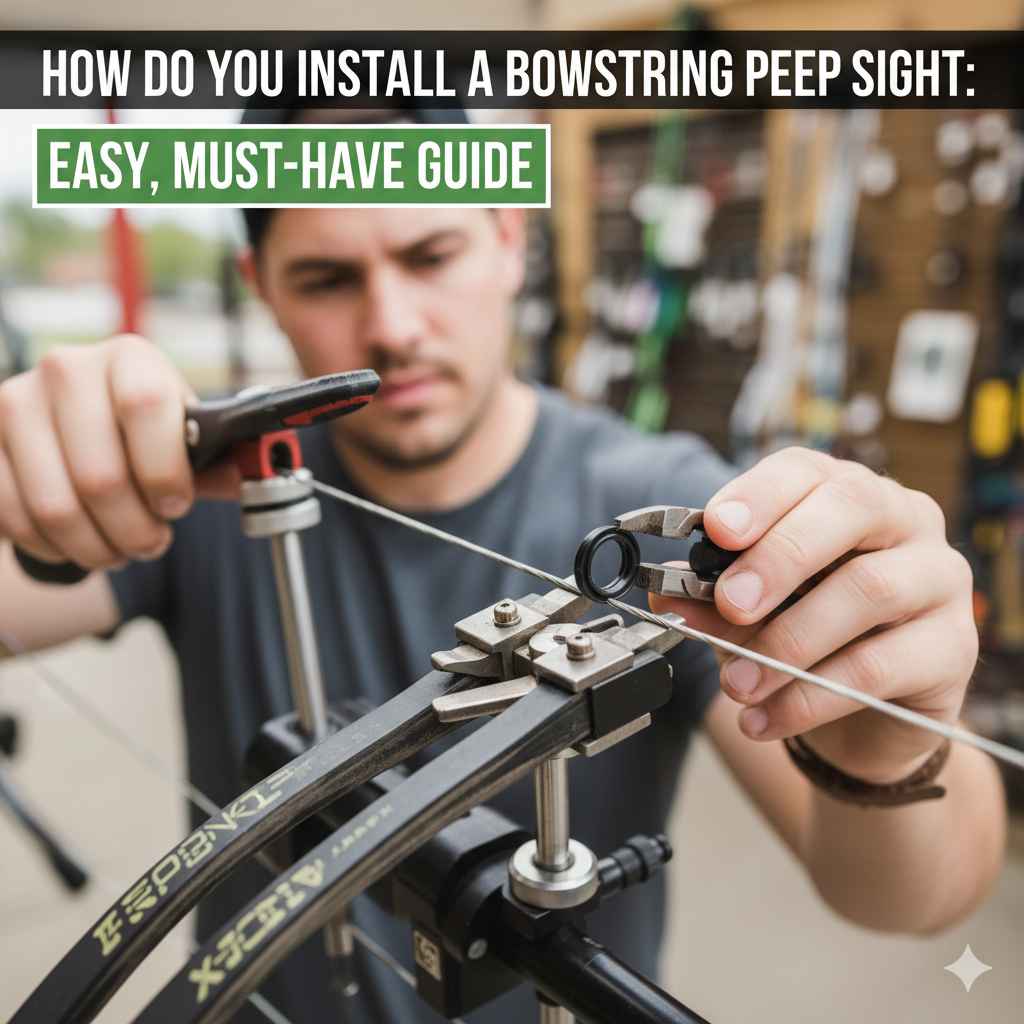
If you’re an archer looking to improve your accuracy and consistency, knowing how do you install a bowstring Peep Sight is essential. A Peep Sight is a small but vital accessory mounted on your bowstring that helps you aim more precisely by providing a consistent anchor point and better alignment with your front sight or target. Whether you’re a beginner or a seasoned archer, installing a Peep Sight correctly can make a significant difference in your shooting performance.
In this guide, we’ll walk you through the process of installing a bowstring Peep Sight with step-by-step instructions, useful tips, and safety considerations. Let’s get started!
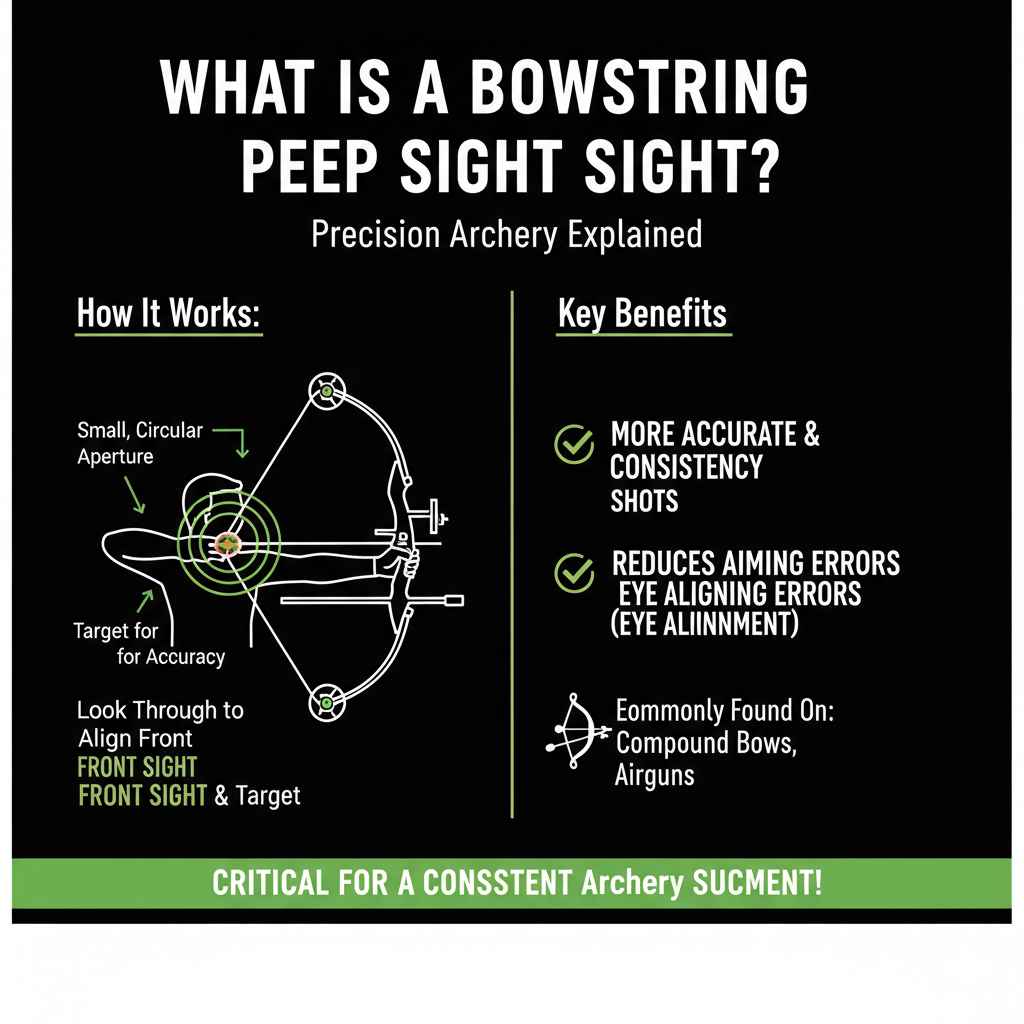
What is a Bowstring Peep Sight?
Before diving into installation, it’s helpful to understand what a Peep Sight is and why it is used. A Peep Sight is a small, circular aperture that is inserted into the bowstring. When you draw the bowstring back, you look through this aperture to align the front sight or the target, resulting in more accurate and consistent shot placement.
Tools and Materials You’ll Need
To install a Peep Sight, gather the following items:
– Bowstring Peep Sight (make sure it is compatible with your bowstring)
– Serving thread or strong string serving material
– Marker or chalk
– Pliers or serving jig (optional but helpful)
– Bow square or ruler for measuring
– Safety glasses (recommended)
– Heat source like a lighter or match (for some peep installation methods)
Make sure you have a clean workspace where you can work carefully on your bowstring without distractions.
Step-by-Step Guide: How Do You Install a Bowstring Peep Sight
Step 1: Identify the Correct Placement
To know exactly how do you install a bowstring Peep Sight in the right spot, you need to find the location on your bowstring where the Peep will line up perfectly when you draw the bow. A general guideline is to place the Peep Sight roughly level with your eye when the bow is at full draw.
A simple way to find this spot is:
1. Put on your shooting glove or finger tab.
2. Draw the bow to your full anchor point.
3. Have a friend mark the spot on the bowstring where the Peep should be inserted (or use a bow square to measure the distance from the top or bottom of the bowstring).
Mark the spot with a marker or a piece of chalk.
Step 2: Prepare the Bowstring
For many installations, you need to loosen the bowstring slightly to insert or wrap the Peep Sight into the serving thread. Avoid loosening the bowstring too much, as this will affect your bow’s tuning.
Some archers prefer to remove the bowstring entirely for installation, but this can be more complex and might require professional assistance.
Step 3: Installing the Peep Sight
There are two main methods to install a Peep Sight:
Method 1: Heat and Slide
Some Peep Sights can be heat-softened and slid onto the serving thread.
– Hold the Peep Sight near a lighter to gently warm it up.
– Once flexible, slide it onto the serving thread at your marked position.
– Let it cool and harden, which will secure it tightly onto the string.
Note: Be very careful not to overheat or burn the serving thread or your fingers.
Method 2: Weaving or Wrapping
This method involves integrating the Peep Sight into the serving thread by weaving or wrapping:
– Deconstruct a short segment of the serving thread at the marked spot.
– Place the Peep Sight’s loop into the gap.
– Wrap and serve the thread tightly around the Peep Sight’s legs or loop to secure it firmly.
– Use pliers or serving jig for neat wrapping.
This method is more common for traditional bowstrings and gives a solid, long-lasting installation.
Step 4: Test Alignment
Once installed, draw the bow and look through the Peep Sight. Check the alignment with your front sight or target. If the Peep Sight is not perfectly aligned, you might need to make minor adjustments by slightly sliding it up or down or rewrapping it.
Step 5: Secure and Inspect
Make sure the Peep Sight is firmly held in place and does not slip. Inspect the serving thread for any damage, and trim any excess thread neatly. Perform several dry draws to ensure everything feels secure.
Tips for Installing Your Bowstring Peep Sight
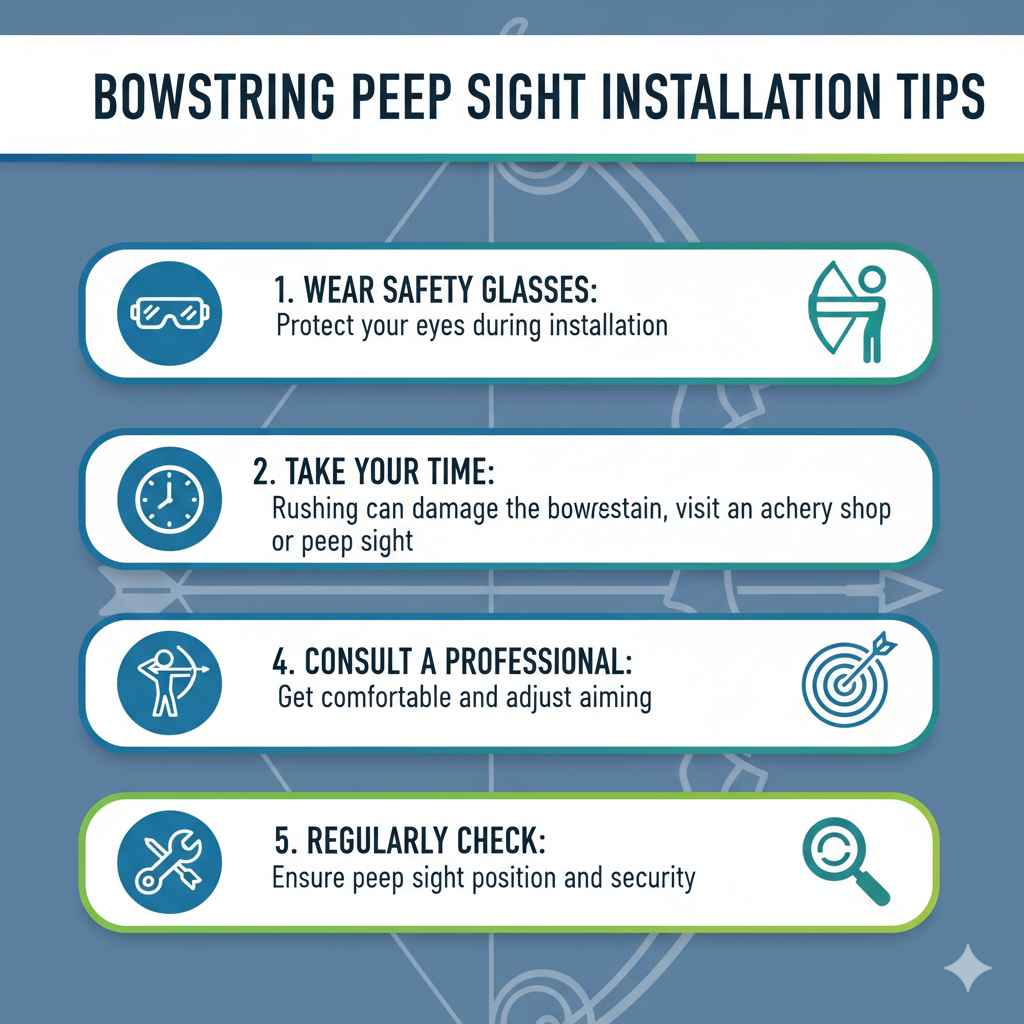
– Always wear safety glasses during installation to protect your eyes.
– Take your time; rushing can damage the bowstring or peep sight.
– If you are uncertain, consult a professional archery shop.
– Practice shooting with your new Peep Sight to get comfortable and adjust aiming techniques.
– Regularly check the Peep Sight’s position and security to prevent accidents.
Conclusion
Understanding how do you install a bowstring Peep Sight equips you with one of the most important skills to enhance your archery. A properly installed Peep Sight provides better sight picture, improves consistency, and ultimately helps you become a more accurate archer. With the right tools, patience, and careful attention to detail, you can install a Peep Sight yourself, saving money and customizing your bow for peak performance.
Ready to take your aim to the next level? Follow these steps, and you’ll be shooting with precision in no time!