Adding arrows pointing down in Microsoft Word is simple! Navigate to the ‘Insert’ tab, click ‘Shapes,’ select a downward-pointing arrow from the ‘Arrows’ section, and draw it onto your document. You can then easily resize, recolor, and adjust its style.
Ever found yourself needing to guide your reader’s eye downwards in a document? Maybe you’re explaining a process, highlighting a key takeaway, or simply want to make your text more visually engaging. Adding an arrow pointing down in Word feels like it should be straightforward, but sometimes, navigating through menus can be a bit puzzling. You might have scrolled through endless options or wondered if there’s a hidden trick. Don’t worry! It’s much simpler than you think. In this guide, I’ll walk you through exactly how to add these helpful directional cues, step-by-step. We’ll cover everything from picking the right arrow to making it perfectly fit your document’s style. Let’s get your document flowing exactly where you want it to!
Unlock Clarity: How to Effortlessly Add Downward Arrows in Word
As a guide in understanding how things work, from the draw of a bowstring to the flight of an arrow, I believe in making complex tasks simple. Just like aiming for your target, placing an arrow in your Word document is about precision and ease. Whether you’re a student trying to make your notes clearer, a professional creating a report, or anyone in between, being able to visually direct attention downwards is a powerful tool. This guide will break down the process into easy-to-follow steps, ensuring you can add that perfect downward-pointing arrow without a hitch.
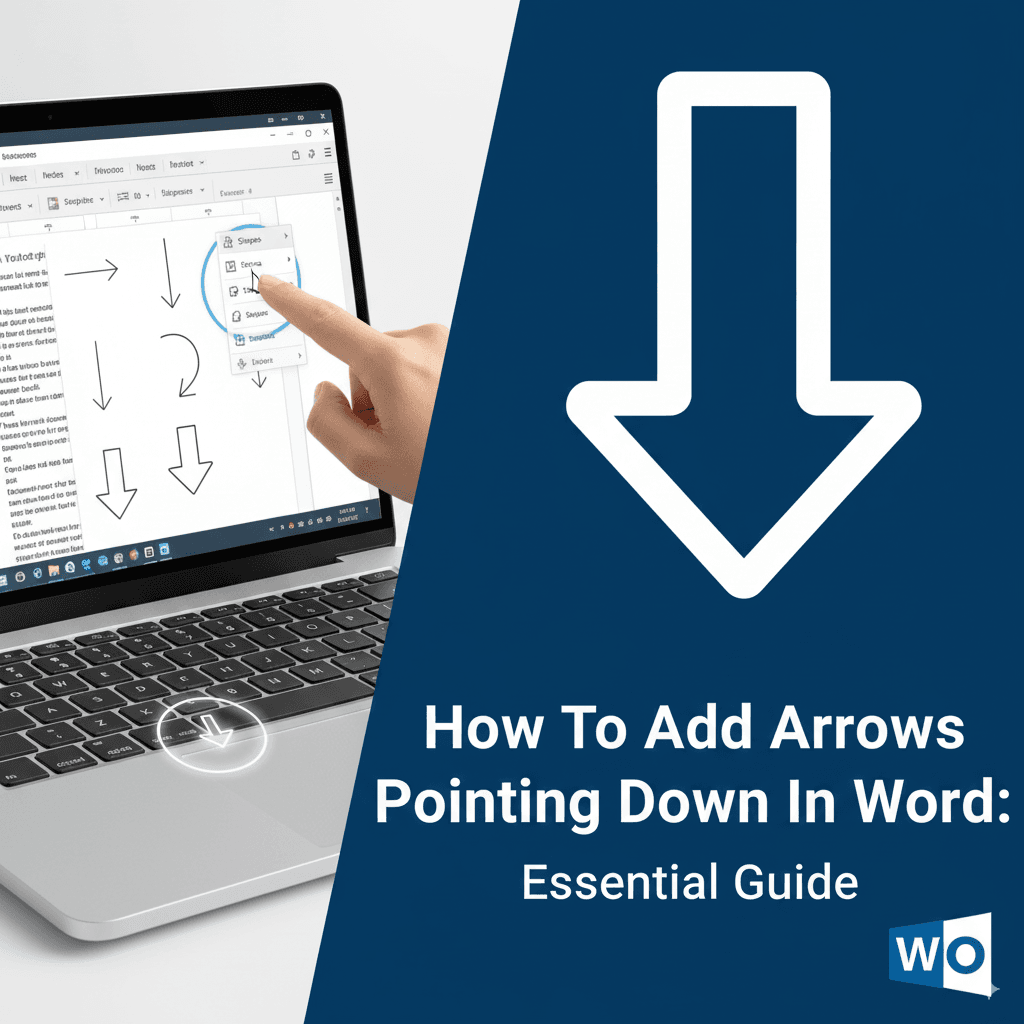
Step 1: Accessing the Shapes Menu
The first step to drawing any shape in Word, including our star the downward-pointing arrow, is to find the ‘Shapes’ tool. This is your gateway to all the visual elements you can insert.
Here’s how to get there:
- Open your Microsoft Word document.
- Look for the ribbon at the top of the window.
- Click on the Insert tab. It’s usually located next to ‘Home’ and ‘File’.
- Within the ‘Insert’ tab, you’ll see a group of options like ‘Pictures,’ ‘Shapes,’ ‘Icons,’ etc. Click on Shapes.
Once you click ‘Shapes,’ a large dropdown menu will appear, showcasing various categories of shapes you can use. Think of this like a quiver filled with different arrow types for your visual communication needs!
Step 2: Selecting the Downward Arrow Shape
Now that you’ve opened the shapes menu, it’s time to find the exact arrow you need. The shapes are organized into categories to make them easy to find.
Follow these simple steps:
- In the shapes menu, locate the section labeled Arrows. You might also see categories like ‘Lines,’ ‘Rectangles,’ ‘Basic Shapes,’ and ‘Block Arrows.’
- Scroll through the available arrow shapes. You’re looking for a simple arrow that clearly points downwards.
- Click on the downward-pointing arrow. Usually, the first few options under ‘Arrows’ will include a standard downward arrow.
Once you select the arrow, your mouse cursor will change into a crosshair, indicating that you’re ready to draw the shape onto your document.
Step 3: Drawing the Arrow in Your Document
With your chosen downward arrow ready, it’s time to place it onto your page. This is a simple click-and-drag action.
Here’s how;
- Position your crosshair cursor where you want the arrow to start (usually its tail).
- Click and hold down the left mouse button.
- Drag your mouse downwards to draw the arrow to your desired length and size.
- Release the mouse button when you’re happy with the arrow’s dimensions.
And just like that, you’ve added a downward-pointing arrow! It’s now an object within your Word document that you can move and modify.
Step 4: Resizing and Moving Your Arrow
Perhaps the arrow you drew is too small, too big, or not quite in the right spot. No problem! You can easily adjust its size and position your arrow precisely where you need it.
To Resize:
- Click once on the arrow to select it. You’ll see small circles or squares appear around it. These are called ‘handles.’
- Click and drag one of these handles. Dragging a corner handle will resize the arrow proportionally. Dragging a side handle will stretch or shrink it in that direction. Hold down the Shift key while dragging a corner handle to maintain the arrow’s proportions.
To Move:
- Click and hold the mouse button on the arrow itself (not on a handle).
- Drag the arrow to its new location on the page.
Tip: If precisely moving or resizing is tricky, you can also use the arrow keys on your keyboard while the shape is selected for fine adjustments.
Step 5: Customizing Your Arrow’s Appearance
Now that your arrow is in place, you might want to make it stand out or match the rest of your document’s design. Word offers extensive options for customizing shapes.
When an arrow (or any shape) is selected, a new tab appears at the top of the ribbon called Shape Format (or sometimes ‘Drawing Tools Format’). This is where all the magic happens.
Here’s what you can change:
- Shape Fill: Click ‘Shape Fill’ to change the arrow’s color. You can choose from theme colors, standard colors, or even custom colors.
- Shape Outline: Use ‘Shape Outline’ to change the color of the arrow’s border. You can also select ‘No Outline’ if you prefer a borderless arrow.
- Weight and Dashes: Under ‘Shape Outline,’ you can also adjust the ‘Weight’ to make the arrow thicker or thinner, and choose different ‘Dashes’ (like solid, dashed, or dotted lines) for the outline.
- Effects: Explore the ‘Shape Effects’ option. Here you can add shadows, reflections, glows, and even 3D rotations to give your arrow a more dynamic look if desired.
- . . . and more! The Shape Format tab has a wealth of options for fine-tuning your graphics.
Think of these customization options like tuning your bow – you can adjust the draw weight, add sights, or change the nocking point to perfectly suit your needs and improve your shot. For your arrow in Word, you’re tuning its visual appeal and clarity.

Advanced Tips for Using Arrows in Word
Once you’ve mastered the basics of adding and customizing a downward arrow, you can take your document design even further. These tips will help you use arrows more effectively and professionally.
Using Different Arrow Types and Styles
Beyond the basic solid arrow, Word offers a variety of arrow styles that can add nuance or emphasis.
- Block Arrows: This category often includes thicker, more prominent arrows that can be good for bold calls to action.
- Callouts: While not strictly arrows, some callout shapes have directional elements that can serve a similar purpose.
- Double-Ended Arrows: You can insert two arrows and point them away from each other, or use one to point down and another to point somewhere else on your page.
- Arrowheads: When adding a standard line and then formatting it as an arrow, you can choose different styles for the arrowhead, including different sizes and shapes. To do this, draw a line, go to ‘Shape Format,’ click ‘Shape Outline,’ then ‘Arrows,’ and select your preferred arrowhead style.
Arrow Placement and Text Wrapping
How your arrow interacts with text is crucial for readability. The ‘Wrap Text’ option controls this.
To adjust text wrapping:
- Select your arrow.
- Go to the Shape Format tab.
- Click on Wrap Text.
Here are common options and what they do:
| Option | Description |
|---|---|
| In Line with Text | Treats the arrow like a large character. It stays exactly where you place it within a line of text but can be awkward for general placement. |
| Square | Text wraps around the rectangular bounding box of the arrow, creating a neat square space. |
| Tight | Text wraps closely around the actual shape of the arrow, often allowing for closer text placement than ‘Square.’ |
| Through | Similar to ‘Tight,’ but text can flow through any transparent areas within the shape if the shape had them (less common for simple arrows). |
| Top and Bottom | Text appears only above and below the arrow, pushing text out of the way on either side. Ideal for centering an arrow between sections. |
| Behind Text | Places the arrow behind any text, making it look like a watermark or background element. |
| In Front of Text | Places the arrow on top of all text, obscuring it. Use with caution! |
For most uses where you want an arrow to point something out, Square or Top and Bottom are excellent choices.
Using Arrows in Combination with Other Tools
Arrows are often more powerful when used with other visual elements. Consider combining them with:
- Text Boxes: Place a text box near the arrow to add a label or explanation. Set the text box’s wrap to ‘Square’ or ‘Tight’ to integrate it smoothly.
- Shapes (Circles, Rectangles): Draw a circle or box around an important section of text or an image and then use a downward arrow to point to it from above or the side.
- SmartArt: For more complex diagrams or process flows, Word’s SmartArt graphics (found under ‘Insert’ > ‘SmartArt’) often include pre-built arrows and connecting lines that can be easily customized. You can find options that are specifically designed for sequential steps.
When to Use Downward Arrows and How to Use Them Effectively
Arrows are visual cues. Like a good coach giving direction, they should be clear and purposeful.
- Highlighting Important Information: Place an arrow pointing down to a crucial sentence, statistic, or footnote.
- Indicating Next Steps: In a process description, arrows can guide the reader from one step to the next, especially if the next step is lower on the page.
- Drawing Attention to a Section: Use an arrow to direct the reader’s eye to a specific paragraph, image, or chart that follows.
- Simplicity is Key: Don’t overuse arrows. Too many visual cues can be overwhelming and defeat their purpose. Ensure each arrow has a clear reason for being there.
- Consistency Matters: If you’re using arrows in a document, try to maintain a consistent style (color, thickness) and placement strategy.
Why Do We Need Downward Arrows in Documents Anyway?
In archery, every part of the equipment and technique serves a purpose – to guide the arrow toward the target. Similarly, in document design, visual elements like arrows help guide the reader’s understanding and focus on the target information. Let’s look at why these simple graphic tools are so valuable:
Enhancing Readability and Flow
A well-placed downward arrow acts as a visual signpost. It tells the reader, “Pay attention to what’s coming up next, directly below this point.” This is especially helpful in long documents or pages with a lot of information, where it can be easy for the reader to lose their place or miss key details. By providing a clear directional cue, arrows improve the overall reading experience, making it smoother and more intuitive. This is akin to ensuring clear communication on the archery range, where instructions must be precise for safety and performance.
Improving Comprehension
Sometimes, the most important information isn’t immediately obvious. An arrow can isolate that key piece of data, explanation, or call to action and draw the reader’s attention directly to it. This is particularly useful when:
- Summarizing key points at the end of a section.
- Highlighting a conclusion or recommendation.
- Directing a reader to a specific part of a diagram or table.
- Emphasizing a warning or important note.
By reducing the cognitive load on the reader – they don’t have to search as hard for meaning – you make your message more impactful and easier to understand. For more information on visual hierarchy and document design, resources like the Graphic Design Principles website can offer broader insights into how visual elements guide the eye.
Visual Interest and Engagement
Pages filled only with text can sometimes appear monotonous. Strategic use of simple graphics, like arrows, can break up large blocks of text and add visual appeal. This makes your document more engaging and can help hold the reader’s attention for longer. It’s not just about conveying information; it’s about how you present it. A touch of visual flair, like a well-placed arrow, can make a document feel more professional and thoughtfully crafted.
Troubleshooting Common Arrow Issues in Word
Even with straightforward steps, you might run into a few bumps. Here are some common problems and how to fix them:
- Arrow Disappears When I Type More Text: This usually happens when the text wrapping is set to ‘In Line with Text.’ Try changing the wrap setting to ‘Square,’ ‘Tight,’ or ‘Through’ so the arrow can float over the text.
- Arrow Won’t Move Freely: If your arrow seems stuck, check its ‘Wrap Text’ setting. ‘In Line with Text’ will anchor it to a specific spot within the text flow. Select a different wrapping option.
- Arrow Handles Aren’t Visible: Make sure the arrow is properly selected. Click on it firmly. If it’s behind text (‘Behind Text’), you might need to click carefully or use the selection pane (accessible via the ‘Home’ tab > ‘Select’ > ‘Selection Pane’) to select it.
- Arrow Looks Pixelated or Low Quality: Ensure you are using the built-in Word shapes. If you pasted an arrow image from elsewhere, it might be low resolution. For best results, always insert shapes directly from Word’s ‘Insert’ > ‘Shapes’ menu.
- I Can’t Change the Color: Double-check that you are on the ‘Shape Format’ tab and have selected ‘Shape Fill’ or ‘Shape Outline’ correctly. Sometimes, if the arrow was inserted as part of a group or a complex object, its formatting might be locked. Try ungrouping if possible, or re-inserting the arrow.

Frequently Asked Questions (FAQs)
Q1: Can I add an arrow pointing down and have text follow it?
A1: Absolutely! The best way to do this is to place your arrow first, then adjust its ‘Wrap Text’ setting to ‘Square’ or ‘Tight.’ Then, position the arrow where you want it. Next, ensure your text is placed either above or below the arrow and flows around it nicely according to the wrap setting.
Q2: What’s the difference between inserting a shape arrow and a symbol arrow?
A2: Inserting a ‘Shape’ arrow from the ‘Insert’ > ‘Shapes’ menu gives you a graphical object. You can easily resize, recolor, and modify its properties. A ‘Symbol’ arrow (found under ‘Insert’ > ‘Symbol’ > ‘More Symbols’) is essentially a character. You can change its color and size, but it behaves more like text and is less flexible graphically.
Q3: How do I make the arrow thicker?
A3: Select the arrow, go to the ‘Shape Format’ tab, click ‘Shape Outline,’ and then select ‘Weight.’ You can choose from various preset thicknesses or type in a custom weight.
Q4: Can I add an arrow that scrolls down the page as I scroll?
A4: Microsoft Word typically doesn’t support dynamic elements like arrows that scroll independently of the page content in a standard document view. For such interactive features, you would typically need to use web development tools or specific software designed for interactive documents, not standard Word processing.