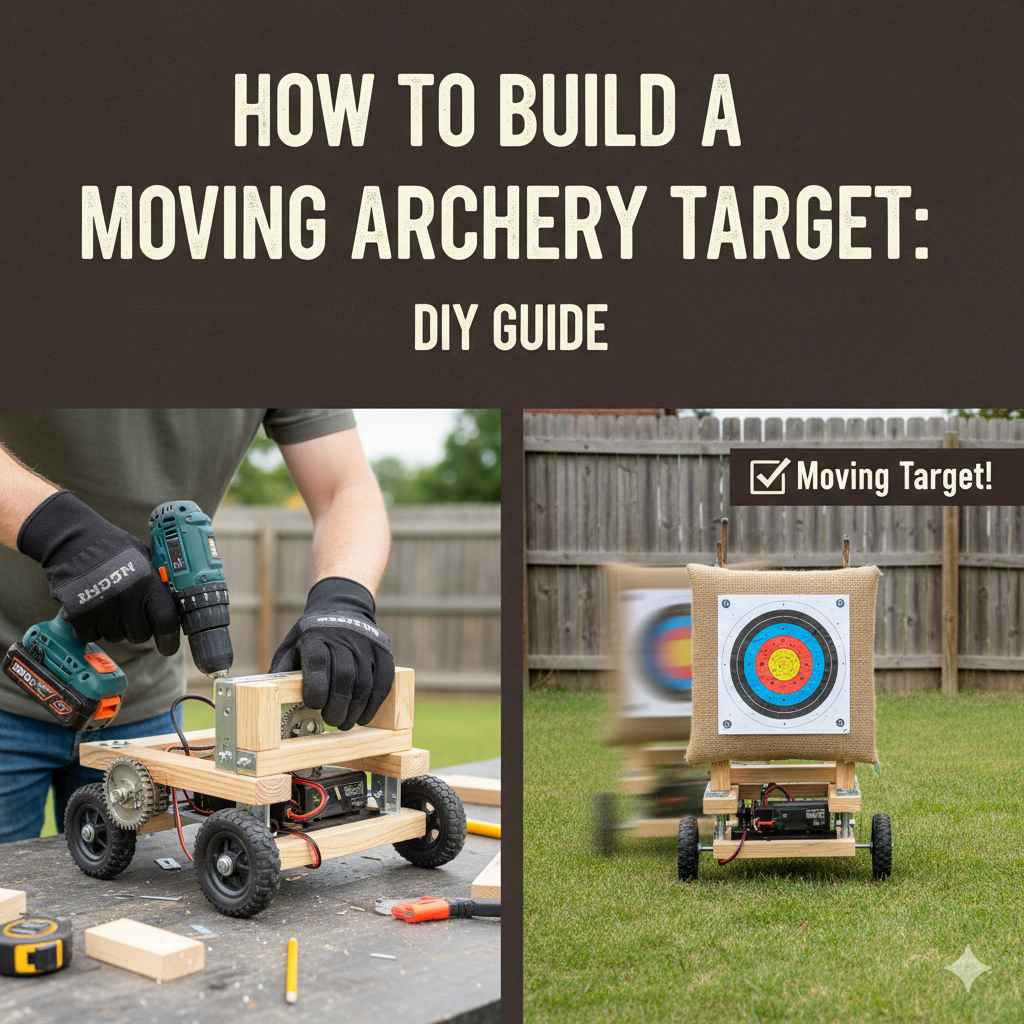
Building your own moving archery target can seem like a big project, especially if you’re new to DIY. You might think it’s too hard or that you need special tools. But it doesn’t have to be! This guide will show you exactly how to create a fun, moving target that will improve your archery skills. We’ll break down every step so you can build it easily. Get ready to make your practice sessions way more exciting.
Why Build a Moving Archery Target
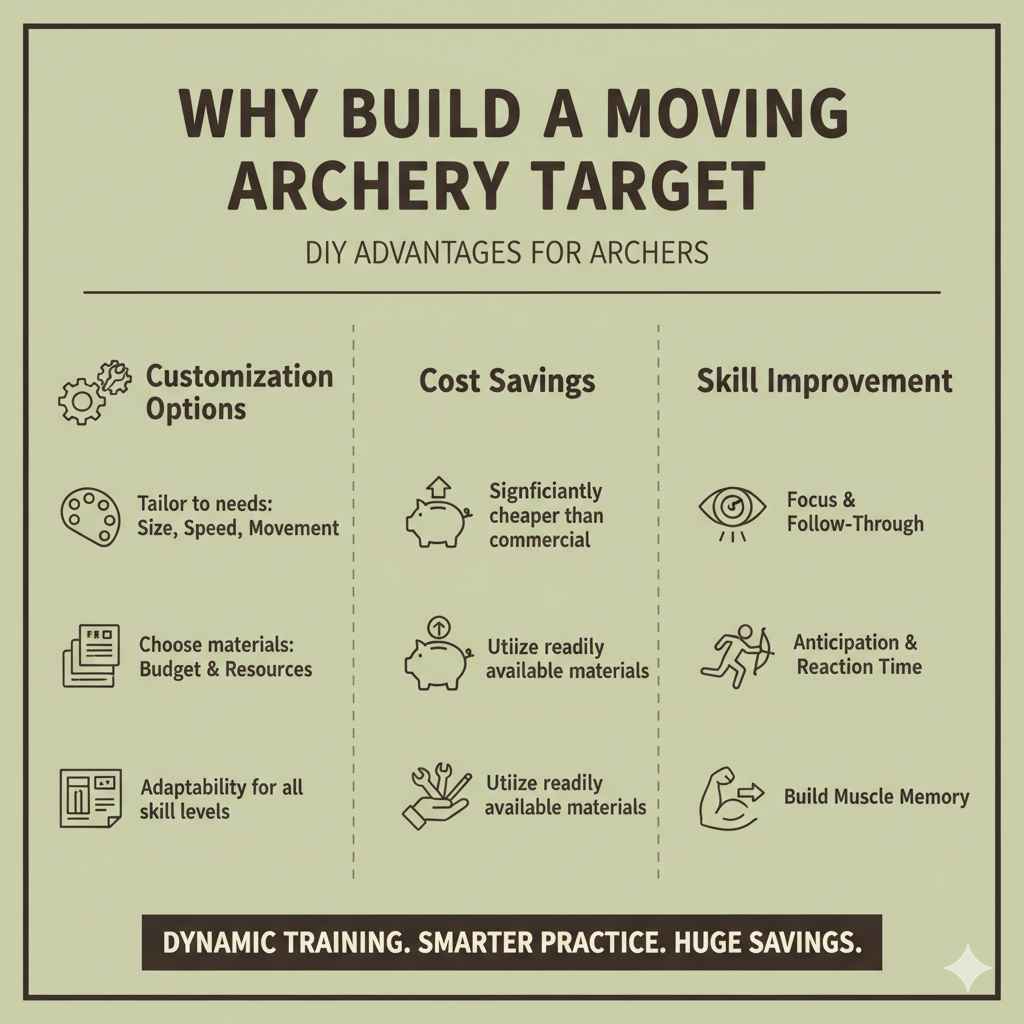
Creating a moving archery target yourself offers a unique way to enhance your archery practice. Traditional static targets are good, but a moving target introduces dynamic elements that better simulate real-world shooting scenarios, like hunting or competitive archery. It forces you to adapt your aim and shooting technique on the fly, improving your reaction time and consistency. This DIY project is also cost-effective compared to purchasing commercial moving targets, which can be quite expensive.
Benefits of a DIY Moving Target
Making your own target means you can customize it to your specific needs. You can adjust its size, speed, and the type of movement it performs. This adaptability is a major advantage for archers of all skill levels. It allows for varied practice drills that keep your training fresh and challenging. The satisfaction of building something useful with your own hands is also a significant perk.
- Customization Options
When you build your own moving archery target, you aren’t limited by pre-set features. You can choose the materials that best suit your budget and available resources. You can also decide on the complexity of the movement. For instance, you might want a simple back-and-forth motion or a more elaborate system that swings. This level of control ensures your target perfectly matches your training goals and practice space.
- Cost Savings
Commercial moving archery targets can cost hundreds or even thousands of dollars. Building your own can significantly reduce this expense. By using readily available materials and a thoughtful design, you can create a functional and durable moving target for a fraction of the price. This makes advanced archery training accessible to more people.
- Skill Improvement
A moving target is excellent for developing critical archery skills. It forces you to focus on your follow-through and to anticipate the target’s movement. This practice helps build muscle memory and improves your ability to shoot accurately under pressure. The dynamic nature of the target makes practice more engaging and less repetitive.
How to Build a Moving Archery Target DIY Guide Planning
Before you start cutting wood or drilling holes, good planning is key. Think about what kind of movement you want your target to have. Do you want it to slide back and forth on a track? Or maybe swing from a rope? Also, consider the size of your target and the archery equipment you’ll be using. This will help you choose the right materials and design. Safety is also a big part of planning. Make sure your design won’t create hazards during use.
Choosing Your Target Type
There are several ways a target can move. One simple way is to have it slide along a guide. Another is to have it swing from a pivot point. You could also create a system where the target spins or moves in a more complex pattern. The easiest for beginners is usually a target that moves along a straight line. This requires a simple track and a mechanism to move the target along it.
The type of movement you choose will affect the complexity of your build. A sliding target is often the most straightforward for a first-time project. It typically involves creating a sturdy frame and a smooth track for the target to glide on.
Gathering Materials and Tools
You’ll need some basic tools like a saw, drill, measuring tape, and screws. For materials, you’ll likely need wood for the frame and a target backer. You might also need pulleys, ropes, or metal rods depending on your design. Consider using sturdy materials that can withstand repeated impacts from arrows. Safety glasses and work gloves are essential for protecting yourself while building.
- Essential Tools
A basic set of woodworking tools is usually enough. This includes a hand saw or a power saw for cutting wood, a drill with various drill bits for making holes, a measuring tape for accurate measurements, and a screwdriver or drill bit for fastening screws. A level is also helpful to ensure everything is straight.
- Key Materials
The main materials will depend on your design. Common choices include plywood or lumber for the frame and target backer. For the moving mechanism, you might use metal pipes, casters, pulleys, or even strong rope. Ensure all materials are durable and can handle outdoor conditions if the target will be used outside.
Designing Your Moving Target
Sketch out your design before you start. This helps visualize the project and identify potential problems. Think about the dimensions. How big should the target face be? How much space do you have for the movement mechanism? A simple sketch can save you a lot of time and frustration later.
How to Build a Moving Archery Target DIY Guide Construction
Now that you have a plan and your materials, it’s time to build! We’ll focus on a sliding target design as it’s a great starting point for many DIYers. This involves creating a stable frame, a smooth track, and a way to make the target move. Patience is key here. Take your time with each step to ensure accuracy and sturdiness.
Building the Frame and Track
Start by building a sturdy base frame. This can be made from lumber. Then, create a track system. This could be as simple as two parallel wooden beams or metal rails that the target will slide on. Ensure the track is smooth and level so the target moves freely without snagging.
The frame provides the foundation and stability for your entire target system. It needs to be strong enough to support the weight of the target and withstand the forces applied during use.
Creating the Movable Target Carrier
You’ll need a way for the target itself to attach to the track and move. This could be a simple wooden block or metal bracket that fits onto your track. Add wheels, casters, or sliders to this carrier so it glides smoothly along the track. Make sure the carrier is wide enough to hold your target backer securely.
- Attaching Wheels or Casters
Depending on your track material, you’ll attach wheels or casters to the target carrier. For wooden tracks, small furniture casters can work well. For metal rails, you might use roller bearings or specific glider wheels designed for that rail type. Ensure they are attached securely and align with the track.
The smooth rotation of the wheels or the glide of the casters is what allows your target to move effortlessly. If these are not aligned correctly or are of poor quality, the movement will be jerky and inconsistent.
Mounting the Target Backer
Once your carrier is ready, attach your target backer to it. You can use screws or clamps for this. Make sure the backer is firmly attached and doesn’t wobble. This backer is what you’ll attach your actual archery target face to.
Adding a Moving Mechanism (Optional but Recommended)
While you can manually pull the target, a mechanism makes it more dynamic. This could be a simple rope and pulley system that allows you to pull the target from a distance. Or, you could rig it to be pulled by a small motor if you’re feeling ambitious. For beginners, a rope and pulley is a great starting point.
A rope and pulley system allows you to control the target’s movement without leaving your shooting position. This adds a significant layer of realism and challenge to your practice.
How to Build a Moving Archery Target DIY Guide Using Your Target
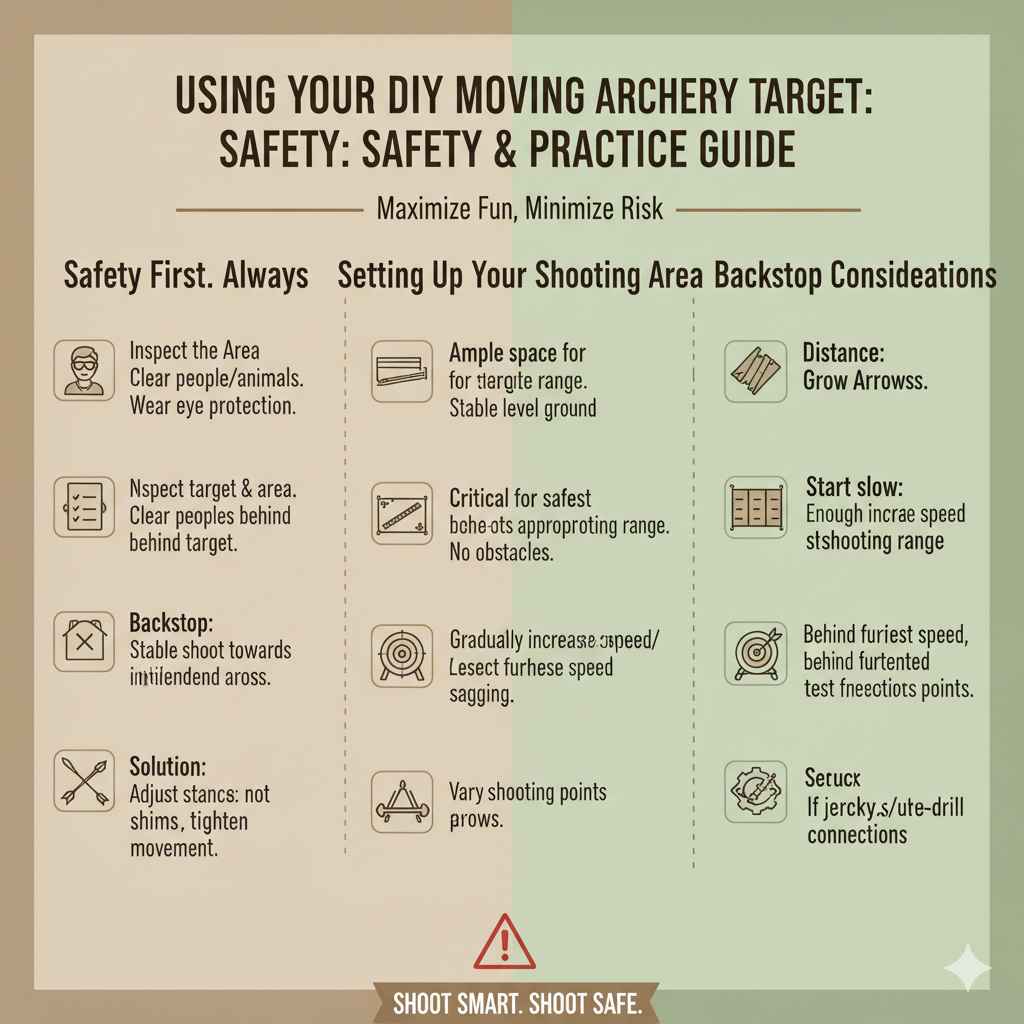
With your moving archery target built, it’s time for the fun part – shooting! Remember to start slow and get a feel for how the target moves. Safety is always number one, so be sure you have a safe backstop behind your target. Experiment with different shooting distances and speeds of movement to make your practice sessions varied and effective.
Safety First Always
Before you shoot, check that your target is securely in place. Ensure there are no loose parts. Always have a safe area behind your target to catch missed arrows. Never shoot towards anything or anyone unintended. Wear eye protection.
Safety should be your top priority. Always perform a quick safety check before each shooting session. This includes inspecting the target for any damage and ensuring the surrounding area is clear.
Setting Up Your Shooting Area
Choose a location with ample space. You’ll need enough room for the target to move its full range and for you to shoot safely. Make sure the ground is stable and that there are no obstacles that could interfere with the target’s movement or your arrows.
- Backstop Considerations
A proper backstop is critical for safety and arrow retrieval. This could be a dedicated archery backstop net, a large pile of dirt, or a sturdy wall designed to stop arrows. Ensure your backstop is positioned behind the furthest point the target will travel.
The backstop is designed to catch any arrows that miss the target, preventing them from traveling into unintended areas. Without a reliable backstop, practicing with any archery target can be dangerous.
Practicing with Your Moving Target
Start by practicing with the target moving slowly. Focus on hitting the center. As you get more comfortable, gradually increase the speed of the target or vary its movement. You can also practice shooting at different points along the target’s travel path.
Varying the speed and the target’s movement pattern will help you develop a more versatile shooting skill set. This prevents your practice from becoming monotonous.
Troubleshooting Common Issues
If your target gets stuck, check the track for any debris or misalignment. If the movement is jerky, the wheels or sliders might need lubrication or adjustment. Ensure all connections are secure.
Sometimes, minor adjustments are all that’s needed to get your moving target working perfectly again. Regularly inspecting your DIY target can help you catch small problems before they become big ones.
Frequently Asked Questions
Question: What kind of wood is best for building an archery target frame
Answer: Pine or fir lumber is generally a good choice for frames because it’s affordable and easy to work with. For the target backer, plywood is common. Make sure the wood is dry and relatively straight.
Question: How far should the track be for a sliding target
Answer: The track length depends on how much you want your target to move. A common range is 5 to 10 feet, allowing for a good dynamic practice area without taking up too much space.
Question: Can I use a regular target face on a moving target
Answer: Yes, you can attach any standard archery target face to your moving target backer. Just ensure it’s secured well so it doesn’t shift during movement.
Question: What safety precautions are most important
Answer: Always use a safe backstop, wear eye protection, and ensure no one is in the path of the target or arrows. Inspect your setup before every shooting session.
Question: How do I make the target move faster or slower
Answer: For a rope and pulley system, you can adjust the speed by how fast you pull the rope. For more advanced systems, you might use different pulley ratios or consider adding a variable speed motor.
Wrap Up
Building your own moving archery target is an achievable DIY project. With careful planning and construction, you can create a valuable tool for improving your archery skills. This guide provided a clear path for construction and use. Enjoy your enhanced practice sessions with your custom-made moving target.