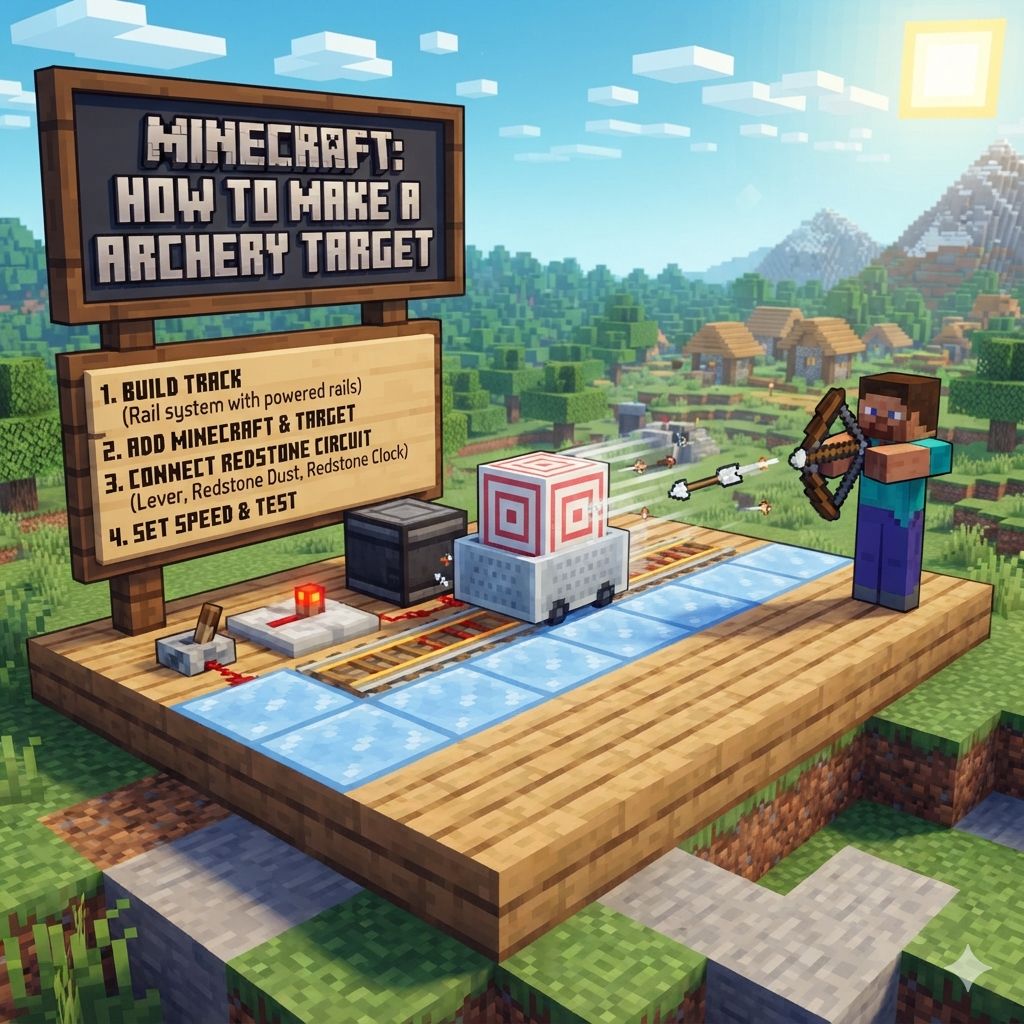
Minecraft: How To Make A Moving Archery Target
Building a moving archery target in Minecraft might sound tricky. You might be picturing complex redstone contraptions or needing a degree in engineering. Don’t worry, I get it. For more on this, see our guide on How To Build A 2X4 Archery Target Stand (Strong & Easy).
For a related target setup, Ark: How To Demolish Archery Target (Get New Items) gives readers another practical build or practice option.
When I first wanted to make a more engaging archery range in my own world, I felt the same way. It felt like a big puzzle. But I learned that with a few clever ideas and simple mechanics, you can create something really cool. Once your range is set up, keep your gear running — see how to repair fishing rods and bows in Minecraft.
In this guide, we’ll break down how to make a moving archery target. We’ll cover different ways to do it. We’ll look at the blocks you need.
And we’ll talk about how to make it work smoothly. By the end, you’ll have a fantastic new way to practice your aim and impress your friends.
A moving archery target in Minecraft can be built using redstone mechanisms. Common methods involve pistons pushing blocks, minecarts on tracks, or even flowing water to move targets. This adds dynamic challenges for players aiming to improve their archery accuracy and create engaging mini-games.
Understanding the Basics of a Moving Target
At its heart, a moving archery target in Minecraft is about creating movement. This movement needs to be predictable enough to aim at, but challenging enough to be fun. We need to think about how to make something appear and disappear.
Or how to make it slide across a path. Or even how to make it spin.
The key is using blocks and mechanics that Minecraft gives us. We’re not adding mods. We’re just using the game’s own rules.
Redstone is our best friend here. It lets us send signals. These signals can trigger actions.
Things like extending pistons or moving minecarts.
Think about what kind of movement you want. Do you want a target that slides back and forth? Or one that pops out from behind a wall?
Maybe even one that drops from the sky and lands on a specific spot. Each of these needs a slightly different approach. But the core ideas are the same: control and timing.
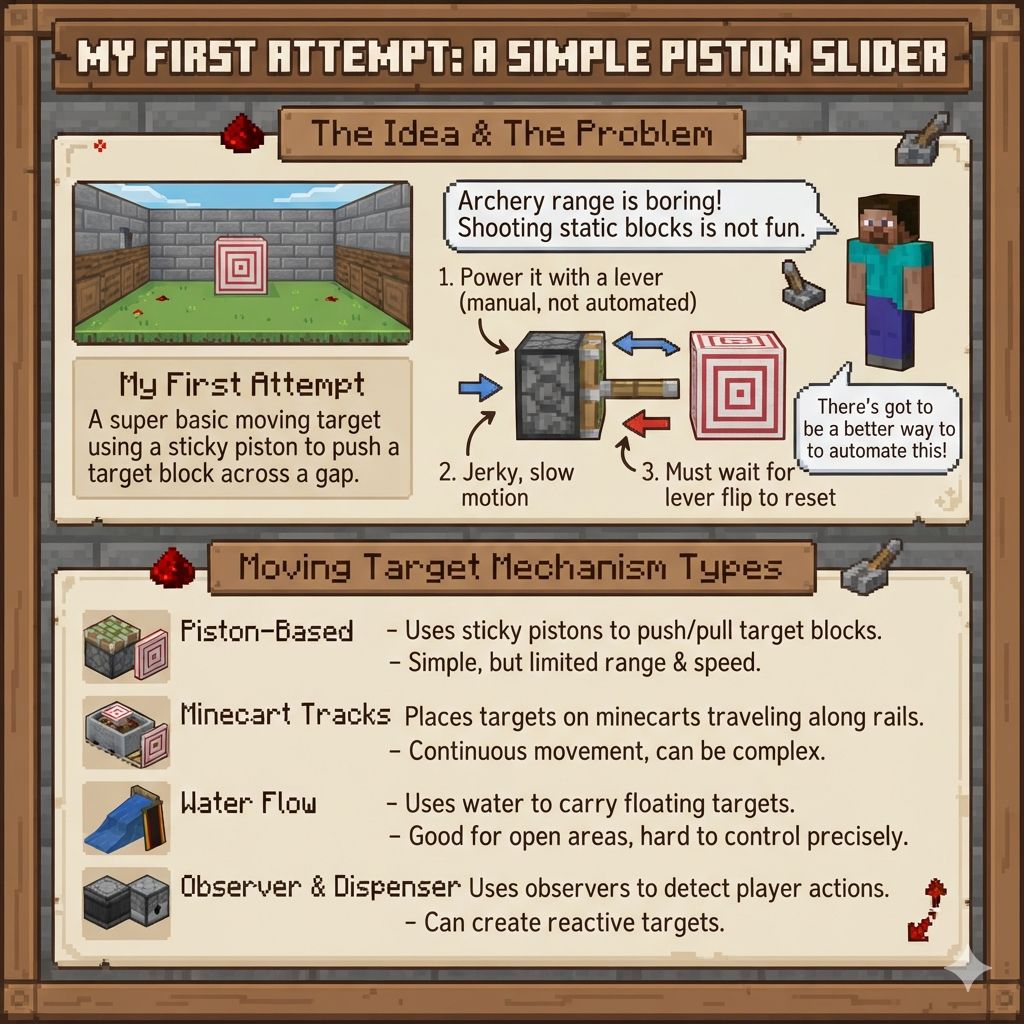
My First Attempt: A Simple Piston Slider
I remember wanting a moving target for my survival world. I had just finished building a huge archery range for my friends. It looked amazing, with all sorts of decorative arrows and targets.
But after a few days, everyone was bored. Shooting at a static block is only fun for so long.
So, I decided to make something move. My first idea was super basic. I wanted a target block to slide across a gap.
I thought about using pistons. I placed a sticky piston facing a block. When I powered the piston, it would push the block.
Then, when I unpowered it, it would pull it back.
It worked, sort of. The problem was, it was a bit jerky. And I had to manually flip a lever to make it move.
It wasn’t automated at all. I also realized that if I missed the target, I couldn’t just shoot again. I had to wait for the lever to be flipped.
It was a start, but definitely not ideal. It made me think: there had to be a better way to do this automatically.
Moving Target Mechanism Types
Piston-Based: Uses sticky pistons to push or pull target blocks. Simple, but can be limited in range and speed.
Minecart Tracks: Places targets on minecarts that travel along rails. Offers continuous movement and can be complex to set up.
Water Flow: Uses water to carry floating targets like signs or banners. Good for large, open areas, but hard to control precisely.
Observer & Dispenser: Uses observers to detect player actions and dispensers to activate other mechanisms. Can create reactive targets.
Building a Sliding Target with Pistons and Observers
This is a classic method. It’s relatively easy to understand and build. We’ll use sticky pistons to push a target block.
Then, we’ll use observers to detect when the target is hit. This will help reset the mechanism or make it move again.
What You’ll Need:
- Sticky Pistons
- Target Blocks (e.g., Wool, Wood Planks, Concrete)
- Redstone Dust
- Redstone Repeaters
- Redstone Torches
- Levers (for testing/manual control)
- Observers
- Building Blocks (e.g., Stone, Cobblestone)
Step-by-Step Guide:
First, decide where your target will move. Let’s say it slides across a 5-block gap. Build a platform or wall on either side of this gap.
Place a sticky piston on one side, facing the gap. Place your target block directly in front of the piston’s face. This is the block that will move.
Now, we need to power the piston. We can use a simple redstone line. Run redstone dust from a power source (like a lever) to the block behind the piston.
When the lever is on, the piston extends, pushing the target block across the gap.
To make it slide back, we need to retract the piston. This is where things get interesting. You can have two pistons facing each other, pushing the target block back and forth.
Or, you can use a redstone pulse to push it out and then another to pull it back.
A common setup uses a clock circuit. This is a redstone loop that sends out continuous pulses. You can build a simple repeater-based clock.
Connect this clock to the piston. The target will then move in and out continuously.
Adding the Observer:
This is where it gets smart. Place an observer block so its “face” (the part with the red dots) is pointing towards the target block. The observer detects when a block state changes.
If an arrow hits your target block, it changes its state. The observer will then send out a redstone signal.
You can use this signal. Connect the observer’s output (the redstone dust coming from its back) to a redstone line. This line can do a few things:
- Pause the clock: If your clock is running too fast, hitting the target could temporarily stop it.
- Trigger a sound: Play a bell sound to confirm a hit.
- Activate another mechanism: Maybe it retracts the target instantly for a quick follow-up shot.
For a simple sliding effect, you can have the observer trigger a short delay before the piston retracts. This way, the target stays put for a moment after being hit, giving you a visual confirmation.
Quick Scan: Piston Target Setup
Target Block: Wool, Concrete, Wood
Movement: Sticky Piston extends/retracts
Power: Redstone Dust, Levers, Clocks
Detection: Observer pointing at target
Advanced: Repeaters for timing, Clocks for auto-movement
I found that using a comparator and a repeater can help create a cleaner pulse from the observer. This ensures the piston retracts smoothly. It’s all about getting the timing right so it doesn’t feel glitchy.
The goal is a seamless back-and-forth motion. Or, a controlled pop-out and retract.
Using Minecarts for More Dynamic Movement
If you want something more than just back and forth, minecarts are your next step. They can travel on tracks, allowing for curves, inclines, and longer distances. This opens up a lot of possibilities for creating complex archery challenges.
What You’ll Need:
- Minecarts
- Rails (regular, powered, detector)
- Target Blocks (that can be placed on a minecart)
- Redstone Dust and Torches
- Levers or Buttons
- Building Blocks
- Comparators (optional, for advanced timing)
Step-by-Step Guide:
First, design your rail system. Where will the minecart travel? Will it be a simple oval?
A figure-eight? Maybe it goes up and down a ramp?
Build the rails according to your design. Make sure to place powered rails at regular intervals. This keeps the minecart moving at a good speed.
You’ll need a way to power these powered rails. Redstone torches or a redstone line connected to a lever will work.
Now, you need to attach your target to the minecart. You can’t directly place most blocks on a minecart. The trick here is to place a block that a minecart can interact with.
A good option is a sign or a banner.
Place your sign or banner on a block. Then, place a minecart on the rail. The minecart will move, and the sign/banner will appear to move with it.
This is your “target.” You can make it look like a real target by putting a custom design on the banner or sign.
To make it loop, you’ll need a way to power the powered rails. A simple way is to have a lever that turns on all the powered rails. When you flip it, the minecart starts its journey.
For automatic starting and stopping, you can use detector rails. Place a detector rail at a key point on the track. When the minecart passes over it, the detector rail emits a redstone signal.
This signal can power the next set of powered rails, or it can be used to trigger a stopping mechanism.
I experimented with this a lot. I found that placing a block with an arrow behind the sign on the minecart makes it easier to see your hits. When an arrow hits the sign or banner, it doesn’t break it.
But the visual cue is helpful. The minecart will just keep going.
If you want to detect hits, it gets a bit more complex. You could place observers along the track, but they would need to detect a change on the sign or banner, which isn’t always reliable. A more common method is to have the target itself be a block that can be activated.
For example, place a target block on a slime block, and have the minecart push that slime block.
A really cool advanced idea is to have the minecart trigger a dispenser that shoots arrows back at you! This turns it into a proper battle arena. You’d need to time the dispenser’s activation perfectly with the minecart’s position.
This requires careful use of redstone repeaters to delay the signal.
Minecart Target Flow
Path Design: Plan rail layout (oval, curve, incline)
Rail Placement: Regular, powered, and detector rails
Target Attachment: Sign/Banner on a block, or target block on slime block
Powering: Redstone torches/lines for powered rails
Automation: Detector rails for starting/stopping
The key with minecarts is patience and testing. You’ll likely need to adjust the speed of the powered rails. You might need to tweak the timing of any automated systems.
But once it’s set up, it offers a truly engaging and unpredictable archery experience. I’ve seen players create entire obstacle courses just using minecart tracks for moving targets.
Water-Based Targets: Simple and Effective
For a different feel, especially in worlds with lots of water or near rivers, water flow can move targets. This method is often simpler than redstone contraptions. It’s good for targets that you don’t need to detect hits on specifically.
What You’ll Need:
- Signs or Banners
- Water Buckets
- Source Blocks (e.g., Cobblestone, Dirt)
- Building Blocks
- Arrows (for shooting)
Step-by-Step Guide:
First, decide on a water channel. This will be where your targets float. It can be a simple straight channel or a more complex path.
Place your source blocks at the start of the channel. This is where the water will come from. Let the water flow.
You want it to create a gentle current.
Now, create your targets. Signs and banners work well. Place them on a solid block.
Or, you can place them directly against a wall on the side of the water channel. When the water flows past, it will push these signs or banners. They will move downstream.
If you want the target to stop at a certain point, you can build a small barrier. Or, you can have the water flow into a collection pool where the targets will gather. You can then manually reset them.
A common setup is to have a dispenser that dispenses a sign or banner into the water stream periodically. You can power this dispenser with a simple timer circuit (like a hopper clock) or a manual button.
I’ve seen players use this for target practice in open fields. They’ll create a large, flowing river. Then, they’ll place signs on the riverbanks at different intervals.
As you stand on a hill overlooking the river, you shoot at the signs as they drift by. It feels very natural and less like a game mechanic.
Detecting hits with this method is tricky. The water flow doesn’t register hits on signs or banners. So, this is more for casual practice or demonstration.
You’d have to visually confirm if you hit the target. If you want to score points, you’d have to count your hits manually or have a friend do it.
Water Target Simple Setup
Water Channel: Create a path for water flow.
Water Source: Place blocks to create flowing water.
Targets: Hang Signs or Banners on channel walls.
Movement: Water current pushes targets downstream.
Reset: Manual repositioning or dispenser.
This method is great for a relaxed archery session. It doesn’t require complex redstone. It blends nicely into natural-looking builds.
It’s a good way to add some life to your surroundings while still getting some target practice in. It’s also very forgiving. If you miss, the target just keeps going, and you get another chance.
Advanced Concepts: Combining Mechanisms
Once you’ve mastered the basic piston or minecart systems, you can start combining them. This is where you can create truly unique and challenging archery ranges.
What You’ll Need:
- All the materials from previous sections.
- More redstone components (comparators, repeaters, observers, pistons, etc.).
- Creative thinking!
Ideas for Combining Mechanisms:
Minecart that Stops to Reveal Target: Imagine a minecart that travels along a track. At certain points, it stops. When it stops, a piston extends from the side, pushing out a target block for you to shoot at.
Once you shoot (or after a set time), the piston retracts, and the minecart continues on its way.
This involves timing the minecart’s stop with the piston’s extension. Detector rails can stop the minecart. Observers or timers can trigger the piston.
It’s a layered challenge.
Piston Target that Swaps Positions: You could have two target blocks. One is in position to be shot at. The other is retracted.
When you hit the first target, an observer triggers a mechanism that swaps them. The hit target moves back, and the new one slides forward. This provides a rapid-fire experience.
This requires careful redstone wiring to ensure smooth swapping. You’ll need to power one piston to retract and another to extend at the same time. Or, use a series of pistons.
Water Target Activated by Redstone: You can use dispensers to place signs or banners into a water stream. A redstone pulse can activate the dispenser. You can even have a pattern of dispensers.
They place targets at random intervals. Or in a specific sequence.
This makes it harder to predict where the next target will appear. You have to be ready for anything. It adds an element of surprise.
I’ve seen players build elaborate shooting galleries where a series of pistons push out different targets one after another. The player has to shoot each one in order. If they miss a target, the sequence might reset or a penalty might be applied.
This turns archery into a timed puzzle.
Another cool thing is to use slime blocks and honey blocks. A piston can push a slime block. This slime block can then push multiple target blocks attached to it.
This allows for a wider spread of targets to appear at once. Or, for a single target to push others out of the way.
Advanced Combo: The “Shooting Gallery”
Core Idea: Multiple targets appear in sequence.
Mechanisms: Pistons, Minecarts, Dispensers.
Trigger: Redstone timers, player hits, levers.
Challenge: Speed, accuracy, prediction.
The true limit is your imagination. Think about what kind of challenge you want to create. Do you want to test reaction time?
Or long-range accuracy? Or the ability to hit small, fast-moving targets? Combining these different mechanics lets you build exactly what you envision.
It’s about building a fun experience.
Real-World Context: Designing Your Archery Range
Where you build your moving target matters. Consider the environment. Is it a dense forest where targets pop out from behind trees?
Or a wide-open plain where they move across a long distance? The setting can inspire the design.
Habits and Behavior: Think about how people will use it. Will it be a quick practice session? Or a dedicated mini-game?
If it’s for friends, you’ll want it to be easy to understand. If it’s for solo practice, you can make it as complex as you like.
I always try to make my archery ranges look natural. If I’m building in a forest, I’ll use wood and stone. I’ll try to hide the redstone as much as possible.
If it’s in a desert castle, I’ll use sandstone and terracotta. This makes the experience more immersive.
Materials and Aesthetics: The blocks you choose for your target and surrounding structures play a big role. Wool targets are easy to see. Concrete offers a cleaner look.
Banners can be customized. Consider how the movement looks against the background. A dark target against a dark wall won’t be as visible as one with good contrast.
User Experience: How easy is it to start the target? Is there a clear button or lever? Is it obvious where to aim?
Are the targets moving at a reasonable speed? These small details make a big difference. A frustrating interface will make people stop playing.
Even the best redstone contraption won’t be fun if it’s hard to use.
I learned this the hard way. My first moving target had a lever hidden behind a bush. Players would spend more time looking for the lever than shooting.
Now, I always try to place controls in obvious, accessible spots. Sometimes, a simple button is much better than a complex switch.
Think about feedback too. When someone hits a target, what happens? A simple sound, like a bell or a piston extending, confirms the hit.
If they miss, does the target just keep moving? Or is there a penalty? Clear feedback makes the game more engaging.
Designing Your Archery Area
Environment: Forest, desert, plains?
User Flow: Easy start, clear aiming lines.
Aesthetics: Block choices, hidden redstone.
Feedback: Hit confirmation, scoring, sound cues.
Ultimately, the best moving target design is one that you and your friends enjoy using. It should be challenging but fair. It should look good in your world.
And it should provide hours of fun practice. Experiment with different ideas. See what works best for your playstyle.
What This Means for You: When is it Just Right?
A moving archery target is great for many situations. It’s perfect for competitive players who want to improve their aim. It’s also fantastic for players who just want to add some fun mini-games to their world.
If you have a server with friends, it’s a guaranteed hit.
When it’s Normal:
- You’re practicing for a big fight and need to hone your long-range skills.
- You want to create a tournament for your friends.
- You’re just looking for a new way to interact with your world.
When to Worry (Slightly):
- Your redstone is causing lag in your world. If this happens, simplify your design. Try fewer moving parts or less complex circuits.
- The targets are moving so fast you can’t possibly hit them. This isn’t practicing; it’s frustration. Adjust the speed.
- Your friends aren’t interested because it’s too complicated to use. Make sure there’s a simple way to start and play.
Simple Checks:
Before you show off your creation, do a quick check. Flick the switch. Does it start smoothly?
Shoot a few arrows. Does it register hits (if designed to)? Are the targets visible and predictable enough to aim at?
I always ask myself: “Would I spend my own time playing this?” If the answer is no, I go back to the drawing board. It’s about creating something genuinely fun. The moving target is just the tool to achieve that fun.
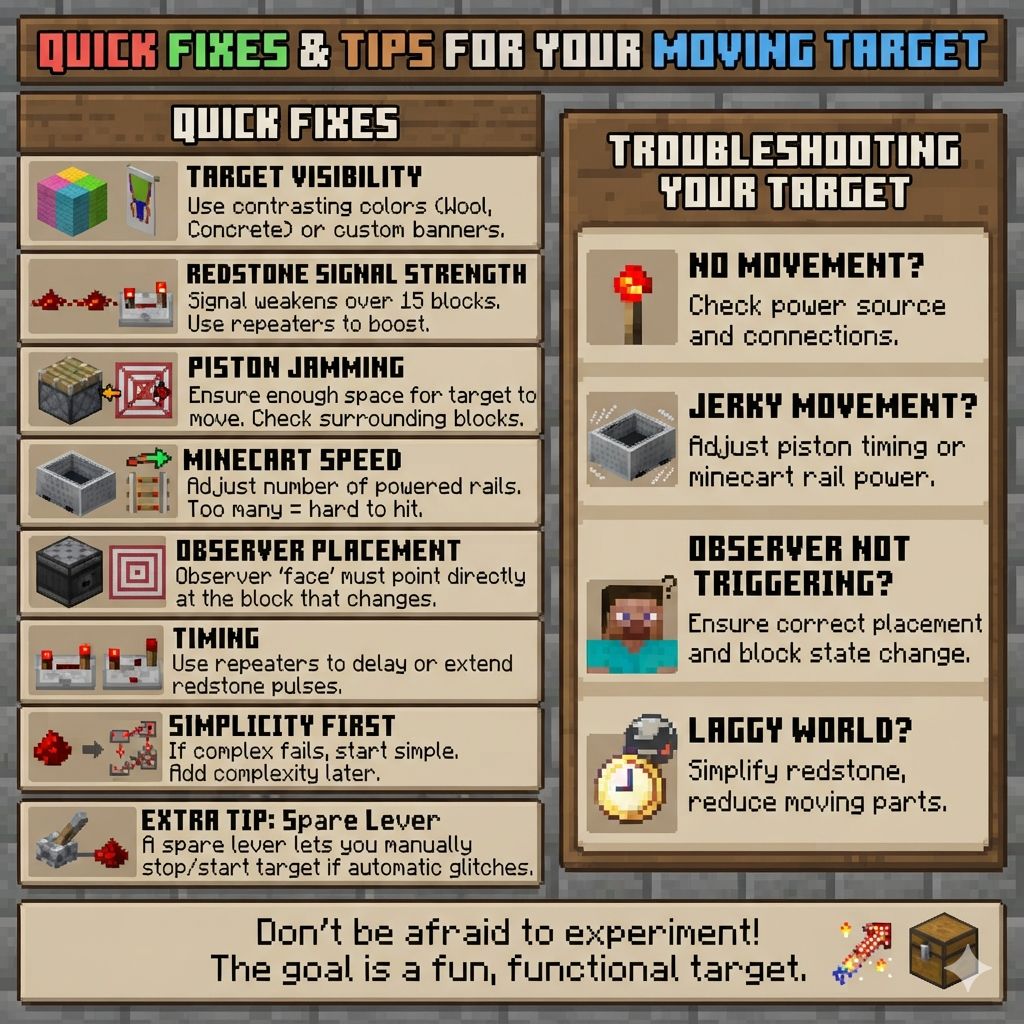
Quick Fixes & Tips for Your Moving Target
Sometimes, things don’t work perfectly the first time. Here are a few quick tips to get your moving target working smoothly:
- Target Visibility: Use contrasting colors. Bright wool or concrete often works best. Banners can be customized to look like targets.
- Redstone Signal Strength: If your redstone line is too long, the signal might weaken. Use repeaters to boost the signal every 15 blocks.
- Piston Jamming: Ensure there’s enough space for the target block to move. Sometimes, surrounding blocks can interfere.
- Minecart Speed: Adjust the number of powered rails. More powered rails mean faster movement. Too many can make it hard to hit.
- Observer Placement: Make sure the observer’s “face” is directly pointing at the block that changes when hit.
- Timing: Redstone repeaters are your best friend for timing. Use them to delay or extend redstone pulses.
- Simplicity First: If a complex design isn’t working, try a simpler one. You can always add complexity later.
I find that having a spare lever connected to the main power source is always a good idea. This lets you manually stop or start the target if the automatic system glitches. It saves a lot of debugging time.
Troubleshooting Your Target
No Movement? Check power source and redstone connections.
Jerky Movement? Adjust piston timing or minecart rail power.
Observer Not Triggering? Ensure correct placement and block state change.
Laggy World? Simplify redstone, reduce moving parts.
Don’t be afraid to experiment. Minecraft is a sandbox. The most creative solutions often come from trying something unexpected.
If one method doesn’t work, try another. The goal is a fun, functional moving target.
Frequent Questions About Moving Archery Targets
Can I make a moving target that shoots back?
Yes, you absolutely can! You can combine moving target systems with dispensers. These dispensers can be triggered by redstone signals.
This signal can come from a timer, a detector rail, or even from an observer detecting a player near the target. It makes for a very challenging archery experience.
What is the easiest way to build a moving target?
The simplest moving target involves a single sticky piston and a target block. You can manually push the block back and forth with a lever. For a more automated but still simple version, use a basic redstone clock circuit connected to the piston.
How do I make the target move faster or slower?
For piston-based targets, you can adjust the redstone clock. Using more or fewer repeaters, or changing their delay settings, affects the speed. For minecart targets, you add or remove powered rails along the track.
More powered rails mean a faster minecart.
Can I use mobs as moving targets?
While you can certainly have mobs wandering around, creating them as reliable “targets” for archery is difficult. Their movement is unpredictable. It’s much easier to build a mechanical target that moves in a controlled path.
You can, however, add mobs to your archery range as obstacles or additional challenges.
What blocks are best for the actual target?
Wool blocks are very visible due to their bright colors. Concrete blocks also offer a clean look and come in many colors. For minecart targets, signs and banners are common because they can be placed on a block that the minecart moves.
You can even customize banners.
How do I detect if I hit the target?
For piston-based targets, an observer block placed to watch the target block will detect hits. When an arrow hits, the block state changes, triggering the observer. For minecart or water targets, detecting hits is harder without complex setups.
You might need to visually confirm hits or use specialized redstone.
Conclusion: Your Archery Range Awaits
Building a moving archery target in Minecraft is a rewarding project. It takes your archery practice from mundane to thrilling. Whether you choose a simple piston slider, a dynamic minecart system, or a flowing water target, the possibilities are vast.
Remember to keep your design clear, your redstone functional, and your players engaged. Happy building, and may your arrows always find their mark!