Target Archery Explained: Beginner-Friendly Guide
So, you’ve seen archers hitting bullseyes on TV or at a local fair and thought, “Could I do that?” Maybe you’re looking for a new hobby that’s a bit different. Perhaps you want to build focus and calm. Whatever sparked your interest, target archery can be a wonderfully rewarding and exciting sport. For more on this, see our guide on How To Build A Wooden Archery Target Stand (Easy Diy).
It takes practice, patience, and a good bit of learning. But don’t worry, it’s totally achievable, even if you’ve never held a bow before.
This guide is here to walk you through everything. We’ll cover what target archery really is. We’ll look at the gear you might need.
We’ll talk about how to shoot safely and effectively. And we’ll point you toward where you can start your own archery journey. Let’s get started! If you’re wondering exactly which target face to use at which distance as you progress, see our archery target size vs. distance guide. If you’re also considering bowhunting, see how hunting and competition bows differ in setup and specs.
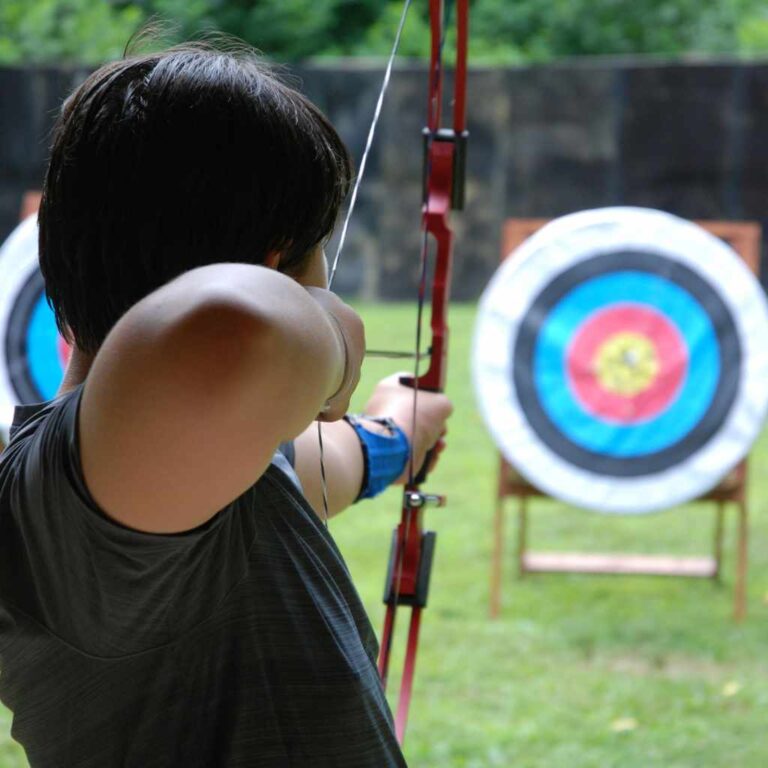
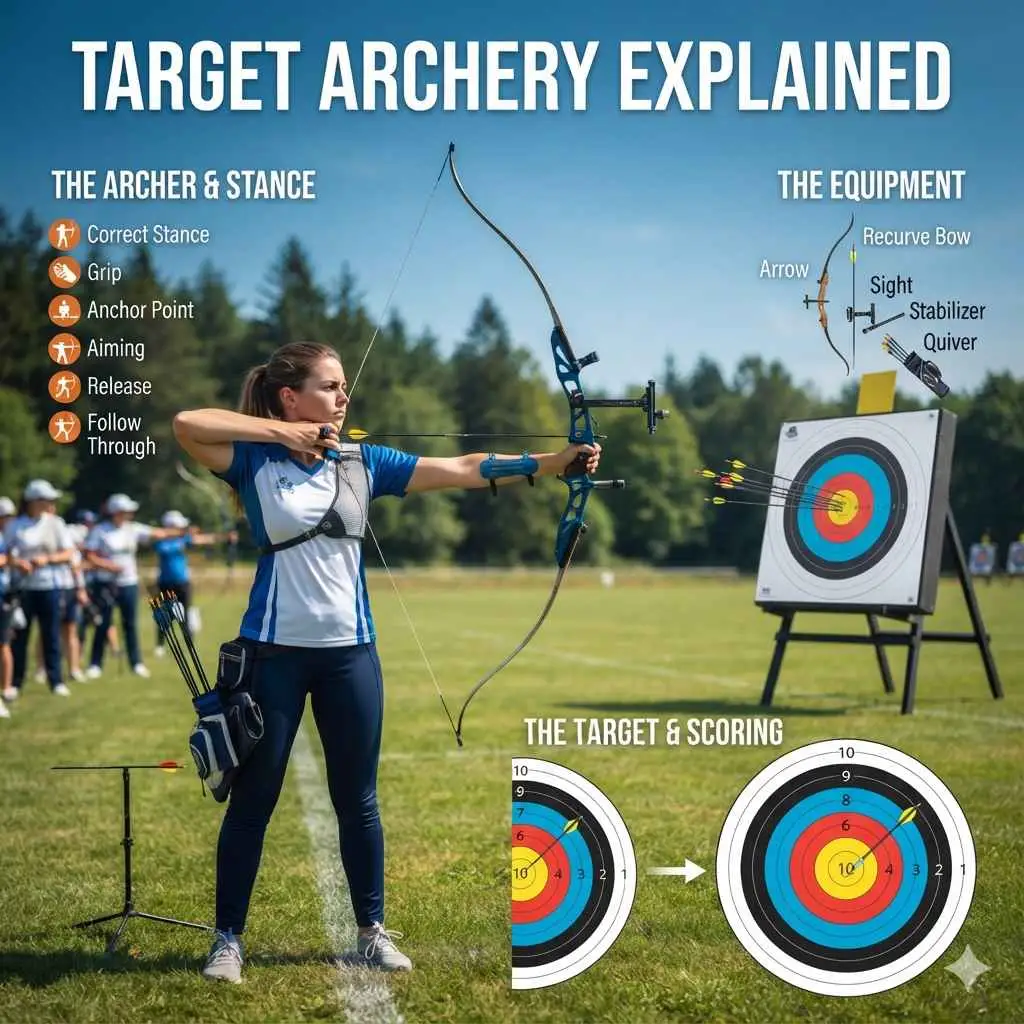
Target archery involves shooting arrows at a stationary target from a set distance. It’s a sport focused on precision and consistency, aiming to hit the center of the target. It requires skill, practice, and proper technique to achieve accuracy.
What Exactly Is Target Archery?
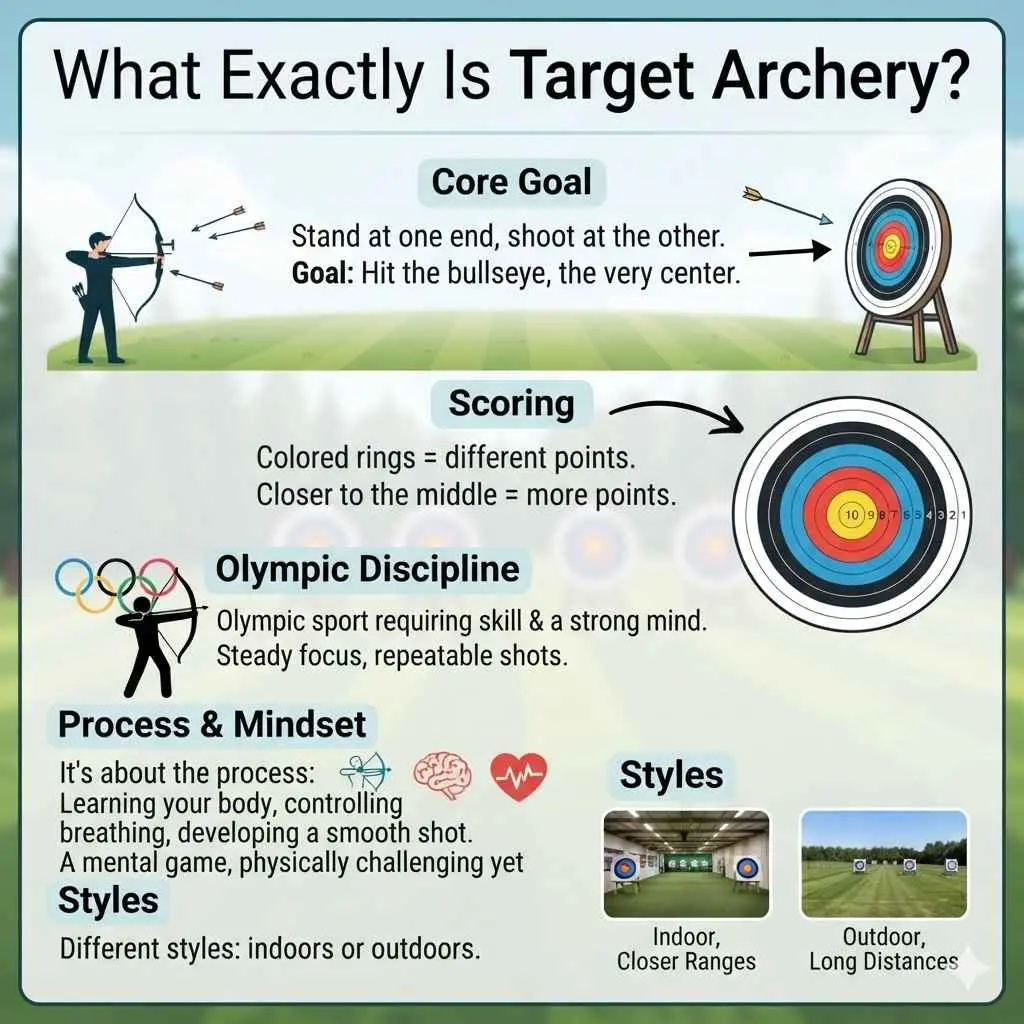
At its heart, target archery is pretty simple. You stand at one end. A target sits at the other.
Your goal is to shoot arrows from your bow and hit the target. You want to hit the bullseye, which is the very center. The closer you get to the middle, the more points you score.
It’s an Olympic sport for a reason. It demands a lot of skill. It also requires a strong mind.
You need to be steady. You need to focus hard. Each shot needs to be almost exactly like the last one.
This is what makes it challenging and fun. It’s a constant effort to improve your own shooting.
There are different styles within target archery. Some are shot outdoors over long distances. Others are shot indoors at closer ranges.
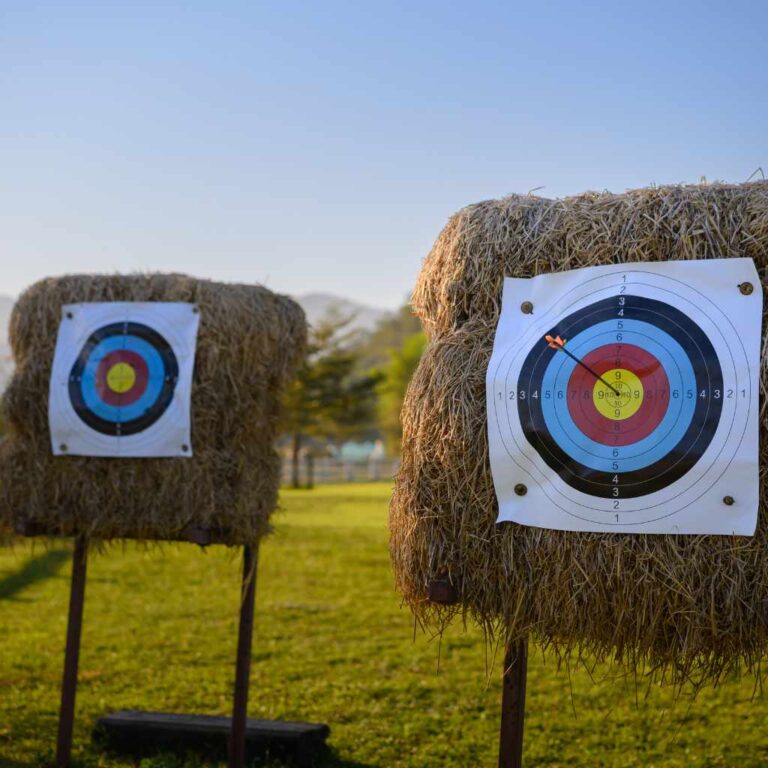
The targets themselves can also vary. They often have colored rings. Each ring is worth a different number of points.
Usually, gold is worth the most points. White is worth the least.
This sport is not just about hitting the target. It’s also about the process. It’s about learning your body.
It’s about controlling your breathing. It’s about developing a smooth, repeatable shot sequence. It’s a mental game as much as a physical one.
Many people find it very calming.
My First Bow: A Story of Clumsy Enthusiasm
I remember my very first time trying archery. It was at a summer camp when I was maybe ten. The instructor handed me this giant wooden bow.
It felt heavy and a bit scary. He showed me how to nock an arrow. It was a thick wooden thing with fletchings, those little feather-like bits.
I tried to pull the string back. My arm muscles screamed. I couldn’t pull it far at all.
The arrow wobbled and then fell off the rest. It landed with a soft thud a few feet away. I felt a flush of embarrassment creep up my neck.
Other kids were already sending arrows flying, not always hitting the target, but at least getting them airborne.
The instructor, a patient man with kind eyes, came over. He adjusted my stance. He showed me how to grip the bow without squeezing it.
He explained how to draw the string smoothly. My second try was better. The arrow went forward, mostly straight.
It hit the straw target, but low and to the left. It wasn’t a bullseye, not even close. But it was an arrow in the target.
That small success felt huge. It was the start of a long journey of learning and improvement.
Target Archery Equipment: The Basics
Bow: This is the main tool. For beginners, a recurve bow is most common. It’s simple and effective.
You can also get compound bows, which use pulleys to make drawing easier.
Arrows: They need to match your bow. They come in different materials like aluminum or carbon. The length and stiffness matter.
Quiver: This holds your arrows. It can be worn on your hip or back.
Armguard: Protects your forearm from the bowstring’s snap. Very important!
Finger Tab or Release Aid: Helps you draw the string without hurting your fingers. Tabs cover your fingers. Release aids are mechanical devices.
Types of Target Archery
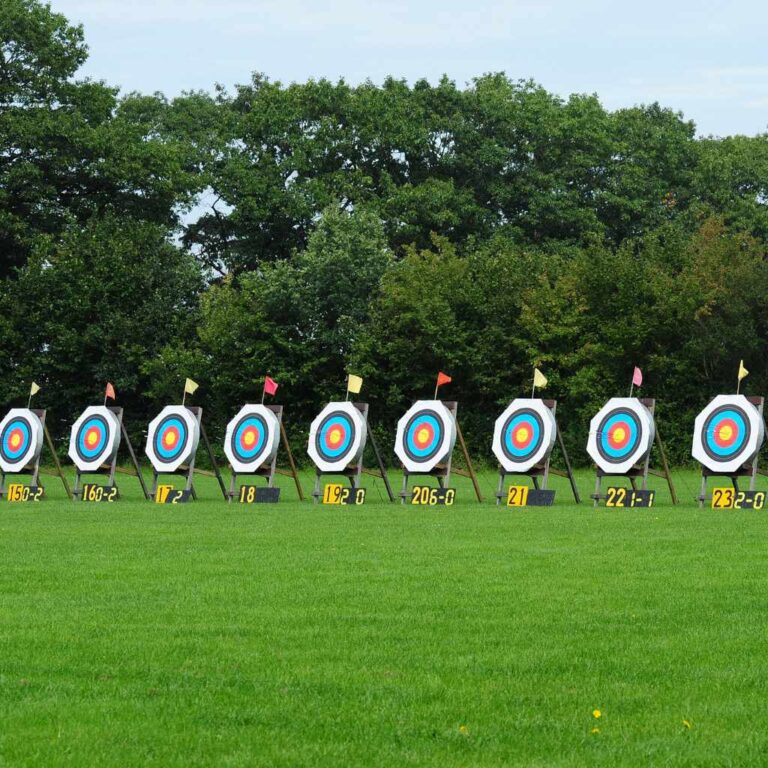
When people talk about target archery, they often mean Olympic Archery. This is the one you see in the Games. Archers shoot recurve bows at targets set at fixed distances outdoors.
There’s also Indoor Archery. This is usually done in a gym or a dedicated range. The distances are shorter.
The targets might be smaller. It’s a great way to practice when the weather is bad.
Another popular form is Field Archery. This is shot outdoors in a natural setting. The terrain can be hilly.
Targets are set at various distances. Some are uphill, some are downhill. It tests your ability to judge distance and angles.
It’s more like hunting, but without the hunt.
Then there’s 3D Archery. This involves shooting at life-sized animal targets made of foam. These targets are placed at unknown distances in a woodland course.
It’s very practical for hunters to practice. It also adds a fun challenge for recreational archers.
Understanding Bow Types: Recurve vs. Compound
For newcomers, the recurve bow is usually the best place to start. It’s what archers use in the Olympics. It’s called “recurve” because the ends of the limbs curve away from the archer.
These bows are elegant and relatively simple. They don’t have fancy parts. You pull the string back with your own strength.
This builds up your muscles and teaches you good form. You get a real feel for the draw weight, which is how hard it is to pull the string.
Compound bows are very different. They use a system of cables and pulleys. This makes it easier to hold the bow at full draw.
Once you pull the string back partway, the pulleys do most of the work. This is called “let-off.”
Compound bows are often more accurate for some people. They can shoot faster arrows. But they are also more complex.
They have sights, stabilizers, and release aids. They require more maintenance. For a beginner, a recurve bow helps you learn the fundamental skills of archery.
The Anatomy of a Target Arrow
Shaft: The main body of the arrow. It’s typically made of carbon or aluminum. The stiffness (called spine) is important.
Point (or Tip): The part that hits the target. For target archery, these are usually simple field points.
Fletching: The small vanes at the back of the arrow. They help stabilize the arrow in flight. Usually made of plastic or feathers.
Nock: The small piece at the very end of the shaft. It clips onto the bowstring to hold the arrow in place.
the point screws into the shaft.
The Importance of Proper Form
Good form is the absolute key to consistent archery. It’s not just about muscle. It’s about balance, control, and repetition.
Think of it like dancing. Every step needs to be precise. Every movement should flow into the next one.
There are several key parts to good archery form. Let’s break them down. You’ll hear terms like “stance,” “nocking,” “drawing,” “anchor,” and “release.” Each one is important.
Stance: How you stand is crucial for balance. Most archers stand with their feet about shoulder-width apart. Some face the target directly.
Others stand at a slight angle, like they’re on a clock face. This open stance helps you rotate your body naturally.
Nocking the Arrow: This is putting the arrow onto the bowstring. You place the nock onto the string at a specific point, often called the “nocking point.” The arrow then rests on an arrow rest on the bow.
Grip: How you hold the bow matters a lot. You don’t want to grip it tightly. A relaxed grip is best.
Imagine you are holding a baby bird. You want to hold it gently so it doesn’t fly away, but also so you don’t crush it. This prevents you from torqueing or twisting the bow.
Drawing the Bow: This is pulling the bowstring back. You use the muscles in your back and shoulders, not just your arms. This is a common mistake for beginners.
They try to use their biceps. Good form uses your whole body. You draw until the string reaches your “anchor point.”
Anchor Point: This is where you bring the drawing hand to your face. It’s a consistent spot, like touching your chin or the corner of your mouth. Having a solid anchor point helps ensure that your draw length is the same every time.
This is vital for accuracy.
Aiming: Many beginner recurve archers don’t use sights. They learn to “instinctively” aim. They focus on the target.
They use their bow hand to point at the target. More advanced archers might add a sight later. This is a small pin that helps you aim.
Release: This is letting the string go. It needs to be smooth. You don’t just “pluck” the string.
You relax your fingers. The bowstring moves forward. This happens very quickly.
A clean release is key to preventing the arrow from wobbling.
Follow-Through: After you release the arrow, your body should remain in the shooting position for a moment. This ensures you don’t jerk or move at the last second. It’s like a golfer following through on their swing.
This completes the shot cycle.
Safety First, Always!
Archery is a safe sport when done correctly. But it’s crucial to follow safety rules. These aren’t just suggestions; they are vital for everyone’s well-being.
Never Dry Fire: This is the most important rule. Never draw and release a bowstring without an arrow nocked. The energy stored in the bow has nowhere to go.
This can damage the bow and even cause injury to the archer. It’s a very strong shock.
Know Your Target and Beyond: Always be aware of what is behind your target. Make sure there’s a safe backstop. This could be a natural hill or a specially designed safety net or buttress.
Never shoot if there are people or animals behind the target.
Always Use the Right Equipment: Make sure your arrows are the right spine for your bow. Make sure your bow is the correct draw weight for your strength. Old or damaged equipment can break.
This can be very dangerous.
Never Point a Bow at Anyone: Even if it’s not loaded with an arrow, a bow should never be pointed at another person. Treat every bow as if it were loaded and ready to fire.
Wear an Armguard: The bowstring can snap forward with great force when released. An armguard protects your forearm from painful string slaps. It’s a simple piece of equipment that prevents a lot of discomfort.
Use a Finger Tab or Release Aid: Protect your drawing fingers. Repeatedly drawing the string can cause blisters or cuts. A finger tab or a release aid makes the drawing process smoother and safer.
Listen to Your Instructors: If you’re taking lessons, pay close attention to the safety instructions. They are there to keep you safe and help you learn properly.
Beginner’s Archery Checklist
- Bow: A beginner-friendly recurve bow.
- Arrows: A set of arrows matched to your bow.
- Armguard: Essential for protection.
- Finger Tab or Glove: To protect your drawing fingers.
- Quiver: To hold your arrows conveniently.
- Target: A safe place to shoot.
- Instruction: Find a local club or coach.
Finding a Place to Shoot and Learn
You might be eager to get your hands on a bow. But the best way to start is often with guidance. Trying to learn all the techniques on your own can lead to bad habits.
These are hard to break later.
Look for a local archery club or shop. Many offer beginner classes or “have-a-go” sessions. These are perfect for trying archery without a big commitment.
You get to use their equipment. You get instruction from experienced archers.
A good coach will teach you the fundamentals of stance, grip, draw, and release. They will help you understand the safety rules. They can also help you choose your first bow.
Getting the right draw weight is important. You don’t want a bow that’s too heavy for you. That will just lead to frustration.
Archery ranges are also great places. They have targets set up. Some are indoor, some outdoor.
You can often rent equipment there. It’s a good way to practice what you learn in classes.
Many larger sporting goods stores that sell archery equipment also have staff who are knowledgeable. They can offer advice. They can help you get set up with basic gear.
But remember, hands-on lessons are invaluable.
I went to a local archery shop for my first real bow. The owner spent almost an hour with me. He had me try a few different draw weights.
He explained why certain bows were better for beginners. He didn’t try to sell me the most expensive thing. He sold me a solid, reliable starter bow.
It made a huge difference in my early progress. The confidence of having the right gear was immense.
Quick Scan: Target Archery vs. Field Archery
| Feature | Target Archery | Field Archery |
|---|---|---|
| Environment | Flat, manicured field or indoor range | Natural terrain, woods, hills |
| Distances | Fixed, known distances | Varied, often unknown distances |
| Bow Types | Primarily recurve (Olympic style) | Recurve, compound, traditional bows |
| Scoring | Centered on bullseye rings | Scoring zones on various targets |
| Focus | Precision, consistency, mental focus | Distance judgment, adaptability, terrain navigation |
My Own Struggle with Consistency
One of the biggest hurdles I faced in my archery journey was consistency. I could have a great shooting session. I’d hit a string of good shots.
Then, the next time I went out, it was like I had never shot before. My arrows would go all over the place.
I’d get frustrated. I’d try to force the shots. I’d grip the bow tighter.
I’d pull the string back too fast. I was changing things without realizing it. I thought maybe my bow was broken or my arrows were bad.
But the problem was me. It was my technique.
My coach at the time told me something simple but profound: “Archery is a game of tiny adjustments, but you have to make them one at a time. If you change too many things, you don’t know what worked or what didn’t.”
He made me focus on just one thing per session. One day it was my stance. The next, it was my anchor point.
Then it was my release. It felt slow at first. But gradually, my shots started to group together better.
I learned to trust my process. I learned that consistency comes from repetition of good habits, not from trying to hit a perfect shot every single time.
The Mental Game of Archery
Archery is often called a mental sport. This is very true. Your mind can be your biggest ally or your worst enemy.
You can have perfect form, but if your mind is racing or you’re stressed, your shots will suffer.
Focus: You need to focus on the shot at hand. Not the last shot that went wild. Not the next shot.
Just this one. Many archers develop a pre-shot routine. This routine helps clear their mind and get them into the zone.
It might involve a few deep breaths, a specific way of nocking the arrow, and drawing smoothly.
Patience: Archery takes time. You won’t become an expert overnight. You need to be patient with yourself.
Celebrate small victories. Learn from your mistakes. Don’t get discouraged by bad shots.
Everyone has them.
Calmness: Stress and anxiety make your muscles tense. This makes your shots unsteady. Archery can actually be a great stress reliever.
The focus required can help you forget about other worries for a while. The rhythmic nature of shooting can be very calming.
Visualization: Some archers find it helpful to visualize the arrow flying perfectly to the target. They imagine the feeling of a smooth draw and release. This mental rehearsal can build confidence.
It’s like meditation in motion. You are fully present in the moment. You are aware of your body.
You are aware of the bow. You are aware of the target. This state of flow is what many people love about archery.
What to Expect at Your First Archery Lesson
Introduction: A brief overview of archery and safety rules.
Equipment: You’ll likely use a club or range’s beginner equipment.
Basic Form: Instruction on stance, grip, drawing, and release.
First Shots: You’ll shoot at a close-range target.
Feedback: An instructor will offer tips and corrections.
Goal: To have a safe, fun introduction and understand the fundamentals.
When to Worry About Your Shooting
It’s normal for your shots to vary. Especially when you’re starting out. But there are a few signs that might mean you need to look closer at your technique or equipment.
Wildly Inconsistent Grouping: If your arrows are landing all over the target, not just clustered together, it could be a sign of an inconsistent draw or release. Are you anchoring in the same spot every time? Is your release smooth?
String Slap: If you’re getting hit by the bowstring on your arm frequently, your anchor point might be too low, or you might not be using an armguard. This is painful and can make you flinch.
Physical Pain: Archery should not cause sharp pain. If you feel pain in your shoulder, back, or drawing arm, it’s a sign that your draw weight might be too high for you, or your form is putting strain on your body. Stop shooting and consult an instructor or doctor.
Difficulty Drawing the Bow: If you struggle immensely to pull the string back, the draw weight is likely too high. This leads to poor form and potential injury. You might need a lighter bow.
Arrows Flying Wildly Off-Course: If your arrows are consistently going way too high, too low, or far to one side, it could be your aiming. Or it could be related to your form during the shot. Are you anticipating the shot?
Are you tensing up?
If you notice these issues, don’t just push through. Take a break. Talk to an experienced archer or instructor.
They can spot problems you might miss. They can offer solutions.
Quick Tips for New Archers
Here are some simple things that can help you as you start your archery journey.
Start Light: Use a bow with a low draw weight. It’s better to learn good form with a lighter bow than to struggle with a heavy one.
Find a Good Coach: Even a few lessons can make a huge difference. A coach can correct bad habits before they stick.
Practice Regularly: Consistency is key. Even short, frequent practice sessions are more effective than one long session every few weeks.
Focus on One Thing at a Time: Don’t try to fix everything at once. Work on improving one aspect of your form each practice session.
Stay Relaxed: Tension is the enemy of good archery. Try to keep your drawing arm, shoulder, and grip relaxed.
Listen to Your Body: If something hurts, stop. Rest. Figure out why.
Be Patient: Archery is a journey. Enjoy the process of learning and improving.
Frequently Asked Questions About Target Archery
Is target archery hard to learn?
Target archery can be challenging, but it’s very learnable. The basics of shooting an arrow are straightforward. Mastering accuracy and consistency takes practice and patience.
Many beginners find they can enjoy shooting within their first few sessions, especially with good instruction.
What is the best bow for a beginner?
For most beginners, a recurve bow is recommended. They are simpler, lighter, and help you develop fundamental archery skills. Look for a bow with a low draw weight, typically between 20-30 pounds, depending on your strength.
How much does archery equipment cost?
The cost can vary widely. A basic beginner recurve bow setup (bow, arrows, armguard, finger tab) might cost between $200 and $400. More advanced equipment, especially for compound bows, can easily cost $1000 or more.
Renting equipment at a club or range is a great way to start before buying.
How far away are targets in target archery?
Target distances vary by the type of archery and skill level. In Olympic recurve archery, targets are set at distances ranging from 30 meters to 70 meters outdoors. Indoor archery targets are typically at 18 or 25 meters. See official target face sizes by discipline (40cm, 80cm, 122cm) for the full breakdown.
Field archery has a wider range of distances.
Do I need to be strong to do archery?
You don’t need to be exceptionally strong. Archery uses a specific set of muscles, and drawing a bow is more about technique and using your back muscles than brute strength. Beginners start with light draw weight bows and build strength gradually through practice.
Is archery a dangerous sport?
Archery is a safe sport when safety rules are followed. The most critical rules are never dry-firing the bow and always being aware of your surroundings and what is behind the target. Proper instruction and supervision significantly reduce risks.
Conclusion
Target archery is a sport that offers a unique blend of focus, skill, and calm. It’s a rewarding activity that can be enjoyed by people of all ages and fitness levels. From understanding the basic equipment to mastering the mental game, the journey is as important as the destination.
Remember to start with good instruction and prioritize safety. Be patient with yourself, celebrate your progress, and most importantly, have fun. The world of archery is waiting for you to explore its rewarding challenges and quiet focus.