How to Make an Archery Bow Stand: Ultimate DIY Guide
Making your own archery bow stand is a rewarding project for any archer, offering a convenient and secure way to store your bow during practice or at the range. A sturdy, custom-made bow stand ensures your valuable equipment stays off the ground and prevents accidental damage. This guide will walk you through the process of creating a durable and functional DIY bow stand, perfect for keeping your gear organized and accessible.
This guide is part of our Archery basics: beginner guide to bows and shooting series.
Simply put, building a DIY archery bow stand is a practical and cost-effective way to create a stable holder for your bow, preventing damage and keeping it accessible during shooting sessions. This guide provides step-by-step instructions and material lists for a robust stand.
Recommended gearAs an Amazon Associate we earn from qualifying purchases. Prices and availability are accurate as of the date shown and are subject to change.


Key Takeaways
- DIY archery bow stand projects offer a cost-effective and customizable solution for bow storage.
- Selecting the right materials, like sturdy wood or PVC, is crucial for durability and stability.
- Proper design ensures the stand securely holds the bow’s limbs and riser without causing stress.
- Assembly requires basic tools and attention to detail for a safe and functional final product.
- A well-made bow stand protects your investment and enhances your archery experience.
What is an Archery Bow Stand and Why Build One?
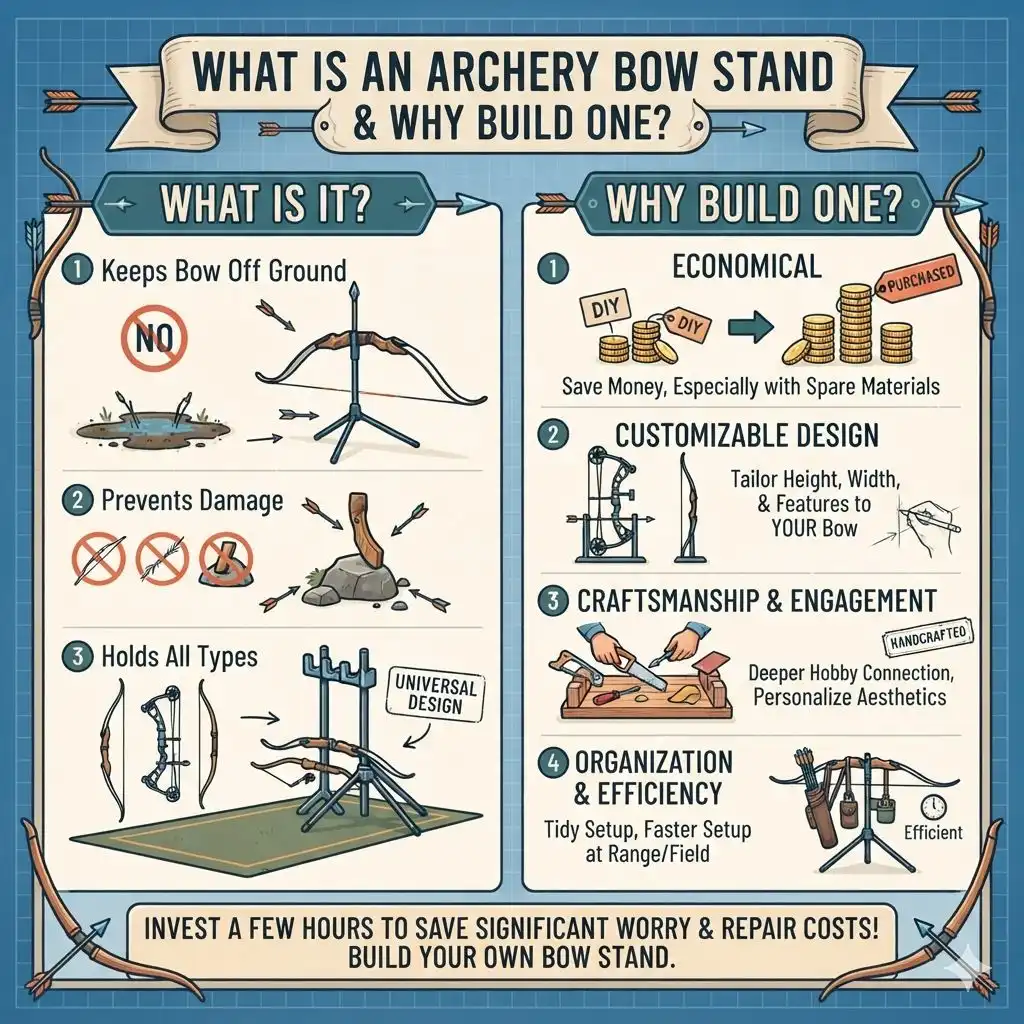
An archery bow stand is a portable or stationary structure designed to hold a recurve, compound, or traditional bow upright and stable. Its primary function is to keep the bow off the ground, away from dirt, moisture, and potential hazards that could cause damage. This prevents scratches on the limbs, protects the string and cables, and keeps the riser from resting on uneven surfaces.
Building your own bow stand offers several advantages over purchasing one. Firstly, it’s significantly more economical, especially if you have spare materials. Secondly, you can customize the design to perfectly suit your specific bow model, whether it’s a heavy compound bow or a lightweight recurve.
You can also tailor its height, width, and aesthetic to your preferences. This project is an excellent way for archers to engage with their hobby on a deeper level, understanding the structure that supports their gear.
A well-constructed DIY bow stand also adds a personal touch to your archery setup. It’s a testament to your craftsmanship and dedication to the sport. Beyond practicality, it contributes to a more organized and efficient shooting experience, whether you’re at a formal range, in your backyard, or out in the field.
Investing a few hours into building one can save you significant worry and potential repair costs down the line.
Choosing Your Materials for a Sturdy Bow Stand
The foundation of any good DIY project lies in the quality of its materials. For an archery bow stand, durability, stability, and resistance to the elements are key considerations. Wood is a popular choice for its natural strength, aesthetic appeal, and ease of working with basic tools.
Pine, cedar, or even scrap lumber can be excellent options, provided they are free from significant knots or rot that could compromise structural integrity.
Alternatively, PVC pipes and fittings offer a lightweight, weather-resistant, and cost-effective solution. PVC is easy to cut, assemble with glue or screws, and can be painted to match your preferences. For heavier compound bows, ensure your PVC joints are well-secured and consider using thicker-walled pipes for added rigidity.
Metal components, like threaded rods or brackets, can also be incorporated for extra reinforcement, particularly at stress points.
Consider the environment where you’ll primarily use the stand. If it’s for outdoor use, opt for weather-resistant materials or apply a protective finish like varnish or paint to prevent rot and corrosion. For indoor use, aesthetics might play a larger role, and you could choose finer woods or custom paint jobs.
Regardless of the material, ensure it’s strong enough to support the weight of your bow without bending or tipping.
- Wood (Pine, Cedar, Plywood): Natural, aesthetically pleasing, easy to work with. Requires sealing for outdoor use.
- PVC Pipes and Fittings: Lightweight, weather-resistant, affordable, easy to assemble. Best for lighter bows or reinforced designs.
- Metal Components (Screws, Bolts, Brackets): Add strength and stability, especially at joints and stress points.
- Fasteners (Screws, Bolts, PVC Cement): Ensure secure connections between components.
- Finishes (Paint, Varnish, Sealant): Protects against weather and enhances appearance.
Design Considerations for Your DIY Archery Bow Stand
Before you cut any wood or PVC, a clear design plan is essential. A functional bow stand needs to safely cradle your bow’s limbs and riser without putting undue stress on any component. The most common designs feature a base for stability and upright supports to hold the bow.
Consider the type of bow you primarily use: compound bows are heavier and wider, requiring a more robust and wider base, while recurve and longbows are lighter and often have a distinct riser shape.
A simple yet effective design is a tripod or a four-legged base for maximum stability, preventing tipping, especially on uneven ground. The upright supports should be spaced appropriately to accommodate the width of your bow’s limbs and have a notch or cradle to rest the riser. For compound bows, you might need a design that specifically supports the parallel limbs.
Some designs incorporate a hook or peg to hold the bowstring when the bow is unstrung, adding another layer of convenience.
Think about portability. If you plan to move the stand frequently, consider making it collapsible or lightweight. Using dowel rods and corresponding holes can allow for easy disassembly.
For a more permanent fixture, a solid, heavier design might be preferable. Always measure your bow carefully—from limb tip to limb tip and the width of the riser—to ensure your design accommodates it perfectly. A well-thought-out design prevents future headaches and ensures your bow stand is truly functional.
- Measure Your Bow: Determine the overall width and height, and the width of the riser.
- Sketch a Design: Draw out your stand, considering base width, upright height, and spacing.
- Consider Stability: A wider base or a tripod design is generally more stable.
- Riser Support: Ensure the uprights have a shape or notch to securely hold the bow’s riser.
- Limb Clearance: Provide enough space for the bow’s limbs to rest without pressure.
- Portability (Optional): Design for easy assembly/disassembly or a lightweight build.
- Aesthetics: Consider how the stand will look, especially if it will be visible.
How to Build a Simple Wooden Archery Bow Stand
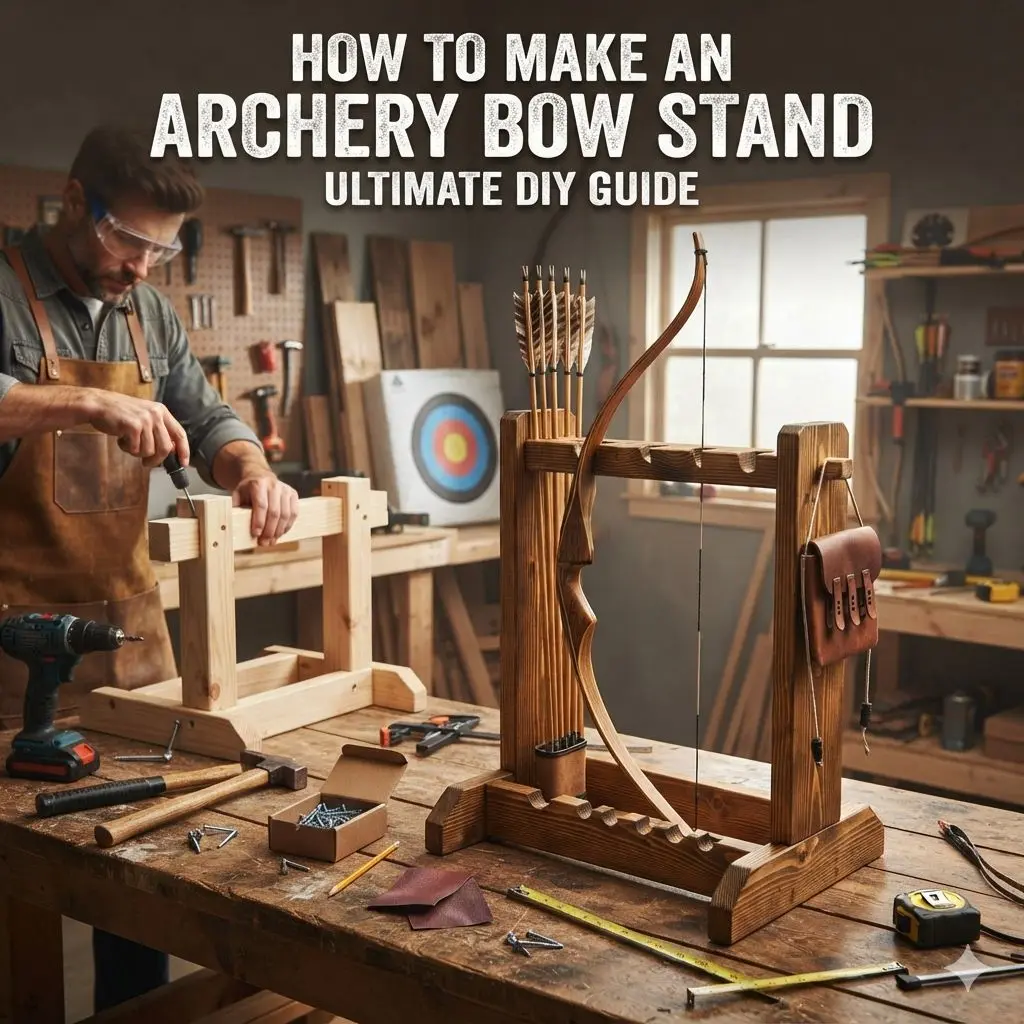
This section outlines how to build a classic wooden bow stand, suitable for most recurve and compound bows. This design focuses on stability and ease of construction, using common lumber sizes.
For this project, you will need basic woodworking tools including a saw (hand saw or miter saw), a drill, a screwdriver, measuring tape, and sandpaper. You’ll also need wood glue and screws. We’ll use 1×3 or 1×4 lumber for the main structure and a piece of dowel rod for the riser support.
Start by cutting your lumber. You’ll need two pieces for the base (around 12-15 inches long each), two pieces for the uprights (around 18-24 inches long each), and two shorter pieces to connect the base legs for added stability (around 6-8 inches long). For the riser support, cut a piece of 1×2 lumber or a sturdy dowel rod to about 6 inches.
Sand all cut edges smooth to prevent splinters.
Step-by-Step Assembly: Wooden Stand
- Construct the Base: Lay the two longer base pieces on a flat surface to form an ‘X’ or a cross. Measure to find the center and drill pilot holes. Secure them together with screws and wood glue for a strong joint.
- Attach Stabilizing Crossbars: Position the two shorter connecting pieces between the legs of your base, about halfway down. Drill pilot holes and secure them with screws and glue to form a sturdy rectangular or square frame for the base.
- Prepare the Uprights: On each upright piece, measure down about 4-6 inches from the top. This is where you’ll attach the riser support. You can either drill a hole for a dowel rod or cut a notch into the wood to cradle the riser. Ensure the notch is wide enough for your bow’s riser.
- Attach Uprights to Base: Position the uprights perpendicular to the base, ensuring they are parallel to each other. They should be positioned towards the center of the base where the two main pieces cross. Drill pilot holes through the base and into the bottom of each upright. Secure with screws and wood glue. For added strength, you can add angled support braces connecting the uprights to the base legs.
- Install Riser Support: If using a dowel rod, drill holes of the same diameter into the front of each upright at your marked positions. Insert the dowel rod and secure it with a dab of glue. If you cut a notch, ensure it is smooth and deep enough.
- Final Sanding and Finishing: Once the glue is dry, give the entire stand a final sanding. Apply a coat of varnish, paint, or sealant to protect the wood. Allow it to dry completely before use.
| Wooden Bow Stand Materials List | Approximate Dimensions | Notes |
|---|---|---|
| 1×3 or 1×4 Lumber | 2 x 12-15 inch (Base) 2 x 18-24 inch (Uprights) 2 x 6-8 inch (Connectors) | Choose straight, knot-free wood. |
| Dowel Rod or 1×2 Lumber | 1 x 6 inch (Riser Support) | Diameter should fit your bow’s riser. |
| Wood Screws | Assorted lengths (e.g., 1.5 inch, 2 inch) | For strong, secure joints. |
| Wood Glue | N/A | High-strength woodworking glue. |
| Sandpaper | Grits 80, 120, 220 | For smoothing edges and surfaces. |
| Wood Finish (Paint, Varnish) | N/A | Protects wood and improves appearance. |
This table provides a clear list of the materials needed for a basic wooden bow stand. Ensure all wood pieces are cut accurately to the specified dimensions for a well-fitting and stable structure.
Creating a PVC Archery Bow Stand: A Lightweight Option
For an incredibly lightweight, weather-resistant, and affordable bow stand, PVC pipe is an excellent choice. This design is perfect for beginners and can be easily modified. The key to a strong PVC stand is using appropriate fittings and ensuring secure glue joints.
You will need PVC pipes (typically 1/2 inch or 3/4 inch diameter), various PVC fittings such as elbows, tees, and end caps, and PVC primer and cement. A PVC cutter or a hacksaw will be necessary for cutting the pipes to length. This material is forgiving and allows for quick assembly.
The fundamental design mirrors the wooden stand: a stable base and upright supports. A common PVC design involves creating a square or rectangular base using straight connectors and elbows, with vertical pipes extending upwards from the corner tees. These uprights can then be fitted with smaller U-shaped or curved pieces to cradle the bow’s riser.
Step-by-Step Assembly: PVC Stand
- Plan Your Design: Sketch a design based on your bow’s dimensions, similar to the wooden stand. Decide on the base size and the height of the uprights. A 12×12 inch base is a good starting point.
- Cut PVC Pipes: Measure and cut your PVC pipes to the lengths required for the base legs, uprights, and any connecting pieces. Use a PVC cutter or a hacksaw for clean cuts.
- Assemble the Base: Start by dry-fitting the base. Connect four equal lengths of pipe using elbows at the corners to form a square. For added stability, you can add connecting pipes across the diagonals or use tee fittings to extend the base outwards.
- Attach Uprights: Insert tee fittings into the corners of your base. Attach vertical pipes (uprights) into the top of these tee fittings. Ensure the uprights are parallel and perpendicular to the base.
- Create Riser Supports: At the top of each upright, you can attach elbow fittings or specialized U-shaped pipe fittings. Some designs use a crossbar between the two uprights with hooks or shaped pieces to hold the riser. A simple method is to use two short pipes coming off the uprights with curved end caps or small bent pieces glued on.
- Glue Components: Once you are satisfied with the dry fit, carefully disassemble the sections, apply PVC primer to the surfaces to be joined, and then apply PVC cement. Reassemble the pieces quickly and hold them firmly for a few seconds until the cement sets. Work in a well-ventilated area.
- Add End Caps: Fit end caps onto any exposed pipe ends, especially on the base legs, to provide a cleaner look and prevent dirt from entering the pipes.
- Painting (Optional): If desired, once the cement is fully cured (usually 24 hours), you can prime and paint your PVC stand using spray paint designed for plastic.
- Base Construction: Use 4 equal pipe lengths and 4 elbow fittings for a square base.
- Upright Attachment: Tee fittings are essential for connecting uprights to the base corners.
- Riser Cradle: Consider U-shaped fittings, bent pipe sections, or a horizontal crossbar for support.
- Stability Enhancements: Add diagonal braces or extend the base width.
- Ventilation: Always work with PVC primer and cement in a well-ventilated space.
- Curing Time: Allow 24 hours for the PVC cement to fully cure before putting weight on the stand.
Warning: Ensure adequate ventilation when using PVC primer and cement. These chemicals have strong fumes. Also, double-check that all glued joints are secure, especially if supporting a heavy compound bow, as poorly bonded joints can fail unexpectedly.
Customizing Your Bow Stand for Specific Needs
The beauty of a DIY archery bow stand is its adaptability. You can easily modify basic designs to cater to unique bow features or personal preferences. For instance, compound bows with parallel limbs often require a stand that supports the limbs from the sides rather than just the riser.
This might involve adding extra arms or a different cradle design.
Consider adding features that enhance usability. A small shelf or tray attached to the base can be useful for holding accessories like releases, tools, or a spotting scope. Some archers prefer a taller stand to keep their bow higher off the ground.
For portable stands, incorporating a simple folding mechanism can be achieved by using specific hinges or by designing the legs to telescope or swivel.
The material finish is another area for customization. Whether you choose to stain and seal wood for a natural look, paint it in camouflage colors, or use vibrant hues on a PVC stand, the finish impacts both aesthetics and protection. For enhanced grip on the riser support, you might consider adding rubber padding or felt tape to prevent slipping and further protect your bow.
| Customization Idea | Description | Best For |
|---|---|---|
| Parallel Limb Support | Adding side arms or a wider cradle to support compound bow limbs. | Compound bows with parallel limbs. |
| Accessory Tray/Shelf | Attaching a small platform to the base for tools, releases, etc. | Archers who carry multiple accessories. |
| Collapsible Design | Using hinges or swiveling joints for easy folding and transport. | Archers who travel to ranges or hunt frequently. |
| Enhanced Grip Padding | Adding rubber, felt, or foam to riser support points. | All bow types; prevents marring and slippage. |
| Adjustable Height | Designing uprights with telescoping sections or multiple hole options. | Archers of different heights or those using various bows. |
This table highlights various ways you can tailor your DIY bow stand to better suit your equipment and personal shooting habits.
Tips for Ensuring Bow Stand Stability and Safety
A wobbly bow stand is not just an inconvenience; it’s a safety hazard. A falling bow can cause significant damage to itself, your equipment, and potentially injure bystanders. Ensuring stability starts with a solid, well-balanced design and continues through proper construction and placement.
For any stand, a wider base generally equates to greater stability. If using a four-legged wooden design, ensure the legs are angled slightly outwards. For PVC, consider extending the base outwards or adding diagonal cross-braces.
The weight distribution is also critical; ensure the stand’s center of gravity is low, especially for taller designs.
When placing your bow on the stand, do so deliberately. Avoid slamming it into place. Ensure the riser is seated correctly in the cradle.
For compound bows, make sure the limbs are not pressing against anything that could cause them to flex unnaturally. If the ground is uneven, use small shims under the base legs to level the stand.
- Wide Base: Always opt for a wider stance for your base than the height of the stand.
- Low Center of Gravity: Keep the main weight of the stand as close to the ground as possible.
- Even Ground: Place the stand on a flat, stable surface whenever possible.
- Check Connections: Regularly inspect all screws, glue joints, or pipe connections for signs of wear or loosening.
- Test with Weight: Before placing your bow, gently push and rock the stand to ensure it doesn’t tip easily.
- Proper Seating: Ensure your bow is fully and securely seated in the riser cradle.
- Avoid Overloading: Do not hang additional weight or equipment on the bow stand unless it was specifically designed for it.
Important: Always consider the weight and balance of your specific bow when designing and building your stand. A heavier compound bow will require a more robust and stable structure than a lighter recurve bow.
Common Mistakes to Avoid When Building Your Bow Stand
Even with the best intentions, DIY projects can encounter pitfalls. Recognizing common mistakes beforehand can save you time, frustration, and prevent the creation of an unsafe or ineffective bow stand.
One frequent error is underestimating the weight and leverage of a bow, especially a compound bow. Building a stand that’s too light or has a narrow base can lead to tipping. Another mistake is not properly securing joints; for wood, this means using enough screws and glue, and for PVC, ensuring full adhesion with primer and cement.
Not measuring accurately is another classic DIY blunder. A few millimeters off can mean the riser doesn’t sit correctly, or the limbs are not properly supported. Lastly, neglecting to finish or seal wooden stands for outdoor use will inevitably lead to premature wear and tear.
- Insufficient Stability: A base that is too narrow or a stand that is too tall without adequate bracing.
- Weak Joints: Inadequate screws, glue, or improperly bonded PVC fittings.
- Poor Measurements: Leading to a stand that doesn’t fit the bow properly.
- Ignoring Bow Type: Designing a generic stand that doesn’t account for the specific needs of compound vs. recurve bows.
- Lack of Finishing: Leaving wood unfinished, making it susceptible to moisture damage.
- Rushing the Process: Not allowing glue or cement to cure fully.
Frequently Asked Questions
What are the best materials for a DIY archery bow stand?
The best materials depend on your needs. Wood offers a classic look and sturdy build, while PVC is lightweight, weather-resistant, and cost-effective. Combining wood with metal reinforcements or using robust PVC fittings can enhance durability.
How tall should an archery bow stand be?
The ideal height varies, but a common range is between 18 to 24 inches. This height keeps the bow comfortably off the ground while remaining easily accessible. You can adjust this based on your preference and bow type.
Can I make a portable or collapsible bow stand?
Yes, by using hinges, swiveling joints, or designing legs that can be detached or folded. PVC designs are inherently lighter and easier to make portable, while wooden stands can incorporate folding mechanisms with careful planning.
What if my compound bow has very wide or parallel limbs?
For compound bows with parallel limbs, you’ll need a stand that supports the limbs from the sides or has a wider cradle to avoid putting pressure on them. Some designs use angled arms or a broader top section to accommodate these bows.
How do I protect my bow from scratches on the stand?
You can add protective padding to the riser support and any points where the limbs might rest. Materials like felt tape, rubber sheeting, or even strips of old mousepad can be glued or attached securely to the stand’s contact points.
Final Thoughts
Building your own archery bow stand is a practical and satisfying project that enhances your archery experience. By carefully selecting materials, planning your design, and paying attention to safety and stability, you can create a durable, custom stand. Whether you choose wood or PVC, a DIY bow stand is a valuable addition to any archer’s toolkit, keeping your equipment secure and ready for action.