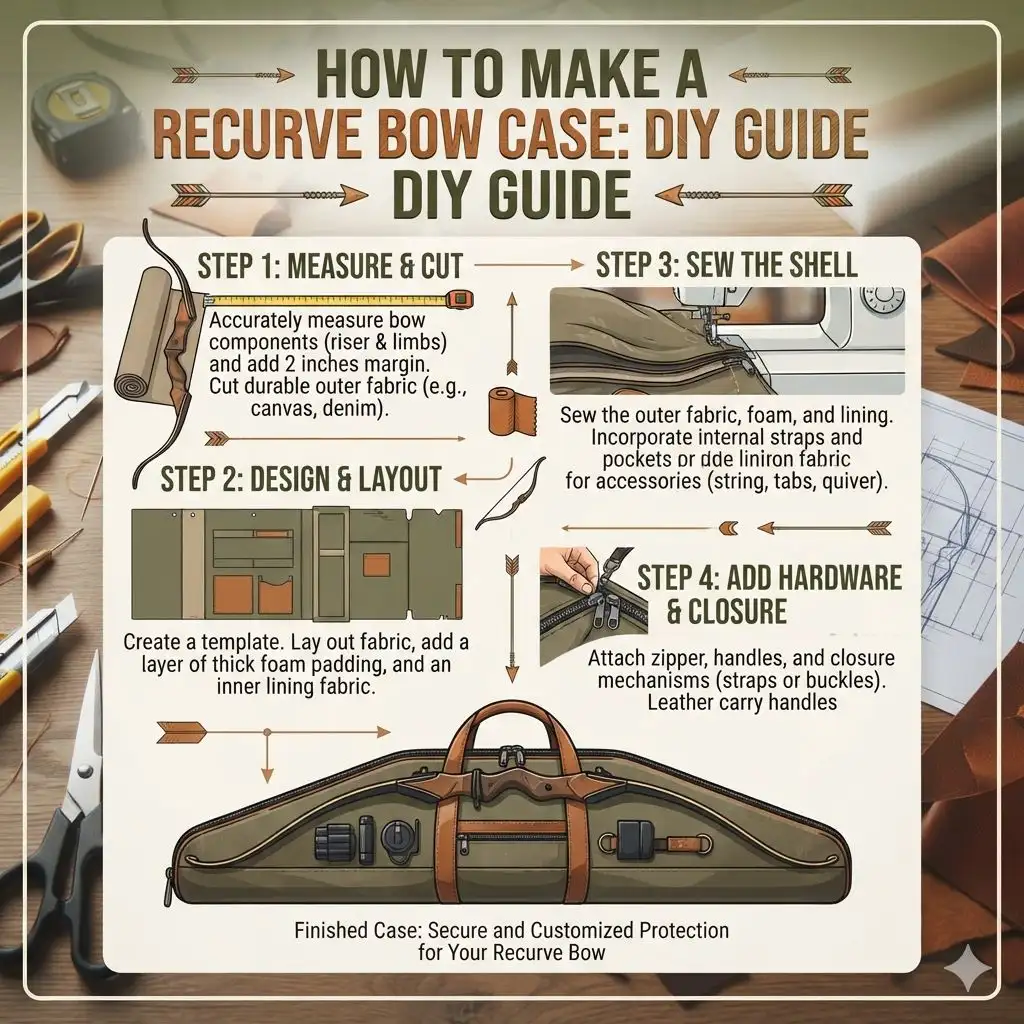
How to Make a Recurve Bow Case: DIY Guide
Making your own recurve bow case can be a rewarding project, offering a custom fit for your equipment and a significant cost saving compared to many commercial options. This guide will walk you through the process, from choosing materials to the final stitch, ensuring your valuable recurve bow is protected and portable. Whether you’re a seasoned archer or just starting, a handmade bow case provides peace of mind and a touch of personal craftsmanship.
Simply put, building a recurve bow case involves selecting durable materials, accurately measuring your bow, and employing basic sewing techniques to create a secure and protective enclosure. This DIY approach allows for customization in terms of size, padding, and added features, making it an ideal project for archers seeking both functionality and personalization.
Recommended gearAs an Amazon Associate we earn from qualifying purchases. Prices and availability are accurate as of the date shown and are subject to change.


Key Takeaways
- Making a recurve bow case allows for perfect customization and cost savings.
- Durable materials like heavy canvas or Cordura, coupled with ample padding, are crucial for protection.
- Accurate measurements of your specific recurve bow, including limbs and riser, are essential for a snug fit.
- Basic sewing skills and tools are sufficient for constructing a functional and attractive bow case.
- Consider adding extra pockets for accessories to enhance the case’s utility.
What is a Recurve Bow Case and Why Make One?
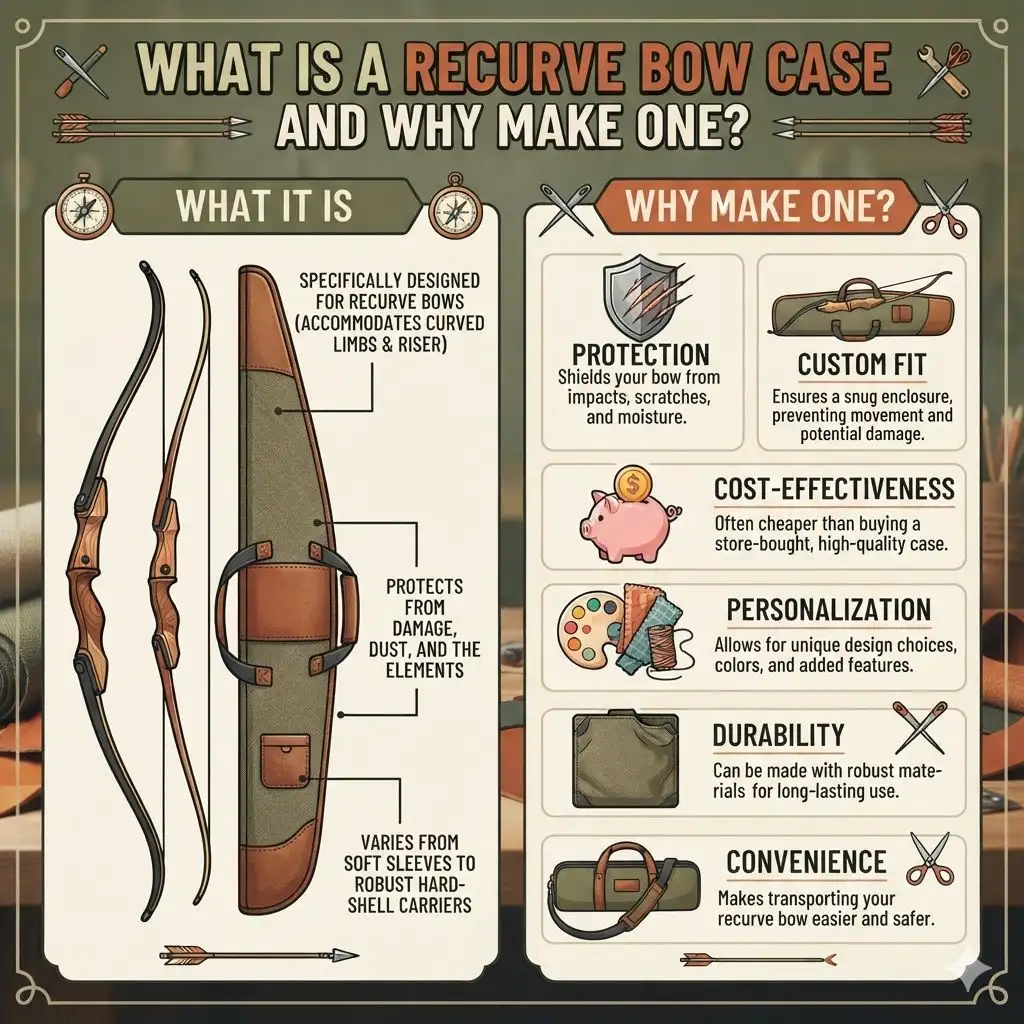
A recurve bow case is specifically designed to store and transport a recurve bow, providing protection from damage, dust, and the elements. Unlike generic cases, a recurve bow case often accommodates the distinct shape of the limbs, which curve away from the archer, and the riser. These cases can range from simple soft sleeves to robust hard-shell carriers.
The decision to make your own recurve bow case stems from several compelling reasons. Firstly, it offers unparalleled customization. You can tailor the dimensions precisely to your bow, ensuring a snug fit that prevents shifting during transport.
This is particularly important for takedown recurve bows, where the limbs and riser are separated.
Secondly, a DIY approach can be significantly more economical than purchasing a comparable quality case from a retailer. High-end bow cases can carry a hefty price tag, while common materials for a handmade case are often more affordable. Lastly, it’s a creative outlet that allows you to infuse your personal style and practical needs into the final product, perhaps adding extra pockets for quivers, arrows, or other accessories.
- Protection: Shields your bow from impacts, scratches, and moisture.
- Custom Fit: Ensures a snug enclosure, preventing movement and potential damage.
- Cost-Effectiveness: Often cheaper than buying a store-bought, high-quality case.
- Personalization: Allows for unique design choices, colors, and added features.
- Durability: Can be made with robust materials for long-lasting use.
- Convenience: Makes transporting your recurve bow easier and safer.
Materials and Tools You’ll Need
Gathering the right materials and tools is the first step toward a successful DIY recurve bow case project. The selection of fabrics is paramount, as they dictate the case’s durability and protective qualities. For the exterior, consider robust materials like heavy-duty canvas, Cordura fabric, or even a strong nylon like Denier.
These fabrics are known for their tear resistance and ability to withstand outdoor conditions.
For padding, you’ll want something that absorbs shock effectively. Closed-cell foam, often used in camping mats or upholstery, is an excellent choice. It provides firm yet flexible cushioning.
Alternatively, thick batting or even layers of dense felt can be used, though foam generally offers superior protection. The lining fabric should be smooth to prevent scratching the bow’s finish. Cotton, fleece, or a soft nylon are good options.
Essential tools include a sewing machine capable of handling heavy fabrics, strong sewing needles (denim or heavy-duty needles are recommended), and durable thread, preferably polyester or nylon thread for its strength. You’ll also need a measuring tape, fabric scissors, chalk or a fabric marker for cutting and marking, pins for holding fabric pieces together, and a zipper or Velcro closure system. Optional but highly recommended are a rotary cutter and mat for precise cuts, and bias tape for finishing raw edges.
- Exterior Fabric: Heavy canvas, Cordura, 600D+ nylon.
- Padding: 1/4 inch or 1/2 inch closed-cell foam, dense felt, thick batting.
- Lining Fabric: Soft cotton, fleece, smooth nylon.
- Thread: Heavy-duty polyester or nylon thread.
- Closure: Heavy-duty zipper (20-30 inches), or strong Velcro strips.
- Webbing/Straps: For carrying handle or shoulder strap (optional).
- Bias Tape: For finishing edges (optional, but recommended for a professional look).
| Material/Tool | Purpose | Quantity/Notes |
|---|---|---|
| Exterior Fabric | Outer shell for protection | Approx. 1-2 yards (depending on bow size) |
| Padding Foam | Shock absorption | Cut to match fabric dimensions |
| Lining Fabric | Smooth interior | Cut to match fabric dimensions |
| Sewing Machine | Assembly | Heavy-duty capable |
| Heavy-duty Thread | Securing seams | 1 spool |
This table provides a clear overview of the essential components required for your DIY recurve bow case project.
How to Measure Your Recurve Bow for a Perfect Fit
Accurate measurements are the cornerstone of a well-fitting recurve bow case. Without them, your case might be too loose, allowing the bow to shift and potentially get damaged, or too tight, making it difficult to insert or remove the bow. The goal is a snug, protective fit that doesn’t put undue stress on the bow’s components.
Start by measuring the overall length of your bow from tip of one limb to the tip of the other when fully assembled. This is your primary length measurement. If you have a takedown recurve, measure the longest limb and the riser separately.
You’ll need to account for how these pieces will fit together inside the case. For the width, measure the widest part of the riser. The limb thickness and width are also important, especially at their widest points.
When taking measurements, ensure the bow is in its assembled state if you plan to store it that way. If it’s a takedown bow and you intend to store it disassembled, measure the longest individual component (usually a limb). It’s also wise to add a small allowance – typically 1-2 inches – to your length and width measurements to account for the padding and the ease of insertion and removal.
This ensures the case isn’t overly restrictive.
- Overall Length: Measure from the tip of one limb to the tip of the other.
- Limb Length (if takedown): Measure each limb from tip to the limb pocket/mount.
- Riser Length: Measure the riser from end to end.
- Riser Width: Measure the widest point of the riser.
- Limb Width/Thickness: Measure the widest part of the limbs.
- Add Allowance: Add 1-2 inches to length and width for padding and ease of use.
Remember to record these measurements carefully and double-check them before cutting any fabric. A little extra time spent on accurate measurement will save frustration later.
Designing Your Recurve Bow Case
Before you start cutting fabric, it’s essential to sketch out a design for your recurve bow case. This design will dictate the dimensions, the number of pieces you need to cut, and the placement of any additional features like pockets or straps. Consider the type of recurve bow you have.
Is it a one-piece recurve, or a takedown model? Takedown bows require a case that can accommodate separated limbs and a riser, often with compartments or specific folding patterns.
A simple design involves creating a long, rectangular pouch with a flap or zipper closure at one end. For takedown bows, you might opt for a design that allows the limbs to be stored alongside the riser, or even a multi-compartment design. Think about the thickness of your padding.
This will add bulk to the final dimensions, so factor this in when determining your fabric cut sizes. A common approach is to cut two main pieces for the body of the case, plus any separate pieces for pockets or straps.
Consider the closure mechanism. A heavy-duty zipper is very secure but can be more challenging to sew on thicker fabrics. Velcro offers a simpler alternative, but might not be as weather-resistant.
A flap closure, secured with buckles or snaps, adds a classic look. For carrying, you can integrate a simple padded handle or add D-rings to attach a shoulder strap. Don’t forget to think about how the pieces will join – typically, you’ll be sewing right sides together and then turning the case right-side out.
Case Styles and Features
- Simple Sleeve: A basic pouch-style case, ideal for takedown bows stored assembled or for one-piece bows.
- Compartmentalized Case: Features separate sections for the riser and limbs, offering maximum protection for takedown bows.
- Padded Handle: For comfortable hand-carrying.
- Detachable Shoulder Strap: For hands-free transport.
- Accessory Pockets: For storing bowstring, tools, armguard, finger tab, or quiver.
- Zipper Closure: Offers secure and weather-resistant sealing.
- Velcro Closure: Quick and easy to open and close.
- Flap Closure: Adds a classic aesthetic and can be secured with buckles or snaps.
The choice of features depends on your personal needs and the specific type of recurve bow you own.
Cutting the Fabric and Padding
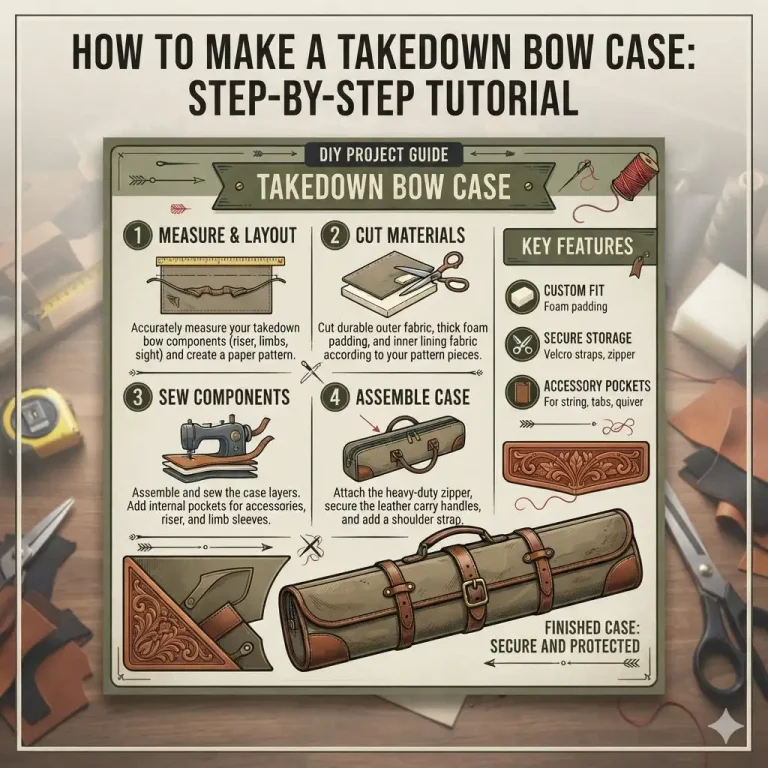
With your measurements and design finalized, it’s time to cut the fabric. Lay out your exterior fabric, lining fabric, and padding material smoothly on a large, flat surface. Remember that you’ll need two main panels for the case body.
For a simple sleeve design, these panels will be the same size. If you’re incorporating separate compartments or pockets, cut those pieces according to your design sketch.
When cutting, it’s crucial to account for seam allowances. A standard seam allowance is typically 1/2 inch. So, if your bow’s total length is 60 inches, and you’re making a simple sleeve, you’d cut your main panels to be 61 inches long (60 inches + 1/2 inch seam allowance on each end).
For width, consider the bow’s width plus padding, then add seam allowances. For example, if the padded bow width is 6 inches, you might cut panels 7 inches wide (6 inches + 1/2 inch seam allowance on each side).
For the padding, cut it to the exact dimensions of the main exterior fabric panels. This ensures it fits snugly inside. If you’re using foam, you might want to cut it slightly smaller than the fabric to avoid bunching at the seams.
For the lining, cut it to the same dimensions as the exterior fabric panels, or slightly smaller if you plan to finish the top edge with bias tape. Precision in cutting now will make the sewing process much smoother.
| Component | Fabric Type | Dimensions | Notes |
|---|---|---|---|
| Main Body Panels | Exterior | Length: Bow Length + 2″ Allowance + 1″ Seam Allowance Width: Bow Width + Padding + 1″ Seam Allowance | Cut 2 pieces |
| Main Body Panels | Padding | Same as exterior panels (or slightly smaller) | Cut 2 pieces |
| Main Body Panels | Lining | Same as exterior panels (or slightly smaller) | Cut 2 pieces |
| Accessory Pocket (Optional) | Exterior/Lining | Custom size based on items | Add seam allowance |
This table outlines the cutting process for the main components of your bow case.
Assembling the Recurve Bow Case
Now for the assembly. Start by preparing the main body panels. Take one exterior fabric panel and one padding panel.
Lay the padding on top of the fabric, aligning the edges. You can temporarily secure the padding to the fabric using fabric glue, basting stitches, or by quilting the two layers together if you desire extra reinforcement. Repeat this for the second set of panels.
Next, prepare the lining. If you’re adding any internal pockets, sew them onto the lining pieces now. Then, take the two exterior panels (with padding attached) and place them right sides together.
Align the edges carefully. If you’re using bias tape to finish the top edge, you’ll typically sew the lining to the exterior along the top edge, then fold it over and stitch again, enclosing the raw edges. If not, you’ll sew the exterior and lining separately to the top opening.
If you’re creating a simple sleeve with a zipper closure at one end, you’ll sew the three sides of the main body panels (exterior and lining together), leaving the zipper opening unsewn. After sewing the sides, you’ll insert the zipper. For a case that opens fully, like a book, you’ll sew the lining to the exterior along the sides and bottom, then attach the zipper across the opening.
Always use a strong needle and appropriate thread for your sewing machine, and consider backstitching at the beginning and end of each seam for added durability.
Important: Ensure your sewing machine is set up for heavy-duty fabrics. Use a longer stitch length (around 3-4mm) to prevent the fabric from tearing along the seam.
- Attach Padding: Secure padding to the wrong side of exterior fabric panels.
- Sew Lining: If using a separate lining, sew it to the exterior fabric along the top edge, or attach it later.
- Join Main Panels: Place exterior panels right sides together and sew the sides and bottom (leaving an opening for turning or zipper).
- Insert Zipper: If using a zipper, attach it to the opening.
- Add Straps/Handles: Sew on carrying handles or D-rings for a shoulder strap.
- Turn Right Side Out: Carefully turn the case right side out through the opening.
- Close Opening: Topstitch the opening shut, or finish the edge if you haven’t already.
- Add Pockets (if separate): Sew any accessory pockets to the exterior before assembling the main body.
Adding Features: Pockets, Straps, and Closures
Once the basic structure of your recurve bow case is complete, you can enhance its functionality with additional features. Pockets are incredibly useful for storing essential archery accessories. You can sew a simple patch pocket onto the exterior of the case, or create an internal pocket within the lining.
For larger items like a quiver or a compact target, you might need a larger, more robust external pocket, potentially with its own closure.
Carrying options are also key. A simple, padded handle is often sufficient for lighter bows or for short transport. This is usually made by folding a strip of fabric with padding inside and then stitching it securely to the top of the case.
For longer distances or for archers who prefer hands-free carrying, a shoulder strap is ideal. You can purchase adjustable strap hardware or create a simple strap from webbing, attaching it to D-rings sewn into the sides of the case. Ensure all strap attachments are reinforced to handle the weight of the bow.
The choice of closure significantly impacts the case’s security and ease of use. Heavy-duty zippers are popular for their robustness and ability to keep out dust and moisture. When sewing a zipper, it’s crucial to use a zipper foot on your sewing machine and to place the zipper teeth close to the seam.
Velcro strips offer a quick, no-fuss closure, but make sure to use industrial-strength Velcro for good hold. Buckles or snaps on a flap provide a more traditional look and can offer a secure closure, though they may be more complex to install.
Pocket Design Options
- Patch Pocket: A simple pocket sewn onto the exterior surface.
- Internal Zippered Pocket: For secure storage of small items inside the lining.
- Bellowed Pocket: A pocket with folds that expands to hold bulkier items.
- Quiver Pocket: A long, narrow pocket designed to hold an archery quiver.
- Small Accessory Pouch: A dedicated small pocket for tools, string wax, etc.
Warning: Ensure all added features like pockets and straps are securely attached. A poorly attached strap could lead to the bow falling and sustaining damage.
Finishing Touches and Optional Upgrades
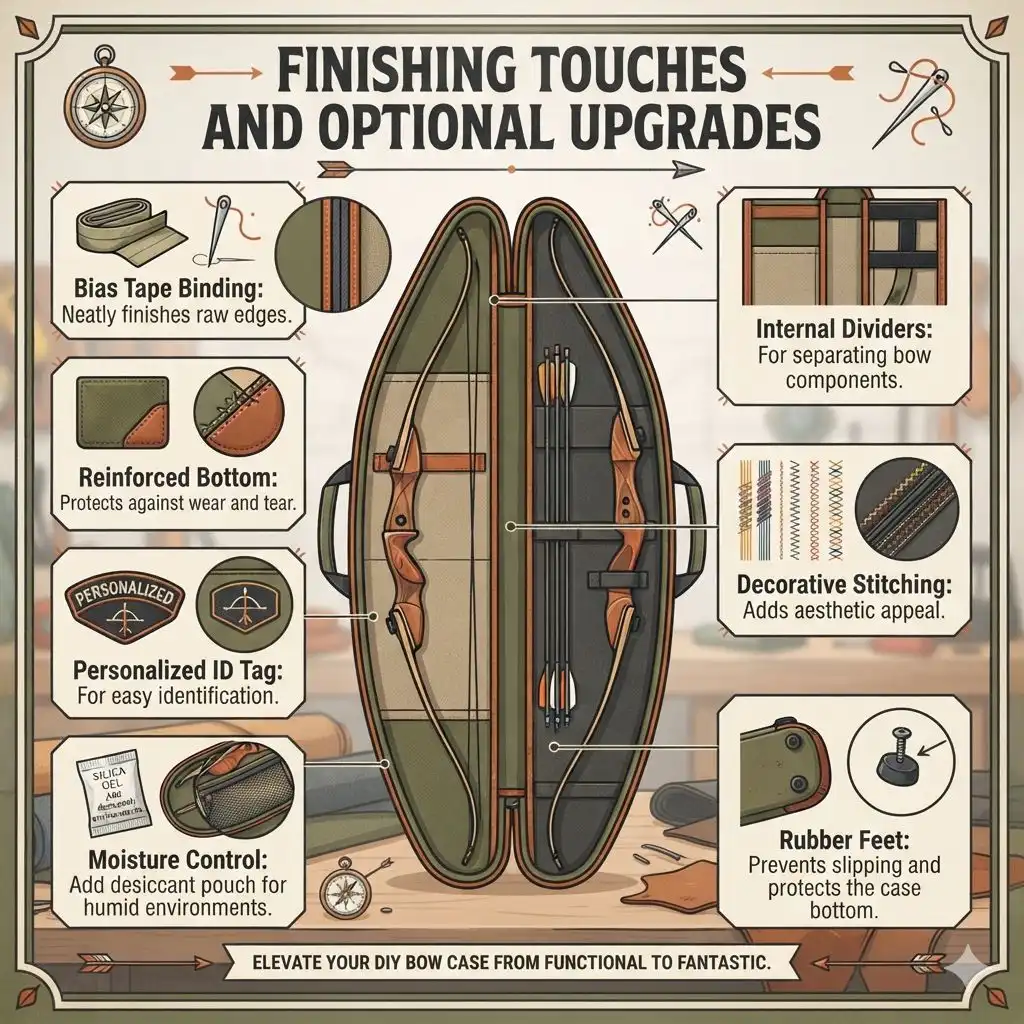
With the main assembly and features in place, it’s time to focus on the finishing touches that elevate your DIY recurve bow case from functional to fantastic. One of the most impactful finishing touches is binding the raw edges. This can be done using pre-made bias tape, which neatly encloses raw seams and adds a professional, clean look.
You can also create your own bias tape from matching or contrasting fabric.
Consider adding a name tag or a personalized embroidered patch. This not only makes your case easily identifiable but also adds a unique personal touch. For added protection, you might want to reinforce the bottom of the case with a more durable material, or even add small rubber feet if you plan to set it down frequently on rough surfaces.
Some archers also like to add a moisture-wicking liner or a small desiccant packet holder inside to combat humidity.
If your design allows, a well-placed internal divider can offer an extra layer of separation and protection, especially for takedown bows. For those who frequently travel, reinforcing the zippers with larger pulls or adding small locks can provide extra security. Remember, the goal is to create a case that not only protects your bow but also suits your specific archery lifestyle and preferences.
These small details can make a big difference in the longevity and usability of your handmade case.
- Bias Tape Binding: Neatly finishes raw edges.
- Reinforced Bottom: Protects against wear and tear.
- Personalized ID Tag: For easy identification.
- Moisture Control: Add desiccant pouch for humid environments.
- Internal Dividers: For separating bow components.
- Decorative Stitching: Adds aesthetic appeal.
- Rubber Feet: Prevents slipping and protects the case bottom.
Frequently Asked Questions
What is the best fabric for a recurve bow case exterior?
Heavy-duty canvas, Cordura, or a strong nylon like 600D or higher are excellent choices for the exterior. These materials are durable, resistant to abrasion, and can offer a good degree of water resistance, protecting your bow from various environmental conditions.
How much padding is needed for a recurve bow case?
At least 1/4 inch to 1/2 inch thick closed-cell foam is recommended for adequate shock absorption. You can also layer thinner foam or use dense batting. The amount depends on how much protection you feel your bow requires and how bulky you want the case to be.
Can I make a recurve bow case without a sewing machine?
While possible with a heavy-duty sewing machine, you can hand-stitch a recurve bow case if necessary. It will be much more time-consuming and labor-intensive, requiring strong needles and a sturdy thread. Ensure your stitches are tight and consistent for durability.
How long should my recurve bow case be?
The case should be at least 2-3 inches longer than your bow to accommodate padding and allow for easy insertion and removal. For takedown bows, measure the longest component (usually a limb) and add this allowance.
What if my recurve bow has uniquely shaped limbs?
If your limbs have an unusual profile, it’s best to create a custom pattern. Trace the outline of each limb directly onto paper or fabric, add seam allowances and padding thickness to these outlines. This ensures a precise fit for any bow shape.
Final Thoughts
Crafting your own recurve bow case is a practical and fulfilling project that ensures your equipment is well-protected with a personal touch. By carefully measuring your bow, selecting durable materials, and employing these steps, you can create a functional, stylish, and cost-effective case. This DIY approach not only saves money but also provides a deep satisfaction that comes from making something with your own hands, perfectly suited to your archery needs.