How to Make a Takedown Bow Case: Step-by-Step Tutorial
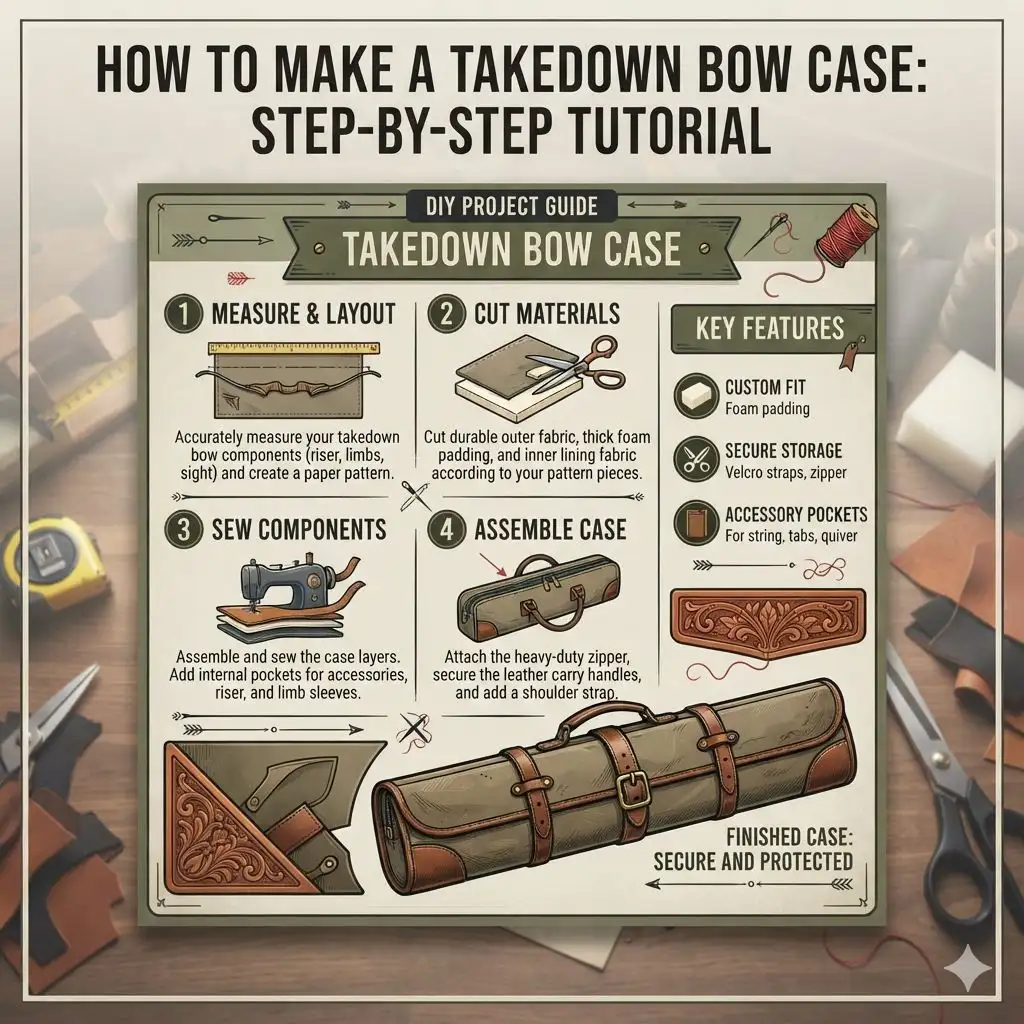
Making a takedown bow case is a rewarding DIY project that ensures your valuable archery equipment is protected and portable. Whether you’re a seasoned archer or just starting, a custom-made case offers superior protection and a personalized touch that store-bought options often lack. This comprehensive guide will walk you through every step, from selecting materials to the final finishing touches, so you can build a durable and stylish case for your takedown bow. For more on this, see our guide on How to Make a Longbow Stand.
Simply put, building your own takedown bow case is an achievable DIY project that provides excellent protection for your archery gear. This tutorial offers a detailed, step-by-step process, covering material selection, cutting, assembly, and finishing, ensuring you create a functional and personalized case.
Key Takeaways
- Making a takedown bow case involves careful material selection, precise cutting, and straightforward assembly techniques.
- Key components include a durable exterior fabric, soft interior lining, sturdy padding, and reliable closure mechanisms.
- The process typically involves cutting fabric panels, adding padding and lining, sewing the pieces together, and installing closures.
- Proper planning and accurate measurements are crucial for ensuring all bow components fit securely and safely within the case.
- A well-made takedown bow case enhances portability and significantly protects your equipment from damage during transport.
What You’ll Need to Make Your Takedown Bow Case
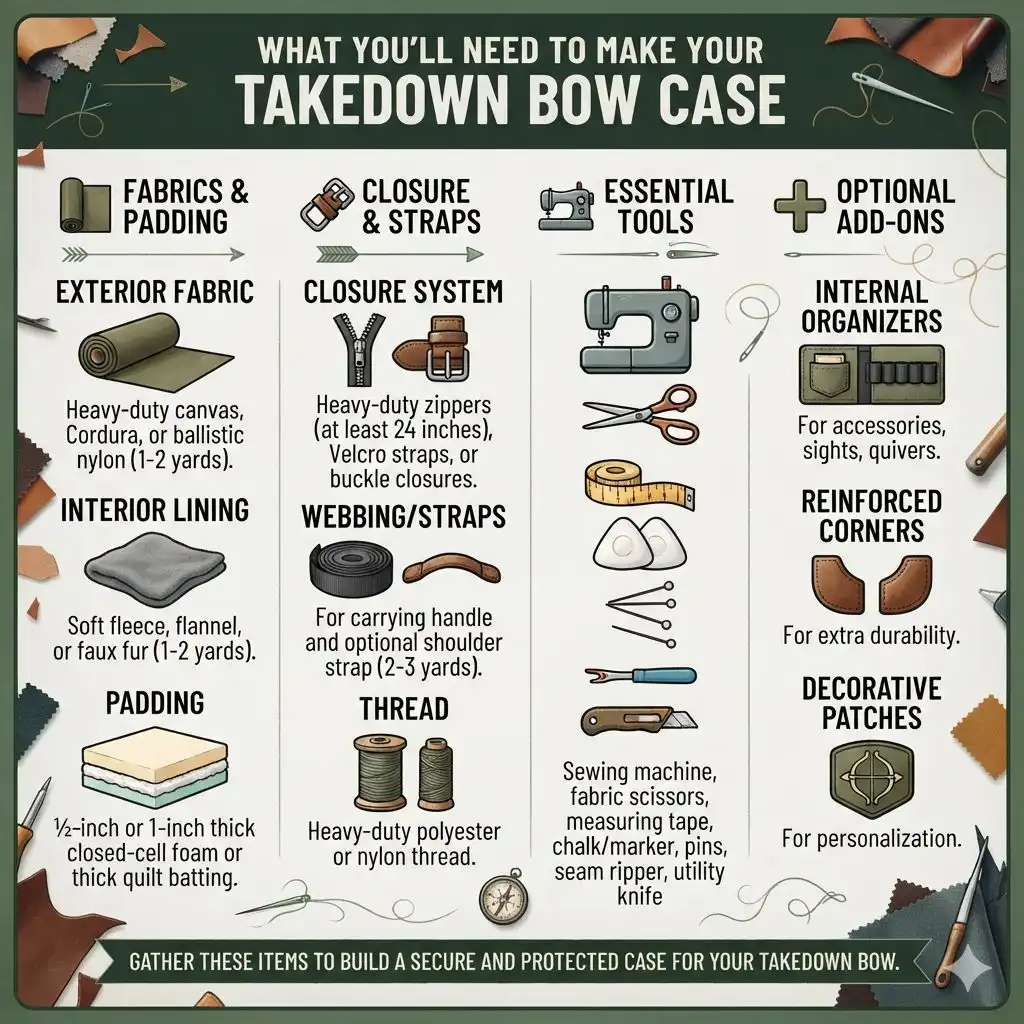
Before you begin cutting and sewing, gathering the right materials and tools is essential for a successful project. The quality of your materials will directly impact the durability and protective capabilities of your finished bow case. Investing in good fabric and padding will make a noticeable difference in how well your bow is safeguarded.
Consider the specific dimensions of your takedown bow’s components—limbs, riser, string, and any accessories like sights or quivers—to ensure everything has a dedicated, secure spot. Accurate measurements prevent the bow from shifting during transport, which can cause damage.
Here’s a comprehensive list to get you started:
- Exterior Fabric: Heavy-duty canvas, Cordura, or ballistic nylon (1-2 yards depending on size).
- Interior Lining: Soft fleece, flannel, or faux fur (1-2 yards).
- Padding: ½-inch or 1-inch thick closed-cell foam or thick quilt batting (enough to cover all interior panels).
- Closure System: Heavy-duty zippers (at least 24 inches), Velcro straps, or buckle closures.
- Webbing/Straps: For carrying handle and optional shoulder strap (2-3 yards).
- Thread: Heavy-duty polyester or nylon thread.
- Tools: Sewing machine (heavy-duty recommended), sharp fabric scissors, measuring tape, chalk or fabric marker, pins, seam ripper, utility knife (for foam).
- Optional: Internal organizers for accessories, reinforced corners, decorative patches.
Measuring and Cutting Your Fabric Panels
Accurate measurements are the cornerstone of any successful sewing project, especially when creating a custom-fit item like a bow case. You’ll need to measure the longest limb, the riser, and consider the space needed for the string and any accessories. It’s always better to measure twice and cut once to avoid wasting precious materials.
Start by laying out your bow components on a flat surface to get a clear visual of their combined dimensions. Account for a few extra inches for seam allowances and padding. A good rule of thumb is to add at least 1-2 inches to each dimension for seams and internal spacing.
Here’s a breakdown of the cutting process:
- Measure the Riser: Measure the length, width, and height of your bow’s riser. Add 2 inches to the length and width for seam allowances and padding.
- Measure the Limbs: Measure the length of each limb. Since limbs are usually tapered, measure at their widest point and their tip. You’ll typically create separate compartments for them. Add 2 inches to the length of each limb measurement.
- Determine Case Shape: Decide on the overall shape of your case. A common design is a rectangular case with separate internal pockets for limbs and a central section for the riser.
- Cut Exterior Panels: Based on your measurements, cut two main rectangular panels for the exterior of the case. These will form the front and back.
- Cut Interior Panels: Cut corresponding interior lining panels from your soft fabric.
- Cut Padding: Cut pieces of foam or batting to match the dimensions of your exterior panels. You might cut separate pieces for the riser and limb sections.
- Cut Compartment Dividers: If you’re creating separate compartments for limbs, cut fabric and padding pieces to form these dividers. These will be sewn into the main panels.
Preparing and Attaching Padding and Lining
Once your fabric panels are cut, the next critical step is to integrate the padding and lining. This layer is what provides the crucial protection against bumps and impacts. The goal is to create a snug, cushioned environment for your bow’s delicate parts.
Attaching the padding securely to the exterior fabric before sewing ensures it doesn’t shift around. For foam, you might use a strong fabric adhesive or simply baste it in place with long stitches. For batting, it can often be quilted to the lining fabric, which then gets attached to the exterior.
Here’s how to prepare and attach these protective layers:
- Prepare Padding: If using foam, cut it precisely to fit the dimensions of your exterior panels. If using batting, you might want to quilt it to your lining fabric in a simple grid pattern for added stability and to prevent bunching.
- Attach Padding to Exterior: Lay your exterior fabric panels flat, wrong side up. Place the cut padding on top, aligning the edges. You can temporarily secure it with pins or fabric spray adhesive.
- Attach Lining: Lay your lining fabric panels flat, right side up. Place the padded exterior panel on top of the lining, aligning all edges. Pin them together securely around the perimeter.
- Consider Reinforcements: For areas that will experience more stress, like where straps attach, consider adding an extra layer of heavy-duty fabric or reinforcing stitching later.
- Prepare Limb Compartments: If you’re creating separate limb compartments, cut and pad these pieces now. You’ll then attach them to the interior lining panel, creating dividers.
Important: Ensure your padding is thick enough to provide adequate shock absorption. Half-inch closed-cell foam is a good minimum for most takedown bows. Consider thicker foam if you plan to transport your bow in rough conditions.
Sewing the Main Case Panels Together
This is where your bow case starts to take shape. Using a heavy-duty sewing machine and strong thread is crucial for creating seams that can withstand the weight and pressure of carrying your bow. Take your time, sew slowly, and use a consistent stitch length for the strongest results.
Proper seam allowance is vital. Stick to your pre-determined allowance (usually ½ to ¾ inch) throughout the process. This not only creates a clean finish but also ensures the structural integrity of your case.
Double-stitching key stress points can also add significant durability.
Follow these steps to sew your main panels:
- Pinning Panels: With the exterior panels right sides together (and lining/padding secured inside), pin all around the edges, leaving an opening on one side for turning. This opening should be large enough to comfortably turn the entire case right side out.
- Sewing the Perimeter: Begin sewing along the pinned edges, using your chosen seam allowance. Sew around three sides and part of the fourth, stopping about 6-8 inches from the end of the opening.
- Reinforce Corners: Backstitch at the beginning and end of your stitching, and at each corner. You can also sew over the corners an extra time for added strength.
- Trim Seams: Carefully trim the seam allowance, especially at the corners, to reduce bulk. Be careful not to cut through your stitching.
- Turn Right Side Out: Gently turn the case right side out through the opening you left. Use a blunt tool (like a chopstick) to push out the corners neatly.
- Close the Opening: Once turned, carefully fold the raw edges of the opening inwards and pin them shut. You can hand-stitch this opening closed for an invisible finish, or machine stitch it close to the edge for a quick, durable closure.
Creating Internal Compartments for Limbs and Accessories
A well-organized interior is just as important as a sturdy exterior. Separate compartments prevent your bow’s components from rubbing against each other, which can cause scratches and damage. This section details how to create these essential internal divisions.
You’ll essentially be sewing smaller fabric “tubes” or pockets within the main case. The size of these compartments will depend on your bow’s specific dimensions. Measure your limbs and riser again to ensure a snug, but not overly tight, fit for each piece.
Here’s how to construct internal compartments:
- Measure and Cut: Measure the length of your longest limb and its widest point. Cut two pieces of your interior lining fabric and padding for each limb compartment. You’ll also need a central compartment for the riser.
- Sew Limb Compartment Tubes: For each limb, take a lining fabric piece and its corresponding padding. Fold the fabric right sides together and sew along the long edge to create a tube. If using foam, sandwich it between the fabric layers before sewing.
- Attach to Main Panel: Place your main interior lining panel (which is already attached to the exterior and padding) right side up. Position the sewn limb compartment tubes onto this panel, aligning one edge with the bottom of the case. Pin them in place.
- Sew Compartment Lines: Sew along the pinned edge of each limb compartment tube to attach it to the main lining panel. Then, sew vertical lines down the main lining panel to create the divisions between compartments. You’ll sew through all layers: lining, padding, and exterior fabric.
- Riser Compartment: Create a wider, central compartment for the riser similarly. Ensure it’s padded and securely attached.
- Accessory Pockets: Consider adding smaller zippered pockets or Velcro-closure pouches to the inside for accessories like finger tabs, armguards, release aids, and extra strings. Cut these from your lining fabric, sew them into place, and add zippers or Velcro.
Installing Zippers, Straps, and Closures
The closure system is your final line of defense against accidental opening and keeps your gear secure. Whether you choose zippers, buckles, or Velcro, ensuring they are robust and properly installed is key. Zippers are popular for their ease of use and ability to seal the case completely.
When installing a zipper, it’s often easiest to do it before sewing the main panels completely shut, or by sewing it directly onto the opening you left for turning. For buckles or Velcro, they are typically attached to the exterior flap or strap that closes the case.
Here’s a guide to installing common closures:
| Closure Type | Installation Steps | Pros | Cons |
|---|---|---|---|
| Heavy-Duty Zipper | Pin zipper tape to opening edges. Sew securely with a zipper foot, ensuring no fabric catches. | Secure closure, good seal, easy to use. | Can snag, requires a robust zipper for durability. |
| Velcro Straps | Cut Velcro pieces. Sew hook and loop sides to opposing flaps. Ensure strong stitching. | Easy to adjust, quick access. | Can wear out, may not seal as tightly as zippers. |
| Buckle Closures | Sew webbing straps to the case and the corresponding buckle parts to an overlapping flap. | Very secure, durable. | Slower to open/close, can add bulk. |
For the carrying handle, cut a length of webbing about 18-24 inches long. Fold the ends under ¼ inch, then another ¼ inch, and stitch them securely to the top of your bow case. Double-stitch this for strength.
If adding a shoulder strap, attach D-rings to the sides of the case and create a adjustable strap using webbing and a slider buckle.
Adding Finishing Touches and Reinforcements
The final details can elevate your DIY bow case from functional to truly professional. Reinforcing high-stress areas and adding decorative elements make your case both more durable and aesthetically pleasing. These steps ensure your case will last for years to come.
Think about areas that will see the most wear and tear: the corners, the zipper pulls, and where the straps attach. Adding extra stitching or even small patches can significantly increase longevity. For a professional look, consider binding the raw edges of the exterior fabric with contrasting bias tape.
Here are some ideas for finishing touches:
- Reinforced Corners: You can add small triangular patches of durable fabric sewn onto the exterior corners of the case to prevent fraying and damage.
- Zipper Pulls: Attach a small loop of paracord or a decorative key chain to the zipper pull for easier gripping, especially with gloves on.
- Edge Binding: Use bias tape to neatly finish the exposed edges of the exterior fabric. This requires careful pinning and stitching, but provides a very clean look.
- Personalization: Embroider your initials, a favorite symbol, or a custom patch onto the exterior of the case.
- Name Tag/ID Holder: Sew on a small clear vinyl pocket to hold your contact information or range tag.
- Waterproofing: For added protection against the elements, consider applying a fabric waterproofing spray to the exterior material. Ensure it’s suitable for your chosen fabric type.
Warning: Be sure to use a needle appropriate for heavy fabrics and a strong thread. A standard sewing machine needle might break on thick canvas or Cordura, so consider purchasing a heavy-duty or denim needle.
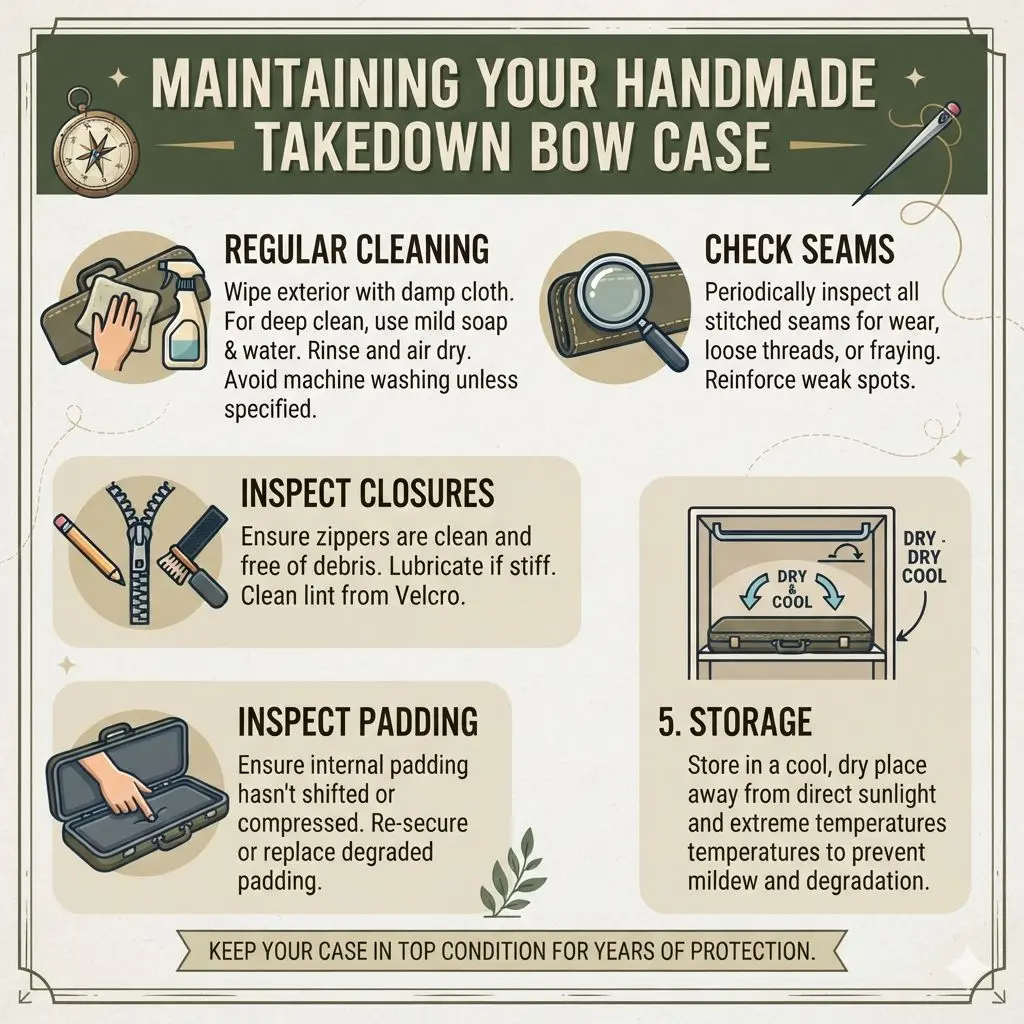
Maintaining Your Handmade Takedown Bow Case
Just like any piece of gear, your handmade takedown bow case will benefit from occasional maintenance to keep it in top condition. Regular cleaning and inspections will ensure it continues to protect your bow effectively for many years.
The type of maintenance needed will depend on the materials you used and how often you expose the case to the elements. Dirt, dust, and moisture can degrade fabric over time, so addressing these issues proactively is always a good idea.
Here’s how to care for your case:
- Regular Cleaning: Wipe down the exterior with a damp cloth to remove dust and dirt. For deeper cleaning, use a mild soap and water solution, then rinse and air dry thoroughly. Avoid machine washing unless the fabric manufacturer specifically states it’s safe.
- Check Seams: Periodically inspect all stitched seams for any signs of wear, loose threads, or fraying. Reinforce any weak spots with extra stitching.
- Inspect Closures: Ensure zippers are clean and free of debris that could cause them to snag or break. Lubricate them with a graphite pencil or a specialized zipper lubricant if they become stiff. Check Velcro for lint buildup and clean with a brush.
- Inspect Padding: Make sure the internal padding remains in place and hasn’t shifted or compressed significantly. If it has, you may need to re-secure it or consider replacing it if it’s severely degraded.
- Storage: When not in use, store your bow case in a dry, cool place, away from direct sunlight and extreme temperatures. This helps prevent mildew and material degradation.
Frequently Asked Questions
What is the best fabric for the exterior of a takedown bow case?
Heavy-duty materials like canvas, Cordura, or ballistic nylon are ideal. They offer excellent durability, abrasion resistance, and protection against the elements, ensuring your bow stays safe during transport and storage.
How thick should the padding be for a bow case?
A minimum of ½-inch thick closed-cell foam is recommended for good shock absorption. For enhanced protection, especially if you travel frequently or in rough conditions, 1-inch thick foam or multiple layers of dense batting can be used.
Can I make a bow case without a sewing machine?
While possible with heavy-duty needles and strong hand-stitching, using a sewing machine is highly recommended. A machine will create much stronger, more consistent seams required to handle the stress of carrying a bow and its accessories.
How do I ensure my bow components fit properly?
Accurate measurements are key. Measure the longest limb, the riser’s dimensions, and the string. Add generous seam allowances (½ to ¾ inch) and space for padding to your measurements to create patterns for your fabric panels and internal compartments.
What if my bow has accessories like sights or stabilizers?
You’ll need to account for the extra space these take up. You can create larger, more accommodating compartments or add separate padded pouches within the main case to hold accessories securely and prevent them from damaging the bow.
Final Thoughts
Making your own takedown bow case is a practical and fulfilling endeavor. By following these steps, you’ve gained the knowledge to create a protective, personalized case tailored to your specific needs. Enjoy the satisfaction of using a case you built yourself, knowing your archery equipment is well-guarded on every adventure.