How to Make a Takedown Bow Riser: Step-by-Step Guide
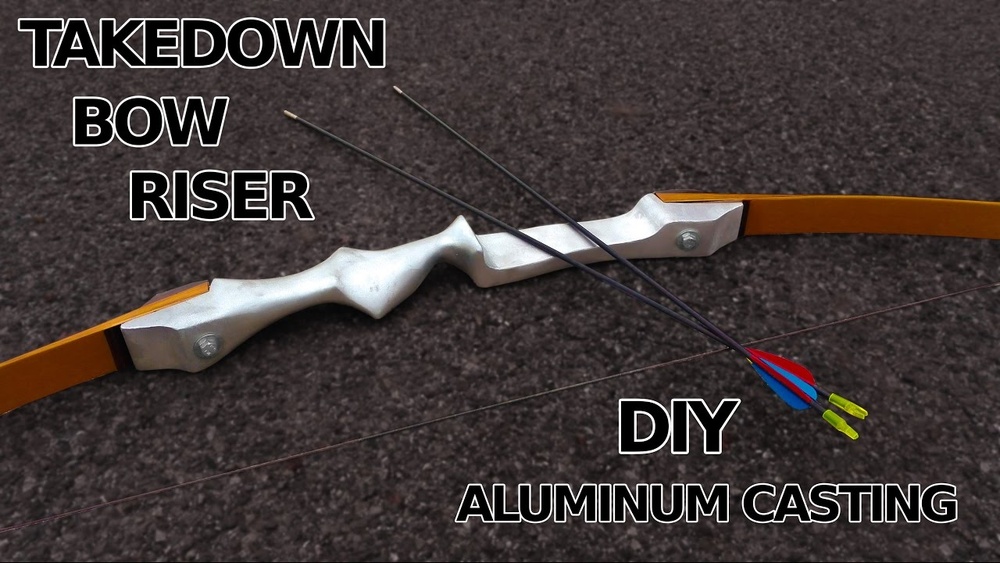
Building your own takedown bow riser is a project that attracts both bowhunters and traditional archery enthusiasts. The riser is the central handle section of a takedown bow, joining the two limbs and holding everything together. Making one from scratch can be challenging, but it’s also highly rewarding.
You get to choose materials, customize the grip, and understand the mechanics of your bow on a new level.
Many people think building a riser requires expensive machines or professional training. In truth, with careful planning, basic woodworking tools, and attention to safety, you can craft a reliable riser at home. This guide will walk you through the entire process, from material selection to final finish.
You’ll learn practical steps, discover important details often missed by beginners, and pick up tips that come only from hands-on experience.
Understanding The Takedown Bow Riser
The takedown bow riser does more than just connect the limbs. It plays a crucial role in accuracy, comfort, and the overall shooting experience. The riser houses the grip, limb pockets (where the limbs attach), and often the arrow rest or sight mount. Choosing the right design and materials can make the difference between a bow that feels like an extension of your arm and one that’s hard to control.
There are two main types of risers: one-piece wood and laminated (layers of different woods or materials). Laminated risers provide extra strength and allow for creative designs. For most home projects, wood is preferred because it’s workable and forgiving.
Another key point is the takedown system, the mechanism that lets you remove or change limbs. The most common systems use bolts or pins. For beginners, bolt-on is the easiest to make and maintain.
Choosing Materials For Your Riser
Selecting the right material is the foundation of a successful riser. Most homemade risers use hardwoods like maple, walnut, or oak because they are strong, stable, and have attractive grain patterns. Some advanced builders use laminates: two or more types of wood glued together for strength and beauty.
When picking wood, look for boards that are:
- Straight-grained
- Free from knots or cracks
- Well-seasoned (dried for stability)
Many risers also include accent stripes or layers of contrasting wood for appearance and to reduce warping.
Here’s a quick comparison of popular riser woods:
| Wood Type | Strength | Workability | Appearance |
|---|---|---|---|
| Maple | High | Easy | Light, subtle grain |
| Walnut | Medium | Moderate | Dark, rich grain |
| Oak | High | Moderate | Prominent grain |
| Bubinga | Very High | Hard | Reddish, striking |
For hardware, you’ll need limb bolts (usually 5/16″ x 18 threads per inch), bushings, and optionally inserts for sights or stabilizers.
Pro Tip: Some beginners try to use softwoods or scrap lumber. These can be unsafe. Stick to known hardwoods for the core of your riser.
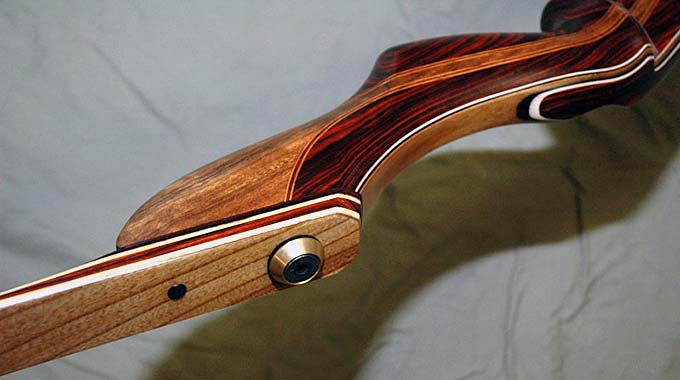
Credit: buildyourownbow.com
Tools And Supplies Needed
You don’t need a full woodshop to make a riser, but having the right tools will make the process smoother and safer. Here’s what you’ll need:
- Jigsaw or bandsaw (for cutting the rough shape)
- Drill and bits (for limb bolt holes and bushings)
- Rasps and files (for shaping the grip and contours)
- Clamps (for laminating, if using multiple pieces)
- Sandpaper (80 to 400 grit for smoothing)
- Epoxy or wood glue (for laminating and installing bushings)
- Measuring tape and ruler
- Pencil and templates (for marking)
Optional but helpful tools:
- Router (for precise edges)
- Drill press (for accurate holes)
- Belt sander (for faster shaping)
Pro Tip: If you’re new to woodworking, practice on scrap wood before starting your actual riser. This helps you get a feel for your tools.
Designing Your Riser
Creating a riser design is where your bow becomes unique. There are many ways to approach this, but a few key considerations will guide you:
- Length: Most takedown risers are 19, 25 inches long. Choose based on your draw length and limb size.
- Grip shape: A comfortable grip is vital for accuracy. Try holding different bows or tools to find a shape that fits your hand.
- Balance: The riser should not feel too top- or bottom-heavy.
- Limb pocket angle: Typical angle is about 15, 18 degrees from the riser centerline. This affects draw weight and bow dynamics.
Many builders use templates from existing bows. You can trace a riser outline from photos found online or draw your own. Make sure to mark:
- Centerline (for arrow path)
- Grip area
- Limb bolt locations
- Sight/stabilizer holes (if desired)
Example: When I built my first riser, I used cardboard templates and held them in my hand to check comfort before cutting any wood. This saved me from making a grip that was too bulky.

Credit: www.youtube.com
Cutting And Shaping The Riser
With your wood and design ready, it’s time to bring your riser to life. Here’s a safe and effective sequence to follow:
- Transfer the template to your wood blank. Mark centerlines and key points clearly.
- Rough cut the outline using a jigsaw or bandsaw. Cut just outside the lines, you’ll refine the shape later.
- Drill the limb bolt holes before shaping. Use a drill press if you have one; this keeps the holes square. Most bows use 5/16″ bolts, spaced 1.5, 2 inches from the riser ends.
- If using laminates, glue the layers together with epoxy or waterproof wood glue. Clamp well and let cure at least 24 hours.
- Shape the grip and contours with rasps, files, and sandpaper. Go slowly and check the feel in your hand often.
Pro Tip: It’s easy to remove wood, but impossible to add it back. Shape gradually and test frequently for comfort and fit.
Installing Limb Bolt Bushings And Hardware
The limb bolts and bushings are critical for a safe, functional takedown system. Here’s how to install them:
- Use threaded brass or steel bushings. These are pressed or epoxied into the riser, providing strong threads for the limb bolts.
- Drill holes slightly smaller than the bushing diameter for a tight fit.
- Epoxy the bushings in place, making sure they’re aligned straight.
- For extra security, add a second set of holes for alignment pins (dowel rods or steel pins) that prevent limb rotation.
If you want to add sight or stabilizer mounts, install threaded inserts at this stage. These are optional for traditional bows but useful for target shooting.
Fine Shaping And Sanding
This step is where your riser goes from rough to refined. Take your time to achieve a smooth, comfortable finish.
- Use coarse sandpaper (80, 120 grit) to remove tool marks.
- Progress to medium and fine grits (220, 400) for a silky surface.
- Round all edges and blend the grip so there are no sharp spots.
Pro Tip: Sand along the grain, not across it. This prevents scratches that become visible after finishing.
Many builders add finger grooves or thumb shelves. Try holding the riser in a shooting stance and mark any areas that need adjustment.
Applying Finish For Durability And Looks
A good finish protects your riser from moisture and brings out the beauty of the wood. Popular finishes for bow risers include:
- Oil finishes (like tung or Tru-Oil): Easy to apply, give a warm look, and allow touch-ups.
- Polyurethane: Provides a tougher, water-resistant surface.
- Spray lacquer: Fast, but less durable than oil or poly.
Apply several thin coats, sanding lightly with fine grit between each. Let the finish cure fully before assembly.
Here’s a comparison of common finishes:
| Finish Type | Durability | Ease of Application | Gloss Level |
|---|---|---|---|
| Tung/Tru-Oil | Medium | Easy | Satin |
| Polyurethane | High | Moderate | Satin/Gloss |
| Spray Lacquer | Low | Easy | High Gloss |
Final Assembly And Safety Check
Once your finish is fully cured, it’s time to assemble the bow and check for safety.
- Attach the limbs using your limb bolts. Make sure they fit snugly, with no wobble.
- Inspect the limb pockets and alignment. The limbs should point straight, parallel to the riser centerline.
- Install any optional accessories, such as a sight, stabilizer, or arrow rest.
- String the bow (use a bow stringer for safety) and check draw weight and tiller (the distance from the string to the limb near the riser).
Pro Tip: If you notice any cracks or loose hardware, do not shoot the bow. Address issues before use.
Test-shoot at a low draw weight and short distance first. Pay attention to vibrations, noise, or any movement in the limb pockets.
Common Beginner Mistakes And How To Avoid Them
Many first-time riser builders make similar errors. Here are the top pitfalls and ways to avoid them:
- Using poor-quality wood: Cheap or soft wood can crack, warp, or break. Always use hardwood, and inspect for defects before starting.
- Misaligned limb pockets: If the limb bolts are not square and parallel, your bow will shoot inconsistently. Take extra time with measurements and drilling.
- Over-shaping the grip: Removing too much material can weaken the riser or make it uncomfortable. Shape slowly and test the fit often.
- Skipping finish coats: Unfinished wood absorbs moisture and swells. Apply enough coats of finish for good protection.
- Ignoring safety checks: Failing to inspect for cracks or loose hardware can lead to injury. Double-check everything before shooting.
In my experience, patience and double-checking measurements are key to a successful first riser.
Customizing Your Riser
One of the best things about building your own riser is the ability to personalize it. Here are a few customization ideas:
- Add accent stripes: Glue thin strips of contrasting wood for a unique look.
- Inlay your initials or a logo: Use wood or metal for a personal touch.
- Textured grip: Carve or burn a pattern for better hold.
- Custom colors: Stain or dye the wood before finishing for a standout appearance.
Advanced builders sometimes add carbon fiber or micarta layers for extra strength, but these require special tools and adhesives.
Maintenance And Long-term Care
A homemade riser can last many years if cared for properly. Here’s how to keep yours in top shape:
- Store in a cool, dry place away from direct sunlight.
- Wipe with a soft cloth after use to remove sweat and dirt.
- Apply a fresh coat of oil finish every year, if used.
- Check limb bolts and bushings regularly for tightness.
- Avoid dropping or hitting the riser against hard surfaces.
Pro Tip: If you notice any changes in the riser’s feel, such as new vibrations or noise, inspect it before shooting again.

Credit: www.youtube.com
Advantages And Limitations Of Homemade Risers
Building your own riser is a satisfying project, but it’s important to understand what you gain, and what you might give up, compared to factory-made options.
| Homemade Risers | Factory Risers |
|---|---|
| Custom fit and design | Precision manufacturing |
| Lower cost (if tools are owned) | Consistent quality control |
| Sense of accomplishment | Warranty and support |
| Requires time and skill | Ready to use immediately |
If you enjoy working with your hands and want a bow that is truly yours, the effort is well worth it. However, for tournament competition or if you need absolute precision, a factory riser may be a better choice.
Frequently Asked Questions
How Do I Know If My Riser Is Safe To Use?
Check for visible cracks, loose bushings, or soft spots in the wood. Test the fit of the limb bolts and make sure the limbs align straight when attached. If you hear any creaks or notice movement while drawing, stop and inspect before shooting.
Can I Add A Metal Plate Or Reinforcement To My Wooden Riser?
Yes, many advanced builders add aluminum plates or steel rods to reinforce high-stress areas, especially near the limb pockets. This adds strength and can improve balance, but requires precise fitting and drilling.
What Is The Best Finish For A Riser In Humid Climates?
Oil finishes like Tru-Oil are popular, but in humid areas, a polyurethane or marine varnish offers better moisture resistance. Apply several thin coats and let each cure fully for best results.
Can I Use Power Tools For All Shaping Steps?
Power tools like routers and belt sanders speed up the process, but hand tools provide more control, especially on the grip. Many experienced builders use a combination: rough shaping with power tools, then final shaping by hand.