How to Make a Takedown Bow Handle: Step-by-Step Guide
Creating your own takedown bow handle is a rewarding project for any archery enthusiast. It brings a sense of craftsmanship and gives you full control over the fit, feel, and performance of your bow. While it’s not a simple task, with patience and the right approach, even a motivated beginner can build a handle that stands up to frequent use. This guide walks you through everything: selecting materials, shaping, fitting hardware, finishing, and essential safety tips. By the end, you’ll understand not only the “how” but also the “why” behind each step.
Understanding The Takedown Bow Handle
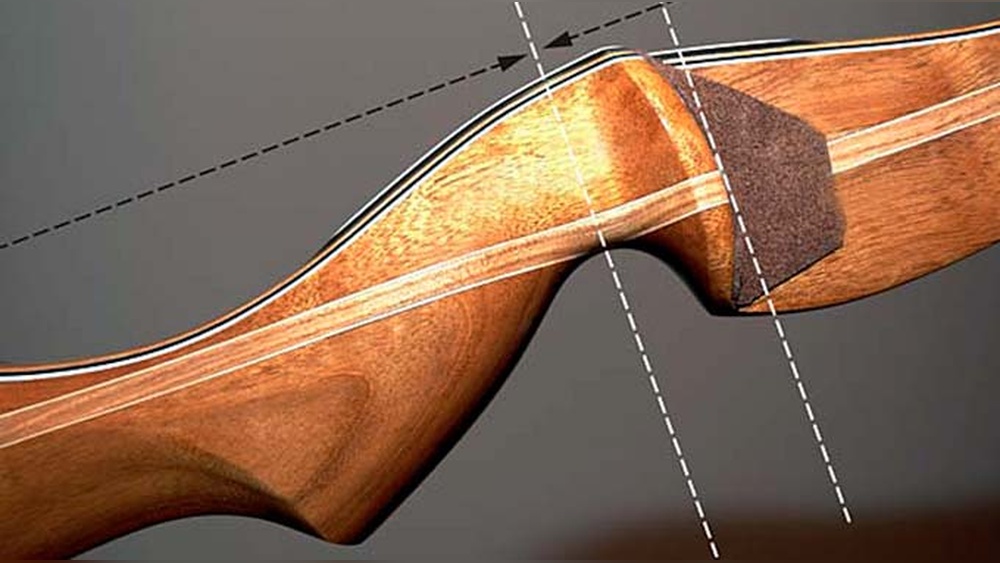
A takedown bow is designed for easy assembly and disassembly. The handle, also called the riser, is the central part that connects the limbs. Unlike one-piece bows, a takedown handle must be strong enough to handle repeated assembly while staying straight and solid. Most modern takedown handles are designed to attach limbs with bolts or a specialized locking system.
A homemade handle lets you customize grip shape, size, weight, and appearance. But it requires careful planning and precise work, because any error can affect the bow’s safety and performance.
Choosing The Right Materials
Your choice of material affects not only the handle’s strength but also its weight, comfort, and appearance. Common materials for bow handles include wood, laminated wood, and sometimes composites.
Wood Types
Hardwoods are the best choice because they offer strength and durability. Popular options:
- Maple, Known for its even grain and good strength-to-weight ratio.
- Walnut, Offers a rich color and is easy to work with.
- Bubinga, Heavy and very strong, but harder to shape.
- Ash, Flexible and shock-absorbent.
Laminated Wood
Many modern risers use laminated wood. This means thin layers of wood are glued together, often with the grain running in different directions. This increases strength and reduces the chance of warping.
Composites
Advanced builders sometimes use fiberglass or carbon fiber, but these require special tools and safety gear. For most DIY builders, wood or laminated wood is preferred.
Material Comparison
Here’s a quick comparison of common materials:
| Material | Strength | Ease of Shaping | Weight | Cost |
|---|---|---|---|---|
| Maple | High | Easy | Medium | Medium |
| Walnut | Medium | Easy | Medium | High |
| Bubinga | Very High | Hard | Heavy | High |
| Laminated Wood | Very High | Medium | Medium | Medium |
Pro Tip: Avoid softwoods like pine, they’re not strong enough for a safe bow handle.
Planning Your Handle: Design And Measurements
A good design is the foundation of a reliable takedown bow handle. Before you start cutting, decide on your handle’s shape, dimensions, and features.
Handle Length And Shape
Most handles are between 18 and 25 inches long. The exact length depends on your draw length and the overall bow size you want.
- Shorter handles (18, 20 inches): Lighter, more maneuverable, suitable for shorter bows or hunting.
- Longer handles (22, 25 inches): More stable, often used for target shooting.
Grip Style
You can choose from several grip styles:
- Low wrist, For a relaxed hand position.
- Medium wrist, Most common; balances comfort and control.
- High wrist, Keeps the hand more upright; some archers find it more accurate.
Example: In my experience, starting with a medium wrist grip gives you a good balance if you’re not sure which style fits you best.
Limb Pocket Angle
The limb pocket angle (where limbs attach) is critical. Most recurve bows use an angle between 15 and 20 degrees. If the angle is off, the bow may not string safely or perform well.
Drawing Your Template
Draw the handle outline on paper or cardboard. Mark the limb bolt holes, grip area, and any cutouts for weight reduction. Transfer this template to your wood blank.
Tools And Supplies You’ll Need
Building a takedown handle requires both hand tools and hardware. Here are the essentials:
Hand Tools
- Saw (bandsaw or jigsaw preferred)
- Spokeshave or rasp for shaping
- Sandpaper (80 to 400 grit)
- Drill and bits (for hardware holes)
- Clamps (for gluing laminates or holding workpieces)
Hardware
- Limb bolts (usually 5/16″-18 thread)
- Brass or steel threaded inserts
- Alignment pins (if your limb design uses them)
Adhesives And Finishes
- Waterproof wood glue (for laminating)
- Epoxy (for installing inserts)
- Wood finish (oil, varnish, or polyurethane)
Pro Tip: Always wear eye and ear protection when using power tools.
Cutting And Shaping The Handle
With your template ready and material chosen, it’s time to start shaping your handle.
Step 1: Cut The Blank
Clamp your wood blank securely. Using your template as a guide, cut out the general shape with a bandsaw or jigsaw. Stay slightly outside your lines, you’ll refine the shape later.
Step 2: Mark Key Locations
With the rough shape cut, mark the following on your blank:
- Centerline (to keep everything symmetrical)
- Limb bolt holes
- Grip location and shape
- Optional: Cutouts for sight or stabilizer mounts
Step 3: Shape The Grip
Use a rasp or spokeshave to shape the grip area. Work slowly, checking the feel in your hand often. The grip should feel comfortable and natural, don’t rush this step.
Step 4: Refine The Handle
Smooth out all surfaces with sandpaper, moving from coarse (80 grit) to fine (400 grit). Pay special attention to edges and corners to prevent splinters.
Step 5: Cut Limb Pockets
Using your layout lines, cut the limb pockets at the chosen angle (usually 15, 20 degrees). You can do this with a handsaw and a chisel, or carefully with a bandsaw.
Step 6: Drill For Hardware
Drill holes for the limb bolts and inserts. Make sure the holes are square to the handle, crooked holes will cause the limbs to twist.
Warning: Test-fit everything before gluing or installing hardware. A mistake here can ruin your handle.
Installing Hardware And Limb Fittings
The hardware connects your handle to the limbs and must be both strong and precisely aligned.
Limb Bolts And Inserts
Most takedown bows use threaded metal inserts set into the handle. Limb bolts thread into these inserts to hold the limbs.
- Drill holes slightly smaller than the outside diameter of your inserts.
- Mix epoxy and apply it to the insert’s threads.
- Press the inserts into the holes. Wipe off excess epoxy.
- Let cure fully (usually 24 hours).
Alignment Pins
Some bows use pins for extra limb alignment. Drill pin holes carefully, if they’re off, limbs won’t line up.
Accessory Mounts
If you want to add a sight, stabilizer, or quiver, drill and install threaded inserts in the appropriate places.
Hardware Comparison
To help you choose, here’s a comparison of common limb bolt and insert types:
| Hardware Type | Strength | Ease of Installation | Availability |
|---|---|---|---|
| Brass Insert | High | Medium | Common |
| Steel Insert | Very High | Hard | Common |
| Direct-thread (no insert) | Medium | Easy | Less Common |
Pro Tip: Buy hardware from archery suppliers, not generic hardware stores, to ensure compatibility.
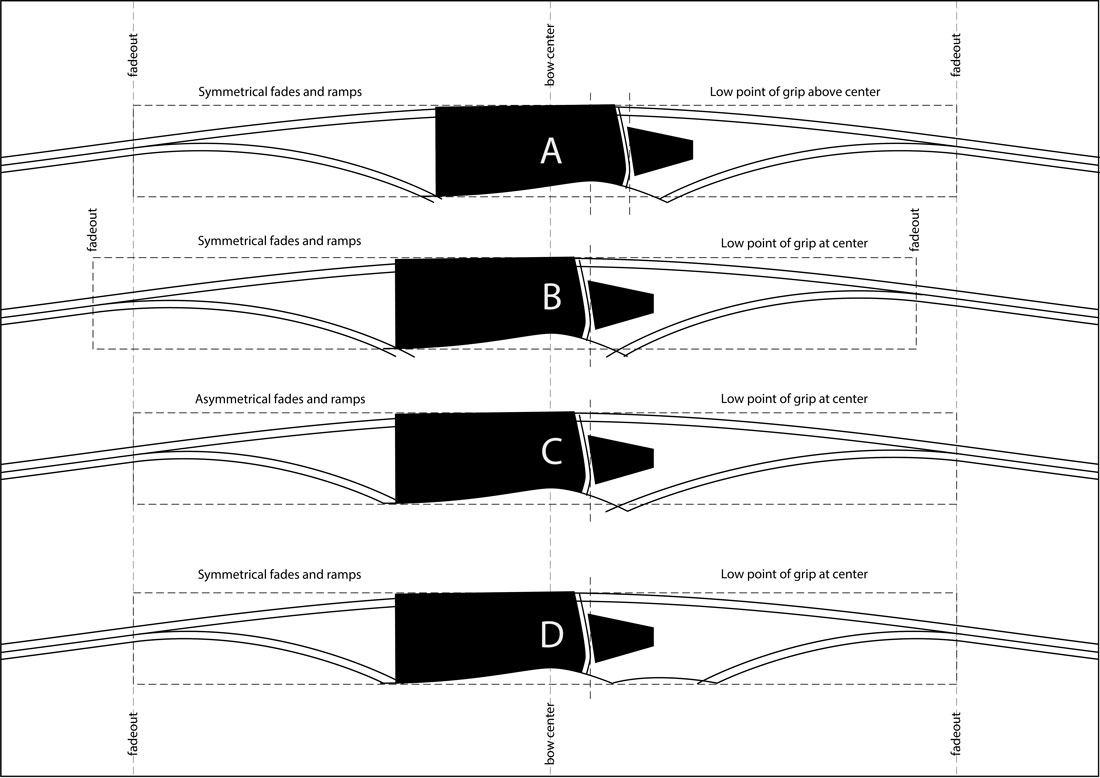
Credit: buildyourownbow.com
Finishing The Handle
A good finish protects your handle from sweat, dirt, and moisture. It also makes the wood look beautiful and improves the feel in your hand.
Sanding
Before finishing, sand all surfaces again with 400-grit sandpaper. Remove all dust with a tack cloth or damp rag.
Choosing A Finish
Popular finishes for bow handles include:
- Tung oil, Penetrates deeply, adds a warm glow, easy to reapply.
- Polyurethane, Tough, waterproof, available in satin or gloss.
- Varnish, Traditional, but can be slippery if too thick.
Apply multiple thin coats, allowing each to dry fully. Lightly sand between coats for a smooth feel.
Adding Grip
Some archers wrap the grip with leather or synthetic grip tape for extra comfort. You can glue a leather wrap directly onto the shaped grip, or use pre-made grip tape.
Final Check
Inspect the handle for any sharp spots or rough areas. Make sure all hardware is tight and flush.
Fitting The Limbs
Attaching limbs to your handle is a critical test of your work.
- Insert the limb bolts and fit the limbs in place.
- Check for tightness, limbs should fit snugly with no wobble.
- String the bow (using a bow stringer for safety).
- Inspect for limb alignment; the string should run straight down the center of the handle.
If the limbs are misaligned, you may need to adjust the pocket angle slightly or use shims. Don’t force the limbs, if they don’t fit, check your measurements and hardware placement.
Warning: Never draw a homemade bow above 20, 25 pounds on the first try. Increase the draw weight only after checking for cracks or movement.

Credit: www.youtube.com
Testing And Safety
Testing your handle is just as important as building it.
First Draws
Start with low tension and check for any signs of cracking, creaking, or movement. Watch the limb pockets closely. If anything looks or sounds wrong, stop and inspect.
Safety Checks
- Look for cracks near the limb pockets or inserts.
- Check that all bolts and inserts remain tight after several draws.
- Flex the limbs gently to test the handle’s strength.
Breaking-in
Shoot a few arrows at low draw weight to break in the handle. If everything feels solid, you can gradually increase the draw weight.
Pro Tip: Log each shooting session and inspect your handle regularly for signs of wear.
Personalizing Your Bow Handle
A homemade handle can be as unique as you want. Here are a few ideas to make yours stand out:
Custom Inlays
Add thin strips of contrasting wood or colored resin for a custom look. Inlays can be fitted into grooves cut into the handle.
Decorative Carving
If you’re skilled with hand tools, try simple carvings or patterns on the grip or riser.
Custom Paint Or Staining
Wood stains can enhance the natural grain, or you can use colored paint for a bolder statement.
Engraving
Use a wood-burning tool or engraver to add your initials or a design.
Example: I once added a simple strip of walnut inlay to a maple riser, and it got more compliments than any other bow I built.
Common Mistakes To Avoid
Even experienced builders make errors. Watch out for these:
- Rushing measurements, Precision is key; always double-check.
- Using weak wood, Handles made from soft or weak wood can break suddenly.
- Misaligned hardware, Crooked inserts will cause poor limb alignment.
- Skipping sanding, Rough spots can lead to splinters or discomfort.
- Too-thick finish, Over-applying finish can make the grip slippery.
Pro Tip: Take your time and test each step before moving to the next.
Maintenance And Long-term Care
A well-made handle will last for years with proper care.
- Keep your bow dry and store it in a cool, shaded place.
- Wipe the handle after use to remove sweat and dirt.
- Check hardware regularly and retighten if necessary.
- Reapply finish every year or as needed.
If you see any cracks or changes in the wood, stop using the bow and inspect it carefully.

Credit: www.youtube.com
Advanced Options And Modifications
Once you’re comfortable building a basic handle, you can try more advanced features.
Adjustable Limb Pockets
Some high-end bows let you adjust the limb pocket angle for tuning. This requires precise machining and special hardware.
Metal Or Composite Reinforcement
Experienced builders sometimes embed aluminum or carbon fiber for extra strength. This adds complexity and cost but can improve durability.
Ilf (international Limb Fitting) System
The ILF system lets you swap limbs between different handles. If you want to try this, study ILF dimensions and hardware standards carefully. More information about ILF can be found at the Wikipedia recurve bow page.
Frequently Asked Questions
What Are The Main Differences Between A Homemade And Factory-made Handle?
Homemade handles offer personal customization, you control the grip shape, weight, and style. Factory-made handles are more consistent and often use advanced materials like aluminum or carbon fiber, which are difficult to work with at home. However, homemade handles can be just as strong if built carefully from quality hardwood.
Can I Use Recycled Or Reclaimed Wood For A Takedown Bow Handle?
Yes, but only if the wood is free from cracks, knots, and rot. Reclaimed hardwood can be strong and beautiful, but always inspect thoroughly. Avoid wood with hidden defects, as these can weaken the handle.
How Do I Know If My Handle Is Strong Enough For Higher Draw Weights?
Test your handle at low draw weights first. Look for any flex, creaking, or cracks. If it passes, you can increase the draw weight gradually. For bows above 45 pounds, consider using laminated wood or reinforcing with composite materials for extra safety.