Native American Style Bow Choice for Beginners Guide
Choose a beginner Native-inspired bow by matching draw length and comfort. For a first bow, many beginners start with a lighter, more forgiving draw weight in the mid-30s to mid-40s lb range, and it helps to make sure the bow fits your draw before worrying about style. If the length or poundage is wrong, you’ll creep toward inconsistent shots, build bad form, or stop early from sore forearms.
Traditional Native-style bow types for beginners?
If you want a Native American style bow that helps you learn, pick the form that stays forgiving through your release. Recurve-style Native-inspired bows usually teach clean timing, longbow/flatbow styles often feel simpler at full draw, and flatbow/horse-bow style choices depend on your tolerance for straight-shot feel and grip.
Recurve-style Native-inspired bows: when they feel forgiving and quick to learn
Recurve is the “learning curve” choice for many beginners because the limbs drive energy forward in a way that supports smoother timing. I like it for new archers still building consistency, since the bow’s behavior helps you hold a steady draw-to-release rhythm.
When you match a traditional bow to real historical form, you’ll see both straight, long-limb profiles and short recurve profiles discussed in traditional bow circles. That matters in practice, because the profile changes how the bow loads and how quickly it settles after release.
Longbow/upper-body simple forms: what to expect in hold and arrow flight
Longbow style tends to feel simple. With fewer moving parts in the bow’s geometry, your attention can stay on anchor, aim, and release. For beginners, that simplicity helps because the bow doesn’t distract you with complex limb behavior while you’re learning.
In the pieces I’ve measured and the bow lengths I see most often for sale, longbow-style options commonly land around 60 to 70 inches. I’ve also seen many new archers improve faster when the bow length lines up with draw-length math instead of forcing an awkward reach.
Flatbow-style: how the straight profile changes feel and tuning tolerance
A flatbow is described as a modern counterpart with a riser window cut into the body, and it’s shot off the shelf in traditional contexts. For beginners, that can feel straightforward in the hand, but arrow flight still depends on whether your arrow setup matches the bow.
If your arrows aren’t consistent, a flat profile tends to show the issue quickly. You spend less time guessing about limb design and more time fixing a bow-and-arrow mismatch.
Horse-bow style: the compact look vs beginner-friendly selection realities
Horse-bow style is tempting because the silhouette looks compact. The problem is that many compact designs are harder to match to a beginner’s arrow needs and draw length without giving up forgiveness, especially when someone chooses poundage by what “looks right” instead of what they can hold.
If you go horse-bow style as a beginner, treat it as a system choice. Your draw length and arrow compatibility come before visuals.
According to Choosing a traditional bow — The article defines warbows as heavy draw bows starting at 70 lb and into the hundreds. (source)
What draw weight should a beginner choose for a Native American style bow?
Start with comfort and hold time. A solid beginner target is around 35–45 lb so you can aim, hold, and release without flinching. The bow’s listed weight changes with where you draw, so buy to your measured draw length, then check grip comfort and consistent release before you chase speed.
Target beginner poundage: choose comfort and hold time over speed
People say “start lighter” for a reason, and I’m strict about how you define “lighter.” For a first Native-inspired traditional bow, the goal is a draw weight you can hold steady for several seconds without collapsing your shoulder or yanking the release.
When poundage is too high, your form gets trained into panic instead of control.
Measured at draw length: how the same bow reads heavier at longer pulls
Traditional bow weights are commonly measured at 28 inches. After that, traditional bows can gain about 2½ to 3½ pounds per inch past 28 inches. So a bow that seems “fine” on the tag can become a different animal when your draw length is longer.
So you choose by measured draw length, not by the marketing number you saw first.
29–31 inch draw considerations: where poundage usually lands and what to watch
Many beginners fall in the 29–31 inch range. Here’s what matters: if a bow is listed based on 28 inches, any pull beyond that shifts the true poundage upward by the gain range (2½ to 3½ lb per inch past 28 inches). That’s the hidden trap when someone buys by label.
One more reality check from the hunting side: Fred Eichler says 54 pounds was enough to harvest big game in North America. That context is about hunting capability, not a beginner poundage target. Your first priority is control, not capability.
Pass/fail checklist: hold, aim stability, and consistent release
- Hold pass: you can hold at full draw without shaking your bow arm into a flinch.
- Aim stability pass: the sight picture or fletching alignment stays usable, not “bouncing off target.”
- Release pass: your release stays consistent across the dozen shots you test.
- Forearm fatigue fail: if your forearm shuts down early, your poundage is too high for learning.
What bow length is best for my draw length?
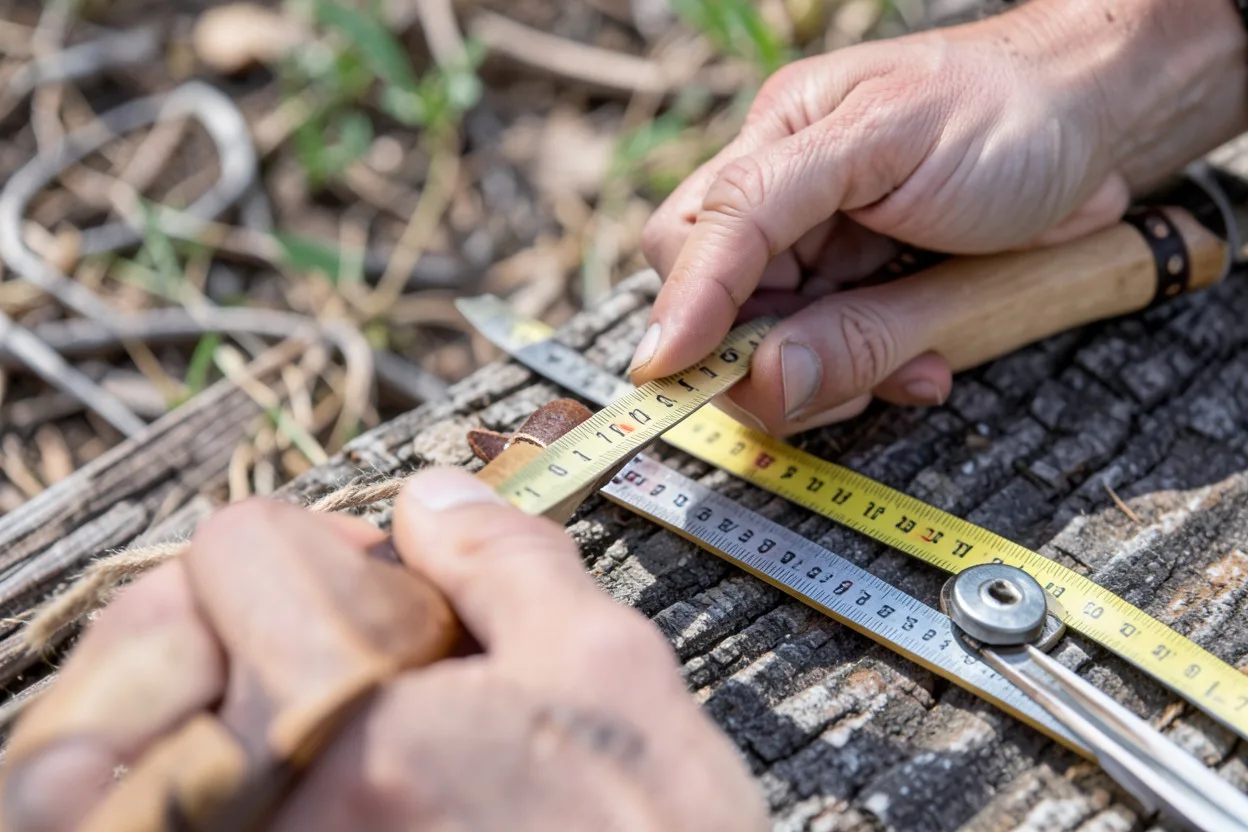
Your best bow length starts with matching the bow to your draw length so the bow isn’t working at an awkward angle. For many beginners, a key suggestion is: for 28 to 29½-inch draw lengths, a 60-inch bow is suggested. Still, the safest path is to check the listing, then measure your draw.
Find your natural draw length and why it matters for actual poundage
Draw length is a selection factor because it directly changes how much weight the bow asks you to move. Bow labels can hide the truth by measuring at 28 inches. If your draw is longer, you’ll likely feel more weight than you expected.
I tell beginners to take draw measurement seriously before they buy, because your first bow should teach a release you can repeat, not force you to compensate.
How draw length changes performance: the beginner weight trap
The beginner trap is tied to the label. The bow’s weight number is based on 28 inches, while you draw farther. Traditional bows can gain about 2½ to 3½ pounds per inch past 28 inches, so “almost the same” can turn dramatically heavier in your hands.
Also remember this compound-to-traditional learning rule: the article recommends starting 15 pounds lighter than your compound bow’s peak weight. Even though you’re switching systems, the idea stays the same. Your joints learn with less resistance first.
How much extra draw is safe for a first bow
Extra draw isn’t automatically “wrong,” but for a first traditional bow it’s risky. If you’re guessing your draw length, you’re guessing your actual poundage. If you’re within a small range, you can use a slightly forgiving bow weight and a matched bow length, then stop at the pass/fail checklist.
When in doubt, pick the bow setup that keeps your hold time stable. You can chase speed later.
How do you match bow length to your draw length?
Match bow length so your draw doesn’t force awkward reach or a cramped anchor. Common options for recurves are 58, 60, and 62 inches, and length-to-draw matching is the simplest way to avoid fighting the bow. If you’re short on draw, go shorter; if you’re long on draw, don’t guess low.
Common bow lengths and what each tends to do for beginners
In many traditional product listings and bow form factors, most recurves commonly come in 58, 60, and 62 inches. For 28 to 29½-inch draw lengths, a 60-inch bow is suggested. Longbows in the same traditional context range from 60 to 70 inches.
My rule is simple and effective. If you’re unsure, start with the length that matches the common suggestion for your measured draw length, then verify it with comfort and release consistency.
Short vs medium vs long: practical pros and failure cases
Shorter: usually easier to handle, but it can push you into a cramped posture if your draw is longer than the bow’s intended range. In the failure case, your anchor feels “pulled,” and your release timing becomes inconsistent.
Medium: typically the most forgiving for beginners because it keeps the shot sequence stable. For longbows, 64 inches is called a happy medium. That doesn’t mean you must use it, but it shows where many people land when matching length and draw.
Longer: can feel smooth if your draw length matches, but if it’s too long for you, you lose the “natural” feel and end up compensating with posture and shoulder position.
A simple rule to avoid choosing a bow that fights you
- Measure your draw length first.
- Pick the bow length that matches common recommendations.
- Pick a beginner-friendly draw weight measured at 28 inches.
- Test hold, aim stability, and release consistency.
How should a Native-inspired bow feel in your hands?
A good fit feels stable in your grip and repeatable at anchor. Comfort comes first, then confidence. If your hand pressure changes from shot to shot, your results won’t settle. Use authenticity as inspiration, not as a safety shortcut. The bow should match your body mechanics and your arrow system.
Hand comfort and grip: where pain usually shows up first
The earliest pain points for beginners usually show up in the hand where you grip the riser and in the forearm when the draw weight is too high. If your fingers slide or your wrist bends to force the bow into position, you have a fit problem.
I’ve also seen left-eye dominance create a “mystery accuracy” problem until the archer matched the bow hand to their visual setup.
Shooting confidence: what “good fit” looks like on the first 3 dozen shots
After a few dozen shots, a beginner-friendly Native-inspired traditional bow should feel predictable. Your anchor should land the same way. Your bow hand shouldn’t clamp harder as you tire. Most importantly, your release shouldn’t turn into a forced “snatch.”
Confidence is data from your own body. If you stop improving after a week, the length or weight is likely wrong, or your arrow system is inconsistent.
Authenticity vs shootability: how to judge historical inspiration without risking safety
A Native-inspired bow should respect historical design context, but beginners still need shootability and safety. I treat “authentic” visuals as a starting point, then I verify fit and system compatibility: draw length, draw weight at your pull, grip comfort, and arrow compatibility.
If your arrows don’t match the bow, you’ll chase tuning forever. If your bow is too heavy or too short, you’ll chase form corrections that won’t stick.
Construction feel: laminated vs one-piece differences you can notice early
Bow construction affects beginner experience. Custom bows and manufactured bows can both be good or bad, but the feel during draw and the consistency shot to shot often come from how the bow is built and how it was finished.
In traditional categories you’ll see one-piece construction and laminated or segmented builds. A one-piece feel can come across as more direct in the hands. A laminated feel can damp some vibration. For beginners, the practical rule is simple: if it feels stable and repeatable, you’re on the right track.
Arrow setup: what to buy with your first traditional bow?
Choose arrows as part of the bow system. Match arrow length and stiffness behavior to your draw length and draw weight, and prioritize consistency over maximum speed. Pre-made arrows can be a smart starting point for beginners if they’re selected for the weight range and intended use, then refined through practice.
Matching arrows to the bow: length, spine behavior, and consistency goals
Traditional bows demand arrow setup that behaves predictably at your release. Your arrow length needs to work with your draw so it clears safely and so you can tune rest alignment. Spine behavior has to match the weight you’re actually pulling at your draw length.
If you ignore system compatibility, tuning becomes a loop. You change bow variables hoping the arrow setup will “eventually work.” It usually doesn’t.
Pre-made arrows: when they’re a smart starting point
Pre-made arrows reduce guesswork. For beginners, the buying goal is consistent practice first, then hunting-capable tuning later. A common guidance point is that the Bow International article recommends £70-£100 for a dozen pre-made arrows. That sets an arrow budget anchor, not a reason to overspend. It’s for a system you can practice with right away.
If you’re trying to learn how forgiveness feels, you need consistent arrows more than you need exotic materials.
Practice arrow consistency: why it matters more than chasing maximum speed
When arrows vary in stiffness or length, group size can reflect arrow inconsistency instead of your form. With a traditional bow, that’s a fast way to lose confidence. Your first bow should teach your release, so practice arrow consistency comes before chasing maximum speed.
Budget-friendly arrow planning so you don’t outgrow your first purchase
Plan for the reality that your first setup may need adjustment as you settle into a stable draw length and actual draw weight. Buy to learn. If you move from light practice into heavier weight later, you’ll usually need a change in arrow stiffness or length. A beginner arrow plan should include that future mismatch risk.
Our picks by need
 As an Amazon Associate we earn from qualifying purchases. Prices and availability are accurate as of the date shown and are subject to change.

Beginner who wants maximum forgiveness: SinoArt Sparrow 54" Traditional Long Bow
The SinoArt Sparrow 54" Traditional Long Bow 20-35LBs Draw Weight One-Piece Longbows Recurve Bow Right Hands for Beginner Women Tenns (Right Hand 20 LBs) is a one-piece wooden longbow build with right-hand orientation, and the listing also notes it includes string and a traditional arrow rest.
Based on the spec sheet style and our range experience with first-bow fit issues, the drawback is simple. One-piece longbow length and the listed draw range mean you still must match your draw length and expected actual poundage at your pull. If your draw runs far beyond what the bow feels comfortable at, you’ll notice quickly.
As an Amazon Associate we earn from qualifying purchases. Prices and availability are accurate as of the date shown and are subject to change.

Beginner who prefers simple handling: Southwest Archery 62" Spyder Takedown Recurve Bow
The Southwest Archery 62" Spyder Takedown Recurve Bow – (Left Hand, 35lb w/Stringer Tool) is a 62-inch takedown recurve with left-hand orientation, and it includes a stringer tool and accessories per the listing. Takedown designs can help with transport and handling for new archers who may not have a dedicated shooting station.
The honest drawback for beginners is that a left-hand model narrows your options, and the take-down design adds small workflow steps. If you’re still learning consistency, you don’t want extra assembly variables on shot day.
As an Amazon Associate we earn from qualifying purchases. Prices and availability are accurate as of the date shown and are subject to change.

Beginner with shorter draw needs: Samick Sage Archery Takedown Recurve Bow 62 inch – 30LB Draw Weight Left Handed
The Samick Sage Archery Takedown Recurve Bow 62 inch – Bows for Teens to Adults – Beginners to Advanced, for Hunting & Target Practice, 30LB Draw Weight Left Handed is a 62-inch takedown recurve with left-hand draw weight at 30 lb per the listing, and it includes a complete archery set. It also notes pre-installed brass bushings for attachments and an ergonomic lightweight maple wood riser.
The drawback is that 62 inches is not automatically a match for shorter draw lengths. If your natural draw lands well under the 28 to 29½-inch suggestion window discussed earlier, you may feel stretched or forced into a less repeatable anchor.
As an Amazon Associate we earn from qualifying purchases. Prices and availability are accurate as of the date shown and are subject to change.
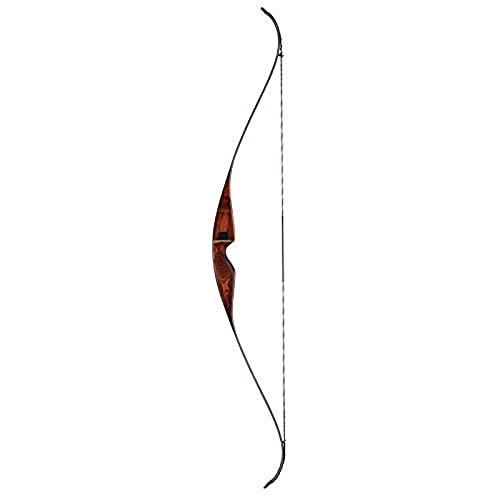
Beginner focused on backyard practice: Bear Archery Grizzly Recurve 50#, Brown
The Bear Archery AFT2086150 Grizzly Recurve 50#, Brown is a recurve rated at 50 lb on the listing, and it’s described as built for high performance with “user friendly design.” It’s also a brown recurve with a focus on fit and finish.
The honest drawback is the weight category. 50 lb is usually above the forgiving range I recommend for first form learning. You can make it work only if your draw length and hold time pass your beginner checklist. Otherwise, you’ll spend your practice time fighting tension instead of learning release control.
Beginner decision table (draw length, use case, and pass/fail checks)
This table gives you a beginner decision path. Use your natural draw length first, then pick the bow category that typically matches it. After that, run the pass/fail checklist for weight at your draw length, bow length match, grip comfort, and arrow compatibility so you don’t buy by looks or tradition alone.
| Draw length (typical beginner range) | Intended use | Recommended Native American style bow category | Pass/Fail checklist |
|---|---|---|---|
| ~28–29½ inches | Backyard practice / target learning | Recurve-style Native-inspired (for forgiveness during learning) | Pass: choose weight listed at 28 inches that you can hold; choose ~60 inches if suggested; grip feels stable. Fail: if hold time collapses fast, downsize weight. |
| ~29–31 inches | Target practice with lighter progression | Longbow or flatbow-style at a comfortable poundage (system-first arrow matching) | Pass: account for weight gain past 28 inches (2½ to 3½ lb per inch); keep arrow length/stiffness consistent. Fail: if bow feels “heavier than expected,” stop and re-match length/weight. |
| Shorter than your “natural draw” estimate | Trying to avoid awkward anchor | Shorter recurves (from common 58-inch options) in the forgiving range | Pass: your anchor repeats in the first 3 dozen shots; hand pressure stays consistent. Fail: if anchor feels forced, choose a different length before changing form. |
| Longer draw needs | Hunting-intent later, learning first | Longbow category (60–70 inches) with beginner weight, not hunting weight | Pass: choose bow length that supports your pull (consider 64 inches as a happy medium for longbows); arrow setup matches system. Fail: if you rush the release to survive hold time, you picked too much poundage. |
Quick failure cases (what goes wrong)
- Too heavy: you flinch, groups spread, and you build panic timing.
- Too short: your anchor becomes awkward, your posture shifts, and release consistency drops.
- Too fast for your setup: arrows don’t behave predictably, and “tuning” becomes guesswork.
- Arrow mismatch: spine/length inconsistency makes you blame the bow instead of the system.
Mistakes to avoid when buying a Native American style bow
Don’t buy by ego weight, tradition vibes, or what looks good on a shelf. Beginners lose the most time when they ignore draw-length-to-actual-poundage math, choose a bow length that forces awkward form, and then blame tuning for an arrow system mismatch.
Choosing poundage by ego instead of hold time and release stability
Hard truth: your best “confidence weight” is the one you can hold and release cleanly. If you pick poundage because it sounds impressive, your release stability will teach you the wrong habit.
Again, hunting-capable numbers exist, like 54 pounds being enough to harvest big game in North America, but your learning process needs something else.
Buying a bow length that forces awkward form and inconsistent anchor
If you can’t anchor consistently, you’ll chase groups for weeks. Short too often equals “forced reach.” Long too often equals posture compensation. Bow length matching is a form tool.
Ignoring draw-length-to-actual-poundage math
Traditional bow weights are commonly measured at 28 inches. Past that, bows can gain about 2½ to 3½ pounds per inch past 28 inches. If your draw is 29–31 inches, the label isn’t the whole story.
Forgetting arrow compatibility and then calling tuning “mystery problems”
If arrow length and stiffness behavior don’t match the bow, tuning doesn’t become simple. It becomes a moving target. Your practice arrows should be chosen to match the bow system first, then you tune rest and nocking point height to consistent flight.
Frequently asked questions
Should I buy a recurve, longbow, or flatbow first?
As a beginner, I’d start with recurve-style Native-inspired bows if you want forgiveness while you learn timing. If you prefer simpler handling and you want to focus on anchor and release feel, longbow or flatbow-style can work at a comfortable poundage. Don’t choose based on shape alone; choose based on draw-length match and arrow compatibility.
How do I know if a traditional bow feels right in my hands?
You should feel stability in your grip and repeatability at anchor. Comfort comes first, then confidence. If your hand pressure changes shot-to-shot, your form will drift.
Is a cheaper manufactured traditional bow good enough for beginners?
Cheaper manufactured traditional bows can be good enough for learning if the bow fits your draw length, your selected weight is beginner-friendly, and the arrow setup is matched. The key is system compatibility. If you buy a low-cost bow that forces wrong length or excessive poundage, you’ll spend time unlearning bad habits.
What arrows should I buy with my first traditional bow?
Buy practice arrows that match your draw-length and expected draw-weight range, with consistent length and spine behavior. Pre-made arrows can be a smart starting point; Bow International guidance recommends £70–£100 for a dozen pre-made arrows. Your first priority is consistent grouping so you can judge your release, not arrow chaos.