How to Make a Hungarian Horse Bow: Step-by-Step Guide
The Hungarian horse bow is a piece of history, combining engineering, art, and culture. This traditional recurve bow, used by the famous Magyar horse archers, is admired for its power, elegance, and efficient design. Today, making a Hungarian horse bow is a rewarding process for archery enthusiasts and history lovers alike.
It requires patience, attention to detail, and respect for old-world craftsmanship. In this guide, I’ll walk you through each step, from choosing materials to final stringing, while sharing insights and tips I’ve learned over years of building and shooting these classic bows.
Understanding The Hungarian Horse Bow
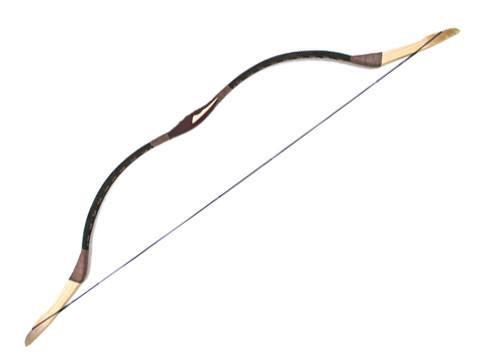
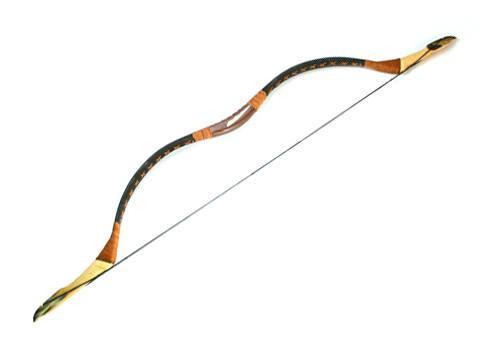
Before you start building, it’s essential to understand what sets the Hungarian horse bow apart. This bow is a type of composite recurve bow, meaning it uses several materials layered together for strength and flexibility. Its signature features include:
- Curved tips (called siyahs) that point away from the archer when unstrung
- A shorter overall length compared to longbows, making it perfect for use on horseback
- A deep “C” shape when unstrung, giving it a high energy output
The design allows for powerful shots from a compact bow, which was crucial for mounted warriors. Making a traditional-style bow at home can bring you closer to history while offering a unique shooting experience.
Gathering Materials And Tools
Primary Materials Needed
A traditional Hungarian horse bow uses a composite structure, typically wood, horn, and sinew. However, for most modern home builds, using synthetic substitutes makes the process more practical and accessible. Here’s what you’ll need:
- Wooden core: Maple, hickory, or bamboo laminations (about 36-48 inches long)
- Backing material: Fiberglass strips or rawhide (for strength)
- Belly material: Optional; use horn for traditional methods or fiberglass for modern builds
- Siyahs: Hardwoods like ash or oak
- Glue: Epoxy resin or waterproof wood glue
- Bowstring material: Dacron or Fast Flight string
- Finish: Varnish, lacquer, or shellac
Tools
- Saw (hand or band saw)
- Rasp and file
- Clamps
- Sanding block and sandpaper (grits 100, 400)
- Heat gun or steamer (for shaping curves)
- Measuring tape and ruler
- Marking pencil
- Protective gear (gloves, eye protection)
Pro Tip: If you want to use authentic materials (horn and sinew), be prepared for a much longer process and higher cost. Modern substitutes are easier for beginners.
Planning Your Bow Design
Key Measurements
The Hungarian horse bow is short, but precise dimensions matter for both safety and performance. Here’s a typical set of measurements for a bow with a 28-inch draw length:
| Component | Recommended Size |
|---|---|
| Overall length (unstrung) | 48 inches |
| Width at grip | 1.25 inches |
| Width at limb tips | 0.5 inches |
| Thickness at grip | 0.75 inches |
| Thickness at limb tips | 0.4 inches |
| Siyah length | 7 inches |
Drawing A Template
Lay out your bow’s profile on a large piece of paper or cardboard. Mark the center (grip), limb sections, and where the siyahs will attach. Accuracy here will prevent problems later.
Shaping The Core And Limbs
Start with your wooden core blank. Mark all measurements, including the grip, limb length, and siyah attachment points. Cut the blank to size, then use a rasp and file to taper the limbs smoothly from the grip to the tips.
The limbs should be thinnest at the ends for flexibility and thicker at the grip for strength.
Sand the edges and faces of the limbs to remove sharp corners. This reduces the risk of splinters and helps the backing material adhere later.
Example: When I made my first bow, I rushed the limb taper and ended up with a stiff, uneven draw. Take your time on this step, it’s key for a smooth shooting bow.
Attaching The Siyahs
The siyahs are short, stiff pieces of hardwood attached to the limb tips. Their backward curve gives the bow its power and unique look.
Siyah Preparation
- Cut two pieces of hardwood, each about 7 inches long and 0.5 inches wide.
- Taper one end of each siyah to fit snugly against the limb tip.
- Use a rasp to round the siyahs, making them comfortable to grip for final shaping.
Siyah Attachment
- Clamp each siyah to the end of a limb with the tapered end flush to the wood.
- Drill small pilot holes for strength.
- Glue the siyah in place with epoxy, then clamp until fully cured (usually 24 hours).
- For extra security, use thin finishing nails or wooden pins.
Once dry, blend the junction with a file and sandpaper. The transition should be smooth to avoid stress points.
Adding The Backing
The backing reinforces the bow, preventing it from breaking under tension. Traditional bows use rawhide or sinew, but fiberglass is common in modern builds.
Applying Backing Material
- Cut a strip of backing material slightly longer and wider than each limb.
- Apply a thin, even layer of epoxy to the back of the bow.
- Carefully lay the backing material, pressing out bubbles.
- Clamp or wrap tightly with elastic bands.
- Allow to cure per the glue’s instructions.
Pro Tip: For historical accuracy, use a layer of rawhide soaked in water, then stretch it over the back and let dry. Rawhide needs to be kept under tension to avoid wrinkles.
Tiller Shaping: Ensuring Even Bend
Tiller is how evenly the limbs bend during the draw. Good tiller means the bow pulls smoothly, preventing weak spots or breakage.
Steps For Tiller Shaping
- Clamp the handle and attach a tillering string (a long, temporary bowstring).
- Slowly pull the string and watch the limbs from the side.
- Mark any stiff or overly flexible areas.
- Remove wood from stiff spots using a rasp.
- Repeat until both limbs bend evenly.
This process takes patience. Make small changes, removing too much wood can’t be undone.
Shaping The Grip
The grip or handle is the center of the bow. It should feel comfortable in your hand and provide stability.
- Mark about 4 inches in the center for the grip.
- Shape the grip to fit your palm, rounding edges and slightly flattening the sides.
- Sand smooth.
You can wrap the grip with leather or cord for extra comfort.

Credit: archery-beier.com
Preparing Nocks For The String
Nocks are small grooves at the siyah tips where the bowstring sits. They must be deep enough to hold the string but not weaken the siyah.
- Use a small file to cut a notch on each side of the siyah tip, about 0.25 inches deep.
- Angle the nocks slightly toward the back of the bow.
Double-check nock placement, if they’re off-center, the string won’t sit correctly.
Sealing And Finishing
A good finish protects your bow from moisture and damage.
- Sand the whole bow with fine (220, 400 grit) sandpaper.
- Wipe clean.
- Apply several thin coats of varnish, shellac, or lacquer.
- Allow to dry fully between coats.
If you want a historical look, add painted designs or leather accents.
Making And Installing The Bowstring
Choosing String Material
Modern bowyers use Dacron or Fast Flight string. For traditional builds, linen or silk can be used, but they’re less durable.
Measuring And Twisting The String
- Measure the bow’s length (nock to nock, along the belly).
- Cut a string about 4 inches shorter than this measurement.
- Twist into a loop at each end (called a “Flemish twist” or use “endless loop”).
- Wax the string for durability.
Stringing The Bow
Hungarian horse bows are usually strung using the step-through method:
- Place the lower siyah against the inside of your ankle.
- Hold the grip in one hand and push the upper limb forward.
- Slip the string into the upper nock.
Be gentle, forcing the limbs can cause cracking.
Testing Draw Weight And Performance
Draw weight is how much force is needed to pull the bowstring back to a set distance (usually 28 inches). For most adults, a draw weight of 30, 50 pounds is comfortable.
To test:
- Use a bow scale or a luggage scale.
- Mark the 28-inch point on an arrow or stick.
- Draw the string to that point and read the weight.
If the bow is too heavy, carefully reduce limb thickness. If too light, you may need to start over, adding material won’t increase draw weight.
Credit: www.thelongbowshop.com
Common Mistakes And Troubleshooting
Every beginner faces challenges. Here are some common mistakes and how to avoid them:
- Uneven limb bend: Check tiller often. Remove wood slowly.
- Cracking or delamination: Use high-quality glue and clamp tightly.
- Rough grip: Spend time sanding and shaping for comfort.
- String not staying in nocks: Check nock depth and angle.
- Twisted limbs: Store the bow flat during construction.
Example: My first bow developed a twist because I left it propped against a wall while drying. Now, I always keep my bows flat during curing.
Modern Vs Traditional Materials: What’s Best?
There’s no single answer, each material offers benefits and trade-offs.
| Material | Pros | Cons |
|---|---|---|
| Fiberglass | Durable, consistent, widely available | Less traditional look, synthetic feel |
| Rawhide/Sinew | Authentic, strong, flexible | Time-consuming, sensitive to moisture |
| Horn | Very strong, traditional | Expensive, hard to work |
| Bamboo | Lightweight, flexible | May not suit all designs |
For most first-time builders, a combination of hardwood, fiberglass, and synthetic string is ideal. Advanced crafters can experiment with horn and sinew for a true historical replica.
Credit: www.thelongbowshop.com
Safety Tips
- Always wear safety glasses when cutting, filing, or sanding.
- Use gloves with epoxy and other chemicals.
- Never draw a bow past its designed limit (usually 28-30 inches for this style).
- Inspect for cracks before every use.
Pro Tip: Store your finished bow in a dry, cool place. Avoid leaving it strung for long periods; this can weaken the limbs.
Comparing The Hungarian Horse Bow To Other Traditional Bows
Hungarian horse bows share similarities with other Asian composite bows but have unique features. Here’s a quick comparison:
| Bow Type | Typical Length | Main Materials | Best Use |
|---|---|---|---|
| Hungarian Horse Bow | 46, 52 inches | Wood, horn, sinew (or fiberglass) | Mounted archery, target shooting |
| Mongolian Bow | 48, 54 inches | Wood, horn, sinew | Long-range, hunting |
| Turkish Bow | 41, 45 inches | Wood, horn, sinew | Flight shooting, target |
| English Longbow | 66, 74 inches | Yew, ash | Warfare, hunting |
The Hungarian bow’s versatility and compact size make it popular among historical archery groups and horseback archers worldwide.
Personalizing Your Bow
Once you’ve built a working Hungarian horse bow, consider adding personal touches:
- Painting or staining: Use traditional colors or patterns inspired by Magyar art.
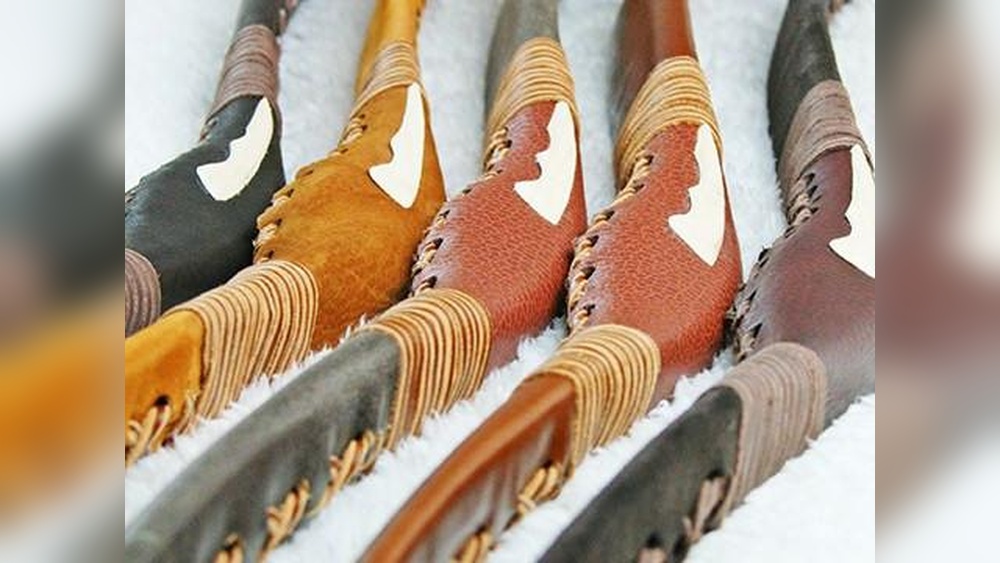
- Leather wraps: Cover the grip or siyahs for comfort and style.
- Inlays or carvings: Add small decorations for a one-of-a-kind look.
Remember, personalization should not compromise the bow’s structure or balance.
Learning To Shoot The Hungarian Horse Bow
Building your own bow is just the beginning. Shooting with a horse bow uses different techniques than modern recurves or longbows.
- Hold the bow in your non-dominant hand, with the arrow resting on the thumb side.
- Use a thumb draw (common in Eastern archery) or a three-finger draw.
- Practice short, smooth draws. Horse bows are not meant for “holding at full draw” for long.
- Start with light arrows to avoid over-stressing your new bow.
Pro Tip: Take a few lessons from a traditional archery coach if possible. This helps prevent bad habits and improves safety.
Maintenance And Storage
A well-made bow can last for years with proper care.
- Unstring the bow after each use to preserve limb tension.
- Wipe down with a dry cloth after shooting.
- Check for cracks, splits, or loose siyahs regularly.
- Reapply finish if the wood looks dry or worn.
If you live in a humid climate, store your bow with silica gel packets to prevent moisture damage.
Frequently Asked Questions
How Long Does It Take To Make A Hungarian Horse Bow?
For beginners using modern materials, expect 20, 30 hours spread over several days. Traditional horn and sinew bows can take months due to drying and curing times.