How to Make a Laminated Horse Bow: Step-by-Step Guide
Building a horse bow is more than just a craft project. It’s a connection to history, culture, and the deep skill of traditional archery. The laminated horse bow stands out for its elegant curves, powerful shot, and beautiful materials. If you’ve ever admired the sleek, recurved shape of these bows and wondered how they’re made, this guide will walk you through every step, from choosing materials to stringing your finished bow. You don’t need a professional workshop, just attention to detail, patience, and a willingness to learn. By the end, you’ll have not only a functional bow but also a greater respect for the art and science behind it.
Understanding Laminated Horse Bows
Before you start, it’s important to know what makes a laminated horse bow special. These bows are inspired by the designs used by ancient horse archers from regions like Central Asia, Mongolia, and Persia. Unlike simple self-bows made from a single piece of wood, horse bows use multiple layers of different materials, usually wood, horn, and sinew, glued together for extra strength and flexibility.
Lamination is the process of bonding these layers. Each material brings a unique quality: wood provides the core structure, horn adds power and compression resistance, and sinew (or modern equivalents like fiberglass) gives elasticity and snap. This combination lets the bow store more energy and release arrows with surprising speed for its size.
Tools And Materials You’ll Need
Getting the right tools and materials is the first big step. You don’t need expensive machines, but you do need reliable basics.
Essential Tools
- Saw (hand saw or band saw for shaping wood)
- Rasp and files (for fine shaping)
- Clamps (at least 8, 10 strong clamps or a custom bow press)
- Heat gun or steam box (for bending wood and horn)
- Sandpaper (various grits, from 80 to 400)
- Epoxy glue (high-strength, slow-cure recommended)
- Ruler and measuring tape
- Carving knife or utility knife
- Protective gloves and goggles
Materials
- Wood core: Maple, hickory, or bamboo are popular choices.
- Horn strips: Water buffalo horn is traditional, but cow horn also works.
- Sinew or fiberglass: Sinew gives a traditional feel; fiberglass is easier for beginners.
- Backing material: Linen, rawhide, or synthetic fibers for reinforcing the back.
- Bowstring material: Dacron (B-50) or FastFlight for modern strings, or twisted natural fibers.
- Finish: Varnish, tung oil, or shellac.
Optional Extras
- Bow press: For precise shaping.
- Micrometer: For measuring thickness.
- Templates: To keep dimensions consistent.
Pro Tip: Always buy a little extra material, especially if you’re new. Mistakes happen, and having spares saves time and frustration.
Planning Your Bow: Dimensions And Design
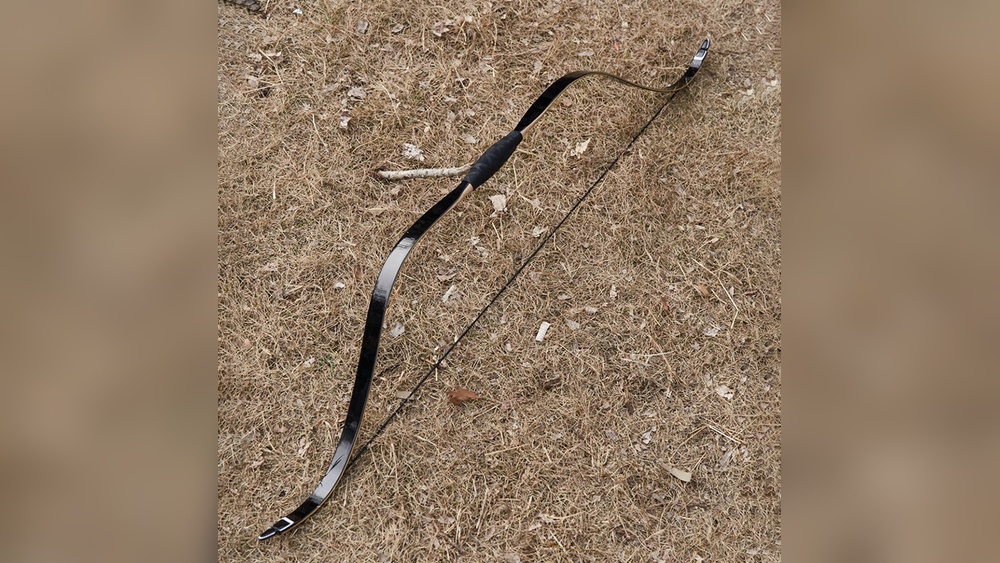
A good plan makes the whole process smoother. The typical horse bow measures 48, 54 inches (about 120, 137 cm) when strung, with recurved tips and a deep belly curve.
Basic Measurements
- Overall length: 50 inches (127 cm) unstrung
- Width at grip: 1.5 inches (3.8 cm)
- Width at tips: 0.5 inches (1.3 cm)
- Thickness at grip: 0.6 inches (1.5 cm)
- Thickness at tips: 0.25 inches (0.6 cm)
These numbers are just a starting point. You can adjust them based on your draw length and the materials you choose.
Draw Weight
Most traditional horse bows are 30, 50 lbs at 28 inches of draw. For beginners, aim for the lower end. Higher draw weights require more experience and stronger materials.
Bow Shape
The classic horse bow has:
- Recurved tips: Curved away from the archer at the ends.
- Reflexed limbs: Limbs curve forward (away from the archer) when unstrung.
- Central grip: Often flattened for comfort.
Draw a full-sized template on cardboard or plywood. This will guide your shaping and help prevent mistakes.
Step 1: Preparing The Core
The core is the backbone of your bow. It must be straight, strong, and free from defects.
- Select your wood: Maple is popular for its balance of flexibility and strength. Bamboo is also light and responsive.
- Cut to size: Using your template, cut the wood blank to the rough dimensions, leaving extra width and thickness for shaping.
- Check for grain: The wood grain should run straight from end to end. Avoid knots, twists, or cracks.
- Shape the profile: With a saw and rasp, shape the core into the classic horse bow outline, wide at the grip, tapering toward the tips.
- Taper the limbs: The limbs should be slightly thicker at the base and thinner at the tips for smooth bending.
In my experience, taking time at this stage saves hours later. Small flaws in the core can turn into big problems when you add horn and backing.
Step 2: Preparing The Horn And Backing
The horn adds power and snap to the bow, but it’s tricky to work with.
Shaping The Horn
- Flatten the strips: Heat the horn strips with a heat gun or steam box until pliable.
- Press and cool: Clamp the strips flat between boards until they cool.
- Trim to size: Cut the horn to match the length and width of your core (usually covering the belly of the limbs, not the grip).
- Rough the surface: Sand the bonding side to help glue stick.
Preparing The Backing
If using sinew, soak the fibers, then lay them out in bundles. For fiberglass, cut strips to fit the back of the limbs. Linen or rawhide needs to be soaked and stretched.
Pro Tip: Always test-fit all layers before gluing. Gaps or overlaps can cause weak spots.
Step 3: Laminating The Bow
Lamination is where your bow starts to take shape. It’s also the messiest and most nerve-wracking part.
Gluing The Horn
- Apply epoxy: Use a thin, even layer on both the horn and the belly of the core.
- Align carefully: Place the horn strips on the belly, making sure they match the curve and have full contact.
- Clamp firmly: Use clamps every few inches along the length. Too much pressure squeezes out glue; too little leaves gaps.
- Cure: Leave for at least 24 hours in a warm, dry place.
Adding The Backing
- Apply glue: Spread evenly on the back of the core.
- Lay sinew/fiberglass: Stretch the fibers or strip along the back. For sinew, overlap each layer slightly.
- Clamp or wrap: Use elastic bands or cloth strips to hold everything tight until the glue sets.
Layering
Some bows use multiple layers of sinew or horn for extra strength. Let each layer cure fully before adding the next.

Credit: glasgowarchers1948.co.uk
Step 4: Shaping And Tillering
Tillering is the process of adjusting the bow’s bend so both limbs flex evenly. This step requires patience and a careful eye.
- Mark the center: Find and mark the exact middle of your bow.
- Rough shape: Use a rasp and file to refine the profile and taper the limbs.
- String the bow (long string): Use a loose string to start gentle bending.
- Check the bend: The limbs should curve smoothly, with no sharp angles or flat spots.
- Remove wood/horn: Gradually shave small amounts from stiff areas, checking after each adjustment.
- Increase draw: As the bow flexes more, shorten the string until you reach your target brace height and draw length.
Common mistake: Removing too much material at once can ruin the bow. Go slow and steady.
Step 5: Finishing Touches
Now your bow looks and feels like a horse bow, but a few final steps will make it safe, comfortable, and attractive.
Sanding
Start with coarse sandpaper (80 grit) and move to finer grades (up to 400 grit). Smooth all surfaces, especially the grip and limb edges. Sharp edges can damage the string or your hand.
Sealing
Apply a sealant to protect against moisture and wear. Tung oil gives a traditional look; polyurethane or varnish offers more protection. Let each coat dry completely before adding the next.
Installing The String
Cut your string to the right length (about 4 inches shorter than the bow’s nock-to-nock distance). Use a Flemish twist or simple loop at each end. String the bow and check for even tension.
Adding Arrow Passes And Nocks
You can file shallow grooves in the tips for string nocks. Some archers add a leather or horn plate where the arrow rests to reduce wear.

Credit: www.ebay.com
Comparing Traditional And Modern Laminated Horse Bows
Here’s a quick comparison of classic versus modern materials for horse bows:
| Feature | Traditional (Horn/Sinew/Wood) | Modern (Fiberglass/Wood) |
|---|---|---|
| Power | High, with “snap” | Very high, consistent |
| Maintenance | High (sensitive to moisture) | Low (more durable) |
| Weight | Light | Varies |
| Cost | High (rare materials) | Medium |
| Difficulty | Challenging | Beginner-friendly |
Tips For Success (and Common Mistakes To Avoid)
Making a laminated horse bow can be frustrating if you skip steps or rush. Here are some practical tips:
- Take your time: Rushing lamination or tillering almost always leads to failure.
- Control humidity: Horn and sinew are sensitive to moisture. Work in a dry area.
- Test-fit everything: Before gluing, check the fit of all parts.
- Don’t overheat horn: Too much heat can make it brittle.
- Use quality glue: Cheap glue can fail under tension.
- Track your progress: Mark changes and measure draw weight as you go.
Pro Tip: Photograph each stage for your own record. This helps if you need to troubleshoot or make another bow later.

Credit: www.amazon.com
Testing And Shooting Your Bow
Once your bow is finished and strung, don’t shoot full draw right away. Follow this process for safety and performance:
- Floor tiller: Press the belly against the floor and flex gently. Listen for cracks.
- Short draws: Draw the string a few inches at a time, holding for a few seconds.
- Increase slowly: Work up to your intended draw length over several days.
- Inspect regularly: Check for any delamination, cracks, or strange noises.
When you’re confident, shoot your first arrows at close range (5, 10 yards). Pay attention to how the bow feels and sounds.
Example: The first time I finished a laminated horse bow, I was surprised by how much power it had for its size. A well-made bow can shoot arrows over 150 feet with ease.
Care And Maintenance
A laminated horse bow can last for decades with proper care. Here’s how to keep it in top shape:
- Unstring when not in use: Relieves tension and prevents warping.
- Store in dry conditions: Avoid damp basements or hot cars.
- Check for damage: Regularly inspect for cracks or loose layers.
- Clean gently: Wipe with a soft cloth; avoid harsh chemicals.
- Reapply finish: Every year or as needed.
Pro Tip: Never leave your bow strung overnight. This is the most common cause of premature failure.
Cost And Time Comparison
Making your own laminated horse bow is rewarding, but how does it compare to buying one?
| Option | Estimated Cost | Time Required | Skill Level |
|---|---|---|---|
| DIY Laminated Horse Bow | $120, $400 (materials) | 2, 4 weeks (part-time work) | Intermediate, Advanced |
| Buy Finished Bow | $300, $900+ | Immediate | Beginner |
While making your own bow is cheaper, it demands time and patience. You’ll also learn skills that are hard to buy.
Historical And Cultural Insights
The horse bow is not just a tool; it’s a piece of history. Used by nomadic peoples across the Eurasian Steppe, it helped shape empires and change warfare. Horse bows are designed for shooting from horseback, short, powerful, and easy to carry.
Different cultures have unique styles:
- Mongolian bows: Deep recurves, wide limbs, heavy use of sinew.
- Turkish bows: Highly reflexed, short, and fast.
- Hungarian bows: Slightly longer, with decorative finishes.
Learning to make a horse bow connects you to these traditions. Many modern archers join clubs or online forums to share their builds, learn from experts, and celebrate the art of bowmaking. For more on the history and types of horse bows, visit the Wikipedia Composite Bow page.
Frequently Asked Questions
How Long Does It Take To Make A Laminated Horse Bow?
Depending on your experience and the drying time for glue, it usually takes 2 to 4 weeks from start to finish. Beginners may need extra time for careful shaping and tillering. Waiting for each glue layer to cure is the slowest part, but skipping this can ruin your bow.