How to Make a Pyramid Self Bow: Step-by-Step Guide for Beginners
Crafting your own pyramid self bow is more than just a woodworking project; it connects you to a tradition that stretches back thousands of years. The pyramid bow, known for its wide limbs that taper gracefully toward the tips, delivers impressive performance, beauty, and a satisfying interactive build. Whether you’re a traditional archery fan, a survivalist, or simply enjoy making things with your hands, building a pyramid self bow can be both challenging and deeply satisfying. This guide walks you through every step, from wood selection to finishing touches, while offering practical advice, comparisons, and insights to help beginners avoid common pitfalls.
Understanding The Pyramid Self Bow
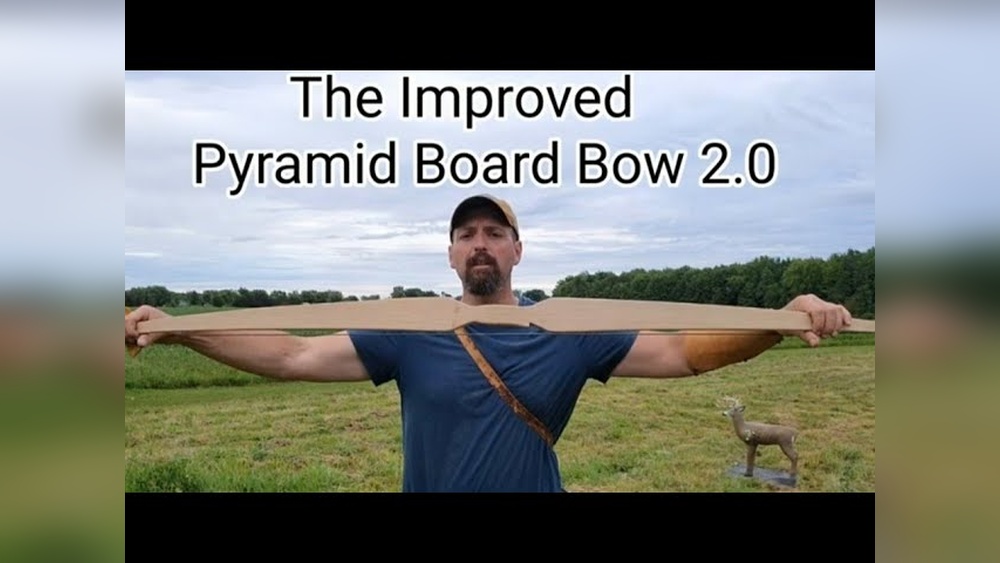
The pyramid self bow is a type of primitive bow known for its distinctive limb shape, wide at the handle, narrowing evenly to the nocks. This design efficiently distributes stress, allowing for a more forgiving, powerful, and stable shot even when made from a single piece of wood (the “self” part of the name).
Unlike longbows or recurves, the pyramid bow’s limbs are typically flat and broad, giving it a unique look and feel. Its simplicity makes it an excellent choice for first-time bowyers, yet it can rival more complex bows in performance if crafted carefully.
Why Choose A Pyramid Self Bow?
- Simplicity: Requires fewer tools and less complex skills compared to recurves or composite bows.
- Performance: A well-made pyramid bow stores and releases energy efficiently.
- Tradition: Follows ancient designs used by cultures worldwide.
- Accessibility: Can be made with basic hand tools and locally available woods.
Pro Tip: The pyramid bow is forgiving of small mistakes. If your first attempt isn’t perfect, it will likely still shoot well and give you valuable experience.
Selecting The Right Wood
The choice of wood is crucial. The bow must flex without breaking, store energy, and return to shape after each shot. Not all woods are suitable, but several species are proven performers.
Best Woods For Pyramid Self Bows
- Osage orange: Highly regarded for its strength and elasticity.
- Hickory: Readily available in North America, very tough.
- Yew: Classic bow wood, used for English longbows.
- Maple: Hard, durable, and often accessible.
- Ash: Flexible and traditional, though less powerful than Osage.
When selecting wood, look for:
- Straight grain: No twists or curves along the length.
- No knots or cracks: Weak spots can cause failure.
- Stave size: At least 68, 72 inches long, 2, 3 inches wide, and 1, 1.5 inches thick.
Here’s a quick comparison of popular bow woods:
| Wood Species | Strength | Elasticity | Availability |
|---|---|---|---|
| Osage Orange | Very High | Excellent | Moderate |
| Hickory | High | Very Good | High |
| Yew | High | Excellent | Low |
| Maple | Medium | Good | High |
| Ash | Medium | Good | High |
Hickory is the best choice for first-timers due to its tolerance for mistakes and its ability to handle heavy draw weights.
Tools And Supplies You’ll Need
Building a pyramid self bow requires a few basic tools. Many are common in home workshops. You don’t need expensive equipment to get started.
Essential Tools
- Drawknife or spokeshave: For shaping the stave.
- Rasp and file: For finer shaping and smoothing.
- Hatchet or small axe: To rough out the initial shape.
- Measuring tape and straightedge: To ensure accuracy.
- Pencil or chalk: For marking.
- Sandpaper (various grits): For finishing.
- Tillering stick or tree: For bending and adjusting the bow.
- Hand saw: For cutting nocks and trimming wood.
- Clamps: To hold the bow during certain steps.
Additional Materials
- String material: Dacron B-50 is common, but strong natural fibers also work.
- Finish: Linseed oil or polyurethane for protection.
- Glue: For optional tip overlays.
Pro Tip: If you lack a drawknife, a sharp utility knife can substitute for careful, slow cuts.
Designing Your Pyramid Bow
Before cutting, plan your dimensions. The pyramid design means the limbs taper in width, not thickness, from the handle to the tips.
Typical Dimensions
- Length: 68, 72 inches (measured tip to tip).
- Width at handle: 1.75, 2 inches.
- Width at tips: 0.5 inches.
- Thickness: Around 0.75, 1 inch at the handle, tapering toward the tips.
A helpful guideline: The bow should be about your height, or slightly taller.
Here’s a basic dimension reference:
| Part | Standard Size |
|---|---|
| Overall Length | 68, 72 inches |
| Handle Width | 1.75, 2 inches |
| Tip Width | 0.5 inches |
| Handle Thickness | 0.75, 1 inch |
Mark these dimensions onto your stave with a pencil before you begin shaping.
Shaping The Stave
Start with the back of the bow, the side facing away from the archer, untouched if possible. The belly (side facing the archer) will be shaped.
- Lay out your design on the stave. Mark the centerline, handle area (about 6 inches long), and the limb tapers.
- Rough out the shape using a hatchet, staying slightly outside your lines. Remove bark and sapwood if using Osage or Yew.
- Refine the shape with a drawknife or spokeshave, carefully working down to your marks. The limbs should taper evenly from the handle to tips in width.
- Smooth the belly and sides with a rasp or file, paying attention to symmetry.
- Leave the limbs slightly thick for now; you will remove more wood during tillering.
Warning: Removing too much wood too quickly can ruin the bow. Work slowly and check your progress often.
Cutting The Nocks
Nocks hold the bowstring at each end. They must be strong and smooth to avoid cutting the string.
- Mark nocks about 0.5 inches from each tip, on both sides of the limb.
- Cut shallow grooves at a 45-degree angle using a small saw or file.
- Smooth the nocks with fine sandpaper to remove any sharp edges.
For extra durability, glue on tip overlays made from hardwood or horn.
Tillering: The Heart Of Bow Making
Tillering is the process of gradually bending the bow to achieve an even curve on both limbs. This step takes patience and careful observation.
Tillering Steps
- Floor tiller: Gently push the belly of the bow against the ground and flex it. Watch for stiff spots and uneven bends.
- Use a tillering stick: Place the bow on a tillering stick or tree and slowly bend the limbs with a string attached loosely to the nocks.
- Remove wood from stiff areas: Use a rasp or scraper to take small amounts from areas that bend less.
- Check often: Re-string and re-bend the bow after every adjustment.
- Continue until both limbs bend evenly and reach your target draw length (usually 28 inches for most adult bows).
Here’s a comparison of common tillering issues and their solutions:
| Issue | Cause | Solution |
|---|---|---|
| One limb stiffer | Uneven wood removal | Remove wood from stiff limb only |
| Flat spots (no bend) | Too thick in that section | Thin the area gradually |
| Over-bending (hinge) | Too thin in one spot | Do not remove more wood there; adjust other areas |
Pro Tip: Beginners often remove too much wood from the belly, making the bow weak. Remove wood slowly, and only where needed.
Stringing The Bow
Once tillering is complete, you can string the bow at its final brace height (the distance from the bowstring to the grip when strung).
- Brace height: For pyramid bows, 6, 7 inches is common.
- Bowstring: Use at least 8, 10 strands of strong material like Dacron B-50 or similar.
- String length: Typically 3, 4 inches shorter than the unstrung bow.
To string the bow safely, use the “step-through” or “push-pull” method to avoid twisting the limbs.
Finishing Touches
A few final details will protect your bow and make it comfortable to use.
Sanding And Smoothing
- Start with coarse sandpaper (80 grit), moving to finer grits (up to 400).
- Round all edges, especially on the grip and tips.
Sealing The Bow
- Apply several coats of linseed oil, tung oil, or a clear polyurethane finish.
- Allow each coat to dry fully before applying the next.
This step protects the bow from moisture and helps prevent warping or cracking.
Adding The Grip
- Leather, suede, or cloth wraps make comfortable, non-slip grips.
- Secure with glue or tightly wound thread.
Pro Tip: Avoid bulky wraps that can reduce control. Thin, firm wraps work best.
Tuning And Shooting Your Pyramid Self Bow
Your first shots will help you fine-tune performance.
- Use matched arrows: Spine (stiffness) and length should suit your bow.
- Check for hand shock: If the bow feels harsh, the limbs may not bend evenly.
- Listen for creaks or cracks: These can signal weak spots.
Practice at short distances first (10, 15 yards). Adjust your grip, stance, and anchor point to get consistent results. Over time, your bow may “settle” and require a little more tillering or sanding for best performance.
Example: On a first pyramid bow, a stiffer top limb causes arrows to fly high and right. Removing a small amount of wood from the stiff limb quickly improved accuracy and feel.
Common Beginner Mistakes To Avoid
Building a bow is a learning process. Avoiding these mistakes will save you time and frustration:
- Rushing tillering: Impatience causes uneven limbs and poor performance.
- Ignoring grain direction: Twisted or irregular grain leads to breaks.
- Too much wood removal: Thinning the belly excessively weakens the bow.
- Skipping sealing: Unprotected wood absorbs moisture and warps.
- Using poor quality string: Weak or stretchy strings reduce power and safety.
Pro Tip: Keep your first bow simple. Save advanced features like recurved tips or decorative overlays for later projects.
Advanced Tips For Pyramid Self Bows
Once you master the basics, consider these tweaks for improved performance:
- Add horn or hardwood overlays to the tips for durability and style.
- Experiment with slightly reflexed (curved away) limbs for more power.
- Try different grip shapes: Flat, rounded, or built-up handles can change the feel.
- Decorate with stains, carvings, or paint for a personalized touch.
Most importantly, keep records of your process, dimensions, wood type, performance notes. These will help you improve with each bow.
Pyramid Self Bow Vs. Other Traditional Bows
How does the pyramid self bow compare to other classic designs? Here’s a quick breakdown:
| Bow Type | Ease of Construction | Performance | Forgiveness | Materials Needed |
|---|---|---|---|---|
| Pyramid Self Bow | Easy | High | High | Single wood stave |
| English Longbow | Medium | Very High | Low | Yew or Osage, precision needed |
| Flatbow | Medium | High | Medium | Wide, flat stave |
| Recurve Bow | Difficult | Very High | Medium | Multiple pieces, glue |
The pyramid self bow stands out for its beginner-friendly build and reliable shooting.
Resources For Further Learning
If you want to go deeper, many excellent books and videos cover bow building in detail. The Primitive Archer magazine and forums are great places to learn from experienced bowyers. For more on archery history, techniques, and materials, the