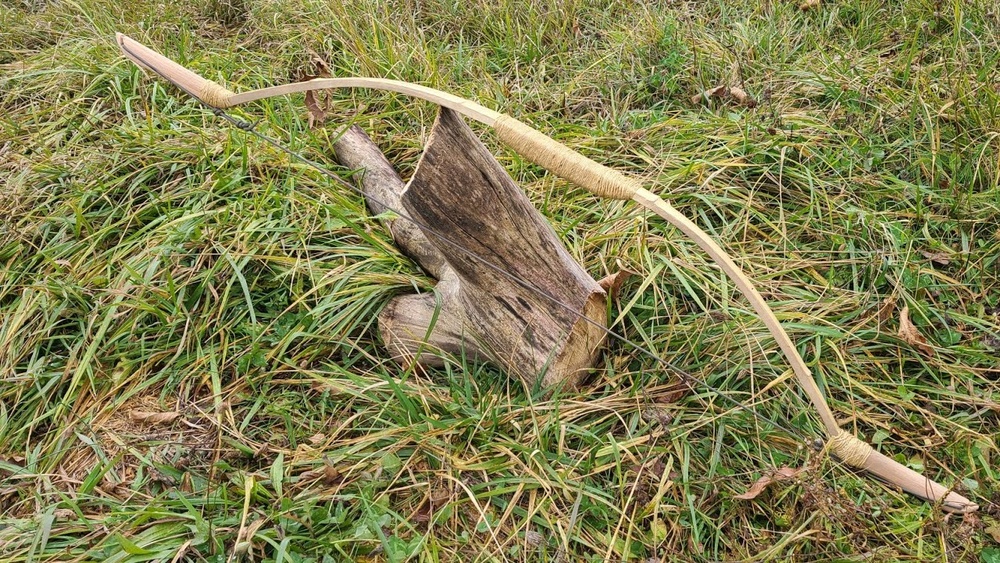
How to Make Horse Bow Bamboo: Step-by-Step Guide for Beginners
Making a horse bow from bamboo is more than just a craft, it’s a link to ancient traditions, a test of patience, and a way to build a tool with your own hands. Horse bows, also known as “reflex bows” or “composite bows,” were used by steppe nomads like the Mongols and Huns for centuries.
These bows are known for their short, curved shape and their power, making them ideal for shooting arrows while riding a horse. Bamboo, a strong yet flexible material, is a favorite for traditional bow makers. But making a horse bow bamboo is a process that requires careful planning, attention to detail, and understanding both the material and the design.
This guide will show you, step by step, how to make a horse bow from bamboo. Whether you are a beginner or have tried bow making before, you’ll discover clear instructions, practical tips, and a few important insights that can make your project successful.
You’ll learn how to choose the right bamboo, shape the limbs, add the horn or sinew (if you want a true composite bow), and finish the bow for strength and beauty. We’ll also look at common mistakes, essential tools, and safety advice.
By the end, you’ll have the knowledge to craft your own horse bow, and maybe even inspire others to try.
Understanding The Horse Bow Bamboo
Before you start, it’s important to know what makes a horse bow special and why bamboo is used. Horse bows are different from Western longbows or recurve bows. They are shorter, with pronounced curves at the tips, and are often made from several materials glued together (wood, horn, sinew). Bamboo’s properties, its strength, lightness, and natural flex, make it ideal for the core or even the main limbs of a bow.
Key Features Of The Horse Bow
- Short length: Usually between 48, 54 inches strung.
- Reflex shape: Limbs curve away from the archer at rest, storing more energy.
- Composite structure: Traditional bows use wood, horn, and sinew, but many modern versions use bamboo with or without these extras.
- High draw weight: Can reach 40, 60 pounds, suitable for hunting or target shooting.
Why Bamboo?
- Flexibility: Bamboo bends without breaking, reducing the risk of limb failure.
- Lightweight: Easier to handle, especially for beginners.
- Availability: Bamboo is easier to find in many regions compared to yew or horn.
- Cost-effective: Making a bamboo bow is usually cheaper.
Tools And Materials Needed
Making a horse bow bamboo requires the right tools and materials. Some items are essential, while others can help make the process easier.
Essential Tools
- Sharp knife: For shaping and trimming bamboo.
- Rasp or file: To smooth edges and taper limbs.
- Saw: For cutting bamboo to length.
- Sandpaper: Various grits (80, 150, 220) for finishing.
- Heat gun or open flame: For bending and shaping the limbs.
- Glue: Animal hide glue for traditional bows, or epoxy for modern builds.
- Clamps or rope: To hold pieces together while glue dries.
- Measuring tape and pencil: For marking lines and measurements.
Materials
- Bamboo pole: Straight, mature, and free of cracks; about 1.5, 2 inches in diameter.
- Sinew or fiberglass tape: For backing the bow (optional, adds strength).
- Horn or wood for tips: If making a composite bow.
- Thread or cotton cloth: For wrapping joints.
- Bowstring material: Dacron, linen, or traditional sinew.
Pro Tip: Choose bamboo that is at least one year old, well-cured, and with thick walls. Thinner bamboo can crack during bending.
Selecting And Preparing Bamboo
Choosing the right bamboo is one of the most important steps. Not all bamboo is suitable for bow making.
What To Look For
- Straightness: Bamboo should be as straight as possible, with minimal curve.
- Diameter and wall thickness: Aim for bamboo with a wall thickness of at least 0.3 inches. Thicker walls add strength but are harder to bend.
- No cracks or splits: Even small cracks can grow during the bending process.
- Age and dryness: Fresh bamboo can shrink or crack as it dries. Use bamboo that has been seasoned for at least 6 months.
Preparing The Bamboo
- Cut to length: For a horse bow, cut the bamboo to about 54, 58 inches.
- Remove branches and nodes: Trim off side branches and sand down any bumps or nodes.
- Split if necessary: Some bowyers split bamboo in half and laminate two pieces for extra strength.
- Heat treat: Gently heat the bamboo over a flame or with a heat gun to drive out moisture and make it more flexible.
If you find small cracks or splits during preparation, fill them with wood glue and clamp until dry. Small flaws can be repaired, but large cracks often mean you need to start with a new piece.
Shaping The Bow Limbs
Now that your bamboo is prepared, you can begin shaping the bow’s limbs. The limbs are the two arms of the bow that bend when you draw the string.
Marking The Limbs
- Measure from the center and mark the handle section (about 4, 5 inches in the middle).
- Mark the limb tips, which should be even on both sides.
Tapering The Limbs
Tapering means making the limbs thinner toward the tips. This helps the bow bend evenly.
- Use a sharp knife or rasp to remove bamboo slowly.
- The limbs should taper from about 1.25 inches wide at the handle to 0.5 inches at the tips.
- Check both limbs often to keep them symmetrical.
Adding Reflex (curvature)
Horse bows have a reflex curve, this is what gives them power.
- Heat the bamboo limbs with a heat gun or over a low flame.
- Gently bend the limbs away from the archer’s side and hold until cool.
- Use clamps or rope to keep the curve in place while cooling.
Warning: Overheating bamboo can cause it to scorch or split. Move the heat source constantly and never hold it in one place for too long.
Backing The Bow
Backing is adding a layer of strong material to the back of the bow (the side facing away from you as you shoot). This reduces the risk of breakage and increases power.
Backing Materials
- Sinew: Traditional and very strong, but takes time to apply and dry.
- Fiberglass tape: Modern and easy to use, but less traditional.
- Rawhide or linen: Good alternatives for beginners.
Applying The Backing
- Roughen the bamboo surface with sandpaper.
- Apply glue to the back of the bow.
- Lay sinew, tape, or cloth evenly along the back.
- Wrap tightly with thread or cloth to hold the backing in place.
- Let dry for at least 24 hours (longer for sinew).
This step is optional, but highly recommended, especially for bows with a draw weight above 30 pounds.
Building The Handle And Tips
A comfortable handle and strong tips are essential for a usable bow.
Making The Handle
- Some horse bows have a simple bamboo grip, while others add wood or leather for comfort.
- Wrap the handle area with cloth or leather to improve grip and absorb sweat.
- For extra support, glue a thin piece of hardwood to the belly (the side facing you).
Shaping The Tips
- Use horn, hardwood, or extra bamboo to reinforce the tips.
- Carve shallow grooves in each tip for the string.
- Make sure the grooves are even and smooth to avoid cutting the bowstring.

Credit: www.youtube.com
Tiller And Stringing The Bow
Tiller means shaping the bow so both limbs bend evenly. This is a key step for both safety and performance.
Tiller Process
- Place the bow on a tillering stick or hook.
- Pull the string a few inches at a time, watching how the limbs bend.
- Remove wood or bamboo from stiff areas with a rasp or file.
- Repeat until the bend is smooth and even on both limbs.
Making And Attaching The Bowstring
- Measure the length of the bow and make a string about 3, 4 inches shorter (for a proper brace height).
- Use dacron, linen, or sinew.
- Make loops at both ends (called “eyes”) for attaching to the tips.
- Carefully string the bow, using a bow stringer if possible.
Example: If your bow is 54 inches, make a string about 50, 51 inches long.
Finishing Touches And Decoration
A well-finished bow lasts longer and performs better.
Sanding And Smoothing
- Start with coarse sandpaper (80 grit) and move to finer grits (220).
- Round off any sharp edges to avoid splinters.
Sealing And Painting
- Apply a light coat of tung oil, linseed oil, or polyurethane for weather resistance.
- For a traditional look, decorate with paint, lacquer, or cloth wrapping.
Testing The Bow
- Start with light draws, do not pull to full draw at once.
- Listen for any cracking sounds.
- If the bow feels uneven or makes noise, check the tiller and backing.

Credit: www.youtube.com
Maintenance And Safety Tips
Taking care of your bamboo horse bow will keep it working for years.
Proper Storage
- Store the bow unstrung in a cool, dry place.
- Avoid direct sunlight and moisture.
Regular Checks
- Inspect for cracks or delamination every few months.
- Oil the bow occasionally to prevent drying out.
Safe Shooting
- Never draw the bow past its maximum draw length (usually 28, 30 inches for a horse bow).
- Always use arrows of the correct length and weight.
Pro Tip: Bamboo bows can suddenly break if overdrawn or exposed to moisture. Always check your bow before shooting.
Comparison: Bamboo Horse Bow Vs. Other Types
To help you see the differences, here’s a comparison of bamboo horse bows with other popular bow types.
| Feature | Bamboo Horse Bow | Western Longbow | Fiberglass Recurve |
|---|---|---|---|
| Length | 48, 54 in | 66, 72 in | 60, 64 in |
| Materials | Bamboo, sinew, horn | Yew, ash, or bamboo | Wood, fiberglass |
| Draw Weight | 30, 60 lbs | 30, 70 lbs | 20, 60 lbs |
| Best For | Mounted archery, tradition | Target, hunting | Sport, beginners |
| Complexity to Make | Medium to high | Medium | Low |
Common Mistakes And How To Avoid Them
Many first-time bow makers make the same errors. Here’s how to avoid the most common problems.
1. Using Fresh Or Wet Bamboo
Fresh bamboo shrinks and cracks as it dries. Always use seasoned, dry bamboo.
2. Over-bending The Limbs
Trying to add too much curve at once can break the bamboo. Heat and bend slowly, a little at a time.
3. Poor Tiller
If one limb bends more than the other, the bow will shoot poorly and may break. Check tiller often during shaping.
4. Ignoring Backing
Skipping backing increases the chance of breakage, especially at higher draw weights.
5. Rushing The Glue
Not letting glue cure fully can cause joints to fail. Follow the glue manufacturer’s instructions for drying times.
Pro Tip: Take your time. Rushing any stage, especially tillering and gluing, usually leads to mistakes or failure.
Example: Step-by-step Timeline For A First Bow
To give you a sense of the process, here’s a rough timeline for making your first bamboo horse bow.
| Step | Estimated Time | Notes |
|---|---|---|
| Select and Prepare Bamboo | 2, 3 hours | Includes cutting, sanding, heat treating |
| Shape Limbs & Add Reflex | 4, 5 hours | Work slowly, avoid overheating |
| Apply Backing | 1, 2 hours (+ drying time) | Let glue cure fully |
| Handle & Tips | 1 hour | Focus on comfort & strength |
| Tiller & String | 3, 4 hours | Tiller gradually, test bend often |
| Finishing & Testing | 2, 3 hours | Sand, seal, decorate, test shoot |
Tips For Successful Bow Making
- Start simple: For your first bow, skip horn or sinew layers and use just bamboo and backing.
- Record your progress: Take notes and photos of each step, this helps you learn and improve.
- Join a community: Visit archery forums or local clubs for advice from experienced makers.
- Read more: Books like “The Traditional Bowyer’s Bible” offer deep insight and methods.
Recommended Resources
If you want to learn more, check out the Wikipedia page on composite bows for history and additional techniques.
Frequently Asked Questions
How Long Does It Take To Make A Bamboo Horse Bow?
A first-time maker usually takes 15, 20 hours spread over several days. The most time-consuming parts are shaping the limbs, tillering, and letting glue dry. With experience, the process becomes faster and smoother.
Can I Use Green Bamboo To Make A Horse Bow?
It’s not recommended. Green bamboo contains too much moisture, which can lead