How to Hold a Horse Bow: Expert Tips for Perfect Form
The horse bow, also known as a traditional recurve bow, is an ancient weapon rooted in the cultures of the Mongols, Huns, and Scythians. Its compact size and unique curve made it ideal for use on horseback, allowing warriors to shoot accurately while riding at full speed. Today, the horse bow is popular among archers who appreciate history, horseback archery, or simply the challenge of mastering a different style of shooting. Yet, one of the most overlooked skills is learning how to hold a horse bow correctly. If you want to shoot accurately, protect your hands, and avoid bad habits, a proper grip is essential. This guide breaks down the art and science behind holding a horse bow, step by step, with practical advice and expert tips for beginners and enthusiasts alike.
Understanding The Horse Bow: Design And Purpose
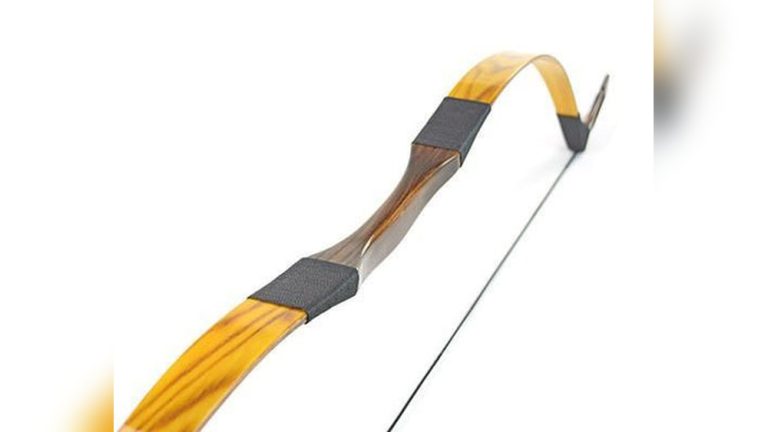
Before you grip a horse bow, it’s important to understand what makes it unique. Unlike modern recurve or compound bows, horse bows have a shorter length, usually between 48 and 54 inches. Their limbs curve sharply at the ends, which stores more energy in a compact frame.
The design allows archers to shoot from horseback, where space is limited. This shape also means the bow can deliver powerful shots even with a shorter draw length. The grip area is often thinner than on modern bows, and there is usually no arrow rest or shelf. Instead, the archer must shoot using the “thumb draw” or “Mediterranean draw” and rest the arrow directly on their hand.
Pro Tip: The way you hold a horse bow affects not just comfort, but also accuracy and safety. The wrong grip can cause the bow to twist, arrows to fly off course, or even painful hand injuries.
The Basics: Hand Placement And Bow Orientation
Choosing Your Bow Hand
Your bow hand is the hand that holds the bow, while the other draws the string. For most people, the left hand holds the bow and the right hand draws the string (if you are right-handed). Left-handed archers do the reverse.
Proper Bow Orientation
Hold the horse bow in front of you. The string should face your body, with the curve of the limbs pointing away. Make sure the bow is not upside down; some horse bows are symmetrical, but many have a subtle difference at each end.
Where To Place Your Hand
The correct place to grip is the center of the bow, on the narrow section designed for holding. Some horse bows have leather wrapping or a slightly thicker area as a visual guide.
- Avoid gripping too high or too low. This creates imbalance and can affect your shot.
The Correct Grip: Step-by-step
Holding a horse bow is not just about grabbing it tightly. A relaxed, balanced grip ensures stability and allows the bow to move naturally during the shot.
1. Rest The Bow In Your Palm
Let the bow handle rest diagonally across your palm, starting from the base of your thumb toward the fleshy part below your little finger. This diagonal placement distributes pressure evenly and gives better control.
2. Wrap Your Fingers (but Not Tightly)
Gently wrap your fingers around the handle. Your thumb should point almost forward, not wrapped tightly around the bow. The index finger may rest slightly above the arrow, with the remaining fingers below.
- Do not squeeze the bow. A tight grip causes tension, leads to “torquing” (twisting) the bow, and reduces accuracy.
3. Keep Your Wrist Relaxed
Maintain a straight wrist. Avoid bending it up or down, as this changes the angle of the shot and can tire your hand quickly.
4. Leave Space Between Hand And Bow
There should be a small gap between the webbing of your hand (the “V” between thumb and index finger) and the bow. This ensures you are not pinching or over-gripping.
5. Check Your Alignment
When you raise the bow, your elbow, wrist, and shoulder should align in a straight line. This creates a stable shooting platform and reduces the chance of injury.
Example: When I first tried a horse bow, I gripped it too tightly, causing my arrows to drift left. Once I relaxed my grip and focused on alignment, my accuracy improved immediately.
Thumb Draw Vs. Mediterranean Draw: Which To Use?
One unique aspect of horse bows is the draw style. Traditional horse archers often use the thumb draw, while modern archers may use the Mediterranean draw. Each affects how you hold the bow.
Thumb Draw
- Common in Mongolian, Korean, and Turkish archery.
- The thumb hooks the string, supported by the index or middle finger.
- The arrow typically rests on the right side of the bow (for right-handed archers).
Grip Adjustment: Since the arrow is on the opposite side, you may need to rotate your hand slightly outward to create a clear path for the arrow.
Mediterranean Draw
- Used in Western archery.
- Three fingers (index, middle, ring) pull the string, with the arrow resting on the left side of the bow (for right-handed archers).
- The grip is similar to standard recurve bow technique.
Pro Tip: Try both draws to see which feels more natural. The thumb draw offers historical authenticity, but the Mediterranean draw can be easier for beginners.
Common Mistakes (and How To Avoid Them)
Learning to hold a horse bow takes practice, and many beginners make similar errors. Being aware of these will save you frustration and help you improve faster.
- Gripping Too Tightly
- This causes the bow to twist, leading to inaccurate shots. Always keep your hand relaxed.
- Bending the Wrist
- A bent wrist changes your anchor point and can cause hand pain. Focus on a neutral wrist.
- Holding Too High or Low
- Off-center gripping creates imbalance and affects arrow flight.
- Not Aligning the Elbow
- Poor alignment puts stress on your joints and reduces shot power.
- Pinching the Arrow
- Squeezing the bow too hard can pinch the arrow, causing it to veer off target.
Warning: If you notice soreness or numbness in your hand, stop and check your grip. Pain is a sign something is wrong.
Comparing Horse Bow Grips To Other Bows
It helps to see how horse bows differ from other popular bows. Here’s a quick comparison:
| Bow Type | Grip Shape | Arrow Rest | Typical Draw Style |
|---|---|---|---|
| Horse Bow | Thin, straight or slightly curved | None (arrow on hand) | Thumb or Mediterranean |
| Modern Recurve | Thicker, ergonomic | Shelf or rest | Mediterranean |
| Compound Bow | Pistol-style, very thick | Mechanical rest | Three-finger release or trigger |
| Longbow | Oval or round, no shelf | None | Mediterranean |
The biggest difference is the lack of an arrow rest and the need to support the arrow with your hand. This requires more attention to grip technique and hand safety.

Credit: www.reddit.com
Safety Tips For Holding A Horse Bow
Safety is crucial in archery, especially when your hand is close to the arrow. The wrong grip can lead to cuts, blisters, or worse.
- Use a hand guard or glove if you are new. This protects against accidental cuts from the arrow fletching or string.
- Do not overdraw the bow. Pulling the string too far can cause the arrow to slip off your hand and cause injury.
- Check for splinters or sharp edges on the bow handle before shooting.
- Practice with light-draw bows first. This builds muscle memory without risking injury from heavy draw weights.
Pro Tip: Many archers wrap their bow handle with soft leather for extra grip and comfort. This also helps absorb sweat and prevent slipping.
Fine-tuning Your Grip For Accuracy
Even small changes in grip can have a big effect on shooting accuracy. Here’s how to fine-tune your hold:
Analyze Arrow Flight
After each shot, watch where your arrows land. Consistent misses to one side often indicate a grip problem.
- Left misses (for right-handed archers): Usually due to torquing or over-gripping.
- Right misses: Often from a loose grip or inconsistent hand position.
Adjust Grip Pressure
The ideal grip pressure is often described as “firm but relaxed. ” You should be able to move your fingers slightly but still control the bow.
Experiment With Finger Placement
Try adjusting which fingers support the bow. Some archers let their pinky and ring fingers relax completely, while others use all fingers equally.
Use Feedback From Experienced Archers
If possible, ask an experienced archer to watch your form. Small corrections can make a big difference.

Credit: www.youtube.com
Practicing The Grip: Drills And Exercises
Building a correct and consistent grip takes time. Here are some effective drills:
1. Blank Bale Shooting
Stand close to a large target (bale) and shoot without aiming. Focus only on your grip and release. This removes the pressure of hitting a bullseye and lets you build muscle memory.
2. Mirror Practice
Hold your horse bow in front of a mirror. Check your wrist alignment, finger position, and elbow angle. Make corrections in real-time.
3. Draw And Hold
Draw the bow and hold it at full draw for several seconds. Pay attention to any tension or discomfort. Adjust your grip until it feels balanced and relaxed.
4. Arrow Loading Drills
Practice nocking and drawing an arrow without shooting. This helps you get used to resting the arrow on your hand and ensures your grip does not interfere.
Pro Tip: In my experience, spending just 10 minutes a day on grip drills improved my consistency more than hours of regular shooting.
Advanced Gripping Techniques
Once you master the basics, you can explore more advanced techniques:
Dynamic Grip
Some advanced archers use a “dynamic grip,” where the pressure shifts slightly during the draw and release. This allows the bow to “jump” forward naturally after the shot, improving arrow flight.
High Vs. Low Wrist Grips
Experiment with the position of your wrist:
- High wrist: The knuckles form a straight line with the forearm. This reduces hand contact with the bow and minimizes torque.
- Low wrist: The wrist drops, increasing hand contact. This can provide more stability but may introduce torque if not careful.
| Grip Type | Pros | Cons |
|---|---|---|
| High Wrist | Reduces torque, faster release | Less stability for beginners |
| Low Wrist | More stable feel, easier for new archers | Risk of twisting bow |
Shooting On Horseback
If you plan to shoot while riding, practice holding the bow with one hand while controlling the horse with the other. The grip must be firm enough to manage movement but relaxed enough for accurate shooting.
Selecting The Right Horse Bow For Your Hand
Not all horse bows are created equal. The right bow should fit your hand comfortably and allow you to use proper technique.
Hand Size And Bow Thickness
If you have smaller hands, look for bows with a narrower grip. Large hands may need a thicker handle for comfort.
Material And Finish
Some bows have smooth wooden handles, while others feature leather or synthetic wraps. Choose one that provides enough friction without causing blisters.
Trying Before You Buy
Whenever possible, handle several bows at an archery shop or club before making a purchase. A comfortable grip makes a huge difference in your learning curve.
Pro Tip: Many archery forums and websites, like Archery 360, offer detailed reviews and buying guides for horse bows.
Maintaining Your Grip Over Time
As you shoot more, your hand may sweat or develop calluses. Keep your grip consistent by:
- Wiping down the handle between rounds to remove sweat and dirt.
- Replacing worn-out grip wraps or leather as needed.
- Checking for hand injuries like blisters or cuts and letting them heal before shooting again.
Integrating Grip Practice Into Your Training
The grip is just one part of archery form, but it affects everything from draw to release. Integrate grip checks into your regular shooting routine:
- Start each session with a few minutes of grip drills.
- Reassess your grip whenever your accuracy changes.
- Make notes in a shooting diary about what works and what doesn’t.
Over time, holding your horse bow correctly will become second nature, and your accuracy will reflect that confidence.
Frequently Asked Questions
What Is The Safest Way To Rest The Arrow On My Hand?
Use the flat part between your thumb and index finger. Keep your fingers relaxed and slightly apart, so the arrow sits securely but does not press into your skin. Wearing a thin glove or using a protective tab can help prevent cuts from the arrow fletching.
Can I Use A Horse Bow With Modern Arrows?
Yes, you can use carbon or aluminum arrows with a horse bow, as long as the spine (stiffness) matches the bow’s draw weight. Modern arrows often have smaller fletchings, which can reduce the risk of hand injuries. Always check that the arrow length is appropriate for your draw.
How Do I Avoid Hand Fatigue During Long Practice Sessions?
Take breaks every 10-15 shots to stretch your hand and wrist. Focus on keeping your grip relaxed, rather than tense. If you feel pain or numbness, stop and check your technique. Building up endurance gradually is safer than pushing through discomfort.
Is Thumb Draw Difficult For Beginners To Learn?
The thumb draw can be challenging at first, especially for archers used to the Mediterranean style. It requires practice to develop thumb strength and proper release technique. Some beginners benefit from using a thumb ring, which protects the thumb and makes drawing easier.
Do I Need To Adjust My Grip When Shooting On Horseback?
Yes. When riding, your body and the bow are in constant motion, so your grip may need to be a bit firmer to maintain control. At the same time, avoid over-gripping, as this can still cause torque. Practice holding the bow with one hand