Building a Safe DIY Archery Backstop on a Budget can seem tough, especially if you are new to archery or DIY projects. You want something that will stop your arrows and keep you, your arrows, and everything around you safe, right? But high prices can be a real roadblock. Don’t worry, though. This post shows you how to build a backstop that’s both safe and easy on your wallet. We’ll show you step by step how to make your own without needing a ton of fancy stuff. Let’s get started and learn how to protect your arrows and target practice area.
Reasons to Craft Your Own Target Protection
Creating your own target protection is more than just a money saver; it’s about customizing your archery experience. Store-bought backstops can sometimes be expensive, and they might not exactly fit your needs or the space you have available. DIY projects let you adjust the size, materials, and features to fit your particular setup. This is a great way to recycle materials or find inexpensive options, meaning you can focus more on the fun of archery. Building your own backstop also gives you a deeper connection to your hobby, and the pride of accomplishment when it’s finished.
Advantages of a Homemade Safety Net
Making your own archery safety net has some unique benefits. You gain control over the quality of the materials and the construction methods used. Commercial options might compromise on materials to save money, but you can choose durable options that will last longer. Furthermore, you can position the backstop exactly where you need it, maximizing the available space in your backyard. Plus, it can be a great family project. Building something together fosters teamwork and shared enjoyment. Lastly, a well-built backstop protects not only your arrows but also the people and objects nearby, providing peace of mind during target practice.
Cost Savings: Building your own backstop is often far cheaper than buying a pre-made one. You can use recycled materials or purchase affordable options like hay bales or old fabrics, dramatically reducing expenses. This allows you to invest more in archery equipment itself.
For instance, hay bales often cost just a few dollars each, while commercial backstops can range from $50 to hundreds, depending on size and quality.
Customization: You can tailor the size, shape, and features of your backstop to fit your space and shooting style. Want a large backstop to accommodate long-distance shooting? Need it to fit a specific area in your yard? DIY lets you do it.
Building it yourself means you can make it as wide, tall, and thick as your archery needs require, which is impossible with a standard-size product.
Material Choice: You have control over the materials used, allowing you to select durable, long-lasting options. This includes things such as heavy-duty fabrics, dense foams, or even a frame built from reclaimed wood.
Unlike the mass-produced options, the materials you use can be chosen for their resilience, helping your backstop survive the elements.
Learning Experience: Building a backstop is a great DIY project, teaching valuable skills like measuring, cutting, and assembling. It’s also a chance to apply problem-solving skills to ensure a safe and effective shooting range.
This hands-on experience allows you to gain a better appreciation for the structure’s construction.
Safety Focus: You ensure your backstop provides maximum protection for your arrows, people, and property. This is especially useful if you live in a location where stray arrows could potentially cause damage.
With a DIY backstop, you can take special measures to guarantee all impacts are contained, providing added safety.
Planning Your Safe DIY Archery Backstop on a Budget
Before you start building, taking the time to plan your project is important. Consider the size of your shooting area, the type of arrows you’ll be using, and the materials that are available to you. Planning ensures your backstop is effective, safe, and fits your needs. This involves thinking about the potential impact of your arrows, the distance you’ll be shooting from, and the area you’re trying to protect. Proper planning means a backstop that’s both safe and efficient. Failing to plan can mean wasted materials or a backstop that doesn’t meet your needs.
Key Factors to Consider
Several elements play a role in the effectiveness of your DIY archery backstop. The construction’s size, the materials used, and the overall design directly affect its ability to stop arrows and how long it lasts. Consider your skill level, the arrows you use, and the potential for a miss. A poorly planned backstop might let arrows pass through, endangering the surroundings. However, a well-planned one can offer excellent protection while also lasting for years. Your plan should also consider the location of your shooting range and who might be around.
Size and Placement: Determine the area where you’ll be shooting and choose a location that has plenty of open space. The backstop should be larger than the target face to catch stray arrows. It must be tall and wide enough. The best place would be a place where any missed arrows cannot travel further.
For example, if you shoot at a distance of 20 yards, make sure the backstop is at least 3-4 feet wider and taller than the target itself.
Arrow Type and Bow Draw Weight: Consider the speed and impact force of your arrows. Arrows from higher-poundage bows or those with greater velocity require a more robust backstop. For recurve bows, which have a lower draw weight, a simpler backstop can be sufficient.
A compound bow shooting arrows at 300 feet per second will need a thicker backstop than a beginner using a youth bow.
Materials Selection: Opt for materials that can stop arrows effectively and withstand weather conditions. Hay bales, heavy-duty fabrics, rubber mats, and foam are all suitable choices. Materials need to be easily replaceable or maintainable to ensure the backstop’s long life.
For example, a combination of layers, such as a fabric covering with a foam or rubber core, will provide excellent arrow stopping power.
Budget Allocation: Set a budget beforehand to guide your material choices and design decisions. Prioritize safety and durability while searching for budget-friendly alternatives. Always compare prices and look for deals or discounts.
Look for sales at local hardware stores or consider using recycled materials to keep expenses in check.
Safety Zone: Identify a clear area around the backstop, free of people or obstacles. This safety zone will ensure there are no unintended injuries should an arrow go astray. It also gives you plenty of room to shoot without distractions.
The safety zone must have plenty of space on either side of the target, as well as behind it.
Materials Needed for Your Backstop
Gathering the right materials is the first step in constructing your Safe DIY Archery Backstop on a Budget. The materials you choose will have a big effect on how well your backstop works. The specific materials you select will vary depending on your budget and the types of arrows you shoot. However, all options share the goal of safely stopping arrows. Careful material selection and preparation can make the building process easier and ensure your backstop’s success. This involves finding the right balance between cost, performance, and the available resources.
Budget-Friendly Material Options
There are numerous affordable materials you can use for your archery backstop, which makes this project accessible. Hay bales are one of the most popular choices, known for their effectiveness and low cost. Used or discarded fabrics can also be layered to absorb impact. Foam materials, like old mattresses or packing foam, also provide effective arrow stopping. The best choice often depends on availability and your specific needs. With a bit of ingenuity, you can locate cost-effective materials that perform well.
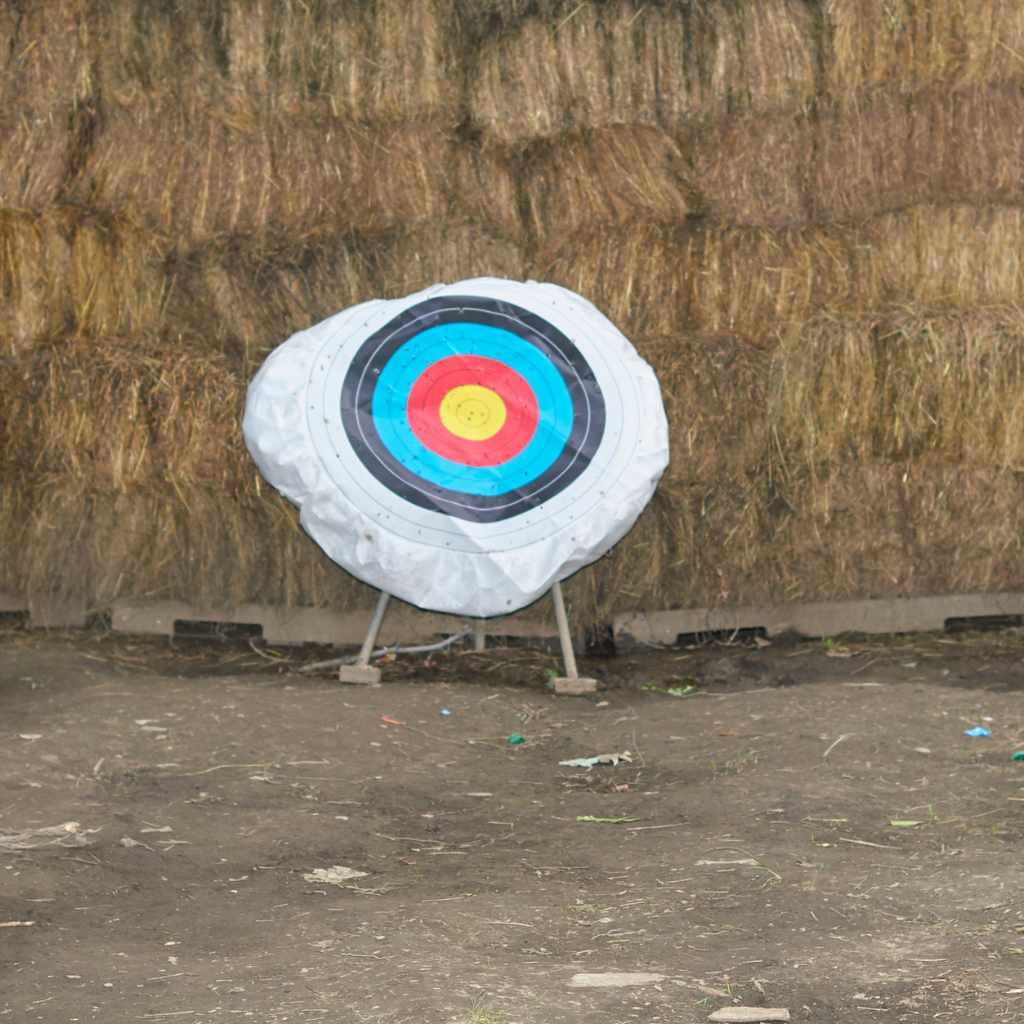
Hay Bales: Hay bales are a time-tested backstop material. They are both affordable and effective. Be sure to replace them regularly. Check local farms or feed stores for the best prices.
They are generally available during the harvest season. For an archery backstop, you might need 3-5 bales.
Fabric Layers: Old blankets, sheets, and heavy-duty tarps can be used in layers to create an effective backstop. Attach them to a frame or hang them from a sturdy structure. The more layers, the better the stopping power.
Find discarded fabric from thrift stores or ask friends and family for unwanted materials.
Foam: Old mattresses, foam padding, or packing foam can be repurposed for this purpose. The denser the foam, the better it works. Ensure the foam is thick enough to stop your arrows completely.
Source foam from local businesses or check online marketplaces for used items.
Rubber Mats: Used rubber mats can be acquired from construction sites or local businesses. These are durable and can withstand repeated impacts.
Make sure the mats are thick enough to stop arrows effectively, and securely attach them to a frame or supporting structure.
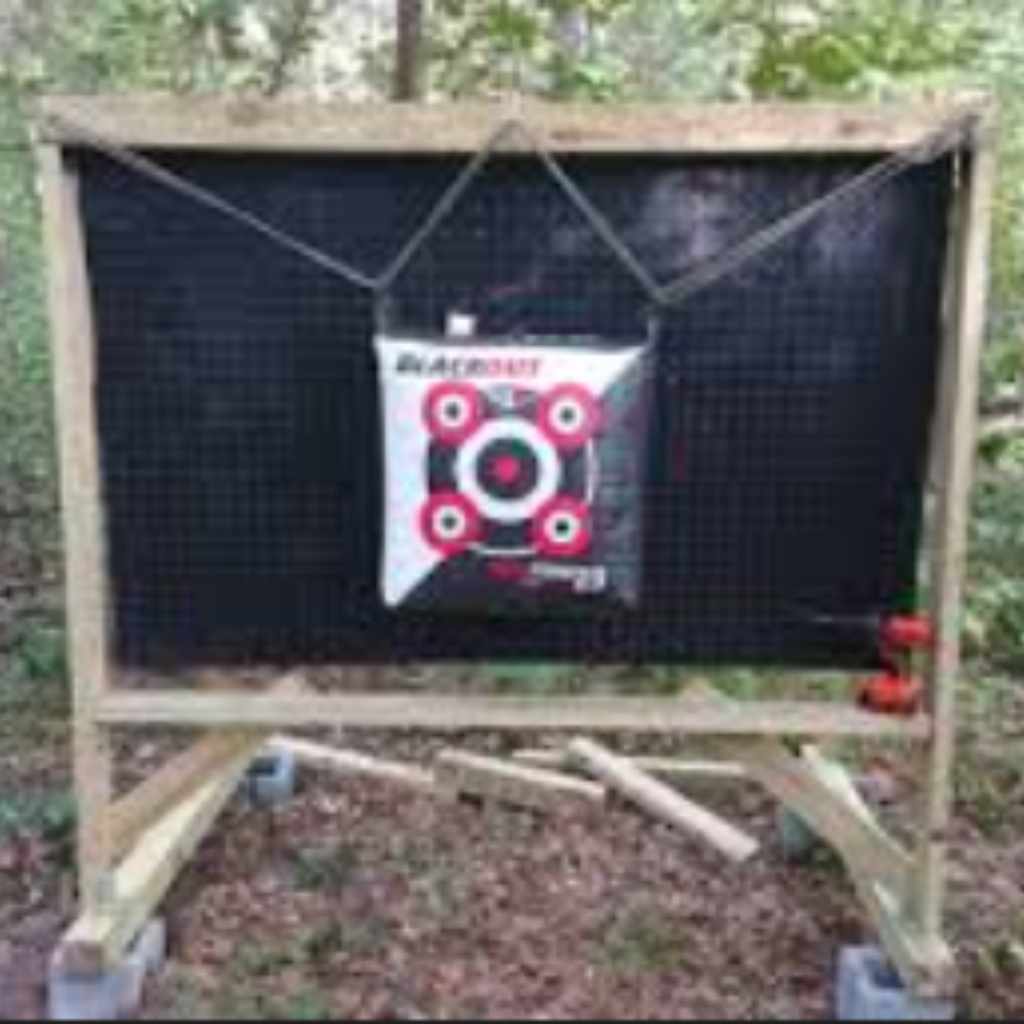
Frames: Construct a simple frame from wood or PVC pipes to hold your chosen backstop material. The frame provides the structural support needed to keep the materials in place. Build the frame sturdy, as wind and impacts will exert force on it.
Use reclaimed wood or inexpensive PVC pipes to build a sturdy and long-lasting frame.
Material Comparison Table
This table compares some common backstop materials, highlighting their pros, cons, and estimated costs. This can help you choose the best materials for your needs.
| Material | Pros | Cons | Estimated Cost |
|---|---|---|---|
| Hay Bales | Affordable, readily available, natural arrow stopper | Requires regular replacement, weather-dependent | $5 – $15 per bale |
| Fabric Layers | Recyclable, flexible, adjustable | Less durable, requires frame | $0 – $20 (depending on source) |
| Foam | Effective impact absorption, good durability | Can be more expensive, needs a frame | $10 – $50 (depending on size/density) |
| Rubber Mats | Very durable, weather-resistant, long-lasting | Can be heavy, may require professional cutting | $20 – $100 per mat |
Building Your Safe DIY Archery Backstop on a Budget Step-by-Step
Constructing your backstop is an exciting phase, where your planning and preparation turns into reality. It is a practical guide to assembling your backstop. Each step has been created to be easy to follow, making this process approachable for all skill levels. Safety should always be your top priority. From the frame to the final touches, each section has information to ensure both safety and effectiveness. By following these instructions carefully, you can create a safe, reliable, and functional archery backstop.
Step-by-Step Building Guide
This simple guide explains the construction process. Each stage is carefully explained, allowing you to build your backstop smoothly. Read through these instructions before beginning. Proper construction is essential for both your safety and the longevity of the backstop.
- Frame Construction: Build the frame to the right size for your target and the amount of protection you need. Make sure it is sturdy, because it will be the support for the whole structure. The frame size should exceed the dimensions of your target, providing adequate coverage.
For instance, for a standard 4-foot target, the frame should be at least 5 feet wide and 5 feet tall.
- Material Preparation: Get your chosen backstop material ready. If you are using hay bales, make sure they are stacked securely within the frame. If using fabric, cut and layer the fabric to fill the frame. If using foam or rubber, cut to the frame’s size.
When using fabric layers, make sure to layer multiple blankets or tarps to improve stopping power.
- Assembly and Securing: Place the backstop material inside the frame. If you’re using hay bales, simply stack them. For fabric or foam, attach them using staples, screws, or heavy-duty tape. Make sure the backstop material is fixed firmly to avoid any movement.
For fabric backstops, staple the fabric to the frame securely, making sure it’s taut to prevent sagging.
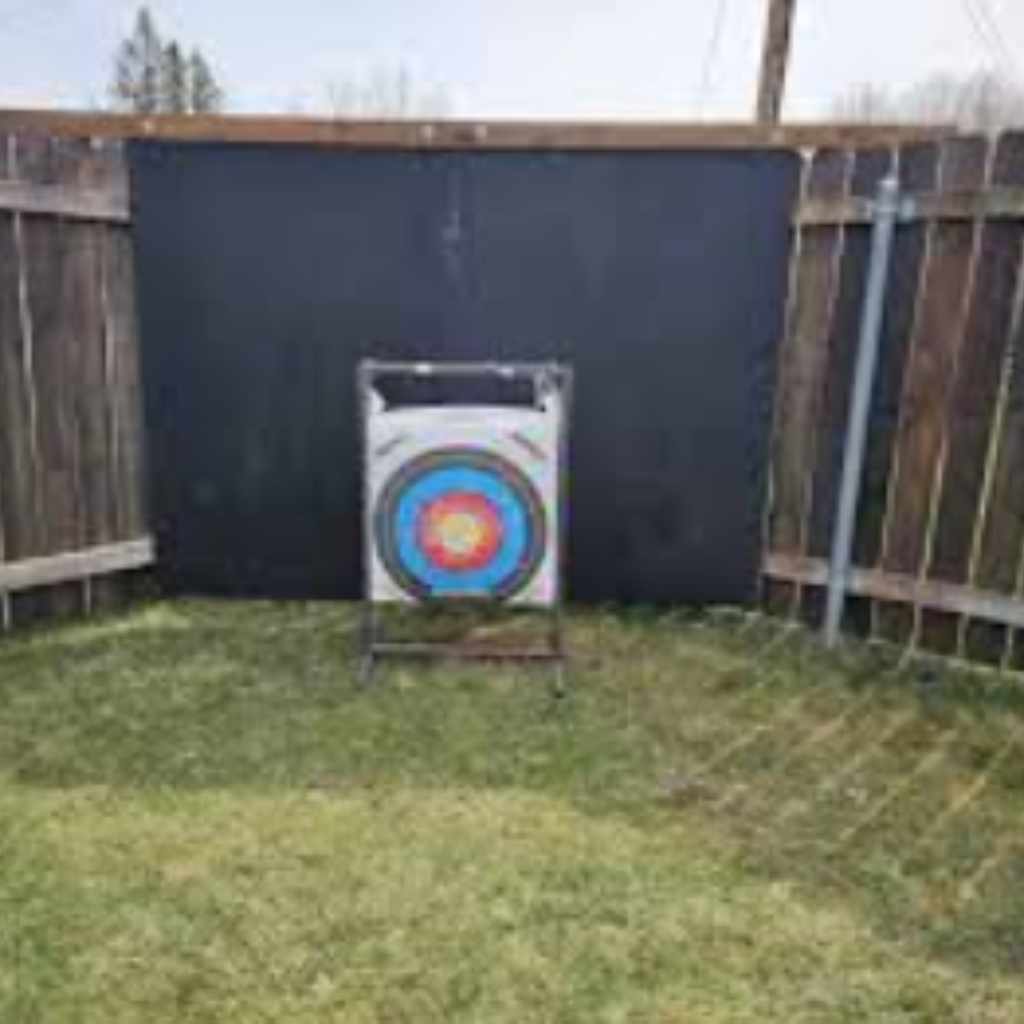
- Installation and Location: Put your backstop in the location you selected. Make sure it’s on level ground and in a clear area. Confirm that there are no objects or people within the safety zone. The area should be far from any structures or walkways.
Position the backstop so that it provides a full barrier to any wayward arrows. Make sure it’s not positioned where an arrow could travel beyond your property.
- Testing and Evaluation: Test the backstop by shooting arrows at it from various distances. Make changes as necessary if you find that arrows pass through. Observe the impact and how well the backstop absorbs the force.
After the first few shots, inspect the backstop for any signs of wear and tear, and add more material if required.
Sample Scenarios
- Scenario 1: You’re using a lightweight youth bow. You can build a backstop from layers of old blankets or repurposed foam secured within a simple wooden frame. This is a cost-effective solution, providing adequate protection for low-impact arrows.
The layered fabric or foam absorbs arrow energy well, and with a simple frame, it is easily constructed in a weekend.
- Scenario 2: You’re a more experienced archer with a compound bow. You should use a backstop made from hay bales or thick rubber mats in a stronger frame. These materials can handle the higher arrow speeds and impact forces of compound bows.
The hay bales or rubber mats need a robust frame that can withstand the consistent impacts without breaking.
Maintaining Your Backstop for Continued Safety
Regular upkeep is essential to ensure the longevity and effectiveness of your archery backstop. Maintenance includes regularly checking the backstop for damage and replacing materials as required. Regular care not only extends the backstop’s life but also assures continued safety during target practice. Keeping your backstop in good shape means fewer chances of problems, and it will keep your shooting area safe for a long time. Simple steps can make a big difference, keeping your backstop ready for safe use.
Essential Maintenance Practices
Several practices will help you keep your backstop in good shape. Frequent inspections will help you identify issues like wear and tear or material damage. Cleaning the backstop regularly will help prevent the decay of certain materials, especially those exposed to weather. With these easy steps, you can be sure your backstop provides excellent safety and lasts for years. By prioritizing maintenance, you guarantee the performance of your backstop and protect yourself and others.
Regular Inspections: Examine your backstop regularly for damage. Look for holes, tears, or compression. This is especially important after heavy use or during harsh weather conditions.
Inspect the backstop after each shooting session. Quick checks can find small issues before they become major problems.
Material Replacement: Replace worn-out or damaged materials immediately. Hay bales compress over time and need replacing. Fabrics may tear, and foam can degrade.
The need for a replacement depends on how often you shoot. Keep spare materials handy for quick repairs.
Weather Protection: Shield your backstop from the elements. If it is located outside, consider a cover to protect it from rain, snow, and sunlight. This extends the lifespan of the materials.
Use a tarp or water-resistant material to cover your backstop when it’s not in use.
Cleaning and Upkeep: Keep your backstop free from dirt, debris, and any signs of mildew. Clean your backstop regularly, especially if it’s outside. This will help maintain its effectiveness.
Use a brush to clean the surface of the backstop and remove any loose debris, which can improve your backstop’s performance.
Safety Checks: Regularly assess the entire setup, including the surrounding safety zone. Make sure that there are no new hazards and that the backstop is still positioned correctly. Ensure that there are no obstructions in the firing lane.
A safe setup is critical, so always make sure there are no hazards and the backstop is working.
Frequently Asked Questions
Question: How often should I replace the materials in my backstop?
Answer: It depends on the material you choose and how frequently you shoot. Hay bales often need replacing every 6-12 months, or sooner if they become heavily compressed. Fabric backstops may need maintenance more often, and foam or rubber can last longer with appropriate care.
Question: Can I use different materials in my backstop?
Answer: Yes, layering materials can be a good idea. For instance, you could place a layer of heavy-duty fabric in front of a layer of denser foam or rubber. This can enhance the stopping power and extend the life of your backstop.
Question: Is a backstop necessary, or can I just shoot at a target?
Answer: A backstop is important for safety. It stops arrows that miss the target from traveling and potentially causing harm or damage. It protects your property and the safety of those around you.
Question: What’s the best way to deal with a backstop that has seen a lot of use?
Answer: The best way to deal with a worn backstop is to replace or replenish the core material. Turn hay bales, rotate fabric layers, or replace damaged sections. Also, consider adding an extra layer of protection to areas that get the most use.
Question: How can I build a backstop that’s good for both field points and broadheads?
Answer: For broadheads, use dense materials like thick rubber mats or tightly packed layers of fabric, as well as replacing the target section more frequently. Regular maintenance, including inspecting for damage and rotating the target face, is key to safety.
Final Thoughts
Creating a Safe DIY Archery Backstop on a Budget is a rewarding project that combines fun and practicality. It’s an easy and cost-effective way to make sure that you and your surroundings stay safe during target practice. By selecting the right materials, such as hay bales, repurposed fabrics, or foam, and carefully following the construction steps, you can make a backstop that meets your specific needs. Regular maintenance ensures your backstop remains effective over the long run, saving money and keeping the archery experience enjoyable for years to come. By planning ahead and applying simple techniques, you will enjoy safe, fun archery.