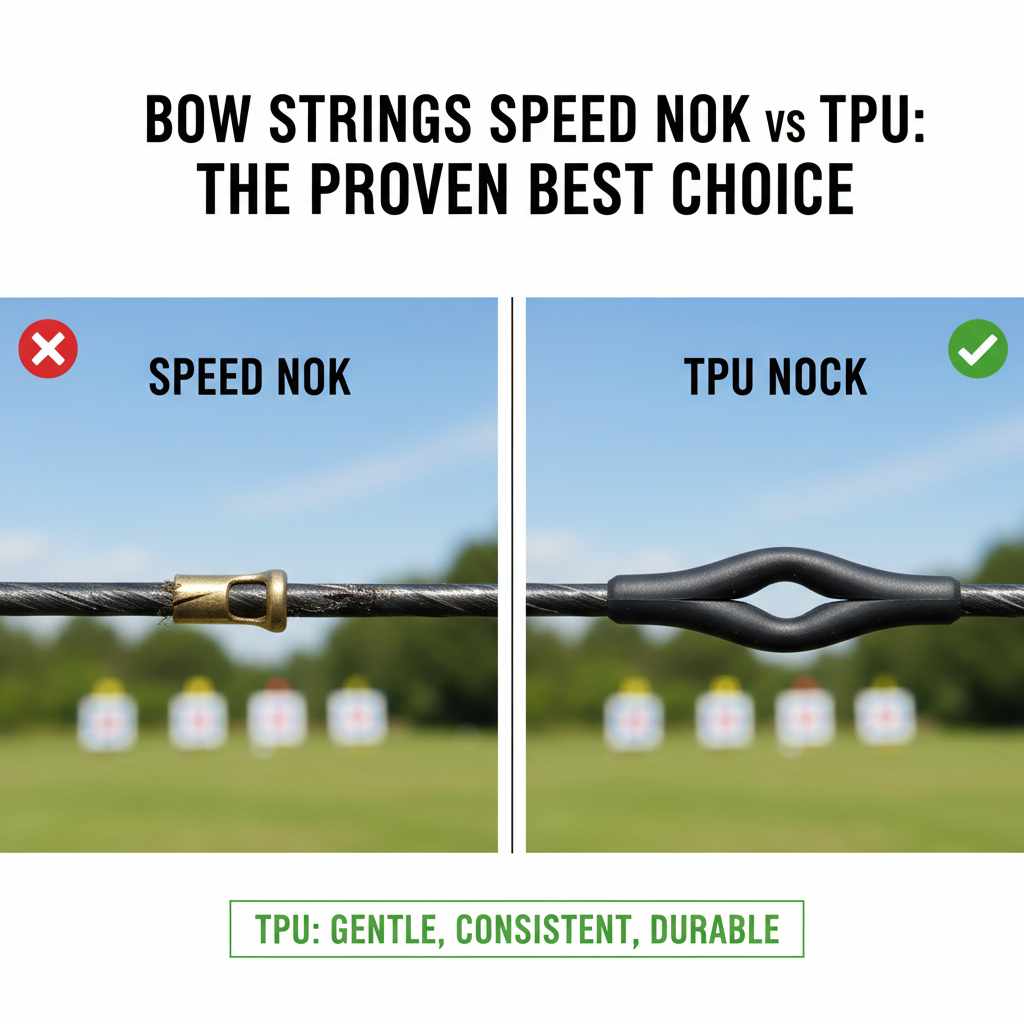
For beginners, the proven best choice is starting with a metal Speed Nok (or brass nock). It is easy to install and adjust while you find your perfect arrow position. Once your form is consistent, upgrading to a tied TPU nocking point is the best long-term choice for bowstring safety and performance.
Have you ever felt frustrated when your arrows don’t hit the same spot? It can be a common problem, especially when you are new to archery. A tiny detail on your bowstring, called the nocking point, could be the cause. It guides your arrow to the same spot for every shot. But which type should you use?
Many archers wonder about Speed Noks versus TPU nocking points. It can sound confusing, but don’t worry. This guide will make it simple. We will walk you through everything, step by step. You will learn what they are, how they work, and which one is right for you. Let’s make your shots more accurate and fun!
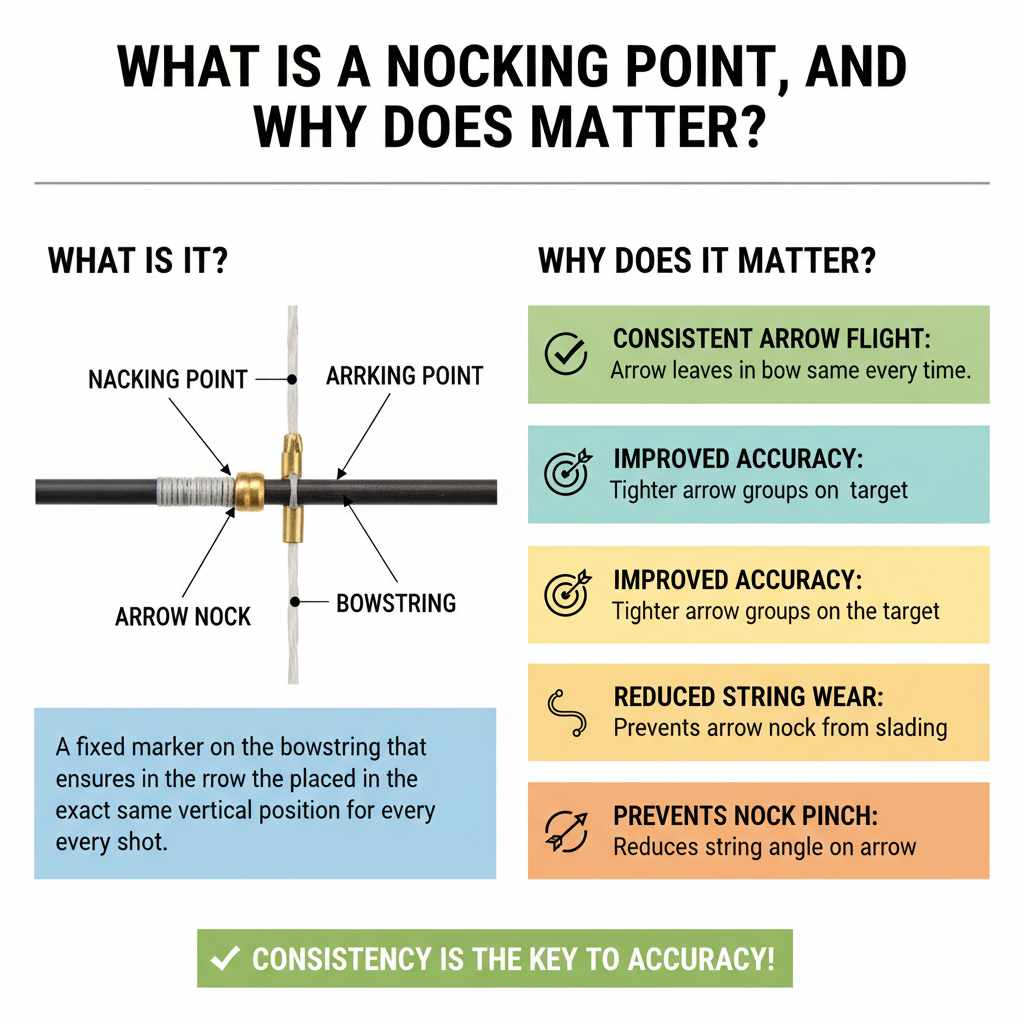
What Is a Nocking Point, and Why Does It Matter?
Before we compare the two types, let’s talk about what a nocking point does. Think of it as a tiny, consistent “shelf” for your arrow on the bowstring. Its only job is to make sure you place your arrow in the exact same vertical spot for every single shot.
Why is this so important? Consistency is the key to accuracy in archery. If you nock your arrow a little too high one time and a little too low the next, your arrows will hit the target at different heights. It’s like trying to throw a ball at a target with a different starting point each time. A fixed nocking point removes that guesswork.
A properly placed nocking point ensures:
- Consistent Arrow Flight: Your arrow leaves the bow the same way every time.
- Improved Accuracy: Tighter arrow groups on the target.
- Reduced String Wear: Prevents the arrow nock from sliding up and down the string serving.
Now that you know why you need one, let’s look at the two most popular options: the classic Speed Nok and the modern TPU nock.
All About Speed Noks (Brass Nocking Points)
When people say “Speed Nok,” they are usually talking about the most common type of nocking point: a small, metal (usually brass) C-shaped clamp. It has a soft plastic liner on the inside to help grip the string. You use a special tool called nocking pliers to crimp it onto your bowstring’s center serving.
These are the old-school, tried-and-true nocking points you’ll see at almost any archery range. They are extremely popular with beginners and pro shops because they are simple, cheap, and effective.
How to Install a Speed Nok: A Step-by-Step Guide
Installing a Speed Nok is a perfect first task for a new bow owner. It’s quick and easy. Here’s how you do it.
Tools You’ll Need:
- Bow Square (T-Square)
- Brass Nocking Point (Speed Nok)
- Nocking Pliers
Step-by-Step Instructions:
- Find Your Nocking Point Location: Clip your bow square onto the bowstring. Let it rest gently on your arrow rest. The standard starting point for a nocking point is about 1/8 to 3/8 of an inch above the 90-degree angle mark on your square. This slight upward angle helps the arrow clear the rest cleanly. You can find more detailed guidance on nocking point placement from official sources like USA Archery.
- Place the Nock Set: Take your brass nock and place it on the bowstring at the mark you made. The opening of the “C” shape should face away from your bow’s riser. Don’t squeeze it shut with your fingers just yet.
- Give It a Gentle Squeeze: Take your nocking pliers. These pliers have a small nub on one side and a dimple on the other. This ensures you crimp the nock into a round shape, not a flat one. Place the pliers around the nock and give it a gentle squeeze. You want it to be tight enough so it doesn’t slide, but not so tight that it damages the string fibers underneath.
- Check for Movement: Gently try to slide the nocking point up and down with your fingers. It should stay firmly in place. If it moves easily, give it another very small squeeze with the pliers. If it’s on too tight, you might need to use the opener on your nocking pliers to loosen it slightly.
- Go Shoot! Now you can test it. Shoot a few arrows to see how they fly. If your arrow is “porpoising” (bouncing up and down), you may need to adjust the nock’s position slightly. This is the biggest advantage of a Speed Nok—it’s easy to move and adjust as you tune your bow.
Pros and Cons of Speed Noks
Like anything, Speed Noks have their good and bad sides.
Pros:
- Extremely Easy to Install: A beginner can install one in under five minutes with the right tools.
- Highly Adjustable: If you need to move your nocking point while tuning your bow, you can easily pry it open slightly, slide it, and re-crimp it.
- Inexpensive: You can buy a pack of them for just a few dollars.
Cons:
- Can Damage the Bowstring: If you crimp it too tightly, the metal edges can cut into the string’s serving and eventually the string fibers themselves. This is their biggest drawback.
- They Are Heavy: Compared to a tied nock, a brass nock adds a small amount of weight to your string. This can slightly reduce your arrow speed (though most beginners won’t notice).
- Can Loosen or Slide: Over time, a brass nock can work itself loose and slide from its original position, which will ruin your accuracy until you notice and fix it.
Understanding TPU Nocking Points (Tied Nocks)
TPU stands for Thermoplastic Polyurethane. While you can find some pre-made TPU nock sets, the term is often used to describe the modern style of tying a nocking point onto the string using a special, durable serving thread. It’s essentially a very tight, compact knot that serves the same purpose as a metal Speed Nok.
This method is favored by many competitive archers and bowhunters because it’s lighter, safer for the string, and more secure. It looks clean and professional, but it does take a bit more skill and patience to create.
How to Tie a Nocking Point: A Simplified Guide
Tying a nocking point can seem intimidating, but the basic concept is simple. You are just wrapping a thread around the string very tightly. There are many complex knots, but here is a simple one to get you started.
Tools You’ll Need:
- Bow Square (T-Square)
- Nocking/Serving Thread
- Sharp Knife or Scissors
- Lighter
Step-by-Step Instructions:
- Find Your Nocking Point Location: Just like with a Speed Nok, use your bow square to mark the spot just above 90 degrees. You can use a small marker or just pinch the spot with your fingers.
- Start the Knot: Cut a 6-inch piece of serving thread. Place the center of the thread behind the bowstring at your mark. You will now have two ends to work with, one on the left and one on the right.
- Tie a Simple Overhand Knot: Take the right end and pass it over the bowstring. Then take the left end, pass it over the right end, and then tuck it under the bowstring and up through the loop you created. This is just a basic starting knot (like the first step of tying your shoes). Pull it snug, but not completely tight yet.
- Create a Series of Knots: Now, continue tying a series of simple square knots. Place one knot on top of the next. You want to build up a small, tight “bump” on the string. Tie about 5-6 knots, pulling each one as tight as you can.
- Trim and Burn the Ends: Once your knot is about the size you want, use a sharp knife to trim the excess thread, leaving about 1/8 of an inch on each end. Carefully use a lighter to melt the trimmed ends into small balls. This prevents the knot from ever coming undone. Be very careful not to touch the flame to your actual bowstring!
- Create a Bottom Nock (Optional but Recommended): Most archers use two tied nocking points—one above the arrow and one below it. This “frames” the arrow nock and keeps it perfectly secure. Simply repeat the process about a nock’s width below your first knot.
Pros and Cons of TPU Nocking Points
Tied nocks offer top-tier performance, but they require a little more work.
Pros:
- Completely Safe for the Bowstring: Since it’s just thread, there is zero risk of damaging your bowstring. It grips the string without pinching or cutting it.
- Extremely Lightweight: A tied nock weighs almost nothing. This means it has a minimal effect on arrow speed, leading to better performance.
- Very Secure: Once tied and melted correctly, a TPU nock will never slide or move. It is the most reliable option.
- Quiet Shot: The lack of metal-on-plastic contact can make for a slightly quieter shot.
Cons:
- More Difficult to Install: It takes practice to tie a tight, clean nocking point. Your first few attempts might look a little messy.
- Not Easily Adjustable: If you need to move a tied nocking point, you have to cut it off completely and tie a new one. This makes it less ideal for the initial bow tuning process.
- Requires More Tools/Supplies: You need serving thread and a lighter, which you might not have on hand.
Head-to-Head Comparison: Speed Nok vs. TPU
So, how do they stack up against each other? Let’s put them side-by-side to see the differences clearly.
| Feature | Speed Nok (Brass) | TPU Nocking Point (Tied) |
|---|---|---|
| Installation Difficulty | Very Easy (Beginner-Friendly) | Moderate (Requires Practice) |
| Bowstring Safety | Potential risk of damage if overtightened. | Completely safe for the bowstring. |
| Weight & Arrow Speed | Heavier, can cause a minor loss in speed. | Extremely lightweight, no impact on speed. |
| Durability & Security | Good, but can loosen and slide over time. | Excellent, will not move once set. |
| Adjustability | Excellent, easy to move for bow tuning. | Poor, must be cut off and re-tied to move. |
| Cost | Very Low (pennies per nock). | Low (a spool of thread lasts for years). |
The Proven Best Choice: A Path for Every Archer
So, after comparing everything, which one is the proven best choice? The answer isn’t just one or the other—it’s about choosing the right one for your current skill level.
For Absolute Beginners: Start with a Speed Nok
If you are new to archery, the Speed Nok is the undisputed best choice to start with. Here’s why: your shooting form, anchor point, and how you hold the bow are still developing. As you get better, you might discover that your ideal nocking point needs to move up or down by a tiny amount.
The adjustability of a brass nock is a lifesaver here. You can easily move it around during the first few weeks or months of shooting without any hassle. It allows you to tune your bow perfectly to your body and style. Worrying about tying a perfect knot when you’re just trying to learn how to shoot is an unnecessary distraction. Start simple.
For Intermediate and Advanced Archers: Graduate to TPU
Once you are confident in your shooting form and your equipment is well-tuned, it’s time to upgrade. The TPU (tied) nocking point is the proven best choice for long-term performance and bow care.
At this stage, you know exactly where your nocking point needs to be. You won’t need to adjust it anymore. By switching to a tied nock, you gain several key advantages:
- You eliminate any risk of string damage from the metal clamp.
- You gain a small amount of arrow speed from the weight reduction.
- You get a nocking point that is 100% reliable and will never move.
Learning to tie your own nocking points is also a valuable skill that deepens your understanding of how your equipment works. It’s a small step that signals you are moving from a casual hobbyist to a more serious archer.
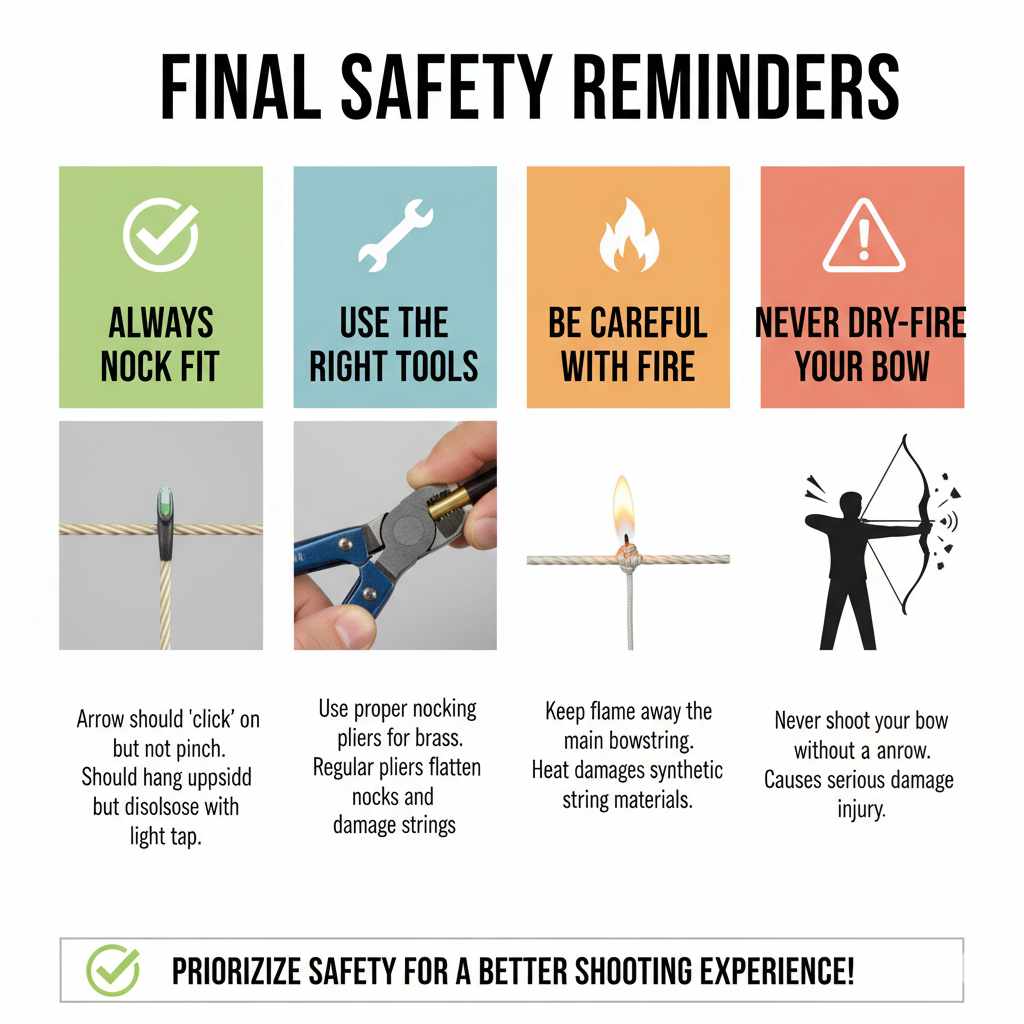
Final Safety Reminders
No matter which nocking point you choose, always put safety first. Here are a few quick tips:
- Always Check Nock Fit: Your arrow nock should “click” onto the string but not be so tight that it pinches. It should be able to hang from the string upside down without falling off, but a light tap should dislodge it.
- Use the Right Tools: Always use proper nocking pliers for brass nocks. Using regular pliers will flatten the nock and damage your string.
- Be Careful with Fire: When melting the ends of a tied nock, keep the flame away from your actual bowstring. The synthetic materials in a bowstring can be damaged by heat.
- Never Dry-Fire Your Bow: Never shoot your bow without an arrow. This can cause serious damage to the bow and can injure you or others.
Frequently Asked Questions (FAQ)
Can a nocking point damage my bow string?
Yes, a metal Speed Nok (brass nock) can damage your bowstring’s serving if you clamp it on too tightly. The metal edges can cut the fibers. A tied TPU nocking point is made of thread and is completely safe for your string.
How do I know where to place my nocking point?
A good starting point is to use a bow square. Place the square on your string so it rests on the arrow rest. Your nocking point should be set about 1/8 to 3/8 of an inch above the 90-degree mark. You will then fine-tune this position by shooting arrows and observing their flight.
Can I use a Speed Nok with a D-Loop?
Yes, many archers use one or two Speed Noks to lock their D-Loop in place and prevent it from sliding. You would place one nock above the D-Loop knot and one below it. However, many people prefer to tie the nocks in place for a lighter and cleaner setup.
How often should I check my nocking point?
You should give it a quick visual check every time you shoot. Before a shooting session, gently try to move your Speed Nok to see if it has loosened. A tied nock rarely needs checking once it is installed correctly.
What is the difference between one and two nocking points?
A single nocking point is placed above the arrow. You nock your arrow underneath it. Two nocking points create a “slot” for the arrow nock to sit between. This can provide a more secure fit and is very common with tied nocks. For a beginner, starting with a single Speed Nok is perfectly fine.
Do I need different nocking points for different types of bows?
No, both Speed Noks and tied TPU nocks work great on recurve bows, longbows, and compound bows (often used with a D-Loop). The principles of providing a consistent location for the arrow are the same for all bow types.
What happens if my nocking point is in the wrong spot?
If your nocking point is too high or too low, your arrow will not fly straight. It may bounce up and down in the air (a motion called “porpoising”) or kick out to one side. This will make it very difficult to shoot accurately and group your arrows tightly.
Your Next Shot is Your Best Shot
Choosing between a Speed Nok and a TPU nocking point doesn’t have to be complicated. They are both great tools that help you become a better archer. The best choice is simply the one that matches your journey.
Start with the simple and forgiving Speed Nok. It gives you the freedom to learn, adjust, and find what works for you without any pressure. As your confidence and skills grow, you can graduate to a tied TPU nock and enjoy the peak performance and reliability it offers. Both will help you on your path to sending arrows straight into the center of the target.
The most important thing is to get out there, practice safely, and have fun. Every arrow you shoot is a chance to learn something new. Happy shooting!