The nock on a wood arrow is typically positioned perpendicular to the grain, usually right where the shaft’s spine curves slightly upwards, creating a consistent ‘nock point’ on your bowstring for accurate and repeatable shots.
Welcome, fellow archers! Are you finding that your arrows aren’t flying quite as straight as you’d like? One of the most common culprits for beginners, especially when using classic wood arrows, is how the nock is set up. It might seem like a tiny detail, but getting ‘how is the nock positioned on a wood arrow’ just right is crucial for consistent shooting and unlocking your arrow’s true potential. Don’t worry, it’s not as complicated as it sounds! We’ll break it down step-by-step, making sure you’ll be hitting your mark with confidence in no time.
Understanding Your Wood Arrow’s Grain and Spine
Before we dive into nock placement, let’s quickly touch upon two important characteristics of wood arrows: grain and spine. Understanding these will help you see why nock placement matters so much.
The Arrow’s Grain
Wood arrows, unlike their modern carbon or aluminum cousins, are made from natural wood. This means they have a natural grain, much like a piece of lumber. You can usually see this grain running along the length of the arrow shaft. The grain has a direction, and it’s essential to respect it when setting up your arrow. Imagine wood grain like the lines on a piece of paper; they run in a specific direction.
The Arrow’s Spine
The spine refers to an arrow’s stiffness – how much it bends when you draw your bow. Every arrow has a spine rating (often found by tapping it gently on a hard surface to listen to the sound, or by looking for markings). This stiffness is vital for how the arrow flies. An arrow that’s too stiff or too weak for your bow will fly erratically. For nock placement, it’s important to know that when you slightly bend an arrow, one side will compress more than the other. The side that compresses more is the ‘weak’ side, and the opposite, stiffer side, is the ‘strong’ side. This plays into the orientation of the nock.

Why Correct Nock Positioning is Key for Wood Arrows
So, why all this fuss about the nock’s position? For wood arrows, it’s all about consistency and leveraging the material’s natural properties. Unlike composite arrows that are uniform, wood has natural variations. Proper nock placement takes these variations into account to ensure that each shot behaves predictably. This leads to:
- Accuracy: A consistently placed nock ensures your arrow sits on the bowstring in the exact same spot every single time. This uniformity is the bedrock of accuracy.
- Arrow Flight: The way an arrow bends and flexes as it leaves the bow (called ‘archer’s paradox’) is influenced by its stiffness and the nock’s position. Correct placement helps the arrow flex correctly, flying true.
- Durability: Placing the nock against the grain can, over time, lead to the nock splitting or weakening, potentially damaging your arrow shaft.
- Safety: A poorly positioned nock could lead to an arrow not seating correctly on the string, resulting in a misfire or an arrow that could break, which is dangerous.
The Golden Rule: Nock Perpendicular to the Grain
Here’s the core principle that most archery experts will tell you: The nock should be positioned perpendicular to the grain of the wood shaft.
What does ‘perpendicular’ mean? Imagine the grain of the wood running North to South. Then, the grain lines are like roads running North to South. The nock should be like a bus stop located at an intersection, where a road running East to West crosses the North-South road. The nock’s opening should point directly East or directly West, making a 90-degree angle with the grain lines.
Why this orientation? When you draw and release the bowstring, the arrow experiences force. By placing the nock perpendicular to the grain, you are orienting the nock to resist bending forces in the most stable direction. This helps the arrow flex predictably and return to straight flight more effectively.
Finding the ‘Sweet Spot’: Where to Place the Nock
While ‘perpendicular to the grain’ is the rule, there’s a subtle but important detail about where on the shaft to attach the nock. Most traditional wood arrows have a natural point of slight upward bend when held horizontally. This is often referred to as the ‘stiff’ side of the arrow. The nock is generally attached to this stiffer, slightly upward-curving area.
Here’s how to find it:
- Hold the arrow horizontally. Let it rest on your hands or a flat surface.
- Observe its natural curve. Most wood arrows won’t be perfectly straight. One side might have a very subtle dip or sag. The opposite side will be the one that naturally curves slightly upward.
- Identify the ‘stiff’ side. The side that curves slightly upward is generally the stiffer side of the shaft.
- Align the nock. The nock should be attached so that its opening points directly away from this stiff, upward-curving side, and its base sits on this stiffer side, perpendicular to the grain.
This placement ensures that when the arrow is under the tension of the bowstring, the arrow’s inherent flex is managed in the most stable way. For more on arrow spine and selection, resources like the Archery Shooters’ Guide to Spine, although more technical, highlight the importance of matching arrow characteristics to the bow.
| Arrow Characteristic | Importance for Nock Placement | How to Identify |
|---|---|---|
| Grain | Nock must be perpendicular to the grain for balanced flex and strength. | Visible lines running along the shaft. |
| Spine (Stiffness) | Nock base sits on the ‘stiff’ side for controlled bending. | Observe natural, subtle upward curve when arrow is horizontal. |
| Nock Point | Consistent placement on the string for repeatable shots. | The point where the nock attaches to the bowstring. |
Step-by-Step: How to Position the Nock on Your Wood Arrow
Ready to get your arrows set up correctly? Here’s a straightforward guide. You’ll need your arrow, a nock, some glue suitable for fletching or arrow components, and possibly a jig if you’re installing them professionally. For beginners, many wood arrows come pre-nocked, but knowing how this is done is invaluable!
Materials You Might Need:
Though many arrows come pre-made, learning to nock or re-nock is a valuable skill. For installing a new nock:
- Your Wood Arrow Shaft
- Nocks: Ensure they are the correct size for your arrow shaft.
- Glue: A fletching cement, super glue (cyanoacrylate), or specialized arrow construction glue.
- Nock Installer/Jig (Optional but Recommended): These tools help ensure perfect alignment and consistent placement, especially if you’re gluing on a new unibody nock or a separate nock and insert. For simple press-fit plastic nocks on traditional shafts, sometimes they are just pushed on.
- Sandpaper (Fine grit): To lightly sand the shaft end for better glue adhesion.
- Rag or Paper Towel
The Process:
Step 1: Prepare the Arrow Shaft End
If you’re replacing an old nock or adding one to a shaft that doesn’t have one, you’ll need to prepare the end. Ensure the shaft end is clean and smooth. If there’s any old glue or debris, gently remove it. You might lightly sand the very end of the shaft where the nock will attach to give the glue something to grip onto. Wipe away any dust.
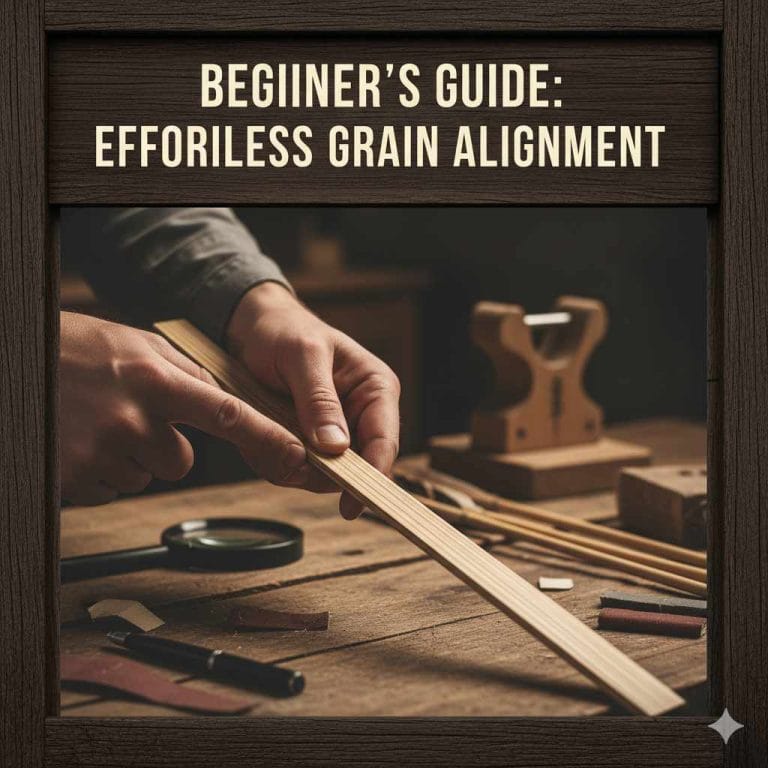
Step 2: Identify the Grain and Shaft Orientation
Hold the arrow shaft and look for the grain. Trace it along the length. Now, hold the shaft horizontally and notice which side has that very slight upward curve. This is your ‘stiff’ side. Remember this side!
Step 3: Orient the Nock
This is where the ‘perpendicular to the grain’ and ‘stiff side’ rules come into play.
- The base of the nock where it meets the shaft should be placed onto the ‘stiff’, slightly upward-curving side of the arrow.
- The nock’s slot or groove should point directly away from this stiff side, forming a 90-degree angle with the wood grain. Imagine the grain runs North-South; your nock opening should point East or West.
Step 4: Apply Adhesive (If Gluing)
If you’re using a glue-on nock or a nock that requires adhesive, apply a thin, even layer of your chosen glue to the end of the arrow shaft or to the inside of the nock, as per the glue manufacturer’s instructions. Avoid using too much glue, as it can squeeze out and create a mess. A common technique for glue-on nocks is to apply glue to the shaft, then press the nock on, give it a half-turn to spread the glue evenly, then align it precisely.
Step 5: Install the Nock
If you are using a nock installer tool or jig, follow its instructions. These tools are designed to hold the arrow and nock perfectly aligned. If you are installing by hand, carefully press the nock onto the prepared end of the arrow shaft. Ensure it’s seated firmly.
Step 6: Align and Secure
Once the nock is on the shaft, and before the glue sets (if applicable), double-check its alignment. Is it sitting squarely on the stiff side and perpendicular to the grain? A tiny misalignment here can affect your arrow’s flight path. If using a jig, it will likely hold it in perfect alignment. If doing it by hand, use a small reference point, like your thumbnail, to ensure the nock is truly perpendicular. Some archers might use a laser or a small level if they are being extremely precise, though for most beginners, careful visual alignment is sufficient.
Step 7: Curing and Testing
Allow the glue to cure completely according to the manufacturer’s instructions. Do not rush this step. Once cured, your arrow is ready. You can test how it fits on your bowstring. It should click or seat smoothly onto the string at your bow’s designated nocking point.
Common Beginner Mistakes and How to Avoid Them
We’ve all been there! As a beginner, it’s easy to make small errors that can impact your shooting. Here are a few common mistakes with nock positioning on wood arrows and how to steer clear of them:
- Ignoring the Grain: Simply pushing a nock on anywhere without checking the grain direction. Always orient the nock perpendicular to the grain.
- Forgetting the Stiff Side: Not identifying or using the slightly upward-curving (‘stiff’) side of the shaft. Placing the nock on the ‘weak’ side can lead to inconsistent arrow flex.
- Over-gluing: Using too much glue, which creates an uneven surface and can make the nock brittle. Aim for a thin, uniform layer.
- Misalignment: Not paying attention to whether the nock is truly straight and perpendicular. Even a slight angle over distance can push your arrow off target.
- Using the Wrong Nock Size: A nock that’s too loose will wobble; one that’s too tight can damage the shaft or be difficult to nock onto the string. Ensure a snug, but not forced, fit.
Checking Your Nock Installation
Once your nock is installed (whether it came pre-installed or you added it yourself), it’s wise to do a quick check. This ensures everything is as it should be before you head to the range.
Visual Inspection
Look at the nock from all angles.
- Does it sit squarely on the arrow shaft?
- Is the opening of the nock aligned straight to accept the bowstring?
- Can you easily see that it’s perpendicular to the wood grain?
- Is there any visible glue squeeze-out that looks messy or uneven?
The String Test
Gently place the arrow onto your bowstring at your established nocking point.
- Does it feel secure?
- Does it click on smoothly?
- Does it feel like it’s sitting flat against the string?
A good snug fit means the nock will stay on the string when you raise your bow but will release cleanly when you shoot. A loose nock might fall off, and a too-tight one will feel like you’re forcing it, which can compromise your release and potentially damage the nock or string.

When to Replace a Nock
Nocks, especially on wood arrows, can wear out or sustain damage. It’s crucial to inspect your arrows regularly. Here are signs that indicate it’s time to replace a nock:
- Cracks or Splits: Any visible cracks in the nock material are a definite sign it needs replacing. This compromises its integrity and can lead to a dangerous failure.
- Worn or Misshapen Groove: If the groove where the bowstring sits is enlarged, chipped, or deformed, it won’t hold the string correctly.
- Loose Fit: If the nock feels loose on the shaft even after being secured, the shaft end might be damaged, or the nock itself is worn out.
- Damage from Dry Firing: If an arrow is accidentally shot without a target (dry-fired), it can severely damage the nock.
- Inconsistent Shooting: If your arrows suddenly start flying erratically, and you’ve ruled out other factors, an old or damaged nock could be the cause.
Regular inspection is part of good archery practice, much like ensuring your equipment adheres to recognized standards, such as those overseen by organizations like USA Archery.
| Sign of Wear | Action Required | Potential Consequence if Ignored |
|---|---|---|
| Visible cracks or splits | Immediately replace the nock. | Arrow failure during shot, potential injury. |
| Deformed or enlarged string groove | Replace the nock. | Inconsistent string seating, reduced accuracy, potential string damage. |
| Loose nock connection to shaft | Inspect shaft end; replace nock if possible. If shaft is damaged, replace arrow. | Arrow may not release properly, leading to poor flight or breakage. |
| Signs of impact damage (e.g., chips) | Carefully inspect for any compromise; replace if unsure. | Weakened nock structure, unpredictable performance. |
Frequently Asked Questions (FAQs) on Nock Positioning
Q1: Do I really need to worry about the grain on a wood arrow?
A: Yes, especially with wood arrows! The grain affects how the arrow flexes. Positioning the nock correctly perpendicular to it helps the arrow bend and recover more predictably, leading to better accuracy and preventing undue stress on the shaft.
Q2: How can I easily find the ‘stiff side’ of my arrow?
A: The easiest way is to lay the arrow horizontally on a flat surface or balance it on your fingers. Most wood shafts have a natural, slight upward curve. The side that curves up is generally the stiffer side where the nock should be placed.
Q3: What happens if I nock my arrow on the wrong side?
A: If you place the nock on the ‘weak’ side or not perpendicular to the grain, the arrow may flex unevenly upon release. This can cause it to fishtail (wobble side-to-side) or fly inconsistently, significantly impacting your accuracy.
Q4: Can I use any glue to attach a nock?
A: It’s best to use glues specifically designed for fletching or arrow components. Super glue (cyanoacrylate) or a specific arrow constructor’s glue are common choices. Avoid general-purpose glues, as they might not be flexible enough or could damage the arrow materials.