Imagine holding a beautifully crafted wooden arrow, its smooth shaft and perfectly fletched feathers telling a story of precision and tradition. Have you ever wondered how these timeless arrows are made?
You’re about to uncover the fascinating process behind the creation of wood arrows, a craft that combines skill, patience, and artistry. Whether you’re an archery enthusiast or just curious about the craftsmanship involved, this article will reveal the secrets and techniques that transform raw wood into the elegant arrows you see today.
As you dive into the world of wood arrow making, prepare to be amazed by the intricate steps and expert craftsmanship required to bring these arrows to life. Keep reading to discover how each component is meticulously shaped and assembled to ensure accuracy and beauty in every shot.
Credit: amys-projects.com
Selecting The Right Wood
Choosing the right wood is important for making arrows. Cedar is a popular choice. It is light and straight. Pine is also used. It is strong and flexible. Spruce is another option. It is lightweight and durable. These woods help arrows fly better and last longer.
Good arrow wood should be straight. It should not bend easily. The wood needs to be lightweight. This helps arrows fly far. Strong wood is best for arrows. It should not break easily. Smooth wood is important too. It helps with accuracy.
Credit: wapitiarcherypoc.com
Preparing The Wood Shafts
Wood arrows start with the right wood. Strong wood is best. Popular choices are cedar and pine. First, the wood is cut into long pieces. These pieces will become the arrow shafts. Each piece is shaped carefully. They must be straight and smooth. Workers use tools to shape the wood. This makes the shafts thin and round. A good shape helps arrows fly well. The right shape is important.
Once shaped, the wood needs smoothing. Workers use sandpaper. Sanding makes the surface smooth. It also removes rough spots. This helps the arrow fly straight. Then, shafts are straightened. Special tools make them straight. Straight arrows fly best. Precision is key. This step is very important. It makes arrows reliable. Smooth and straight arrows fly far.
Spine Testing And Selection
Spine strength shows how much an arrow can bend. It’s important for arrows. Arrows with the right spine fly straight. The spine is tested by hanging a weight. The arrow bends under the weight. This helps check its flexibility. Arrows must be strong yet flexible. This ensures good performance.
The bow and arrow must match. A strong bow needs a strong arrow. Weak arrows break easily. They may not fly straight. Checking the match is vital. Test different arrows with the bow. See which flies best. This ensures accuracy in shooting. Always choose arrows wisely.

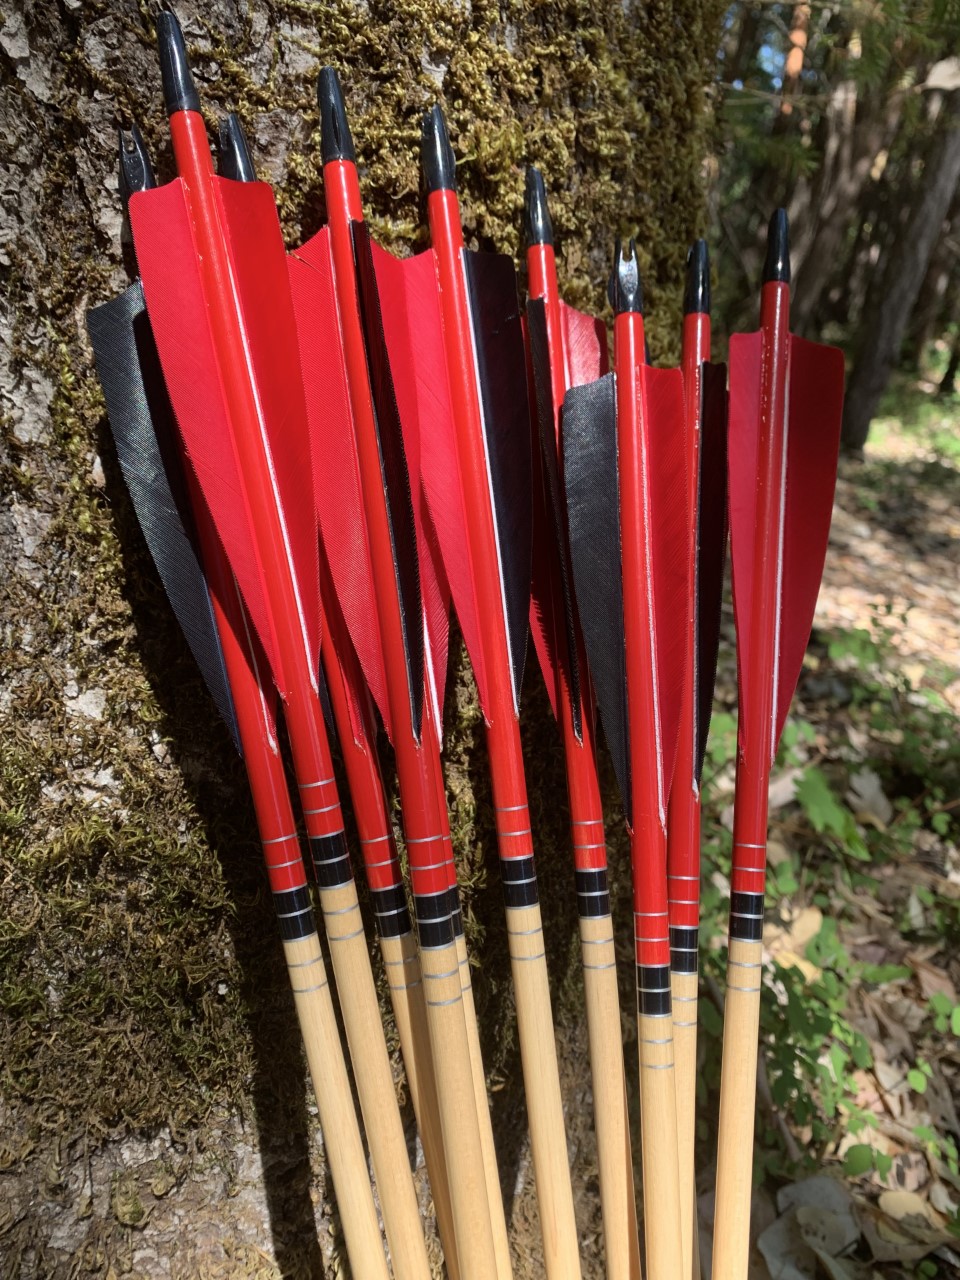
Credit: www.shatterproofarchery.com
Fletching Techniques
Fletching materials help arrows fly straight. Feathers and vanes are common choices. Feathers come from birds. They make arrows stable. Vanes are made of plastic. They are strong and last long. Both have their own benefits. Feathers are light. Vanes are waterproof.
Feathers or vanes are glued to arrow shafts. This step is crucial. The fletching must be straight. It affects arrow flight. Some people use jigs. They hold fletching in place. Glue is applied carefully. It dries quickly. The process requires patience. A well-fletched arrow flies true.
Nock Crafting
Nocks come in many types. Some are made of plastic. Others are made of wood. Snap-on nocks are common. They grip the string well. Pin nocks are small and light. They fit on tiny pins. Traditional nocks are simple. They are often carved by hand. Different nocks fit different bows. Choosing the right nock is important. It affects how well you shoot.
Aligning nocks is very important. They must be straight. Crooked nocks make arrows fly badly. Check the nock’s position. It should be at the right angle. Use tools to help align them. Some people use a special gauge. This helps get it just right. Always test the arrow after aligning. Make sure it flies well.
Adding The Arrowhead
Arrowheads come in many shapes and sizes. Some are sharp and pointy. Others are flat and wide. Different arrowheads have different uses. Hunters like the broadhead type. It is sharp and cuts well. Target shooters use field points. These are simple and safe. There are also blunt tips. They are round and used for practice. Each arrowhead has a special job. Choose the right one for your arrow.
Arrowheads must be tight on the arrow. A loose arrowhead can fall off. Use strong glue to fix it. Some people use a screw-in method. This keeps the arrowhead in place. It is important for safety. Make sure the arrowhead is straight. A crooked arrowhead can miss the target. Check it often. Safety first!
Finishing Touches
Crafting wood arrows involves selecting straight-grained wood, shaping it into shafts, and sanding for smoothness. Feathers are then added for stabilization, and the arrowhead is attached to complete the process. Each step requires precision and care to ensure quality and performance.
Applying Protective Coatings
Wood arrows need protective coatings. These coatings guard against water and damage. First, apply a thin layer of sealant. Let it dry. After drying, add a second coat. This makes the arrow strong. Finish with a final coat. This keeps the arrow smooth. Arrows last longer with good coatings.
Decorative Elements
Decorating arrows is fun. Many use paint or stain. Bright colors make arrows easy to see. Some add feathers or patterns. This makes arrows look special. Designs can show who owns the arrow. Adding personal touches is a nice way to finish.
Testing And Calibration
Wood arrows must fly straight. Straight flight is key for accuracy. Each arrow gets tested. Experts check for any bends. They adjust arrows if needed. Perfect balance is crucial. A balanced arrow flies better.
Small changes can improve accuracy. Weight adjustments help a lot. Experts add or remove tiny weights. This makes the arrow fly true. Feather placement also matters. Feathers guide the arrow. They keep it steady in the air.
Frequently Asked Questions
What Materials Are Used For Wood Arrows?
Wood arrows are typically made from sturdy woods like cedar, pine, or spruce. These woods provide durability and flexibility. The arrow shaft is crafted from these woods, while feathers, often turkey or goose, are used for fletching. The arrowhead is made from metal or stone, adding weight and precision.
How Is The Arrow Shaft Created?
The arrow shaft is crafted by carefully selecting straight-grained wood. This wood is then cut and sanded to the desired diameter and length. The shaft is shaped using tools to ensure uniformity and smoothness. Finally, it’s treated with finishes to enhance durability and performance.
Why Is Fletching Important For Wood Arrows?
Fletching stabilizes the arrow during flight, ensuring accuracy and consistency. It typically involves attaching three feathers to the arrow shaft. These feathers create drag, which helps maintain the arrow’s trajectory. Properly fletched arrows improve shooting precision, making them crucial for archery enthusiasts.
How Do You Attach Arrowheads To Wood Arrows?
Arrowheads are attached using a method called “point tapering. ” The shaft’s end is tapered to fit the arrowhead. Glue or adhesive is applied to secure the arrowhead. This ensures it stays firmly attached during use. Proper attachment is vital for the arrow’s performance and safety.
Conclusion
Crafting wood arrows is an art. It involves precision and care. These arrows begin as raw wood. Skilled hands shape and test them. Each step ensures quality and balance. Wood types affect performance. So does the arrow’s finish. Traditional methods honor history.
Modern touches enhance durability. Archers appreciate the natural feel. They connect with each arrow. Wood arrows offer a unique shooting experience. Perfect for both beginners and pros. Their beauty and functionality endure. Discover the joy of shooting with handcrafted wood arrows.