Do I need a chest protector for mountain biking? The short answer is: Yes, if you ride aggressively, frequently, or on technical trails, especially downhill or enduro. For casual cross-country riding, it’s optional but highly recommended for added safety against unexpected falls.
Welcome! Thinking about adding a chest protector to your mountain biking gear can feel confusing, especially when you’re just starting out or upgrading your kit. It seems like another bulky piece of equipment. Many riders wonder if they truly need this extra layer of armor. Rest assured, choosing the right protection is simple once you understand what these devices do and when they matter most. We are going to break down exactly what a chest protector is, who benefits most from one, and how to pick the perfect fit, making your ride safer and more fun. Let’s get you geared up with confidence!
Understanding Chest Protection in Mountain Biking
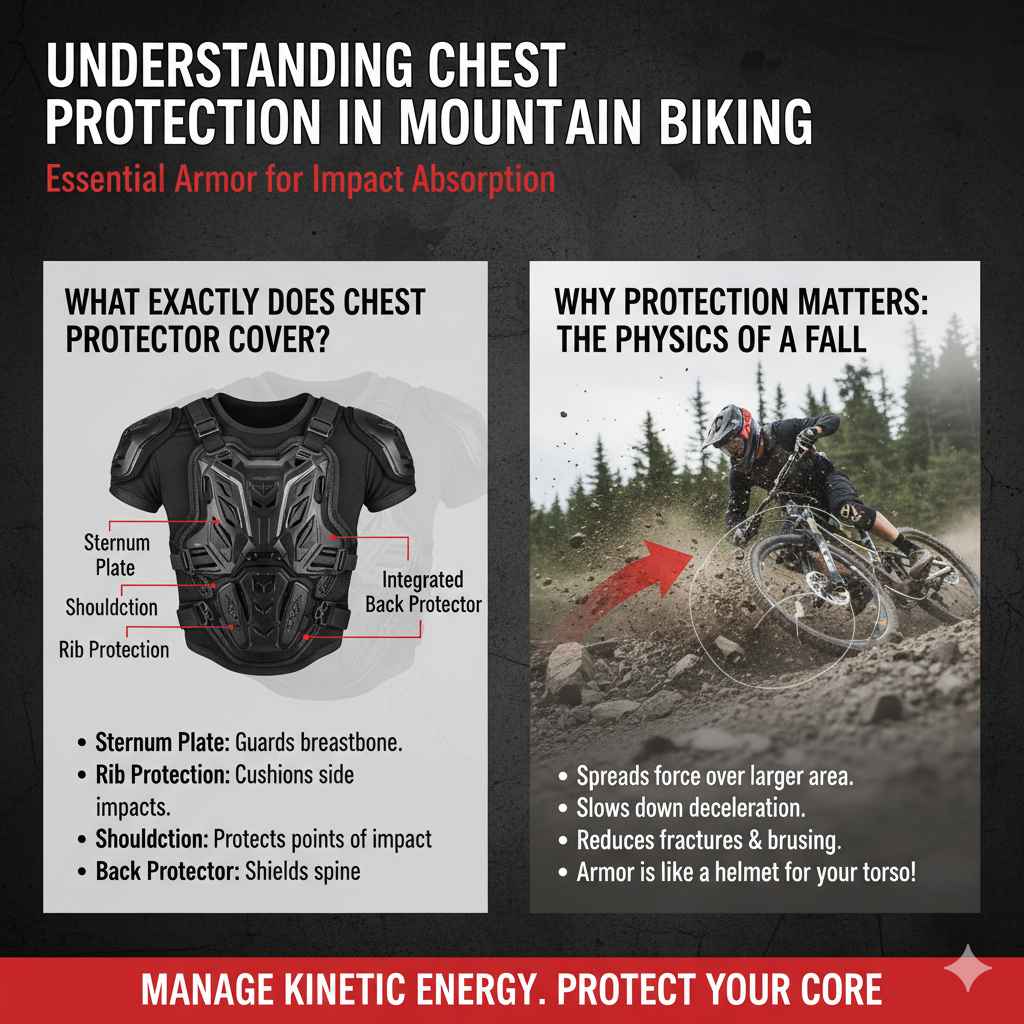
When we talk about “chest protectors” in mountain biking, we are usually referring to upper-body armor that covers the sternum, ribs, shoulders, and sometimes the back. This gear is designed to absorb and disperse the energy from direct impacts—like hitting a tree, sliding on rocks, or landing awkwardly after a jump.
What Exactly Does a Chest Protector Cover?
Chest protectors come in a few different styles, but generally, they focus on protecting the vital front and sometimes back areas.
Sternum Plate: This is the hard plastic or specialized foam area covering the breastbone. It’s crucial because a direct hit here can be extremely painful and dangerous.
Rib Protection: Many models include side panels or flexible foam designed to cushion the ribs against impacts when you fall sideways or twist during a crash.
Shoulder Pads: Often integrated, these protect the sharp points of your shoulders, which frequently take the first hit in a tumble.
Back Protector (Often Integrated): High-end models integrate a full back protector, which shields the spine from direct crushing forces.
Why Protection Matters: The Physics of a Fall
Mountain biking inherently involves speed and obstacles. Even the most skilled riders crash. The key benefit of armor is managing kinetic energy. When you fall, that energy has to go somewhere.
A chest protector spreads the force of impact over a larger area and slows down the deceleration of your body parts. This significantly reduces the chance of fractures, bruising, or internal injury compared to wearing just a jersey. Think of it like a helmet for your torso. You wouldn’t skip the helmet, right? This is the next logical step for aggressive riding.
Do I Need A Chest Protector For Mountain Biking? Deciding Factors
The need for a chest protector isn’t a universal requirement; it highly depends on what, where, and how fast you ride. Here is a breakdown of when it moves from optional to essential.
Riding Discipline: Where You Ride Matters Most
Different types of mountain biking expose you to different levels of risk.
| Riding Discipline | Risk Level | Chest Protector Recommendation |
| :— | :— | :— |
| Cross-Country (XC) | Low to Moderate | Optional, but wise for rocky terrain. |
| Trail Riding (General) | Moderate | Recommended if trails have frequent obstacles or speed sections. |
| Enduro Racing | High | Highly Recommended/Often Required by organizers. |
| Downhill (DH) Racing | Very High | Essential gear for virtually all riders. |
| Bike Park Riding | High | Essential, especially on lift-accessed terrain. |
For those riding trails that look like this—steep, rocky, or featuring jumps—the likelihood of a heavy impact increases drastically. For official guidance on safety standards, reputable sources like the International Mountain Bicycling Association (IMBA) often emphasize protective gear based on trail difficulty.
Assessing Your Personal Risk Level
Beyond the terrain, your personal habits play a huge role in the decision. Ask yourself these questions honestly:
1. How often do I ride technical terrain? Technical terrain includes steep chutes, large rock gardens, or fast, narrow singletrack.
2. Am I comfortable hitting jumps or drops? Jumps introduce height, and height dramatically increases impact force upon landing errors.
3. What type of bike am I riding? A heavy downhill bike demands more protection than a lightweight hardtail XC bike because downhill bikes encourage higher speeds on rougher terrain.
4. How often have I crashed recently? If you are in a learning phase or pushing your limits, your chance of falling is higher.
If you answered yes to the first two questions, you should seriously consider protection.
The Comfort Factor vs. Protection Trade-Off
A common worry beginners have is that chest protectors are too hot, too bulky, or restrict movement. Modern gear has vastly improved this.
Heat Management: Many modern protectors use ventilated plastic plating and moisture-wicking fabrics. While any protection adds some warmth, good quality gear breathes surprisingly well.
Mobility: Full-torso roost guards can be restrictive. However, lighter, flexible options (often called pressure suits or flexible core protectors) offer significant impact coverage without feeling like a medieval suit of armor.
It is always better to ride slightly warmer and protected than risk a season-ending injury because your gear felt uncomfortable one hot day.
Types of Chest Protectors: Finding Your Ideal Armor
Not all chest armor is created equal. Understanding the main categories will help you select gear that matches your riding style and comfort level.
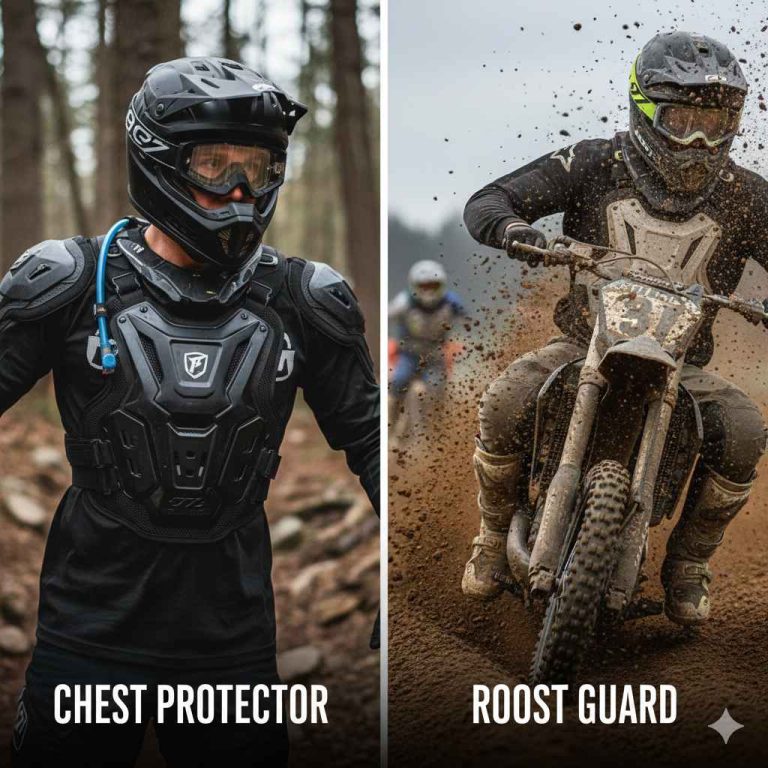
1. Roost Guards (The Basics)
Roost guards are typically simpler, lightweight plastic shells designed primarily to protect against flying debris (roost) kicked up by other riders, especially common in motocross but useful in group rides.
Pros: Very light, excellent ventilation, easy to wear under a jersey.
Cons: Minimal impact absorption for heavy falls; often lack rib or shoulder coverage.
Best For: Casual trail riders or riders who frequently ride with others on dusty trails.
2. Pressure Suits / Full Body Armor
These are the most comprehensive options. They look like a compression shirt but have integrated hard or high-density foam padding across the chest, back, shoulders, and elbows.
Pros: Maximum coverage, excellent protection against blunt force, many models meet CE EN 1621-2 standards for back protection.
Cons: Can be hotter, slightly more expensive, and potentially bulky under tight jerseys.
Best For: Downhill, Enduro racing, and riders tackling extremely rough or high-consequence terrain.
3. Hybrid/Strap-On Chest Plates
These offer a middle ground. They usually feature a hard front plate (sternum protection) secured by straps, sometimes with integrated back panels.
Pros: Good compromise between coverage and weight, often adjustable for fit.
Cons: Coverage can vary widely between brands; less protection for the sides/ribs compared to a full pressure suit.
Best For: Aggressive trail riders or newer downhill riders who want sternum protection without the bulk of a full suit.
Understanding Protection Ratings (CE Standards)
When shopping, look for certifications. The European standard CE EN 1621 is commonly referenced for impact protectors.
CE EN 1621-1: Typically for limb protectors (like elbows/knees), indicating impact attenuation levels.
CE EN 1621-2: Specifically for back protectors, denoting significant impact force reduction.
Look for gear that explicitly mentions these ratings, especially the back protection element, as it shows the gear has been rigorously tested to handle high-energy impacts.
Step-by-Step Guide: Choosing and Fitting Your Chest Protector
Getting the right fit is crucial. Ill-fitting armor shifts during a crash, leaving vital areas exposed. Follow these steps to ensure your new gear works perfectly when you need it most.
Step 1: Determine Your Primary Riding Style
First, look back at the disciplines discussed above. Are you casually exploring or sending it off drops?
If your riding is mostly gentle or involves fire roads, skip the heavy gear for now.
If you are hitting bike parks or racing Enduro, you need maximum coverage (Pressure Suit or high-end Hybrid).
Step 2: Measure Yourself Accurately
Sizing charts are your best friend. Do not guess based on your T-shirt size.
- Chest Circumference: Measure around the fullest part of your chest, just under your armpits.
- Waist/Stomach: Measure around your natural waistline (where you’d wear your MTB shorts).
- Torso Length (for some suits): Measure from the base of your neck down to your hips or belt line.
Always consult the manufacturer’s specific sizing chart, as brands fit differently.
Step 3: The Try-On Test (Crucial for Comfort)
If possible, try the protector on over a thin base layer, as you would wear it on the trail.
Check for Coverage Gaps: Ensure the sternum plate completely covers your breastbone without riding too high onto your throat or too low onto your stomach when you are bent over, mimicking riding position.
Test Mobility: Raise your arms above your head, twist your body side to side, and hunch over. The armor should stay in place and not pinch or restrict your breathing or range of motion severely.
Shoulder Alignment: Shoulder pads should sit directly on top of your shoulders; they should not slide off toward your neck or hang down your bicep.
Step 4: Review Ventilation and Adjustability
Examine the back panel. Does it have large vents? Are the adjustment straps sturdy? Look for hook-and-loop (Velcro) closures that feel strong and won’t loosen under heavy sweat or vibration.
Step 5: Coordinate with Other Gear
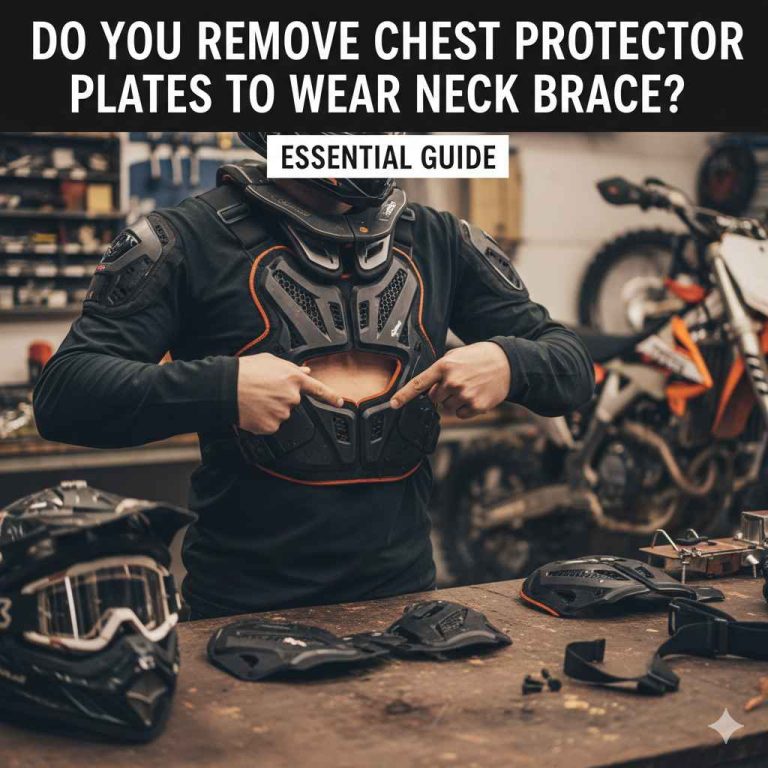
If you plan to wear a neck brace (highly recommended for serious downhill riding), you must ensure your chest protector is compatible. Many modern chest protectors feature cutouts or adjustable height to accommodate the back of a neck brace seamlessly. A poorly fitted setup can actually be more dangerous than wearing nothing at all.
Pros and Cons of Wearing a Chest Protector
Making an informed decision means weighing the benefits against the drawbacks. Here is a balanced look at what you gain and what you sacrifice by adding armor.
Advantages (The Safety Upside)
- Injury Prevention: Directly reduces the risk of fractured ribs, bruised sternum, and severe upper-body abrasions.
- Confidence Boost: Knowing your vital organs and bones are shielded allows you to push your limits safely, leading to faster skill progression.
- Protection from Debris: Guards against sharp rocks, branches, and roost from other riders (hence the name “roost guard”).
- Spine Support: Many integrated back protectors offer better back support and impact absorption than standard hydration packs alone.
Disadvantages (The Trade-Offs)
- Added Weight: Even lightweight options add a noticeable few pounds.
- Increased Heat: Layering armor increases body temperature, leading to quicker fatigue on hot days.
- Cost: Quality armor can be a significant initial investment compared to basic padding.
- Potential for Restriction: Poorly fitted or overly aggressive armor can impede movement, affecting handling and breathing on long climbs.
To help visualize the impact force reduction, consider this general comparison table regarding energy absorption:
| Impact Surface | Energy Absorption (Relative) | Injury Potential |
|---|---|---|
| Bare Skin/Jersey | Very Low (0-10%) | High |
| Light Padding (e.g., Hydration Pack) | Low (10-30%) | Moderate |
| Full Chest Protector (CE Rated) | High (60-90% reduction) | Low |
Maintenance and Care for Your Protective Gear
Your chest protector is an investment in your safety. Treating it well ensures it remains effective for years to come. Remember that impact armor is designed to protect you once per crash; hard impacts can compromise the materials even if they look fine externally.
Cleaning After a Grimy Ride
Mud, sweat, and grime break down the plastics and fabrics over time, leading to odors and material degradation.
- Remove Components: If possible, take out any removable foam inserts or hard plastic plates.
- Hand Wash: Use lukewarm water and a mild soap (like dish soap or specialized sports cleaner). Do not use harsh detergents or bleach.
- Rinse Thoroughly: Ensure all soap residue is washed out, as residue can irritate the skin or degrade the elastic straps.
- Air Dry Only: Never put your armor in a clothes dryer or use high heat. Heat warps the plastic and ruins the impact foam. Hang it up in a shaded, well-ventilated area.
Inspecting for Damage
Regular inspection is non-negotiable, especially after a hard fall.
Check the hard plastic shells for deep cracks or stress lines. A hairline crack means the protector has absorbed a major impact and must be replaced immediately.
Examine all straps and buckles. If the Velcro is frayed or the plastic buckles are cracked, replace the unit.
Feel the foam padding. If it feels compressed, crumbly, or permanently deformed, it has lost its ability to absorb energy effectively and needs replacement.
For information on material science regarding impact absorption, resources from sporting goods safety organizations, such as those dealing with ASTM standards, often provide deeper insight into why aging protective gear fails.
When Can Beginners Skip the Chest Protector?
If you are 100% dedicated to mellow riding, there are specific scenarios where you might delay purchasing one, though we always advise caution.
Pure Pavement or Smooth Gravel Paths: If your “mountain biking” is strictly on well-graded, non-technical paths with very low speed, the risk of a torso impact is minimal.
* Climbing Focus: If you spend 90% of your time pedaling uphill on smooth climbs where speeds are very low, the risk is reduced.
However, even on smooth trails, a simple slip on a root or loose patch can send you tumbling into a rock or stump. For beginners, it is often wise to purchase a lighter-weight chest protector early on. Wearing it during your learning phase builds good habits and protects you while you master basic bike control and braking skills. Think of it as insurance during your crucial skill development stage.

FAQ: Beginner Questions About Mountain Bike Chest Protectors
Q1: Do I have to wear a chest protector if my bike jersey already has shoulder pads?
A: Yes, generally. Jersey pads are usually light foam designed only for light abrasion resistance or mild dabbing. They offer almost no protection against the blunt force impact that a hard-shell chest protector is designed to manage against rocks or the ground.
Q2: Can I wear my chest protector under my regular riding jersey?
A: Yes, this is common practice, especially with modern, low-profile pressure suits. However, ensure your jersey is loose enough to fit over the armor comfortably without binding or riding up. Very bulky roost guards may require an oversized jersey.
Q3: Are chest protectors only for Downhill riders?
A: No. While essential for Downhill, they are increasingly common in Enduro and aggressive trail riding. If you are hitting jumps, drops over three feet, or riding very fast over rock gardens, a chest protector is a smart choice regardless of the label on your riding discipline.
Q4: How often should I replace my chest protector?
A: You should replace it immediately after any hard crash where you felt the armor take a significant blow. Otherwise, inspect it annually. Even without crashes, materials degrade over 3–5 years due to UV exposure, sweat, and repeated minor flexing.
Q5: Will wearing a chest protector make me sweat too much?
A: It will increase heat slightly, but modern designs focus heavily on ventilation with air channels and mesh. Look for gear specifically marketed as lightweight or ventilated if heat is a major concern for your climate.
Q6: Do I still need a backpack if I wear a chest protector?
A: Yes, often. Many chest protectors cover the sternum and back but leave the upper/mid-back exposed. A hydration pack or small backpack is still necessary to carry water, tools, and first aid supplies. Just ensure the pack sits correctly over the back armor without pushing it into your spine.
Conclusion: Making the Smart Choice for Safer Trails
Deciding whether you need a chest protector for mountain biking boils down to risk assessment: what terrain are you tackling, and how aggressively are you riding it? If your adventures involve speed, jumps, technical rock gardens, or steep descents, the answer is a confident “yes.” A chest protector is not a sign of weakness; it is a sign of smart preparation, much like choosing the right bike for the job.
By taking the time to understand the different types—from simple roost guards to full pressure suits—and ensuring a perfect fit, you maximize both safety and comfort. Don’t let the initial investment or slight added warmth deter you from protecting your ribs and sternum. Investing in quality protection today means fewer painful, trail-ending crashes tomorrow, allowing you to focus on progressing your skills and truly enjoying the incredible challenge mountain biking offers. Gear up wisely, ride within your limits, and most importantly, have fun out there!