Yes, a bow shoots differently with a quiver attached because it adds weight, changes the bow’s balance, and can introduce torque. This often causes arrows to fly off-target. The solution is to re-tune your bow with the quiver on, practice consistently, and ensure the quiver is mounted correctly to restore your accuracy.
Have you ever spent hours sighting in your bow, getting perfect groups, only to attach your quiver and watch your arrows fly completely off target? It’s a frustrating moment that makes many archers scratch their heads. You might wonder if you did something wrong or if your equipment is faulty. The good news is, you’re not alone, and your equipment is likely fine. This is a very common issue for both beginners and seasoned archers.
The simple act of adding a quiver changes the physics of your bow. But don’t worry, it’s an easy problem to solve. In this guide, I’ll walk you through exactly why this happens and give you simple, step-by-step instructions to get your bow shooting perfectly with the quiver attached. We’ll turn that “fail” into a success.
Why Your Bow Shoots Differently With a Quiver
Attaching a quiver to your bow seems like a small change, but it has a big impact on how your bow behaves. Think of your bow as a finely tuned instrument. Adding anything to it, especially on one side, can throw off its balance and performance. Let’s break down the main reasons why this happens in simple terms.
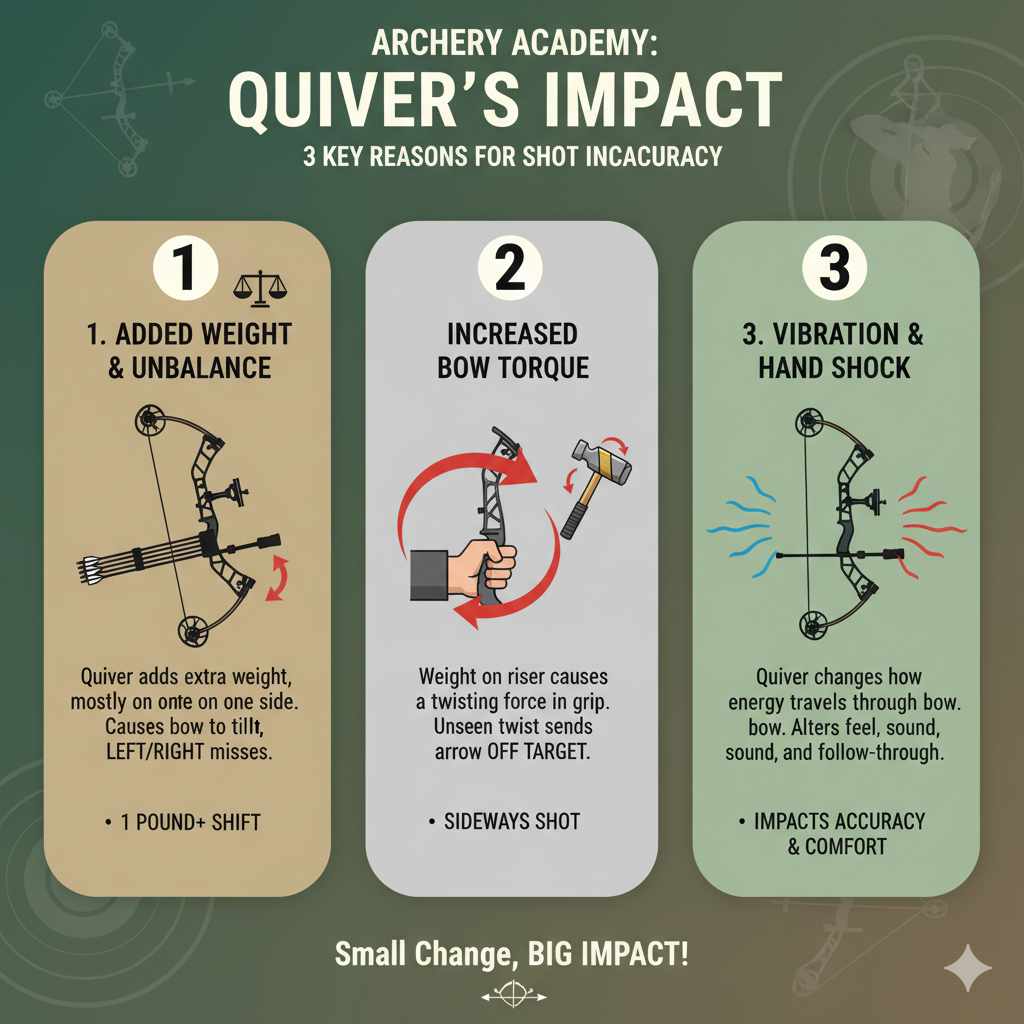
1. Added Weight and Unbalanced Feel
The most obvious change is the extra weight. A quiver, especially when full of arrows, can add a pound or more to your setup. This extra weight is almost always on one side of the bow. Your body and muscles are used to holding the bow a certain way. When you add that lopsided weight, your bow will naturally want to lean or tilt in that direction.
Even a tiny, subconscious tilt can cause your arrows to miss the target by several inches, especially at longer distances. This is why many archers find their arrows suddenly hitting to the left or right of where they were aiming.
2. Increased Bow Torque
Torque is a fancy word for a twisting force. Because the quiver sits on the side of your bow’s riser (the handle), its weight encourages you to twist the grip slightly when you draw and shoot. You might not even feel yourself doing it, but this tiny twist is enough to send your arrow sideways.
Imagine holding a hammer. It’s easy to hold it straight up and down. Now, tape a small weight to one side of the hammerhead. It will constantly want to twist in your hand. The same principle applies to your bow when a quiver is attached.
3. Changes in Vibration and Hand Shock
When you release the bowstring, a huge amount of energy travels through the bow. This creates vibration. Your bow is designed to handle this vibration in a specific way. Adding a quiver changes the bow’s overall mass and shape, which alters how that vibration travels through it.
Sometimes, this can actually help by dampening vibration and making the bow quieter. Other times, it can create new, unfamiliar vibrations or “hand shock” that affect your follow-through and accuracy. Your bow just feels and sounds different, which can be enough to throw off your shot.
Common Accuracy Problems Caused by an Attached Quiver
When you experience the “quiver fail,” the problems usually show up on the target in a few predictable ways. If you see any of these issues right after mounting your quiver, you’ll know exactly what’s causing them.
- Arrows Consistently Hitting Left or Right: This is the most common issue. For a right-handed shooter, the quiver is on the left side of the bow, which often causes arrows to hit to the left. The opposite is true for left-handed shooters.
- Inconsistent Arrow Groups: Your arrows might not just hit left or right—they might go all over the place. One shot is left, the next is high, and the one after is low. This happens because the new weight and balance are making it hard for you to hold the bow steady and repeat your form perfectly every time.
- Changes in Vertical Impact: Sometimes, the added weight can cause you to hold the bow slightly differently, making your arrows hit higher or lower than before.
- Broadheads Planing Differently: If you’re a bowhunter, this is a major issue. The change in bow dynamics can make your broadheads steer your arrows differently than your field points, a problem that wasn’t there before you attached the quiver.
Recognizing these signs is the first step. Now, let’s get to the fun part: fixing it.
Your Step-by-Step Guide to Shooting Accurately With a Quiver
Getting your bow to shoot well with a quiver attached isn’t magic. It’s about making a few key adjustments and practicing the right way. Follow these steps, and you’ll be shooting tight groups with your quiver on in no time.
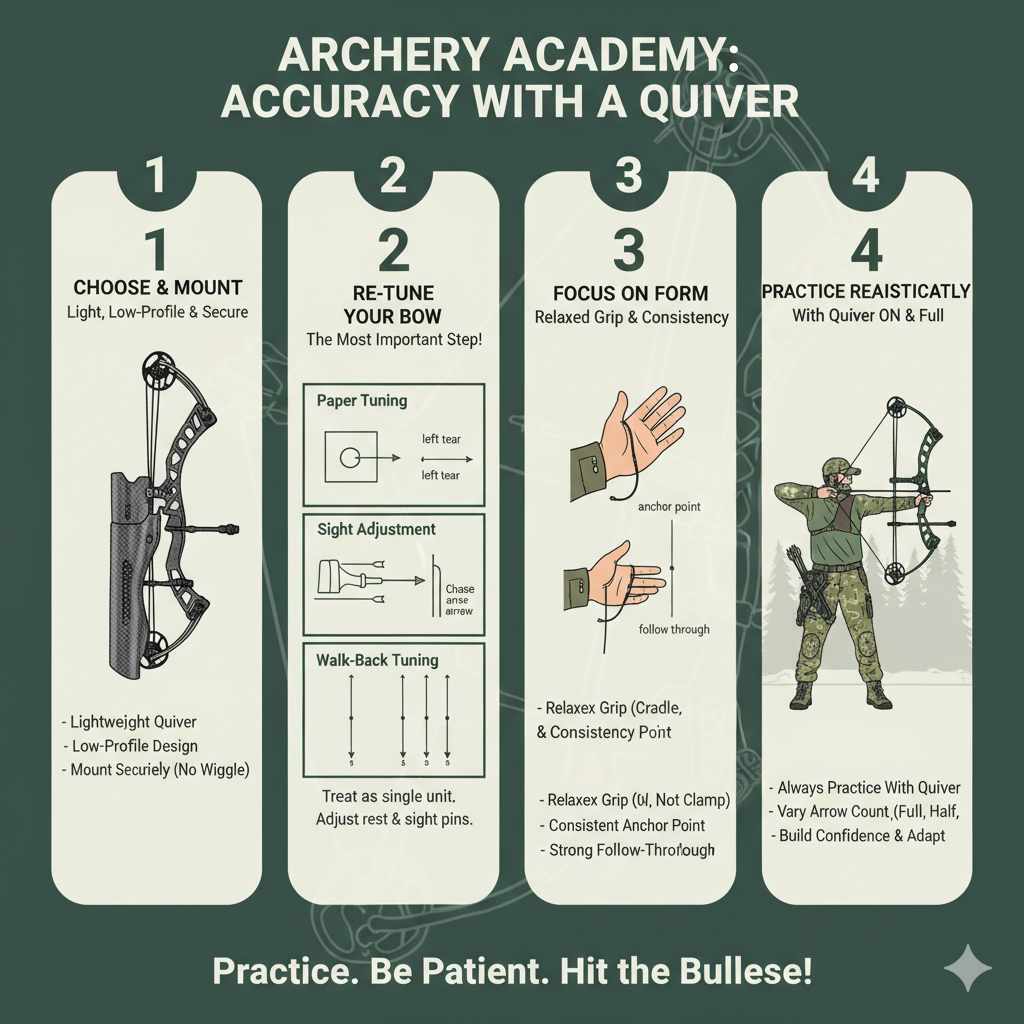
Step 1: Choose and Mount Your Quiver Correctly
Not all quivers are created equal. The type of quiver you choose and how you attach it makes a huge difference. For bow-mounted quivers, the goal is to keep it as light and tight as possible.
- Go for a Lightweight Quiver: Look for quivers made from carbon or a lightweight polymer. Every ounce matters when it comes to balance.
- Choose a “Low-Profile” Design: The best quivers are designed to sit as close to the bow’s riser as possible. The further the quiver sticks out, the more it will want to twist the bow in your hand. Many modern quivers have adjustments that let you bring them in closer to the riser.
- Mount It Securely: Make sure the quiver is mounted tightly. Any wiggle or looseness will create noise and inconsistent vibrations, which will ruin your accuracy. Double-check the mounting screws before you start shooting.
Step 2: Re-Tune Your Bow (The Most Important Step)
This is the secret sauce. You cannot expect your bow to shoot the same after adding a major accessory. You must re-tune your bow with the quiver attached and full of the arrows you plan to shoot.
Treat your bow-and-quiver setup as a single unit. Here’s a simple tuning process for beginners:
- Start with Paper Tuning: Paper tuning is a great way to see how your arrow is flying. Shoot an arrow through a large piece of paper from about 6 feet away. A perfect shot will leave a clean hole with three fletching marks. If you have a tear, it tells you the arrow is coming out of the bow crooked. You can find excellent guides on paper tuning from resources like the Archery Trade Association.
- A “left tear” (for a right-handed shooter) means the back of the arrow is kicking to the right. To fix this, you may need to move your arrow rest slightly to the right.
- A “right tear” means the back of the arrow is kicking to the left. Try moving your arrow rest slightly to the left.
- Adjust Your Sight: Once your arrow is flying straight, you’ll likely need to adjust your sight pins. If your arrows are hitting left with the quiver on, move your sight to the left (always “chase the arrow” with your sight). If they hit high, move your sight up. Make small, one-pin adjustments until you are hitting the bullseye again at 20 yards.
- Fine-Tune with Walk-Back Tuning: For even better accuracy at longer ranges, try walk-back tuning. Shoot at a vertical line on a large target. Start at 20 yards, aiming for the top of the line. Then, walk back to 30, 40, and 50 yards, always using your 20-yard pin to aim at the same spot. If your arrows drift to one side as you move back, it indicates a tuning issue that needs a small rest adjustment.
Step 3: Focus on Your Form and Grip
With the added weight of the quiver, your form becomes more important than ever. The most common mistake is gripping the bow too tightly to counteract the weight, which introduces even more torque.
- Maintain a Relaxed Grip: Your hand should be relaxed. The grip should rest on the pad of your thumb. Imagine your hand as a cradle for the bow, not a clamp. A bow sling is a great tool to help you trust a relaxed grip.
- Use a Consistent Anchor Point: Make sure you are anchoring your release hand in the exact same spot for every shot—like the corner of your mouth or under your jaw. Inconsistency here will lead to inconsistent groups.
- Follow Through: After you release the string, keep your bow arm pointed at the target until the arrow hits. Don’t drop your arm to see where the arrow went. A strong follow-through helps cure many accuracy problems.
Step 4: Practice How You Plan to Shoot
This rule is simple but critical: If you plan to hunt or compete with your quiver on, you need to practice with your quiver on. And not just on, but with the same number of arrows in it that you’d normally carry.
The balance of your bow changes as you take arrows out of the quiver. A full quiver feels very different from a quiver with only one arrow left. Practice shooting with a full quiver, a half-full quiver, and a nearly empty one to get used to the changing feel. This will make you a much more consistent and confident archer in real-world situations.
Troubleshooting Common Quiver-Related Shooting Fails
If you’ve re-tuned your bow and are still having issues, this chart can help you diagnose the problem.
| Problem | Potential Cause | How to Fix It |
|---|---|---|
| Arrows consistently hitting left (for right-handed archers) | Bow torque from quiver weight; sight needs adjustment. | Relax your grip. Move your sight to the left. Consider a slight arrow rest adjustment. |
| Wide, inconsistent arrow groups | Inconsistent form; loose quiver mount. | Practice with a focus on your anchor point and grip. Tighten all quiver mounting screws. |
| Bow feels loud or has a lot of vibration | Quiver is amplifying vibration; arrows are loose in the holder. | Ensure arrows are seated snugly in the quiver hood and gripper. Check that the quiver itself is tight. Some quivers have built-in vibration dampeners. |
| Broadheads are flying differently than field points | The quiver has magnified a small tuning issue. | Go back to paper tuning or walk-back tuning with broadheads on. Small rest adjustments are often needed. This is a crucial step for bowhunters. |
Quiver On vs. Quiver Off: Is There a “Right” Way?
Many archers debate whether it’s better to shoot with the quiver on or to take it off in a hunting situation. Honestly, there is no single right answer—it comes down to personal preference and what you practice. The most important thing is to be consistent. If you sight in your bow with the quiver off, you should take it off every time you shoot for accuracy.
Here’s a look at the pros and cons of each method to help you decide.
| Method | Pros | Cons |
|---|---|---|
| Shooting with Quiver ON |
|
|
| Shooting with Quiver OFF |
|
|
For many hunters, the convenience of having arrows ready outweighs the cons. For target archers, the quiver almost always comes off for maximum precision. The choice is yours, but remember to stick with it in your practice sessions. For a deeper look at bow balance and stabilization, the physics principles explained by universities like the University of Illinois can be helpful for understanding rotational motion.
Frequently Asked Questions
1. Does a full quiver shoot differently than a half-empty one?
Yes, it does. As you remove arrows, the weight and balance of your bow change slightly. While the difference may be minimal at close range, it can become noticeable at longer distances. It’s best to practice with varying numbers of arrows in your quiver to get used to the different feels.
2. Should I practice with my quiver on all the time?
You should practice with the exact setup you intend to use when it counts. If you hunt with your quiver on, then the vast majority of your practice should be with it on. If you are a target archer and always remove it for competitions, then practice with it off.
3. Can a quiver damage my bow?
A properly installed quiver will not damage your bow. Modern bows are built with threaded holes specifically for mounting accessories like quivers. Just make sure the mounting screws are snug but not over-tightened, and ensure no part of the quiver is rubbing against the limbs or cams.
4. What’s the best type of quiver for a beginner?
For a beginner using a compound bow, a bow-mounted quiver is often the most convenient and popular choice. Look for a simple, lightweight, two-piece quiver that holds 4-6 arrows. These are easy to attach and provide a good balance of function and simplicity without being too expensive.
5. How do I stop my quiver from making noise?
Noise usually comes from two places: a loose mount or vibrating arrows. First, check that all mounting screws are tight. Second, make sure your arrows fit snugly in both the rubber gripper and the foam hood. If they are loose, you can sometimes add a small piece of fabric or felt inside the gripper slots to tighten them up.
6. Does the brand of the quiver matter?
While high-end brands often offer better materials, lighter weights, and more adjustability, the brand is less important than the design and proper installation. A well-designed, securely mounted budget quiver that you’ve tuned your bow for will perform much better than an expensive, poorly mounted one.
7. Can I just take my quiver off before I shoot?
Yes, many hunters do this. They will carry their bow with the quiver attached and then remove it once they are in their tree stand or ground blind, hanging it on a nearby hook. If you choose this method, just make sure you have sighted in and practiced with your quiver off.
Putting It All Together: Your Path to Quiver Confidence
So, does a bow shoot different with the quiver attached? Absolutely. But that “fail” you experienced is not a setback—it’s a normal part of the archery journey. It’s a sign that you’re paying attention to your equipment and your accuracy, which is what makes a good archer great.
By understanding why it happens and following the steps to fix it, you can turn this common frustration into a point of confidence. Remember the keys to success: choose a good quiver, mount it correctly, re-tune your bow with it attached, and practice consistently with the setup you plan to use. Don’t let a change in equipment throw you off your game. Embrace the process, make the adjustments, and soon you won’t even think twice about shooting with your quiver on.
Happy shooting!