Making a longbow quiver is a rewarding project. Start by creating a paper pattern for the main body and base. Cut your material, like 5-6 oz leather, punch stitching holes along the edges, and sew the pieces together using a saddle stitch. Finally, attach a strap, and you’ll have a beautiful, custom quiver ready for the archery range.
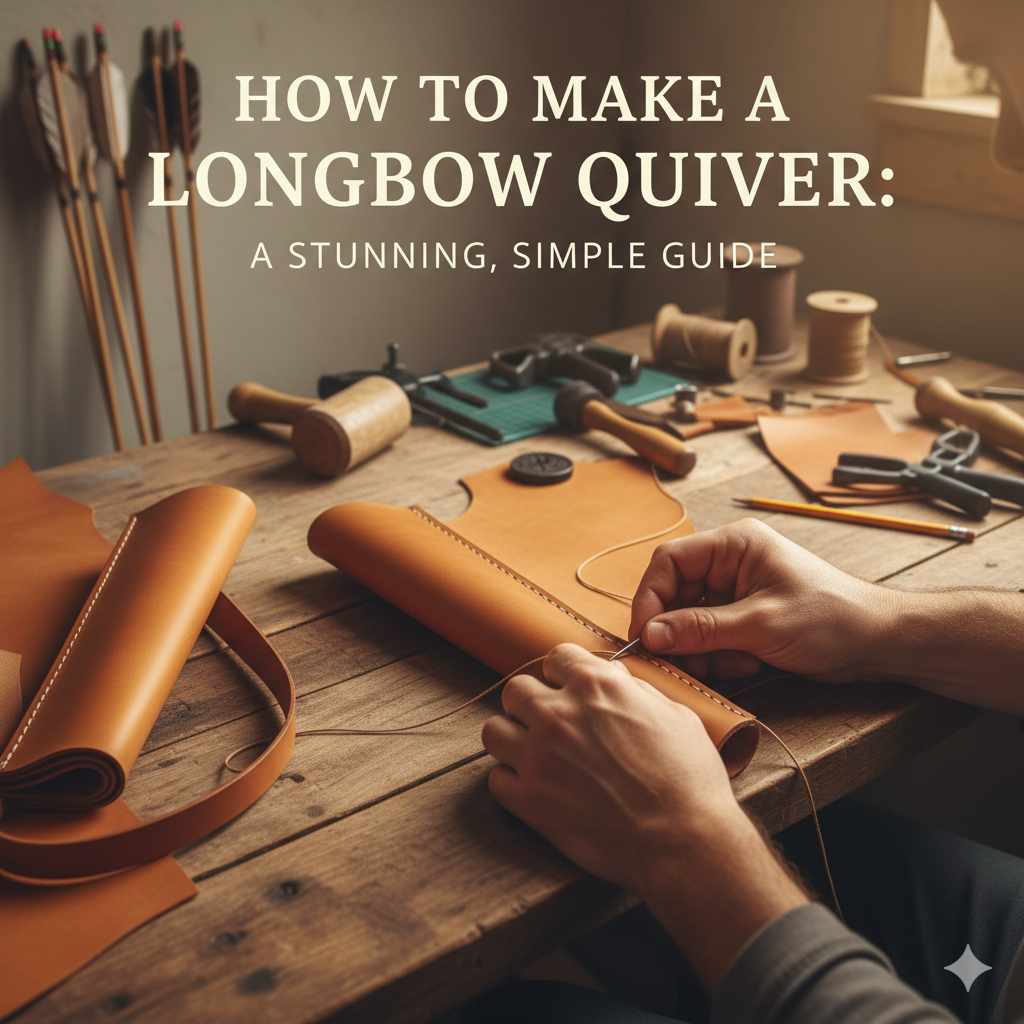
Hello, archers! Salman here. Have you ever stood on the shooting line, arrows tucked awkwardly under your arm, thinking there has to be a better way? A good quiver is essential, but store-bought options can feel impersonal or expensive. What if you could make one that’s perfectly suited to you, your bow, and your style?
Making your own longbow quiver sounds complex, but I promise it’s one of the most satisfying projects a new archer can tackle. It connects you more deeply to your gear and gives you a huge sense of accomplishment. In this guide, I’ll walk you through every simple step, from choosing a style to making the final stitch. Let’s create something you’ll be proud to carry!
Why Bother Making Your Own Quiver?
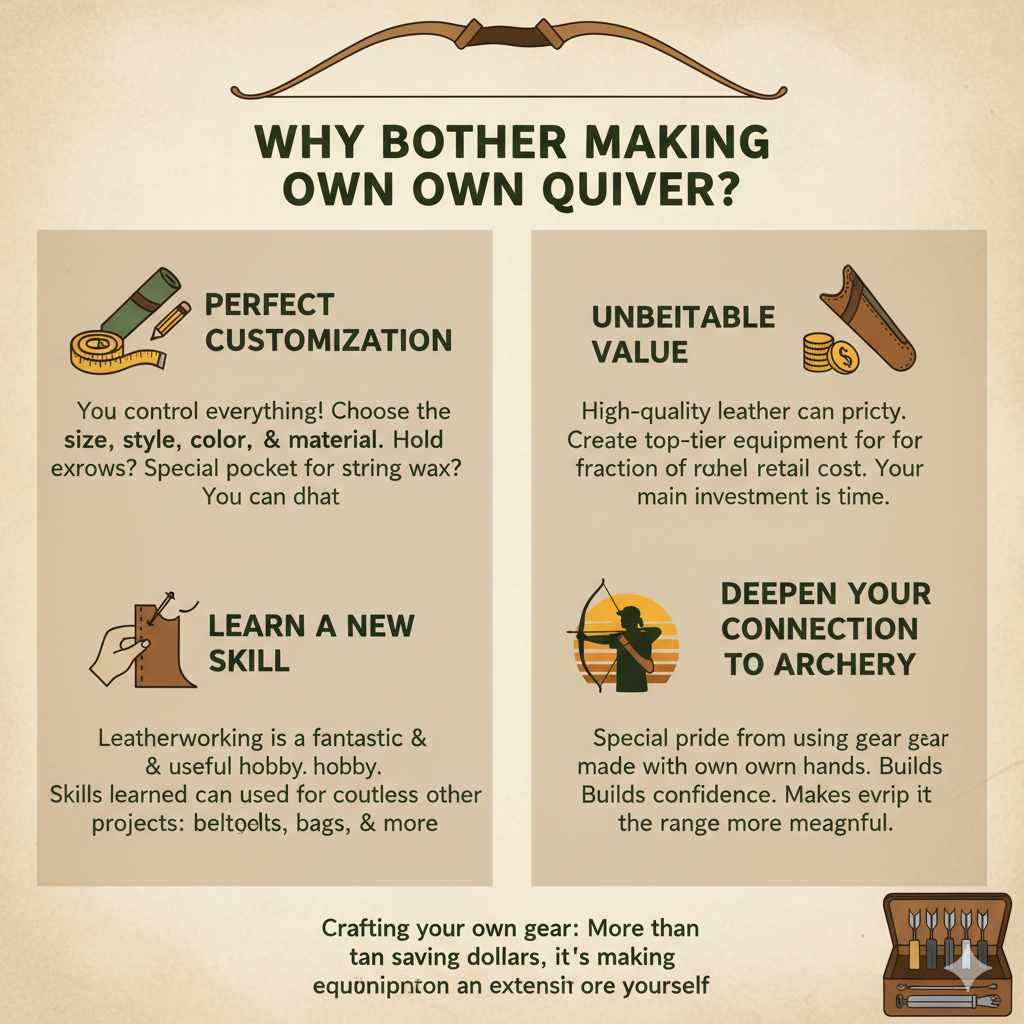
Before we grab our tools, let’s talk about the “why.” Crafting your own gear is a time-honored tradition in archery. It’s more than just saving a few dollars; it’s about making your equipment an extension of yourself. Here are a few great reasons to make your own longbow quiver:
- Perfect Customization: You control everything! Choose the size, the style, the color, and the material. Want it to hold exactly 12 arrows? You can do that. Need a special pocket for your string wax? You can add it.
- Unbeatable Value: A high-quality leather quiver can be pricey. By making it yourself, you can create a top-tier piece of equipment for a fraction of the retail cost. Your main investment is your time.
- Learn a New Skill: Leatherworking is a fantastic and useful hobby. The skills you learn making a simple quiver can be used for countless other projects, from belts to bags.
- Deepen Your Connection to Archery: There’s a special pride that comes from using gear you made with your own hands. It builds confidence and makes every trip to the range more meaningful.
Choosing Your Quiver Style
The first big decision is what kind of quiver to make. There are three main types, each with its own pros and cons. Think about how you shoot and what feels most comfortable for you. Most beginners find a back or hip quiver to be the most versatile and traditional for a longbow.
| Quiver Style | Pros | Cons | Best For |
|---|---|---|---|
| Back Quiver | Classic, traditional look. Holds many arrows. Keeps arrows out of the way when walking through brush. | Can be slow to draw from. Arrows can rattle or fall out if you bend over. Takes practice to use smoothly. | Traditional archers, roving, and those who want a classic “Robin Hood” aesthetic. |
| Hip Quiver (or Side Quiver) | Very easy and fast to draw arrows from. You can easily see your remaining arrows. Comfortable for standing and shooting. | Can get in the way when walking through dense woods. Arrows can snag on branches. | Target archers, beginners, and anyone who values speed and convenience. |
| Bow Quiver | Arrows are always with the bow, ready to go. Quiet and secure. Excellent for hunting. | Adds weight and bulk to your longbow, which can affect balance. Limited arrow capacity. | Hunters and archers who need to move quietly and have arrows immediately accessible. |
For this guide, we will focus on making a classic and simple back quiver from leather. The principles and techniques, however, can be easily adapted for a hip quiver as well.
Gathering Your Materials and Tools
You don’t need a full workshop to make a beautiful quiver. A few basic tools and good materials will get the job done. Think of this as your shopping list for the project.
Essential Materials:
- Leather: A piece of 5-6 oz vegetable-tanned (veg-tan) leather is perfect. It’s sturdy enough to hold its shape but flexible enough to work with. You’ll need a piece roughly 24 inches by 18 inches for the main body and a smaller piece for the base and strap.
- Waxed Thread: This is strong, durable thread used for stitching leather. Get a color that either matches or contrasts nicely with your leather.
- Leather Needles: You’ll need two blunt-tipped harness needles. They are designed to pass through pre-punched holes without splitting the leather.
- Contact Cement or Leather Glue: This will help hold pieces in place before you stitch them.
- Large Sheet of Paper: For making your pattern. Kraft paper or an old paper grocery bag works great.
Essential Tools:
- Utility Knife or Craft Knife: A sharp blade is crucial for clean cuts. Make sure you have fresh blades.
- Metal Ruler or Straight Edge: For guiding your knife to make straight cuts.
- Stitching Chisels or Awl: Stitching chisels (also called pricking irons) are forks that punch evenly spaced holes for your thread. An awl can also be used to poke holes one by one.
- Mallet: A rawhide or poly mallet is best for striking your stitching chisels without damaging them.
- Cutting Mat: A self-healing cutting mat will protect your work surface and your knife blade.
- Pencil and Measuring Tape: For marking your pattern and leather.
Step-by-Step Guide: Let’s Make Your Quiver!
Ready to get started? Find a clean, well-lit space to work. Take your time with each step, and remember that small imperfections give your quiver character. This is your creation!
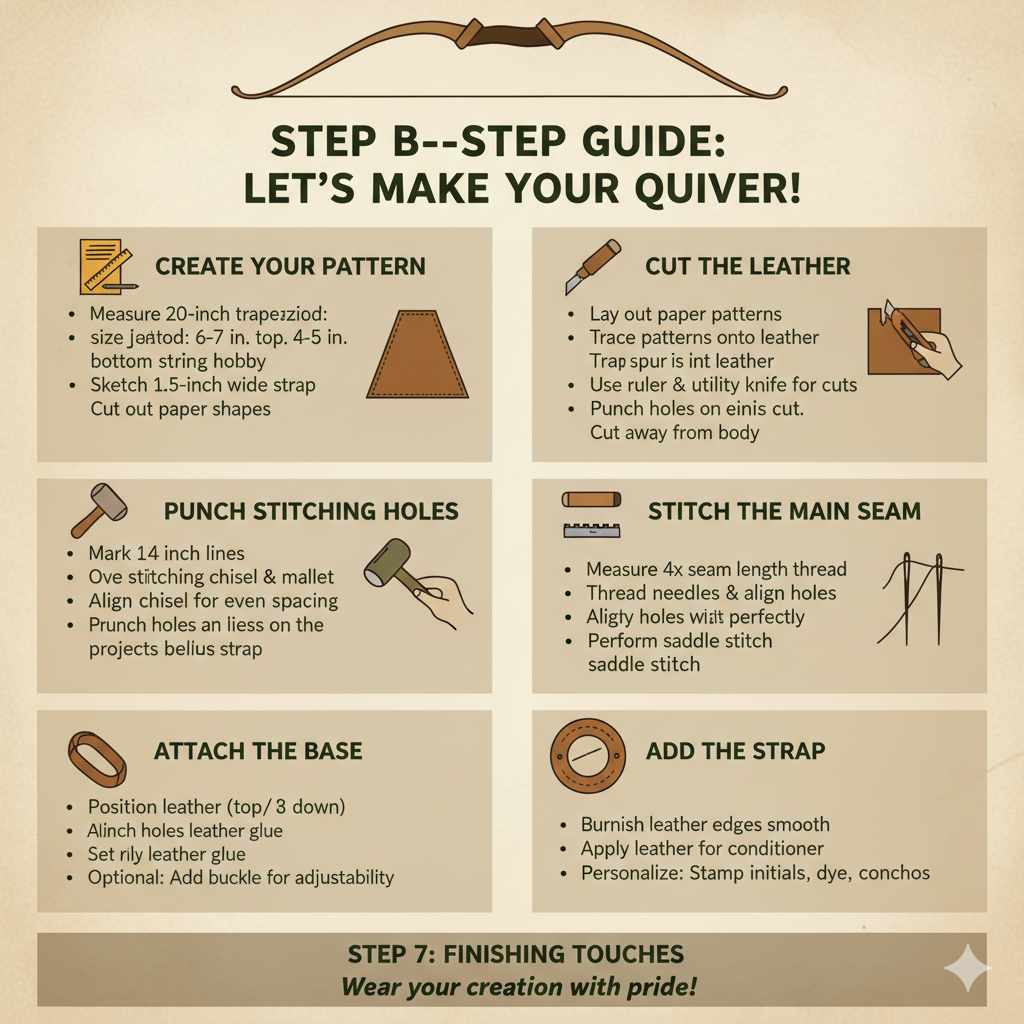
Step 1: Create Your Pattern
Your pattern is the blueprint for your quiver. Getting this right will make the rest of the process much smoother.
- Measure the Body: Lay your large sheet of paper on a flat surface. We’re going to create a long trapezoid shape. A good starting length is 20 inches—long enough to cover most of your arrows.
- Draw the Shape: The top opening of your quiver should be wider than the bottom. A good measurement is about 6-7 inches wide at the top and 4-5 inches wide at the bottom. Use your ruler to draw a 20-inch-long trapezoid with these widths. This shape will be rolled into a tube.
- Create the Base: The base will be a circle. Take the bottom width of your trapezoid (let’s say it’s 4 inches). This will be the diameter of your quiver’s base. However, when you roll the trapezoid, the bottom opening will form a circle. You can use a compass or trace a circular object that’s roughly 4 inches across to create your base pattern.
- Design the Strap: Decide how long you want your strap to be. A good way to measure is to drape a measuring tape over your shoulder in the position you’d wear the quiver. Add a few extra inches. A good strap width is about 1.5 inches. Draw this long rectangle on your pattern paper.
- Cut Out Your Patterns: Carefully cut out the paper patterns for the quiver body, the circular base, and the strap.
Step 2: Cut the Leather
Now we move from paper to leather. This is where your project starts to feel real! Always remember the old rule: measure twice, cut once.
- Lay Out the Pattern: Place your paper patterns on the smooth side of your leather. Arrange them to use the leather as efficiently as possible.
- Trace the Pattern: Use a pencil or a scratch awl to lightly trace around your patterns onto the leather.
- Cut with Care: Place your leather on the cutting mat. Using your metal ruler as a guide, press down firmly with your utility knife and make long, steady cuts. For the circular base, go slowly and carefully. It’s better to make several shallow passes than to try and cut through it all at once. For your own safety, always cut away from your body. The Occupational Safety and Health Administration offers great tips on knife safety.
Step 3: Punch the Stitching Holes
This is the most critical step for getting a clean, professional look. Evenly spaced holes will result in beautiful, straight stitches.
- Mark Your Stitching Line: Along the two long, non-parallel edges of your trapezoid body piece, use a ruler to mark a faint line about 1/4 inch in from the edge. Do the same around the entire circumference of your circular base piece.
- Punch the Holes on the Body: Lay one edge of the quiver body on your cutting mat. Place your stitching chisel on the marked line, starting at one end. Give it a firm tap with your mallet to punch the holes through the leather. Move the chisel down the line, placing the first tooth in the last hole you made to ensure perfect spacing. Repeat for the other long edge.
- Punch the Holes on the Base: This is a bit trickier because it’s a curve. Go slowly and carefully, punching holes all the way around the circular base, following your marked line.
Step 4: Stitch the Main Seam
We’ll use a “saddle stitch” for this. It’s an incredibly strong stitch where two needles pass through each hole, creating a durable seam that won’t unravel. You can find many great video tutorials on saddle stitching online.
- Prepare Your Thread: Measure a length of waxed thread that is about four times the length of the seam you’re about to sew. Thread a needle onto each end of the thread.
- Line Up the Edges: Roll your trapezoid body piece into a tube, overlapping the two edges you just punched so the holes line up perfectly. You can use a bit of contact cement or some clips to hold it in place while you work.
- Start Stitching: Push one needle through the first hole at the top of the quiver. Pull the thread through until you have an equal length on both sides. Now, take the right-hand needle and push it through the second hole. Then, take the left-hand needle and push it through that same second hole, being careful not to pierce the thread that’s already there. Pull both ends tight.
- Continue Down the Seam: Repeat this process for every hole: right needle through, left needle through, pull tight. You’ll quickly get into a rhythm. This creates a strong, beautiful stitch line.
- Finish the Stitch: When you reach the last hole, backstitch two or three holes to lock the thread in place. Snip the thread close to the leather.
Step 5: Attach the Base
Your quiver now looks like a tube. It’s time to close the bottom.
- Fit the Base: Fit your circular base piece into the bottom of the quiver tube. The holes you punched in the base should line up with the holes at the bottom of the tube. This can be a tight fit, which is good! A little bit of leather glue applied to the edge can help hold it in place.
- Stitch the Base: Using the same saddle stitch method, carefully stitch the base to the quiver body. This can be awkward, so take your time. Go all the way around the circle.
- Turn It Right-Side Out: If you stitched it inside-out for a cleaner look, now is the time to carefully turn your quiver right-side out. The leather will be stiff, so be gentle.
Step 6: Add the Strap
Your quiver is almost complete! The final step is adding the strap so you can carry it.
- Prepare the Strap Ends: Decide where you want to attach the strap. A common placement is to attach one end near the top opening and the other about two-thirds of the way down.
- Attach the Strap: You can attach the strap in a few ways. The strongest method is to use rivets. Punch a few holes in the end of the strap and corresponding holes in the quiver body, then set the rivets with a hammer. Alternatively, you can punch stitching holes and stitch the strap directly onto the quiver body, forming a sturdy box stitch.
- Make It Adjustable (Optional): For an adjustable strap, you can add a buckle or a “Sam Browne” button stud. This is a great feature if you’ll be wearing the quiver over different amounts of clothing.
Step 7: Finishing Touches
These small details take your project from “homemade” to “handcrafted.”
- Burnish the Edges: Rub the raw edges of the leather (like the top opening of the quiver) with a damp cloth and then briskly rub them with a smooth piece of wood or canvas. This smooths and darkens the edges for a professional finish.
- Condition the Leather: Apply a good quality leather conditioner, like neatsfoot oil or a beeswax-based cream. This protects the leather from the elements and gives it a rich, beautiful sheen.
- Personalize It: This is your chance to get creative! You can use leather stamps to add your initials, a pattern, or a symbol. You can dye the leather before you start or add decorative conchos. Make it uniquely yours.
And there you have it! Stand back and admire your work. You’ve just created a stunning, functional piece of archery equipment with your own two hands. Take it to the range, fill it with arrows, and wear it with pride.
Frequently Asked Questions (FAQ)
What is the best type of leather for a beginner?
For a first project, 5-6 oz vegetable-tanned (veg-tan) leather is ideal. It’s thick enough to be durable and hold its shape, but not so thick that it’s difficult to cut and sew by hand. It also takes dye and stamps very well if you want to customize it.
How long will it take to make a longbow quiver?
For a beginner, plan on spending a weekend on this project. This gives you plenty of time to work carefully without rushing. A more experienced leatherworker could likely complete it in 4-6 hours. The key is to enjoy the process!
Do I absolutely need special leatherworking tools?
While specialized tools like stitching chisels make the job easier and more professional, you can improvise. You can use a sturdy awl and a ruler to mark and punch holes individually. Instead of a mallet, a regular hammer with a block of wood to protect your tools can work. However, investing in a basic leather starter kit is highly recommended if you plan on doing more projects.
Can I make a quiver without sewing?
Yes, you can! You can make a “no-sew” quiver by using rivets or Chicago screws instead of thread. You would punch holes along the seam and then fasten them together with rivets every inch or so. It creates a more rustic, rugged look and is very strong.
How do I care for my new leather quiver?
Leather care is simple. Keep it dry when possible. If it gets wet, let it air dry slowly away from direct heat. Every 6-12 months, wipe it down with a clean cloth and apply a light coat of leather conditioner to keep it from drying out and cracking. With proper care, your quiver will last a lifetime.
What are some other materials I can use if I don’t have leather?
If leather isn’t an option, you can make a great quiver from other materials. Heavy-duty canvas, denim, or even a sturdy PVC pipe can be adapted. For a canvas or denim quiver, you would follow similar steps but use a heavy-duty sewing machine or hand-sew with an upholstery needle and thread.
How do I stop my arrows from rattling in the quiver?
A great tip to silence a back quiver is to put a piece of sheepskin or thick felt at the bottom. This cushions the arrow points and stops them from clanking together as you walk. It’s a simple addition that makes a huge difference, especially for hunters.
Conclusion: More Than Just a Quiver
Congratulations on building your own longbow quiver! You didn’t just create a tool to hold your arrows; you’ve created a piece of gear that tells a story. Every stitch holds the memory of your focus and effort. Every time you pull an arrow from it, you’ll feel a sense of pride that you just can’t get from something bought off a shelf.
This project is a fantastic first step into the wider world of traditional archery and crafting. It teaches patience, attention to detail, and the joy of creating something both beautiful and functional. I hope this guide has shown you that you are more than capable of making amazing gear for yourself. Now, get out to the range, show off your new quiver, and let those arrows fly straight and true!