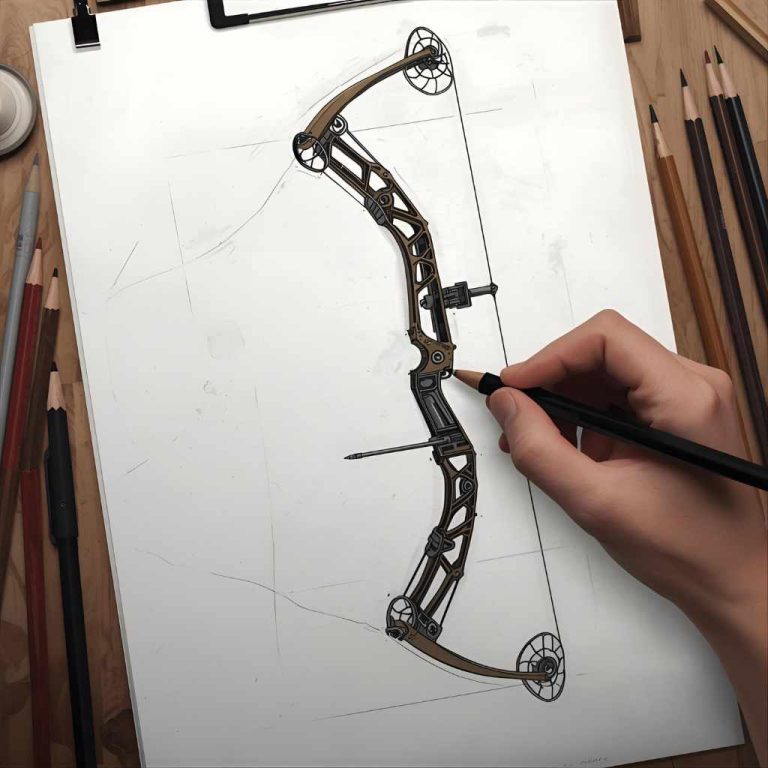
Creating a yew composite bow is an achievable project for the dedicated beginner. This guide provides clear, simple instructions, covering everything from selecting your yew staves to tillering your finished bow. You’ll learn essential techniques to craft a functional and beautiful bow, transforming raw materials into a piece of archery history. Get ready to embark on a rewarding crafting journey!
Welcome, fellow archery enthusiasts! Ever looked at a beautifully crafted yew bow and thought, “I wish I could make one myself?” You’re in the right place! Many beginners find themselves a little intimidated by the idea of bow making, especially with a material as storied as yew. But don’t worry, I’m here to break it down into simple, manageable steps. Think of me as your friendly guide on this incredible journey. We’ll take it slow, focus on safety, and make sure you end up with a bow you’re proud of. Let’s start with understanding what makes a yew bow so special and then dive into the rewarding process of building one. Get ready to discover your inner bowyer!
Why Yew for Your First Composite Bow?
Yew wood has been a top choice for bowyers for thousands of years, and for good reason! It has a unique combination of properties that make it ideal for bow making. It’s strong but also elastic, meaning it can bend a lot without breaking and spring back into shape quickly.
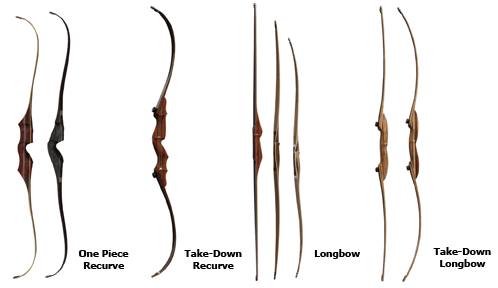
When we talk about a “composite bow” in the context of historical yew bows, it doesn’t always mean adding modern materials like fiberglass. Often, it refers to how the wood itself is used or combined with other natural elements to enhance its performance. For our beginner project, we’re focusing on a traditional self-bow (a bow made from a single piece of wood) that utilizes yew at its best. While true composite bows with horn and sinew are more complex, understanding a good yew self-bow is the foundational step.
Choosing yew might seem like a big step, but it’s a rewarding one. The process of shaping it into a functional bow is incredibly satisfying. We will guide you through the selection of your wood, the basic tools you’ll need, and the core techniques to get you started. By the end of this guide, you’ll have a solid understanding of how to make a yew composite bow that respects tradition while being accessible to a newcomer.

Understanding Yew Wood’s Properties
Yew wood is famous for its distinct heartwood and sapwood. The heartwood, typically reddish-brown, is strong and rigid. The sapwood, a pale yellow close to the bark, is elastic and flexible. In a well-made yew bow, the sapwood is put under tension (stretching), and the heartwood is put under compression (squashing). This combination is what gives yew bows their incredible power and durability.
This dual nature makes yew a fantastic material for a self-bow (a bow made from a single piece of wood). The natural arrangement of these two types of wood in a log is perfect for fulfilling the roles required of the bow’s back (tension side) and belly (compression side).
Materials and Tools You’ll Need
Gathering the right materials and tools is your first mission! Don’t feel overwhelmed; many of these can be acquired relatively easily. Safety is key, so always wear eye protection and consider gloves.
Essential Materials:
- Yew Stave: The heart of your bow! Look for a stave that is straight, with minimal knots or twists. Ideally, it should have a good amount of the pale sapwood on one side (this will be the back of the bow) and darker heartwood. A seasoned stave, dried for at least a year or two after felling, is best. Beginners might consider purchasing a pre-qualified stave from a reputable bowyer supplier to ensure quality.
- Tracing Paper or Pencil: For marking out your bow design.
- String Material: Dacron B-50 or similar modern bowstring material is beginner-friendly. Alternatively, you can learn to make a traditional linen or sinew string later.
- Wood Finish: A simple oil finish (like tung oil or Danish oil) or even beeswax will protect your bow.
Essential Tools:
- Drawknife: For removing large amounts of wood quickly and shaping the stave.
- Spokeshave: For finer shaping and smoothing after the drawknife.
- Rasps and Files: Various shapes and coarseness for detailed shaping and getting into tight spots.
- Scrapers: Cabinet scrapers or specialized bow scrapers are excellent for final smoothing.
- Sandpaper: A range of grits from coarse (80) to fine (220 or higher) for finishing.
- Measuring Tape or Ruler: For accuracy during design and shaping.
- Pencil: For marking lines.
- Bow Square: Not strictly essential for a first bow, but very helpful for ensuring symmetry.
- Tillering Stick/Tree: A notched stick or a sturdy tree limb used to gradually bend the bow and check its tiller (how evenly it bends).
- String Jig (Optional): If you plan to make your own strings, a simple jig is helpful.
- Safety Glasses: Absolutely non-negotiable!
- Work Gloves: To protect your hands.
Step-by-Step Guide: Crafting Your Yew Bow
Let’s get down to business! This process requires patience. Take your time with each step. Rushing is the quickest way to make a mistake.
Step 1: Selecting and Preparing Your Yew Stave
Finding the right stave is crucial. You want a piece of yew that is as straight as possible, ideally a heartwood/sapwood plank. For beginners, seek out suppliers who specialize in bow staves. They often sell wood that has been dried and is suitable for bow making. Measure your stave to ensure it’s long enough for your desired bow length (usually around the archer’s height) and wide enough to cut your limbs. Clean off any loose bark, but leave the thin layer of sapwood intact – this is your bow’s back!
Inspect the stave carefully for checks (cracks) or large knots. Small, sound knots might be workable, but major defects can compromise the bow’s integrity. If your stave is freshly cut, it needs to be seasoned (dried) properly. This can take months or even a couple of years. Air drying in a cool, dry place, away from direct sun or heat, is the best method.
Step 2: Designing Your Bow
Decide on the basic design. For a first yew bow, a simple flatbow or a slight D-shape is recommended. A typical design might be around 1.5 inches wide at the handle and tapering to about 0.5 inches at the tips. The thickness will also taper. You’ll want to draw a centerline down the stave and then sketch out the shape of your bow limbs.
Consider the “belly” (the side that will be compressed) and the “back” (the side that will be in tension). For yew, you want the natural sapwood to be your bow’s back. Avoid removing this layer at all costs! Your design should follow the grain of the wood as much as possible. Most bowyers aim to have the grain running straight along the length of the limbs.
Design Considerations for Yew:
| Feature | Description | Beginner Tip |
|---|---|---|
| Length | Typically 5.5 to 6 feet (168-183 cm) for a powerful draw. | Start with a length close to your own height for easier management. |
| Width | Tapers from handle to tips. | A 1.5-inch (3.8 cm) width at the handle, tapering to 0.5 inches (1.3 cm) at the tips, is a good starting point. |
| Thickness | Tapers from handle to tips. Avoid removing too much thickness initially. | A starting thickness of 0.75 inches (1.9 cm) at the handle, tapering to 0.25 inches (0.6 cm) at the tips, can be modified. |
| Handle | Can be a simple unadorned section or slightly thicker for grip. | Leave a central section about 4 inches (10 cm) untouched for now, or slightly thicker for a comfortable grip. |
Step 3: Rough Shaping the Stave
Now, use your drawknife to carefully remove wood from the belly side. Remember, the sapwood on the back must remain untouched! Gradually remove wood from the belly, working from the handle towards the tips. Aim to create a rough taper – thinner at the tips, thicker at the handle. Don’t try to make it perfectly symmetrical or thin yet; that comes later. Focus on removing bulk wood efficiently and safely.
Use your drawknife with smooth, controlled strokes, always cutting away from yourself. If you’re unsure, watch some videos of experienced woodworkers using a drawknife. Keep checking that you are only removing wood from the belly side. The back of the bow (sapwood) is your reference; do not alter it.
Step 4: Refining the Shape and Floor Tiller
Once you have the rough shape, switch to your spokeshave and rasps. This is where you start refining the taper and making the limbs more symmetrical. You can use your pencil to mark reference lines and checkpoints. Constantly rotate the stave and examine it from all angles to ensure both limbs are being shaped consistently.
The goal here is to get the limbs to roughly the same thickness and width. You’re not trying to bend the bow yet; you’re just shaping the wood. You can dry-fit the stave against your leg or a firm surface to get a general sense of its stiffness, but the real tillering comes next. This is often called “floor tillering” because you’ll be checking it by laying it on the floor and gently pressing down on the handle. Observe how it bends.
Use your measuring tape to check that the limbs are roughly the same thickness and width at corresponding points. Aim for gradual, smooth curves. Avoid sudden changes in thickness, as these create stress points. For more detailed shaping and smoothing, start using your files and scrapers. A cabinet scraper is excellent for taking thin shavings and achieving a very smooth surface without removing too much material.
Step 5: Cutting the Nocks
Nocks are where the bowstring attaches. These can be cut directly into the wood or reinforced with horn or other materials. For a beginner, cutting them into the wood is simpler. They should be placed at the very tips of the limbs. You can use V-shaped or U-shaped cuts. Ensure they are deep enough to hold the string securely but not so deep that they weaken the tip. The angle of the nock is important; it should guide the string away from the limb.
Use a small saw or a file like a triangular file to carefully cut the nocks. Start by making a shallow groove and then deepen it gradually. Aim to make them identical on both limb ends. The string nocks should be angled slightly towards the belly of the bow. For a yew bow’s sapwood back, you’ll generally cut the nocks into the sides of the very end of the limb, leaving the back untouched.
Step 6: Tillering – The Most Crucial Stage
Tillering is the art of carefully bending the bow limb by limb until it pulls smoothly to your desired draw weight and length. This is where patience is paramount! You’ll use a tillering stick or tillering tree. This is a board with notches cut at increasing distances from a fixed point. You place the bow’s handle on the fixed point and hook one of the nocks into a notch. Then, you pull the bow string (or a temporary string) to that notch and observe how the limbs bend.
The Tillering Process:
- Initial Bend: Tie a loose, temporary string onto your bow. Place the bow on the tillering stick. Pull the string a few inches. Observe the bend. You want to see a nice, even curve on both limbs.
- Identify Stiff Spots: If one limb is bending less than the other, it’s a stiff spot. You need to remove wood FROM THE BELLY side of that stiff spot. Never remove wood from the back!
- Scrape and Re-check: After removing a small amount of wood (just a few shavings), re-string the bow and pull it again to the same position. Check the bend.
- Gradual Increase: Repeat, gradually increasing the draw length and checking the tiller at each stage. Look for a smooth, even arc on both limbs. Both limbs should bend identically.
- Target Draw Weight: Continue tillering until the bow bends evenly to its intended draw length (e.g., 28 inches) and achieves its target draw weight. You may need a draw weight scale for this.
It’s vital to only tiller the bow to its intended maximum draw length and weight. For a beginner’s yew bow, aim for a modest draw length (e.g., 20-25 inches) and draw weight (e.g., 30-40 lbs). Attempting to push the bow too far for too long can cause it to break. You can learn more about the physics of bow tillering from resources like the USDA Forest Products Laboratory, which offers deep insights into wood properties and structural mechanics relevant to archery.
Step 7: Final Smoothing and Finishing
Once your bow is tillered, you’ll have removed most of the rough shaping tools. Now, use your scrapers and fine-grit sandpaper to smooth the belly and sides of the bow. The goal is a beautifully smooth surface, free of tool marks. Ensure all sharp edges are rounded slightly for comfort and to prevent splinters.
Finally, apply your chosen finish. Several thin coats are better than one thick one. This will protect the wood from moisture and give it a pleasant look. Allow each coat to dry fully before applying the next. Natural oils like tung oil are good choices as they penetrate the wood and enhance its natural beauty.
Step 8: Stringing Your Bow
Now for the moment of truth! If you bought a pre-made string, ensure it’s the correct length for your bow (typically a couple of inches shorter than the unstrung bow). If you made your own, ensure it has a proper loop on one end and an adjustable knot or loop on the other. Place the bow’s bottom limb on the ground (with a protective pad), step through the string, and use the bow’s flexibility to flex it enough to attach the string loop to the top nock. This is called a step-through stringing method and is common for self-bows.
Once strung, brace the bow, remove it from the tillering stick, and give it a gentle pull. It should feel smooth and strong. Congratulations, you’ve made a yew composite bow!
Maintaining Your Yew Bow
Your yew bow is a piece of natural art and requires care. Always store it unstrung in a cool, dry place away from direct sunlight or heat. Never dry-fire your bow (shooting it without an arrow), as this can damage the bow and is dangerous. Inspect it regularly for any signs of cracking or splintering, especially on the belly side after tillering. Treat it with respect, and it will serve you well for many years.

FAQ: Your Burning Questions Answered
Q1: How long does it take to make a yew bow?
Making a yew bow can take anywhere from a weekend of focused work for the rough shaping and tillering, to several weeks or months if you are taking your time and drying the wood properly yourself. Tillering itself is the most time-consuming part, requiring patience and careful, incremental work.
Q2: Can I use any yew tree I find?
Ideally, you want to use staves from trees that have been felled and seasoned for at least a year or two. Using green wood will result in a bow that loses its shape or breaks quickly. Also, ensure you have permission to harvest wood if you’re not using purchased staves. Always identify the wood correctly; other woods can look similar but lack yew’s ideal properties.
Q3: What draw weight should I aim for as a beginner?
As a beginner, it’s wise to aim for a lower draw weight, typically between 30-40 pounds at your desired draw length (often 28 inches). Lower draw weights are easier to manage for learning proper shooting form and are less likely to break during the tillering process or when you’re still developing your technique. You can always build a heavier bow later once you have more experience.