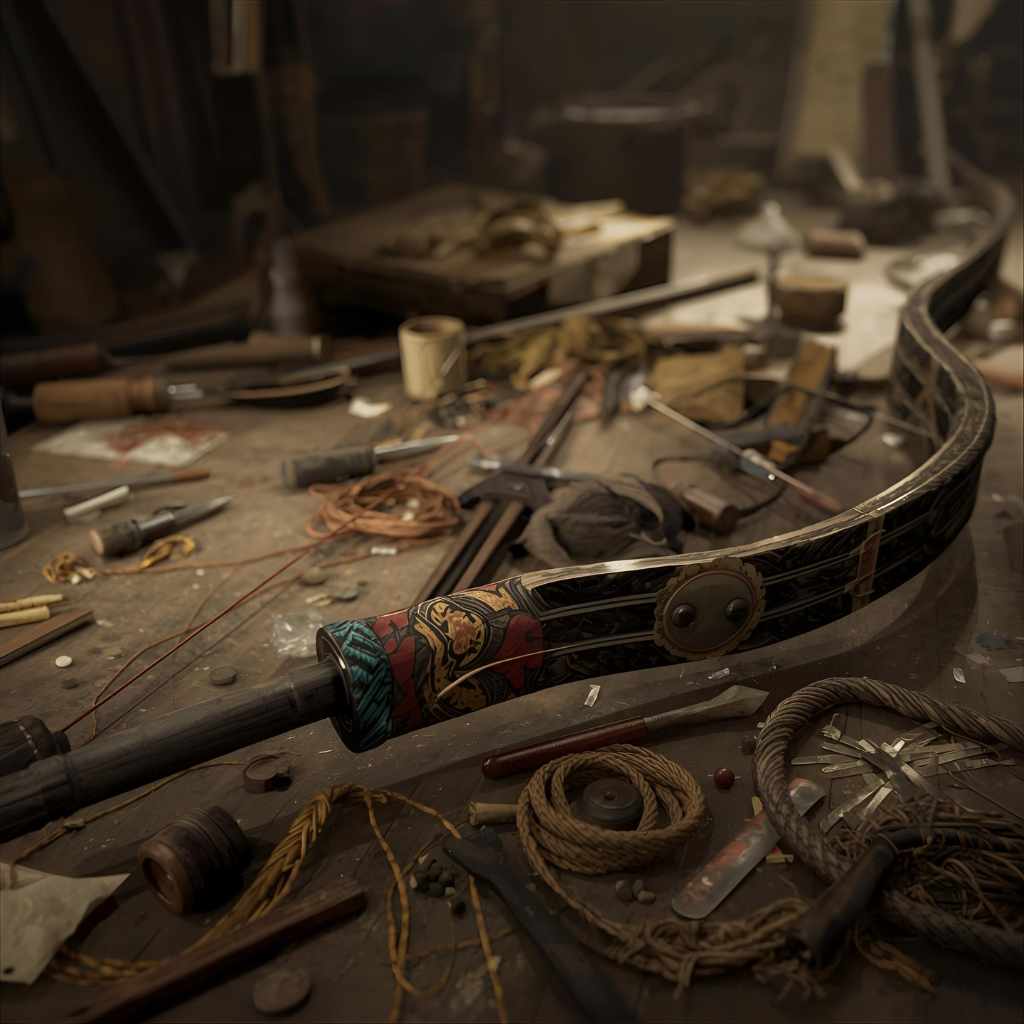
Composite bows were expertly crafted by layering and bonding different natural materials—wood, horn, and sinew—under tension to create a powerful, compact weapon. This intricate process, perfected over centuries, allowed for bows stronger and more efficient than simple wooden ones.
Ever looked at a picture of an ancient bow and wondered how on earth they made it? Especially those smaller ones that seemed incredibly powerful? You’re not alone! Understanding how composite bows were made is like unlocking a secret from the past. These weren’t just sticks with strings; they were marvels of engineering, relying on clever use of natural materials and a deep understanding of physics. Making one is a fascinating journey into history and craftsmanship. Don’t worry if it sounds complicated – we’ll break it down, step-by-step, making it easy to grasp.
In this guide, we’ll walk you through the amazing process of how these incredible bows came to life. You’ll learn about the materials used, the careful preparation, and the ingenious techniques that made them so effective. Get ready to discover the secrets behind one of history’s most iconic weapons!
The Magic Behind the Composite Bow: Materials and Design
Before we dive into the “how,” let’s understand the “what.” A composite bow isn’t made of just one piece of wood. Instead, it’s a sophisticated blend of three key natural materials, each serving a vital purpose:
- Wood Core: This forms the backbone of the bow. It needs to be strong and flexible, providing the basic shape and structure. Think of it as the frame of a house.
- Animal Horn: Usually taken from animals like ibex or wild sheep, horn goes on the belly side of the bow (the side facing the archer when shooting). Horn is excellent at compression, meaning it handles being squeezed a lot without breaking. So, when you draw the bow, the horn is being compressed on the inner curve.
- Animal Sinew: This is tough, fibrous connective tissue found in animal muscles. Sinew is applied to the back of the bow (the side facing away from the archer). Sinew is incredibly strong under tension, meaning it can handle being stretched a lot. So, when you draw the bow, the sinew is being stretched on the outer curve.
The brilliance of the composite bow lies in how these materials work together. Wood provides flexibility, horn resists compression, and sinew resists tension. By layering them correctly, bowyers (bow makers) created a weapon that could store and release a lot more energy than a simple wooden bow of the same size. This meant they could be shorter, making them ideal for use on horseback or in tight spaces, yet still deliver a powerful shot.
The design is also critical. Composite bows often have distinct curves. The primary curves come from the wood core. Then, the horn and sinew layers are strategically applied to enhance these curves and optimize the bow’s performance. The result is a bow that bends efficiently and snaps back with incredible force.
Gathering the Treasures: The Crucial Components
The quality of the finished bow starts with the quality and preparation of its raw materials. This was a lengthy and skilled process for ancient bowyers. Let’s look at what was needed and how it was prepared:
1. The Wood Core: Choosing and Shaping
Not all wood is created equal for bow making. Bowyers sought out woods that were strong, moderately flexible, and readily available in their region. Common choices included:
- Maple
- Birch
- Ash
- Walnut
The wood had to be carefully dried and seasoned. This wasn’t a quick process; it could take months or even years. Improperly seasoned wood would warp, crack, or become weak, dooming the bow from the start. Once seasoned, the wood was shaped into the basic form of the bow, often a simple stave or plank. The general outline of the limbs (the parts that bend) was roughed out, setting the stage for the next layers.
2. The Horn: Sourcing and Preparation
For the horn, durability and density were key. Bowyers preferred horn from:
- Ibex
- Wild sheep (like Asiatic mouflon)
- Goats
The horn was typically harvested from the horns of these animals. The process of preparing horn involved several steps:
- Soaking: The horn was often soaked in water for an extended period. This made it more pliable and easier to work with.
- Splitting: Large horns were carefully split lengthwise.
- Shaping: The split horn pieces were then flattened and shaped into thin, usable plates or strips. This might involve hammering or pressing them while still damp and pliable.
- Smoothing: The inner and outer surfaces were smoothed to ensure a good bond with the wood and sinew layers.
The horn pieces were meticulously fitted and glued onto the belly of the wooden core. This layer would bear the brunt of the compression when the bow was drawn.
3. The Sinew: Collection and Processing
Sinew was the powerhouse of tension. It was collected from the large tendons and muscles of large animals, such as deer, horses, or oxen. The process was labor-intensive:
- Collection: Sinews were carefully harvested from slaughtered animals, often from the backstraps and leg muscles.
- Drying: The raw sinew was dried thoroughly. This made it brittle and easier to break down into individual fibers.
- Pounding: The dried sinew was then pounded with mallets or stones. This action separated the tough connective tissue into fine, hair-like strands.
- Rehydration and Twisting: Before use, the separated fibers were rehydrated. Then, they were twisted and separated further into manageable bundles of fibers.
These bundles of sinew fibers were then ready to be applied to the back of the bow.
The Art of Assembly: Layering and Gluing
This is where the true magic happens. The bowyer carefully combines the prepared materials to build the bow limb by limb.
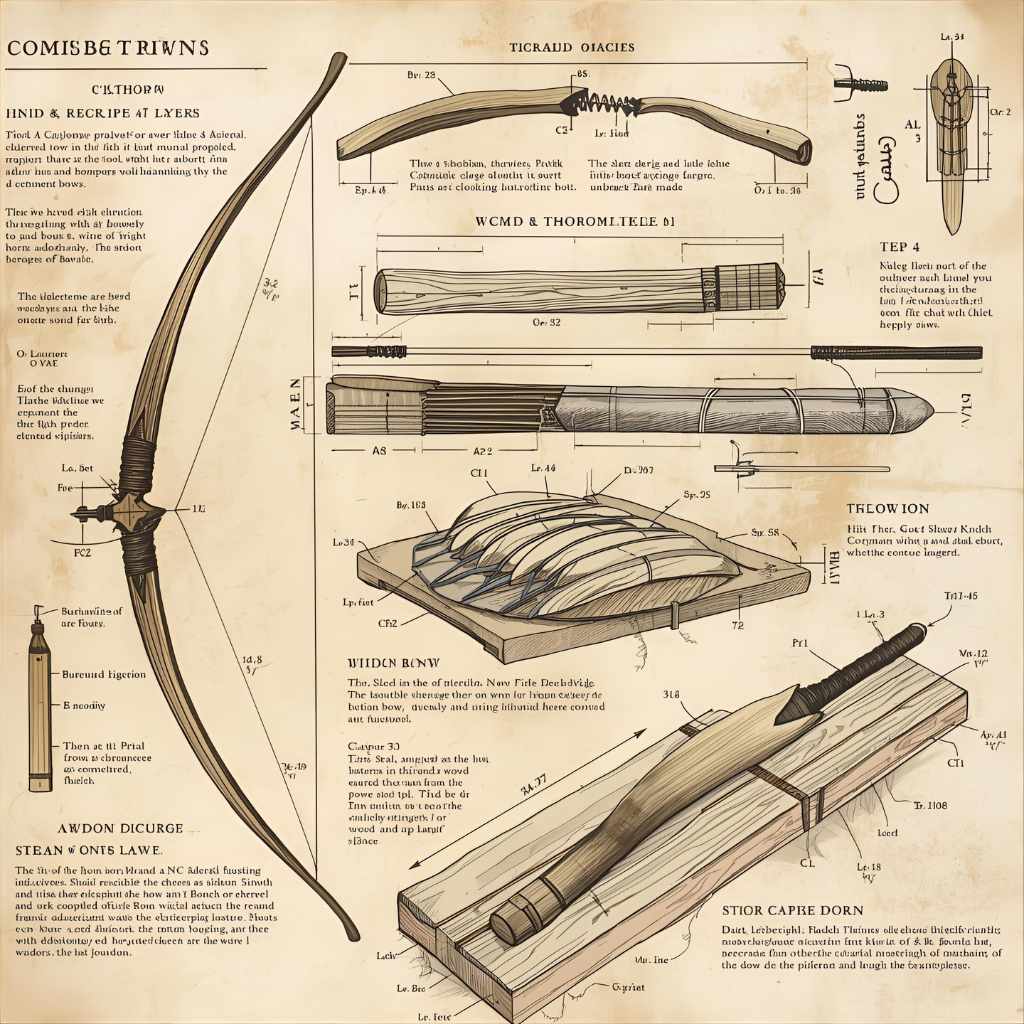
Step 1: Shaping the Wood Core
The seasoned wood stave is worked into the basic shape of the bow. This involves carefully removing material to create the desired limb thickness and profile. The central grip area is often left thicker and more rigid, while the limbs taper towards the tips. Great care is taken to ensure the wood’s grain runs along the length of the limbs for maximum strength.
Step 2: Attaching the Horn Layer (Belly)
Thin, pre-shaped pieces of horn are meticulously glued and pressed onto the belly side of the wood core. The horn pieces are typically smaller and arranged to follow the natural curve of the wood. A strong, durable glue is essential. Traditionally, this was often made from animal hides (like rawhide glue), fish bladders, or bone. The horn pieces overlap slightly at the joints to create a continuous, strong surface. This layer is critical for resisting the squeezing forces when the bow is drawn.
Step 3: Attaching the Sinew Layer (Back)
This is perhaps the most intricate and time-consuming step. The rehydrated, processed sinew fibers are applied in tight bundles to the back of the bow. They are laid down in lengths, carefully overlapping one another. The bowyer meticulously works the sinew, applying it in layers. As each layer is applied, it’s often coated with a strong glue, ensuring it bonds tightly to the previous layer and the wood core. This process builds up a robust layer of tension-resistant material on the outside of the limb. The sinew must be laid down with extreme care, always running along the length of the limb.
Step 4: The Role of Glue
Glue is the essential binder that holds all these disparate materials together. Without a strong, resilient adhesive, the composite bow would simply pull itself apart under tension. Traditional glues were made from boiling animal parts:
- Hide Glue: Made from boiling the skin and connective tissues of animals. It creates a very strong, durable bond.
- Bone Glue: Made similarly from boiling bones.
- Fish Glue: Derived from fish swim bladders.
The glue was often applied hot and allowed to set. The entire composite structure was then compressed, often using clamps or by carefully applying pressure while the glue dried. This compression is absolutely vital for a strong bond between the layers.
Step 5: Curing and Shaping the Bow
After the horn and sinew layers are glued in place, the bow needs to cure. This involves allowing the glue to dry and harden thoroughly, which could take weeks or even months. During this time, the bow is often kept under slight tension or in a specific shape. This tillering process is where the bow develops its final working shape. The bowyer carefully scrapes and sands the limbs, gradually drawing them to tension to ensure they bend evenly and smoothly. Any uneven bending can create weak spots and cause the bow to break.
The final shaping might include:
- Refining Limb Taper: Ensuring the limbs thin out gracefully to the tips.
- Forming the Grip: Creating a comfortable and stable handhold.
- Nocks: Carving small notches at the limb tips to hold the bowstring.
The back of the bow (sinew side) is often left slightly rough to aid in gripping the string, while the belly (horn side) is smoothed for aesthetic appeal and to prevent snags.
The Mighty String and Finishing Touches
Once the glued and tillered limbs are ready, the final touches are applied.
Creating the Bowstring
The bowstring itself was usually made from materials that could withstand immense force. Common choices included:
- Linen or Hemp fibers: Twisted together to form a strong cord.
- Animal sinew: Multiple strands of sinew could be twisted into a strong string.
- Rawhide: Thin strips cut from animal hides.
The string needed to be strong but also have a little give. It was often made with loops at each end to fit securely into the nocks carved on the bow’s limb tips. The length of the string was crucial; it had to be just right to achieve the correct “brace height” (the distance between the string and the bow’s grip when unstrung).
Applying Protective Coatings
To protect the sinew and wood from moisture, which is the enemy of glue and natural materials, bowyers applied protective coatings. These often included:
- Animal fats or oils: These would soak into the sinew and fill tiny pores.
- Animal blood: Sometimes mixed with other substances, blood is surprisingly durable.
- Resins or waxes: These could be applied to create a more water-resistant seal.
These coatings not only offered protection but also enhanced the appearance of the bow, giving it a sheen.
Why Such an Elaborate Process? The Advantages of Composite Bows
All this work might seem excessive, but the rewards were significant. Composite bows offered several key advantages over simpler designs:
- Power-to-Size Ratio: They were incredibly powerful for their short length. This made them ideal for cavalry archers or archers in confined spaces, like fortified positions. A short, powerful bow is much more effective than a long, weak one.
- Efficiency: The layered construction allowed the bow to store and release energy more efficiently. This meant more of the energy put into drawing the bow was transferred to the arrow.
- Durability: When made correctly, composite bows were very durable and could withstand repeated flexing, provided they were cared for and protected from moisture.
- Versatility: The ability to use various materials available locally allowed different cultures to adapt and produce effective composite bows suited to their environment and available resources.
The design principles of composite bows influenced archery for thousands of years and across vast geographical areas, from the Steppes of Asia to the Roman Empire. Understanding this construction method highlights the ingenuity and deep knowledge of materials possessed by ancient craftspeople.
A Table of Materials and Their Roles
To summarize the essential components and their functions, consider this table:
| Material | Location on Bow | Primary Function | Key Characteristic |
|---|---|---|---|
| Wood Core | Center of limbs | Provides basic shape, flexibility, and structure | Strength, moderate flexibility |
| Horn | Belly side (facing archer) | Resists Compression | Durable, dense, handles squeezing |
| Sinew | Back side (away from archer) | Resists Tension | Fibrous, strong under stretching |
| Glue (Hide, Bone, Fish) | Between all layers | Binds materials together | Strong, resilient adhesive |
Modern Echoes: How Composite Bows Influence Today
While modern bows use advanced synthetic materials like fiberglass, carbon fiber, and special plastics, the fundamental principles behind their construction are deeply rooted in the ancient composite bow. Today’s recurve and longbow designs often mimic the layering and material science first perfected by ancient bowyers. Even advanced compound bows, with their pulleys and cams, aim for that same high energy storage and efficient release that the ancient composite bow achieved through natural materials. The concept of layering materials with different properties—one to compress, one to stretch—is a core tenet of modern bow design.
For anyone interested in archery, understanding the history and construction of the composite bow provides a profound appreciation for the skill and innovation of our ancestors. It shows that even with limited tools and natural resources, incredible feats of engineering were possible!
Frequently Asked Questions About Composite Bows
Q1: How long did it take to make a composite bow?
Making a composite bow was a lengthy process. It could take anywhere from several months to over a year, depending on the complexity, skill of the bowyer, and drying/curing times for the wood, glue, and layers.
Q2: What kind of animals were used for horn and sinew?
For horn, animals like ibex, wild sheep, and goats were preferred. For sinew, large mammals like deer, horses, and oxen provided the strong tendons needed.
Q3: Was it difficult to get the right shape for the limbs?
Yes, tillering the limbs to bend evenly was one of the most challenging and crucial parts of bow making. It required a skilled eye and a delicate touch to avoid creating weak spots.
Q4: Could anyone make a composite bow?
No, making a composite bow was a specialized craft. It required deep knowledge of materials, woodworking, and the physics of archery. Bowyers were highly respected artisans.
Q5: Were composite bows waterproof?
Not entirely. While coatings of fat or wax helped, they were always vulnerable to prolonged exposure to moisture. They were best cared for by keeping them dry and perhaps oiled.
Q6: Did all composite bows look the same?
No. While the basic principles of layering wood, horn, and sinew were common, designs and specific materials varied greatly by region and culture, leading to many distinct types of composite bows.
Conclusion
The creation of a composite bow was a true masterpiece of ancient craftsmanship. It involved carefully selecting, preparing, and layering natural materials—wood for flexibility, horn for compression, and sinew for tension—all bound together with strong animal glues. This intricate process allowed for the creation of significantly more powerful and efficient bows that were shorter and more maneuverable than simple wooden bows, making them formidable weapons for archers across the globe for millennia. From the meticulous seasoning of wood to the painstaking application of sinew fibers, every step demanded skill, patience, and a profound understanding of how these materials would behave under immense stress. The legacy of the composite bow lives on, not just in historical study, but in the fundamental design principles that continue to inspire modern archery equipment. It’s a testament to human ingenuity and the enduring power of nature’s best materials.