Making a Uruk-hai style composite bow is a rewarding, albeit complex, project. While highly customizable, a basic understanding of materials, shaping, and binding is essential. This guide breaks down the process for beginners, focusing on achievable steps and safety.
Ever watched the Uruk-hai descend in ‘The Lord of the Rings’ and marveled at their powerful bows? Many beginners find themselves drawn to the idea of crafting such a formidable weapon. Creating a Uruk-hai style composite bow might sound daunting, but with the right guidance, it’s a project that can bring you immense satisfaction. This isn’t just about building a prop; it’s about understanding craftsmanship and bringing a piece of fantasy to life. Don’t worry if you’re new to this; we’ll walk through it step-by-step, making sure you’re comfortable and confident at every stage. Get ready to learn the essentials and embark on this unique bow-making adventure!
Understanding the Uruk-hai Bow: What Makes It Special?
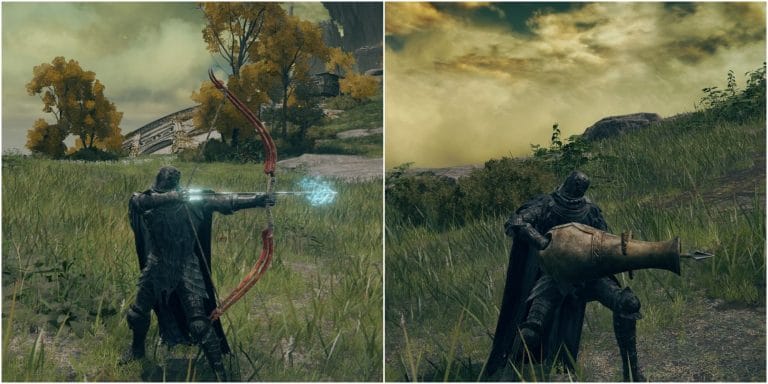
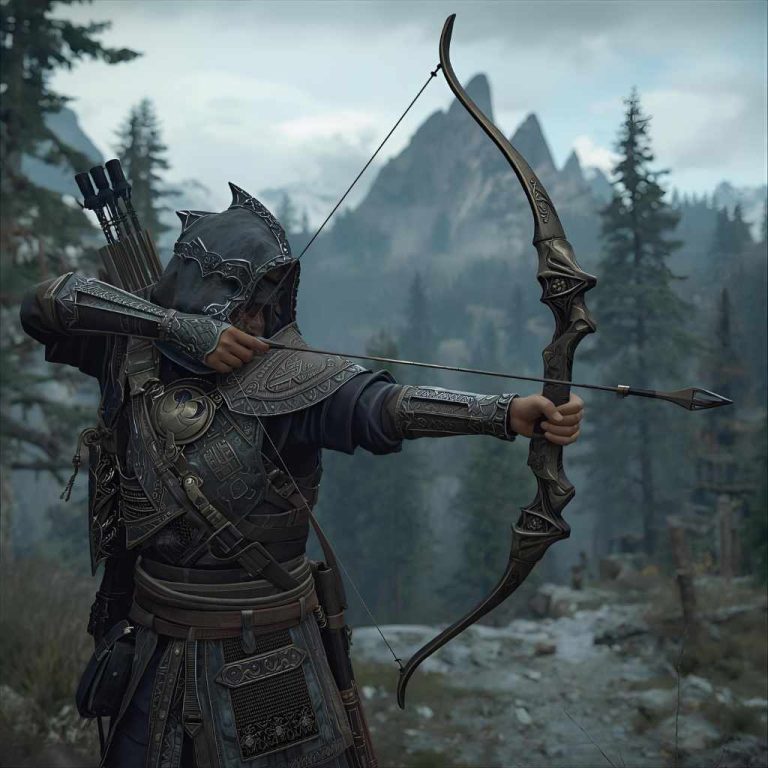
The bows wielded by the Uruk-hai in ‘The Lord of the Rings’ are iconic for their menacing appearance and implied power. While they are fictional creations, their design draws inspiration from real-world historical composite bows. These ancient weapons were known for their strength and range, achieved by combining different materials. Uruk-hai bows, in particular, often feature a darker, more rugged aesthetic. They appear to be made from dark wood or leather, with a sturdy, almost brutal design. For our purposes, we’ll focus on creating a bow that captures this essence, emphasizing a strong, functional, and visually striking piece.
Key characteristics of Uruk-hai bows include:
- Composite Construction: The foundation of a true composite bow lies in layering different materials. This enhances the bow’s power, durability, and ability to withstand tension.
- Sturdy Limbs: They appear thick and robust, suggesting significant draw weight.
- Dark Aesthetic: Usually depicted with dark wood, leather, or binding, contributing to their intimidating look.
- Generous Size: Often shown as longbows or slightly recurved, providing good leverage and arrow speed.

Essential Materials and Tools for Your Uruk-hai Bow
Before we start, gathering the right materials and tools is crucial. This project requires more than just a piece of wood. We’ll be focusing on materials that mimic the Uruk-hai look while remaining accessible for a beginner. Safety first! Always wear safety glasses and gloves when working with tools and materials.
Materials You’ll Need:
- Wood Core: A sturdy hardwood blank is your starting point. Oak, ash, or even a strong piece of maple can work. Look for a piece about 60-70 inches long, 1.5-2 inches wide, and 1 inch thick, with straight grain.
- Backing Material: For a composite effect, a strong, flexible material for the back of the bow is needed. While traditional composite bows use animal sinew and rawhide, for a beginner-friendly and accessible option, consider strong linen or hemp cord, or even rawhide strips if you can source them safely.
- Belly Material: The belly needs to be strong but flexible enough to compress. A denser hardwood layer or even a strong bamboo strip can work. Again, for a simpler approach, we can rely on the wood core’s properties and reinforce it with binding.
- Glue: A strong, flexible wood glue is essential for adhering layers if you’re creating a true composite bow. For a simpler build, strong, waterproof adhesive like Titebond III or even a modern epoxy can be used.
- Binding Material: Dark, durable cordage like hemp twine, thick leather lacing, or even strong fabric strips soaked in a sealant will be used to bind the limbs and add to the Uruk-hai aesthetic.
- Optional Aesthetics: Dark wood stain, leather dyes, or even black paint to achieve the signature Uruk-hai look.
- Arrow Shelf Material (Optional): A small piece of hardwood or leather for building up an arrow rest.
Tools for the Job:
- Saw: A handsaw or bandsaw for cutting the wood to size. Refer to Popular Mechanics’ guide on bandsaw safety if using one.
- Rasp and Files: For shaping the bow limbs.
- Scraper: A cabinet scraper is excellent for fine-tuning the tiller.
- Sandpaper: Various grits (from coarse 80 to fine 220) for smoothing.
- Clamps: To hold pieces together while glue dries.
- Measuring Tape and Pencil: For marking.
- Bow Square: Useful for checking limb tiller.
- Optional: A drawknife and spokeshave for more advanced shaping of the wood core.
Step-by-Step Guide: Crafting Your Uruk-hai Composite Bow
This guide focuses on a simplified composite approach, prioritizing a strong, visually Uruk-hai-esque bow that is achievable for beginners. We’ll build a strong wood core and reinforce it with binding.
Step 1: Preparing the Wood Core
Select your hardwood blank. Ensure it’s free from knots or cracks, and the grain runs straight along its length. Measure and cut it to your desired length. For an Uruk-hai style, aim for around 65 inches. Mark the center point, which will be your handle area (around 4-5 inches wide).
Step 2: Shaping the Limbs
This is where the bow starts to take shape. Use your rasp and files to gradually taper the limbs from the handle area towards the tips. The belly (the side that will bend inwards) should be rounded or slightly convex, while the back (the side that will be under tension) must remain perfectly flat and untouched. Even a small scratch on the back can cause the bow to break. Think of a gentle curve, getting thinner as it reaches the tips. It’s best to work slowly, symmetrically on both limbs, and remove wood evenly.
Tapering Guidelines:
| Section | Width (Approx.) | Thickness (Approx.) |
|---|---|---|
| Handle | 1.5 – 2 inches | 1 inch |
| Mid-limb | 1 inch | 0.75 inches |
| Near Tips | 0.5 inches | 0.25 inches |
This is a rough guide; the exact dimensions will depend on your wood and desired draw weight. The goal is a smooth transition from thick at the handle to thin at the tips.
Step 3: Creating the Nocks
At the very end of each limb, you need to cut notches (nocks) to hold the bowstring. Cut a shallow groove on the sides of each tip, curving slightly towards the belly. These should be deep enough to secure the string but not so deep as to weaken the tips. Ensure they are smooth to prevent cutting into the bowstring.
Step 4: Initial Tillering (Very Important!)
Tillering is the process of ensuring both limbs bend evenly. This is CRITICAL. Start by gently pressing down on the bowstring (or a temporary string) and observing how the limbs bend. You want them to curve symmetrically. Use a bow square if you have one to guide you. Carefully scrape or sand away wood from the belly of the stiffer limb until the bend is equal. Go slowly! This process can take hours and requires patience. A poorly tillered bow will likely break.
You can learn more about the importance of tillering from resources like Archery GB’s guide on bow tiller.
Step 5: Adding the Composite Reinforcement (Simplified Approach)
For a beginner, a full sinew/hide composite is very advanced. Instead, we’ll focus on the ‘look’ and adding strength through binding.
Option A (Strong Binding): Tightly wrap the limbs from just above the handle to the nocks with your chosen dark cordage (hemp, leather lacing). Apply a strong, flexible glue (like Titebond III or epoxy) to the cord as you wrap. This will help reinforce the wood and give it a rugged, composite look. Overlap the windings. Let it dry completely.
Option B (Rawhide Overlay – Slightly More Advanced): If you can safely acquire and prepare rawhide strips, these can be glued and tightly wrapped onto the back of the limbs. This offers genuine composite benefits. Ensure the rawhide is soaked and pliable before applying. This requires careful work to ensure a smooth, tight bond.
Step 6: Final Tillering and Stringing
Once your binding is dry and secure, repeat the tillering process. The added binding might have slightly altered the bend. Continue to remove wood from the belly of the stiffer limb until the bend is perfect and even throughout the draw. You can use a tillering stick or a temporary string. Never overdraw the bow during tillering; only bring it to a partial draw to check the bend.
Step 7: Creating the Bowstring
You’ll need a strong, Flemish twist bowstring made from Dacron B-50 or a similar synthetic material. For a Uruk-hai bow, a dark-colored string would be ideal. If you’re unsure how to make a Flemish twist string, many archery suppliers offer pre-made ones, or you can find excellent tutorials online. The length of the string will be shorter than the bow; when strung, it should brace the bow at your desired “brace height” (the distance from the handle to the string, typically 6-7 inches).
Step 8: Finishing Touches
Once the bow is tillered and strung, it’s time for aesthetics. Sand the entire bow smoothly, starting with coarser grits and moving to finer ones. Apply your chosen dark stain, dye, or paint to achieve that authentic Uruk-hai look. Seal the wood with a protective finish like polyurethane or a natural oil finish to protect it from moisture. You can also add leather wraps to the handle for comfort and appearance.
Safety First: Handling Your Composite Bow
Making and using any bow, especially one inspired by Uruk-hai weaponry, comes with responsibilities. Safety should always be your top priority:
- Never Dry Fire: Never draw and release the bowstring without an arrow nocked. This can cause severe damage to the bow and potentially injure you.
- Inspect Your Bow: Before each shooting session, check the bow for any cracks, splinters, or signs of damage. Pay close attention to the back of the limbs and the nocks.
- Always Use Proper Arrows: Use arrows that are compatible with your bow’s draw weight and type.
- Establish a Safe Shooting Area: Always shoot in a controlled environment with a safe backstop that can stop arrows. Never shoot towards people, animals, or property.
- Learn Proper Shooting Form: Good form improves accuracy and safety. Consider taking lessons from a certified archery instructor. You can find resources on safe archery practices from organizations like the USA Archery Safety Guidelines.
- Wear Protective Gear: Always wear an arm guard to protect your forearm from string slap and a finger tab or glove for shooting.
Choosing Arrows for Your Uruk-hai Bow
The type of arrows you use is as important as the bow itself. For a bow inspired by the Uruk-hai, you’ll want arrows that complement its rugged appearance and power.
- Material: Traditional wood shafts are often preferred for their aesthetic appeal with historical-style bows. Pine, cedar, or even birch shafts can work well. For durability, carbon arrows are also an option, though they might not fit the visual theme as closely.
- Spine (Flexibility): Spine refers to the arrow’s stiffness. It needs to match your bow’s draw weight and your draw length. An arrow that is too flexible or too stiff will fly erratically and can be dangerous.
- field points: For practice, use field points (broad, blunt tips).
- Broadheads (for hunting): If you plan to hunt, ensure your bow is suitable for hunting draw weights and use appropriate broadheads, always adhering to local hunting regulations.
Getting the correct spine is crucial for accuracy and safety. Arrow manufacturers often provide charts, or you can consult with experienced bowyers or archery shops to determine the right arrows for your specific bow.
Maintenance: Keeping Your Bow in Top Shape
A well-maintained bow lasts longer and performs better. Here’s how to care for your Uruk-hai composite bow:
- Storage: Store your bow in a cool, dry place away from direct sunlight and extreme temperature changes. A bow bag or case is ideal.
- Bowstring Care: Wax your bowstring regularly to keep the fibers strong and prevent fraying.
- Finishing Touch-ups: If the finish starts to wear, you can re-sand lightly and reapply your chosen stain and sealant.
- Avoid Prolonged Bending: Don’t leave your bow strung for extended periods, especially in hot or humid conditions. This can damage the tiller.
- Inspect Regularly: As mentioned in the safety section, always inspect your bow before use.

FAQ: Your Uruk-hai Bow Questions Answered
Q1: Is making a composite bow like the Uruk-hai’s possible for a complete beginner?
While creating a traditional, high-performance composite bow with sinew is advanced, this guide focuses on a simplified version using a strong wood core and robust binding for a similar aesthetic and improved durability. It’s achievable with patience and careful work.
Q2: How long will it take to make one Uruk-hai bow?
This can vary greatly depending on your skill, tools, and how much time you dedicate. A basic wood core bow can take several days of work, with tillering being the most time-consuming part. A true sinew composite would take weeks or even months.
Q3: What is the most important part of bow making?
Tillering is arguably the most crucial step. It ensures the bow bends evenly and safely. Skipping or rushing tillering is the most common reason for bows breaking.
Q4: Can I use any type of wood?
No, you need a strong, resilient hardwood. Woods like osage orange, yew, oak, ash, and hickory are traditional choices. For beginners, ash or oak are good starting points. Avoid softwoods like pine or fir.
Q5: What is ‘draw weight’ and how do I determine it?
Draw weight is the amount of force (in pounds) required to pull the bowstring back to a certain length (usually 28 inches). For this project, you can aim for a moderate draw weight (25-40 lbs) which is more manageable for beginners. Determining it precisely involves specialized equipment, but you can gauge it during tillering.
Q6: Where can I find safe shooting locations?
Look for designated archery ranges, large open fields with a natural backstop like a dirt bank, or a private property with landowner permission. Always ensure there is no risk to people or property behind your target.
Conclusion: Embrace the Journey of Creation
Crafting your own Uruk-hai inspired composite bow is more than just a woodworking project; it’s an immersion into history and fantasy. You’ve learned about the unique characteristics of these fictional weapons, the essential materials and tools you’ll need, and the crucial step-by-step process—with a strong emphasis on safety and tillering. Remember, patience and precision are your best allies here. Don’t be discouraged if your first attempt isn’t perfect. Each project is a learning experience. By following these steps and prioritizing safety, you can create a bow that not only looks the part but is also a functional and rewarding piece of craftsmanship. So gather your supplies, approach the build with a focused mind, and enjoy the deeply satisfying process of bringing your very own Uruk-hai bow to life!