How To Attach A Bowfishing Reel To A Bow
Bowfishing has surged in popularity among archers and outdoor enthusiasts seeking a unique blend of fishing and bowhunting. The thrill of targeting fast-moving fish in shallow water, combined with the skill of archery, makes bowfishing both challenging and rewarding. However, the foundation for a successful bowfishing adventure starts long before you hit the water, it begins with properly attaching a bowfishing reel to your bow.
Choosing the right reel and ensuring it’s securely and accurately mounted can dramatically impact your success and safety on the water. Whether you’re a seasoned bowhunter looking to branch out or a beginner drawn by the sport’s excitement, understanding the nuances of reel attachment is essential.
This guide will walk you through every step, from selecting compatible reels and bows to precision installation, troubleshooting, and real-world insights, ensuring your setup is reliable and effective for any bowfishing challenge.
Key Takeaways
- Properly attaching a bowfishing reel is crucial for safety, accuracy, and fish retrieval.
- There are three main types of reels: Drum, spin-cast, and retriever, each with specific mounting requirements.
- Compatibility between your bow, reel, and mounting hardware ensures optimal performance.
- Preparation, correct tool usage, and step-by-step installation minimize equipment failures and missed opportunities.
- Real-world examples and troubleshooting tips help you avoid common mistakes and maintain your gear for long-term use.
Credit: www.basspro.com
Understanding Bowfishing Reels And Bow Compatibility
Before diving into the attachment process, it’s important to understand the types of bowfishing reels available and how they interface with different bows. Choosing compatible equipment ensures a secure fit and optimal functionality, laying the groundwork for a successful bowfishing experience.
Types Of Bowfishing Reels
Bowfishing reels fall into three primary categories, each offering distinct advantages and mounting methods:
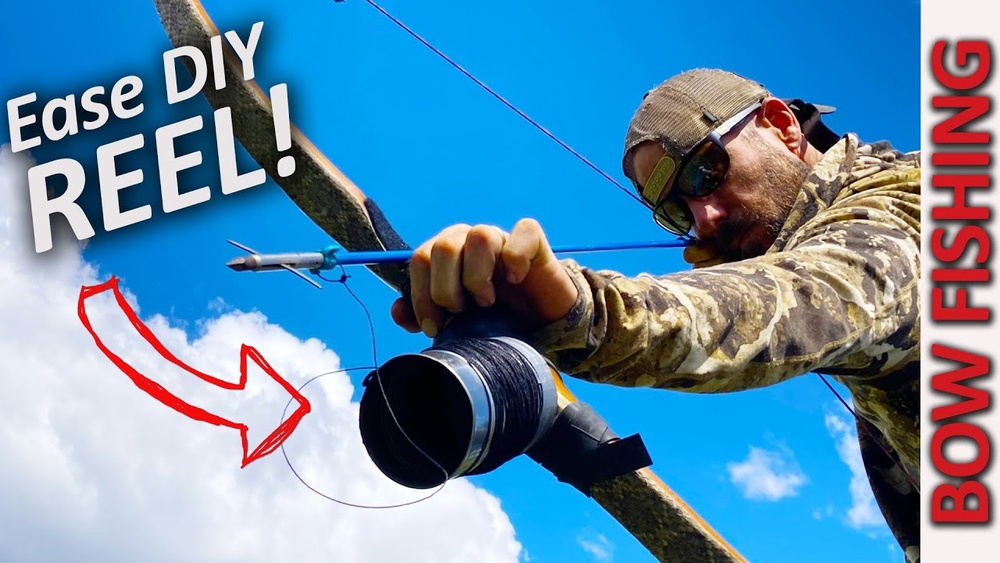
- Drum (Hand-Wrap) Reels: Simple, durable, and inexpensive, these reels attach directly to the bow riser. The line is manually wrapped onto the drum after each shot. Best for beginners or those seeking a low-maintenance option.
- Spin-Cast Reels: Similar to fishing reels, these provide a trigger release and smooth line retrieval. They require a reel seat that mounts to the bow’s stabilizer hole.
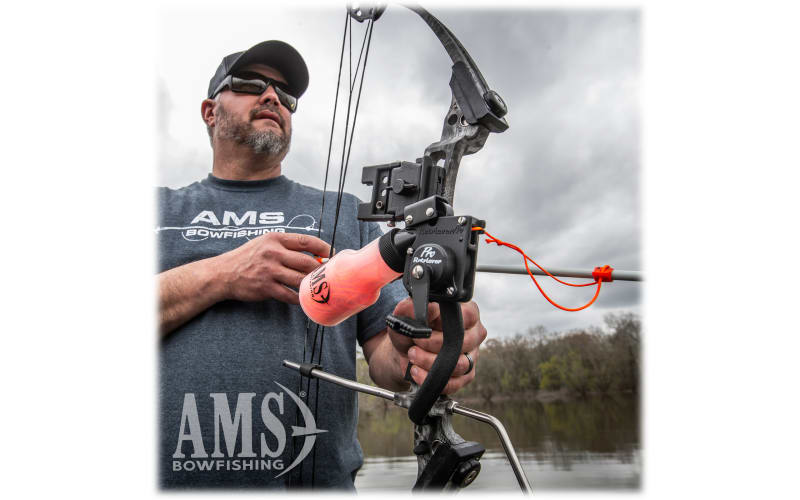
- Retriever Reels: Featuring a bottle-style design, these reels store line loosely in a bottle, minimizing tangling and allowing quick retrieval. They’re typically mounted using a bracket system and are popular for their reliability and ease of use.
Bow Types And Mounting Points
Not all bows are created equal for bowfishing. The most commonly used are:
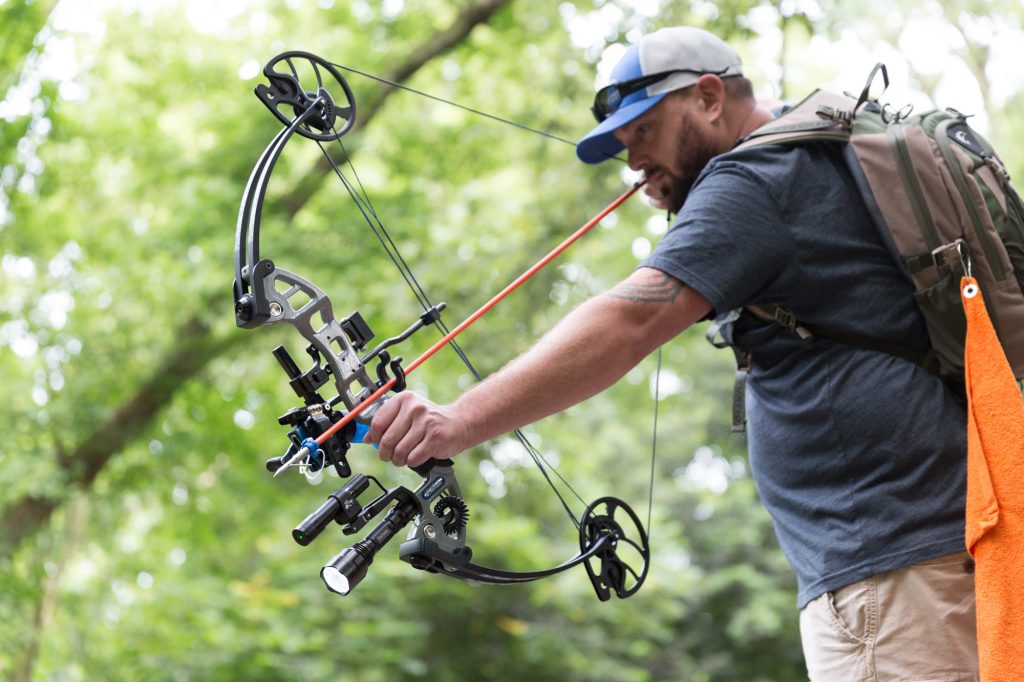
- Compound Bows: Offer power and accuracy, with built-in mounting holes for accessories.
- Recurve Bows: Lightweight and simple, often used by traditionalists.
- Specialized Bowfishing Bows: Designed specifically for the sport, these come pre-drilled and reinforced for reel attachment.
Key Compatibility Considerations:
- Ensure your bow has a stabilizer bushing or threaded hole for reel mounting.
- Verify that the reel’s mounting hardware matches your bow’s design.
- For recurve bows without a stabilizer hole, aftermarket brackets are available.
Comparison Table: Reel Types And Bow Compatibility
| Reel Type | Attachment Method | Bow Compatibility | Best For |
|---|---|---|---|
| Drum (Hand-Wrap) | Direct to riser (bolts/screws) | Recurve, Compound | Beginners, Budget setups |
| Spin-Cast | Reel seat (stabilizer hole) | Compound, Bowfishing bows | Quick shots, Versatility |
| Retriever | Bracket system (screws/bolts) | Compound, Recurve, Bowfishing bows | No-tangle, Fast action |
Pro Tip:
Always check your bow’s manufacturer specifications for maximum accessory weight and mounting recommendations to avoid damaging your equipment.
Credit: www.fin-finder.com
Preparing Your Bow And Reel For Installation
Preparation is a critical step often overlooked by beginners. Taking the time to gather the right tools, inspect your equipment, and lay out your workspace can streamline installation and prevent costly errors.
Essential Tools And Materials
Gathering the necessary tools beforehand will save time and frustration. Common items include:
- Screwdrivers (Phillips and flathead)
- Allen wrenches (various sizes)
- Mounting hardware (bolts, washers, brackets, usually included with reel)
- Thread-locking compound (optional, for added security)
- Soft cloth or mat (to protect bow finish)
- Bowfishing line (if not pre-spooled)
Inspecting Your Bow And Reel
A thorough inspection helps identify potential issues before they cause problems on the water:
- Check your bow for cracks, stripped threads, or loose components.
- Ensure the reel is free of defects, the line is undamaged, and the mounting hardware is complete.
- Verify that any adapter brackets or reel seats are present and undamaged.
Setting Up A Safe Workspace
Choose a clean, well-lit area with a stable surface for assembly. Keep small parts in a tray or container to prevent loss. If you’re new to bowfishing gear assembly, consider watching reputable video guides or reading the manufacturer’s manual for visual reference.
Lining Up Your Mounting Points
Bowfishing reels must align perfectly with the arrow’s path to ensure accurate shots and smooth line flow. Dry-fit the reel and bracket (if applicable) to confirm everything lines up before final tightening.
Example:
Testing a spin-cast reel on a compound bow often reveals that the included bolts are slightly too short for the thicker riser. Swapping them for longer, stainless-steel bolts prevented future loosening and ensured a snug fit.

Credit: www.megamouthbowfishing.com
Step-by-step Guide: Attaching Each Type Of Bowfishing Reel
The specific steps to attach your reel will depend on the reel and bow type. Below, you’ll find detailed instructions tailored to the three main reel styles.
Attaching A Drum (hand-wrap) Reel
- Locate Mounting Holes: Most drum reels bolt directly to pre-drilled holes on the bow riser (usually above the grip).
- Align the Reel: Hold the drum reel so the line outlet aligns with the arrow rest.
- Insert Bolts/Screws: Use included hardware to secure the reel, tightening evenly to avoid misalignment.
- Check for Stability: Wiggle the reel gently, there should be no movement.
- Spool the Line: Thread the bowfishing line through the line guide and wrap it around the drum, securing the loose end.
Warning: Over-tightening can strip threads or crack the riser, especially on older recurves. Tighten until snug, then stop.
Installing A Spin-cast Reel
- Attach the Reel Seat: Screw the reel seat into the bow’s stabilizer bushing. Ensure it’s flush and secure.
- Mount the Reel: Slide the spin-cast reel onto the seat, aligning the trigger for comfortable access.
- Secure with Lock Nut: Tighten the reel using the provided lock nut or thumbscrew.
- Thread the Line: Run the line through the arrow rest and line guide, ensuring no tangles.
- Test Operation: Depress the trigger and spool line to confirm smooth movement.
Setting Up A Retriever Reel
- Bracket Positioning: Place the mounting bracket on the riser, lining up holes with pre-drilled points.
- Install Bolts: Insert and tighten mounting bolts, using washers if needed to protect the finish.
- Attach the Reel: Slide the retriever reel onto the bracket, securing it with the supplied screws or levers.
- Route the Line: Feed the line through the roller guide, ensuring it follows a straight path.
- Check Functionality: Pull line and reel it back to ensure smooth action and no snags.
Pro Tip:
Apply a small amount of thread-locking compound to mounting bolts if you plan on frequent, high-vibration use, this prevents loosening during repeated shots.
Case Study: Switching From Drum To Retriever Reel
A bowfisher in southern Louisiana upgraded from a hand-wrap drum to a retriever reel after repeated line tangles and slow retrievals. After following the manufacturer’s mounting instructions and double-checking alignment, he reported a 30% increase in successful shots and far fewer lost fish, citing the retriever’s faster line management as a key advantage.
Fine-tuning Your Bowfishing Setup For Performance
Once your reel is attached, fine-tuning is essential for accuracy, comfort, and reliability. Proper setup reduces the likelihood of missed shots or equipment failure.
Aligning The Reel And Arrow Rest
A misaligned reel can cause line drag, affecting shot trajectory and accuracy. To ensure proper alignment:
- The reel’s line outlet should point directly at the arrow rest.
- Use washers or shims if necessary to adjust the reel’s angle.
- For recurve bows, ensure the line doesn’t rub against the riser or limbs.
Adjusting Line Tension And Spooling
Incorrect line tension can result in tangles, missed shots, or lost fish.
- For hand-wrap reels, keep the line snug but not tight when spooling.
- Spin-cast and retriever reels often feature adjustable drag, set it according to the manufacturer’s recommendations.
- Use high-visibility, abrasion-resistant bowfishing line for best results.
Ensuring User Comfort And Safety
A comfortable setup allows longer sessions and more accurate shooting:
- Position the reel for easy trigger or handle access.
- Check for sharp edges or protruding hardware that could snag gloves or clothing.
- Make sure the line path is unobstructed and away from fingers during the shot.
Example:
Switching to a retriever reel typically makes shots feel smoother, though occasionally the line may slap the wrist. Adding a simple line guide near the arrow rest eliminated the issue, improving both comfort and shot consistency.
Table: Bowfishing Reel Features And Adjustments
| Feature | Drum Reel | Spin-Cast Reel | Retriever Reel |
|---|---|---|---|
| Line Capacity | Low | Medium | High |
| Adjustable Drag | No | Yes | Yes |
| Mounting Complexity | Simple | Moderate | Moderate |
| Line Tangle Prevention | Low | Moderate | High |
Pro Tip:
Consider marking your mounting bolts with a paint pen after installation. This lets you quickly spot any loosening hardware during routine checks.
Common Mistakes And Troubleshooting Tips
Even experienced archers encounter occasional problems when attaching or using bowfishing reels. Recognizing and addressing these issues quickly can save time and frustration.
Mistake: Over-tightening Bolts
Over-tightening mounting hardware can strip threads or crack the riser, especially on lighter recurve bows. If you notice the reel shifting or hardware feeling loose, check the threads for damage and use appropriately sized bolts.
Mistake: Misaligned Line Path
If the line rubs against the riser, limb, or arrow rest, you’ll experience drag, inaccuracy, or line damage. Reposition the reel or add a line guide to ensure a straight, unobstructed path from the reel to the arrow rest.
Mistake: Incompatible Hardware
Attempting to force-fit a reel using mismatched bolts or brackets can damage both bow and reel. Always use hardware provided by the manufacturer, or purchase adapters designed specifically for your bow model.
Problem: Reel Loosens During Use
Repeated vibration from shooting can cause mounting bolts to loosen. Apply a thread-locking compound to bolts, and check tightness periodically during outings.
Problem: Line Tangles Or Snags
Improper spooling or low-quality line can lead to tangles, especially with drum reels. Always spool line evenly and consider upgrading to a premium, abrasion-resistant line.
Example:
A friend’s spin-cast reel repeatedly jammed during a tournament. After disassembly, sand often finds its way into the reel housing. A quick cleaning and regular maintenance schedule prevented future issues.
Maintaining And Inspecting Your Bowfishing Setup
Proper maintenance extends the life of your gear and ensures consistent performance. Regular inspection is key, especially after trips in muddy, sandy, or saltwater environments.
Cleaning And Lubrication
- After each outing, wipe down your bow and reel with a damp cloth to remove dirt and debris.
- For spin-cast and retriever reels, periodically open the housing (as per manufacturer instructions) and apply appropriate lubricant to moving parts.
- Rinse and dry all components thoroughly after use in saltwater to prevent corrosion.
Inspecting For Wear And Tear
- Check the bowfishing line for frays or nicks, replace immediately if damaged.
- Inspect mounting bolts and brackets for rust, corrosion, or loosening.
- Look for cracks or stress marks on the bow riser near mounting points.
Replacing And Upgrading Components
Over time, you may want to upgrade your reel, line, or mounting hardware for improved performance. When replacing parts, always use components compatible with your existing setup.
Pro Tip:
Store your bowfishing setup in a dry, temperature-controlled environment. Extreme heat or humidity can degrade line and weaken adhesives over time.
Real-world Examples And Case Studies
Learning from others’ experiences can reveal pitfalls and best practices for attaching and maintaining bowfishing reels.
Example 1: Tournament Angler’s Quick-change Setup
A competitive bowfisher in Florida needed to swap between spin-cast and retriever reels based on tournament rules. By installing universal mounting brackets and marking alignment points, he reduced reel change time to under two minutes, gaining a tactical edge.
Example 2: Family Bowfishing Outing
A parent teaching their child to bowfish chose a lightweight recurve and a drum reel for simplicity. After attaching the reel using rubber washers to prevent scratching, they practiced in the backyard pool. The child’s confidence grew with each tangle-free shot, highlighting the importance of a beginner-friendly setup.
Example 3: Night Bowfishing Adjustments
During a night bowfishing trip, a group discovered their spin-cast reels reflected too much light, spooking fish. They applied matte tape to reduce glare and re-checked all mounting hardware before launching, resulting in a successful catch.
Table: Common Bowfishing Scenarios And Recommended Reel/bow Setups
| Scenario | Recommended Reel | Bow Type | Reason |
|---|---|---|---|
| Beginner Practice | Drum Reel | Recurve | Simple, affordable, easy to maintain |
| Tournament Competition | Retriever Reel | Compound | Fast retrieval, minimal tangles |
| Night Bowfishing | Spin-Cast Reel | Bowfishing Bow | Smooth, quiet operation |
Frequently Asked Questions
What Is The Best Type Of Reel For A Beginner Bowfisher?
For beginners, a drum (hand-wrap) reel is often the best choice due to its simplicity, durability, and low cost. It requires minimal setup and maintenance, allowing new bowfishers to focus on learning the basics of aiming and shooting. As skill increases, upgrading to a spin-cast or retriever reel can offer greater efficiency and speed.
Can I Attach A Bowfishing Reel To Any Bow?
Not all bows are suitable for bowfishing reel attachment. The bow must have a stabilizer bushing or compatible mounting points. Many modern compound and dedicated bowfishing bows include these features, but some traditional recurve bows may require aftermarket brackets. Always consult your bow’s manual or manufacturer for compatibility details.
How Often Should I Check The Tightness Of My Reel’s Mounting Bolts?
It’s advisable to check the mounting hardware before every outing and at regular intervals during extended use, especially after shooting 20-30 arrows. Vibration from repeated shots can loosen bolts, potentially leading to equipment failure or loss of the reel. Using a thread-locking compound can reduce the frequency of required checks.
Is It Necessary To Use A Specific Type Of Bowfishing Line With My Reel?
While some reels come pre-spooled, it’s best to use high-visibility, abrasion-resistant bowfishing line tailored to the species and environment you’re targeting. These lines are designed to withstand the unique stresses of bowfishing, such as rapid acceleration and contact with debris. Standard fishing line often lacks the strength and durability required.
Where Can I Find Detailed Installation Guides Or Video Tutorials For My Reel And Bow Model?
Many reputable manufacturers offer installation guides and video tutorials on their official websites. For example, the AMS Bowfishing Resources page provides detailed instructions, troubleshooting tips, and visual aids for various setups. YouTube channels focused on archery or bowfishing also offer step-by-step demonstrations.
Properly attaching a bowfishing reel to your bow is more than a matter of convenience, it directly impacts your safety, accuracy, and enjoyment on the water. By selecting compatible equipment, carefully following installation steps, and regularly maintaining your setup, you’ll be well-equipped to tackle any bowfishing challenge. Whether you’re aiming for your first carp or sharpening your skills for competition, a secure and efficient reel attachment is the foundation of every successful shot. For more information on bowfishing techniques and gear, visit the Wikipedia Bowfishing page and stay updated on the latest best practices. Happy bowfishing!