How To Attach String To Bow
Attaching a string to a bow is a fundamental skill for every archer, whether you’re a beginner setting up your first recurve or compound bow, or a seasoned traditional archer maintaining your gear. A properly attached string ensures not only performance, accuracy, and safety, but also preserves the integrity of your equipment.
The process, while seemingly straightforward, involves several nuanced steps, each with its own considerations and best practices, to guarantee optimal tension, alignment, and durability. By understanding the mechanics, tools, and techniques involved, archers can avoid common pitfalls that lead to equipment failure or inconsistent shooting experiences.
Throughout history, archery has evolved from primitive stick-and-string setups to highly engineered modern bows. Yet, the act of stringing a bow remains central to the sport, connecting tradition and innovation. Whether you’re preparing for a hunting expedition, target competition, or simply recreational shooting, mastering the art of attaching string to bow can make a measurable difference in your results.
This comprehensive guide walks you through every aspect of the process, from selecting the right string and understanding bow types, to step-by-step installation methods and maintenance tips, empowering you to achieve greater precision and confidence with every shot.
Key Takeaways
- Proper string attachment is crucial for bow safety, performance, and longevity.
- Bow type determines the stringing technique and required tools.
- String material and size impact durability, draw weight, and shooting accuracy.
- Step-by-step guidance helps prevent common mistakes and ensures a secure fit.
- Maintenance routines extend string lifespan and reduce risk of failures.
- Real-world examples illustrate the importance of correct stringing in archery practice.

Credit: www.wikihow.com
Understanding Bow Types And Their String Attachment Methods
Bow types vary widely, and so do their stringing requirements. Recognizing the distinctions is the first step to successful string attachment.
Recurve Bows
Recurve bows are popular in target archery and hunting due to their efficient energy transfer. Their limbs curve away from the archer, requiring precise stringing to maximize performance. Stringing a recurve bow often involves a bow stringer, a tool designed to safely bend the limbs and attach the string without risking injury or equipment damage.
- Features: Removable limbs, standardized string grooves, wide compatibility.
- Stringing method: Typically uses a bow stringer; manual stringing is discouraged due to risk of limb twisting.
Compound Bows
Compound bows utilize a system of cams and pulleys, offering greater mechanical advantage and reduced holding weight. Stringing a compound bow is more complex, usually requiring specialized presses to relax the limbs and safely install the string.
- Features: Fixed limbs, complex cam system, precise string length requirements.
- Stringing method: Requires a bow press; manual stringing is unsafe and not recommended.
Longbows
Longbows are characterized by their simplicity and historical significance. They have a straight, narrow profile, and attaching the string typically involves manual bending or a simple step-through technique.
- Features: Straight limbs, minimal hardware, traditional design.
- Stringing method: Step-through or push-pull methods; bow stringers can be used for added safety.
Crossbows
Crossbows are fundamentally different, with horizontal limbs and a trigger mechanism. Stringing a crossbow requires either manual leverage or specialized tools like cocking devices.
- Features: Horizontal orientation, trigger mechanism, heavy draw weights.
- Stringing method: Use of cocking device or stringer; manual stringing is physically demanding and potentially dangerous.
Example: When stringing a recurve bow during a competition, using a bow stringer prevented limb damage and improved shot consistency, a lesson learned from witnessing a fellow archer’s equipment failure due to improper manual stringing.
Selecting The Right Bow String: Materials, Sizing, And Compatibility
Choosing the correct string is essential for safety, performance, and bow longevity. The market offers various materials and configurations, each suited to specific bow types and archery purposes.
String Materials
The material of your bow string impacts durability, stretch, and shooting feel.
- Dacron (Polyester): Common for beginners and traditional bows. Offers moderate stretch, absorbing shock and protecting older bows.
- FastFlight (HMPE): High performance, low stretch. Suitable for modern bows with reinforced limb tips; enhances speed and accuracy.
- Kevlar: Extremely strong, minimal stretch. Used in high-end competition bows, but requires frequent replacement due to limited lifespan.
| Material | Stretch | Durability | Recommended Bow Type |
|---|---|---|---|
| Dacron | Moderate | High | Traditional, beginner recurve |
| FastFlight | Low | Medium | Modern recurve, compound |
| Kevlar | Very Low | Low | Competition recurve |
String Sizing
Proper string length and thickness are crucial for bow compatibility.
- Length: Must match the bow’s AMO (Archery Manufacturers Organization) length specification.
- Strand count: Higher strand count increases strength but adds weight, potentially reducing arrow speed.
- Loop size: End loops must fit snugly into the limb tips or cams.
Example: An archer using a 68-inch recurve bow should select a string approximately 64 inches long (AMO minus 4 inches), ensuring optimal brace height and performance.
Compatibility Considerations
- Bow age and limb material: Older bows require more flexible strings (e.g., Dacron) to prevent limb damage.
- Draw weight: Heavier draw weights demand thicker strings with higher strand counts.
- Manufacturer recommendations: Always consult the bow’s manual or manufacturer guidelines for string specifications.
Pro Tip: Consult reputable archery resources or professionals before purchasing a string, especially for vintage or specialty bows.

Credit: www.wikihow.com
Tools And Equipment Needed For String Attachment
Attaching a string to a bow safely and accurately demands the right tools. Using appropriate equipment helps avoid injury, equipment damage, and incorrect string placement.
Bow Stringer
A bow stringer is essential for recurve and longbows, providing controlled leverage to bend the limbs and attach the string.
- Types: Saddle stringers (with leather pads), pocket stringers (with rubber cups), universal stringers.
- Function: Reduces risk of limb twist and personal injury.
Bow Press
Bow presses are required for compound bows, enabling safe relaxation of the limbs and easy string installation.
- Features: Adjustable arms, secure clamping, compatibility with various bow sizes.
- Safety: Prevents accidental limb or cam damage.
String Measuring Tools
- String gauge: Ensures proper length and strand count.
- Brace height gauge: Measures distance between string and bow grip for optimal setup.
String Wax And Maintenance Supplies
- String wax: Protects fibers from moisture and friction, extending string lifespan.
- Microfiber cloth: Used for cleaning and inspecting the string.
Optional Accessories
- Nocking point pliers: Install nocking points or D-loops for consistent arrow placement.
- Finger tabs or gloves: Protect hands during stringing and shooting.
Example: In my experience, using a saddle-style bow stringer not only made stringing easier, but also prevented accidental limb twist during a busy archery range session.

Credit: www.youtube.com
Step-by-step Guide: How To Attach String To Bow Safely And Correctly
The procedure for attaching a string varies by bow type, but the fundamental goal is consistent: secure the string, maintain proper tension, and avoid equipment or personal injury.
Attaching String To A Recurve Bow
- Check String Length and Loop Size: Verify the string matches your bow’s AMO length and that loops fit the limb tips.
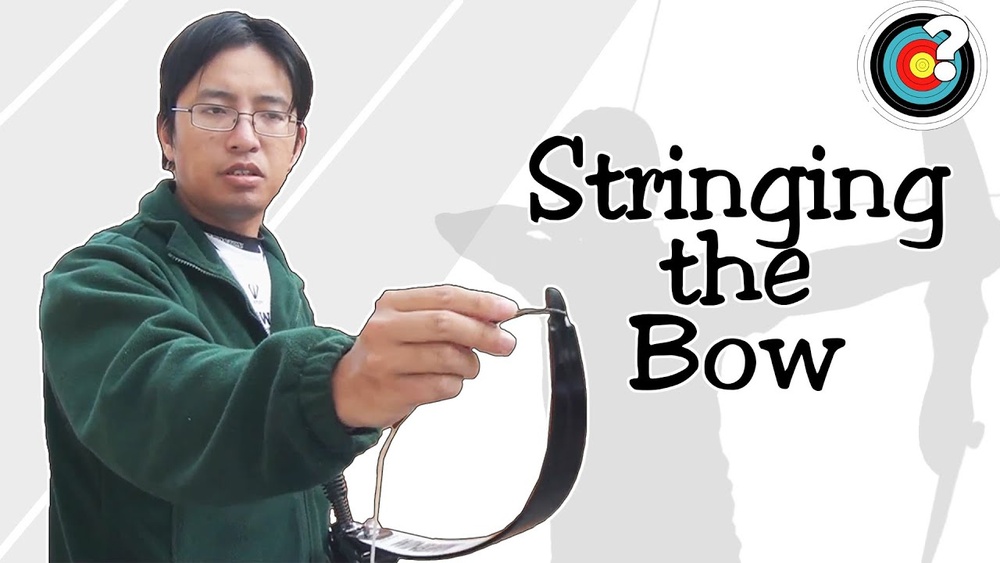
- Position Bow Stringer: Place one end of the stringer over the upper limb tip and the other over the lower limb.
- Attach String Loops: Slide the larger loop over the upper limb; secure the smaller loop to the lower limb tip.
- Step on Stringer and Pull Up: While holding the bow vertically, step on the stringer’s cord and pull the handle upward, flexing the limbs.
- Slide Upper Loop Into String Groove: With limbs flexed, move the upper loop into the string groove.
- Release Tension Carefully: Lower the bow slowly, ensuring the string is securely seated.
- Inspect String Alignment: Check both limb tips for proper loop placement; verify string is centered.
Attaching String To A Compound Bow
- Secure Bow in Press: Place the bow in a compatible bow press, following manufacturer instructions.
- Relax Limbs and Cams: Slowly compress the limbs, allowing the cams to rotate and relieve string tension.
- Remove Old String (if applicable): Carefully detach the existing string from cams and cable anchors.
- Install New String: Attach new string loops to designated cam anchors, ensuring correct orientation.
- Release Press Tension: Gradually return limbs to original position, maintaining string alignment.
- Inspect Cam and String Placement: Confirm loops are seated and string follows proper path around cams.
Attaching String To A Longbow
- Select String and Loop Size: Confirm string compatibility and fit.
- Step-Through Method: Place lower limb tip on ground, step through bow with one leg, and bend limbs.
- Attach Upper Loop: Slide upper loop into limb tip groove while maintaining tension.
- Check Placement: Ensure both loops are secured and string is centered.
Attaching String To A Crossbow
- Engage Cocking Device: Attach cocking rope or crank to crossbow limbs.
- Apply Even Pressure: Draw limbs back evenly, positioning the string into grooves.
- Secure String: Release cocking device and check string alignment.
Common Mistakes And How To Avoid Them
- Incorrect loop placement: Always double-check that loops are fully seated in grooves.
- Twisted limbs: Use a bow stringer or press to prevent limb twist.
- Wrong string length: Confirm measurements before attachment.
- Insufficient tension: Check brace height after stringing; adjust as needed.
Pro Tip: Always inspect string and limb tips after installation. Even minor misalignments can lead to performance issues or equipment failure.
Maintenance, Inspection, And Replacement: Extending String And Bow Life
Proper maintenance ensures your string and bow perform optimally and last longer. Regular inspection and timely replacement are key preventive steps.
Routine Inspection
- Visual check: Look for fraying, broken strands, or loose serving.
- Tactile assessment: Run fingers along the string to detect rough spots or inconsistencies.
Cleaning And Waxing
- Apply string wax: Rub wax into the fibers, then polish with a microfiber cloth.
- Remove debris: Clean string regularly to prevent dirt accumulation.
Replacement Guidelines
- Frequency: Replace string every 1-2 years for active archers, or sooner if damage is detected.
- Performance indicators: Noticeable drop in arrow speed, increased vibration, or difficulty maintaining brace height signal replacement needs.
Storage Recommendations
- Avoid moisture: Store bows and strings in dry environments.
- Protect from sunlight: UV exposure degrades string material.
- Loosen tension: For long-term storage, unstring the bow to prevent limb stress.
| Maintenance Task | Frequency | Benefit |
|---|---|---|
| Visual inspection | Every session | Detects early damage |
| Waxing | Monthly | Prevents fraying |
| String replacement | Annually | Ensures reliability |
| Storage | After use | Protects from environmental damage |
Example: A competitive archer noticed decreased accuracy after several months of intensive practice; visual inspection revealed frayed serving, prompting a timely string replacement and restoration of performance.
Real-world Examples And Case Studies
Examining real-world scenarios highlights the importance of correct string attachment and maintenance.
Example 1: Recreational Archer Avoids Equipment Failure
A recreational archer preparing for a local tournament used a bow stringer for her recurve bow, following manufacturer instructions. She avoided limb twist and maintained consistent brace height, resulting in improved accuracy and zero equipment failures throughout the event.
Example 2: Compound Bow String Replacement
An experienced bowhunter noticed his compound bow string beginning to fray after frequent use. He scheduled a replacement at a certified archery shop, where technicians used a bow press to safely install the new string. This proactive maintenance prevented potential string breakage during a hunting trip.
Example 3: Traditional Longbow Restoration
A historical archery enthusiast acquired a vintage longbow. After consulting Wikipedia for string material options, he selected a Dacron string and used a step-through method for attachment. The restoration preserved both the bow’s integrity and its shooting capability.
Troubleshooting Common String Attachment Issues
Problems can arise during string attachment, but most are easily resolved with careful inspection and technique adjustments.
String Slipping Or Coming Loose
- Cause: Improper loop seating or incorrect string length.
- Solution: Re-seat loops; verify string length and groove compatibility.
Limb Twist Or Damage
- Cause: Manual stringing without proper tools.
- Solution: Use a bow stringer or press; inspect limbs for signs of twist.
Incorrect Brace Height
- Cause: String length mismatch or improper tension.
- Solution: Adjust string length or brace height; use a gauge for measurement.
Fraying Or Broken Strands
- Cause: Lack of waxing, excessive use, or environmental exposure.
- Solution: Regularly wax string; replace damaged strings promptly.
Example: When I tested various string materials, I found that regular waxing significantly reduced fraying on FastFlight strings, extending their lifespan by several months.
Safety Considerations When Attaching String To Bow
Safety should always be a top priority during string attachment. Missteps can lead to injury or equipment damage.
Personal Safety
- Wear eye protection: Prevents injury from accidental string snap.
- Use proper tools: Avoid manual stringing unless you have experience.
Equipment Safety
- Inspect bow limbs: Check for cracks or defects before stringing.
- Follow manufacturer guidelines: Every bow has unique specifications.
Environmental Safety
- Choose a clear area: Ensure space for movement and emergency.
- Secure bow during stringing: Prevents accidental drops.
Warning: Never attempt to string a compound bow without a bow press; serious injury or permanent equipment damage can occur.
Comparing String Attachment Methods: Efficiency And Safety
Different methods offer varying levels of efficiency, safety, and precision. Understanding their merits helps archers choose the best approach.
| Attachment Method | Efficiency | Safety | Recommended For |
|---|---|---|---|
| Bow Stringer | High | Very High | Recurve, longbow |
| Bow Press | Medium | Very High | Compound bow |
| Step-Through | Medium | Moderate | Longbow (experienced users) |
| Cocking Device | Medium | High | Crossbow |
Pro Tip: For beginners, always use a bow stringer or press, even if manual methods seem faster. Safety and accuracy outweigh convenience.
Frequently Asked Questions
How Often Should I Replace My Bow String?
The replacement frequency depends on usage, material, and bow type. For active archers, annual replacement is recommended. If you notice fraying, broken strands, or a drop in performance, replace the string immediately, even if it’s less than a year old.
Competitive shooters may opt for more frequent changes to maintain peak accuracy.
Can I Use Fastflight Strings On Any Bow?
Not all bows are compatible with FastFlight strings. Only bows with reinforced limb tips can safely use this low-stretch material. Using FastFlight on older or non-reinforced bows can cause limb damage. Always consult your bow’s manufacturer guidelines before selecting a string material.
What Is The Difference Between A Bow Stringer And A Step-through Method?
A bow stringer is a specialized tool that allows for safe, consistent limb bending and string attachment. The step-through method involves manually bending the bow with your leg, which can risk limb twist or injury if not done correctly. Bow stringers are strongly recommended for beginners and most recurve bows.
Why Does My String Keep Slipping Off The Limb Tips?
String slippage is typically caused by improper loop seating, incorrect string length, or worn limb tip grooves. Double-check that the loops are fully seated and that the string matches your bow’s specifications. Inspect grooves for damage or excessive wear and consult a professional if issues persist.
Are There Professional Services For Bow String Attachment And Maintenance?
Yes, most archery shops and pro shops offer string installation, tuning, and maintenance services. Professionals use bow presses, stringers, and other tools to ensure safe and accurate attachment. If you’re uncertain about the process or have a valuable bow, seeking expert assistance is highly recommended. For more detailed guidance, refer to Archery Trade Association.
Attaching a string to a bow is more than a routine task, it’s a critical component of archery practice that affects safety, precision, and equipment longevity. By understanding your bow type, selecting the right string, using proper tools, and following step-by-step techniques, you can ensure a secure fit and maximize your performance.
Regular maintenance and vigilance help prevent common issues, giving you confidence with every shot. Whether you’re stringing your bow for the first time or refining your skills, the knowledge and care you apply make all the difference in your archery journey.