Wearing a back quiver comfortably and quietly involves three key steps: choosing a quiver with adjustable straps, positioning it high and angled on your back for easy reach, and practicing a smooth, silent draw. A snug fit prevents bouncing and noise, making it an effective choice for both traditional archers and modern hunters.
Hello, fellow archers! Salman Arfeen here. If you’ve ever imagined yourself as a classic archer, you probably pictured a quiver full of arrows resting on your back. It’s an iconic look! But making it work in real life can be tricky. Arrows might rattle, the quiver might swing around, or you might fumble trying to grab an arrow. It can feel frustrating.
Don’t worry, you’re not alone. Many beginners struggle with this. The good news is that wearing a back quiver effectively is a skill you can learn. With the right quiver and a little practice, you can move with confidence and draw arrows smoothly. In this guide, I’ll walk you through everything you need to know, step-by-step.
Why Choose a Back Quiver?
The back quiver is the classic, timeless choice for carrying arrows. It offers a unique blend of tradition and practicality that many archers love. But like any piece of gear, it has its strengths and weaknesses. Understanding these can help you decide if it’s the right fit for your archery style.
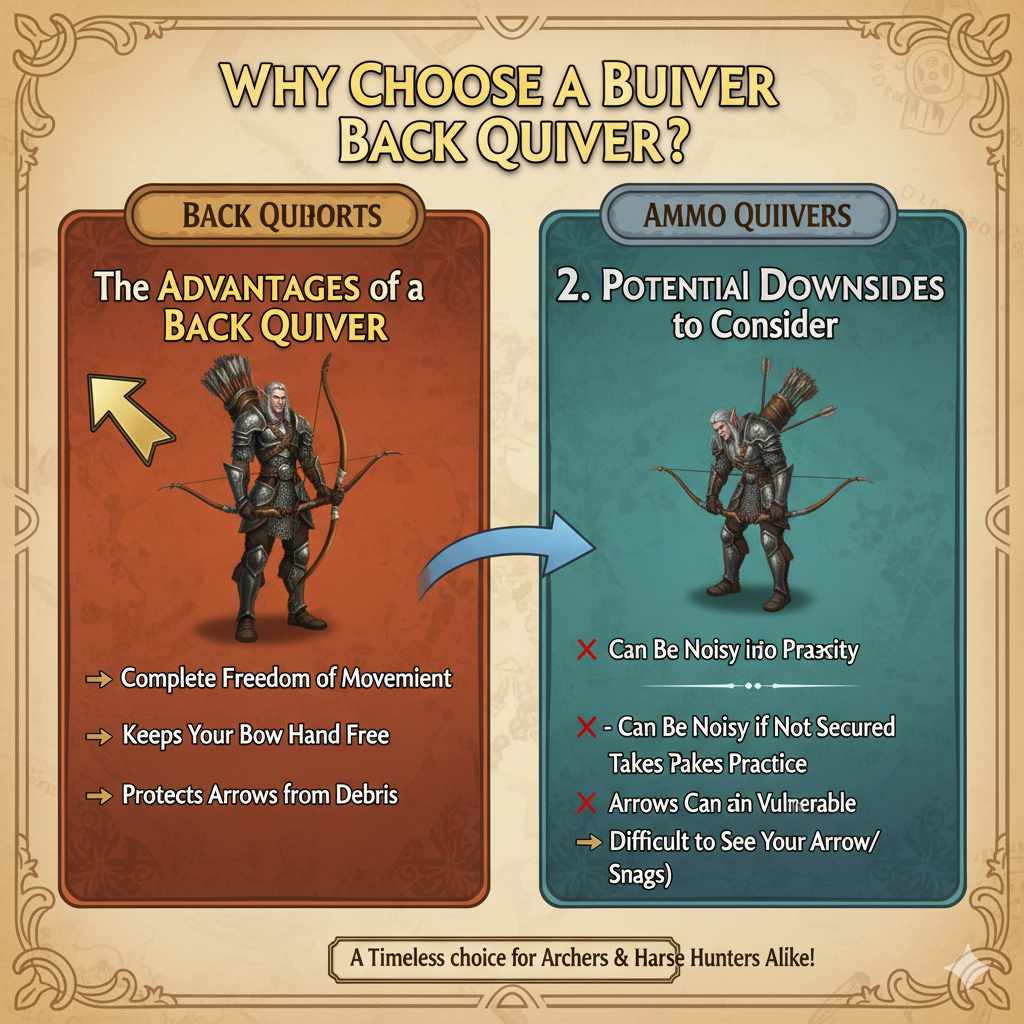
The Advantages of a Back Quiver
So, what makes the back quiver so popular? It comes down to a few key benefits that are especially helpful when you’re on the move.
- Complete Freedom of Movement: With nothing on your hip or bow, your legs and arms are completely unobstructed. This is a huge plus when you’re walking through thick woods, climbing a treestand, or navigating tricky terrain.
- Large Arrow Capacity: Back quivers are generally designed to hold more arrows than hip or bow quivers. This is great for a long day of practice or stump shooting where you don’t want to keep running back to grab more arrows.
- Keeps Your Bow Hand Free: Unlike a bow quiver, a back quiver doesn’t add any extra weight or bulk to your bow. This can help you maintain better balance and a more consistent shot.
- Protects Arrows from Debris: When you’re walking, your arrows are kept up and away from mud, snow, and low-lying branches that could damage your fletchings.
The Potential Downsides to Consider
Of course, no gear is perfect. A back quiver can present a few challenges, especially for new users. It’s important to be aware of them so you can learn to overcome them.
- Can Be Noisy if Not Secured: If the quiver isn’t fitted correctly, arrows can rattle against each other or the quiver itself. This can be a deal-breaker for hunters trying to remain silent.
- Drawing an Arrow Takes Practice: Reaching over your shoulder to pull an arrow smoothly and quietly is a learned skill. It’s not as intuitive as grabbing an arrow from your hip.
- Arrows Can Be Vulnerable: When bending over or crawling, your arrows can sometimes slide out if the quiver is at the wrong angle. You also have to be mindful of low-hanging branches that could snag them.
- Difficult to See Your Arrow Supply: You can’t easily glance down to see how many arrows you have left, which might be a minor inconvenience for some.
Here’s a simple table to help you weigh the pros and cons at a glance:
| Pros of a Back Quiver | Cons of a Back Quiver |
|---|---|
| Unmatched freedom of movement | Arrows can rattle and make noise |
| High arrow capacity | Drawing an arrow requires practice |
| Doesn’t add weight to your bow | Arrows can fall out when bending over |
| Protects arrows from ground-level obstacles | Difficult to quickly check your arrow count |
Choosing the Perfect Back Quiver for You
Not all back quivers are created equal. Finding the one that fits your body and your needs is the first step toward mastering its use. A great quiver will feel like a part of you, while a poor one will feel like a clumsy backpack. Let’s look at the key features to consider.
Material Matters: Leather, Nylon, and More
The material of your quiver affects its durability, weight, quietness, and look.
- Leather: The traditional choice. Leather is durable, quiet, and develops a beautiful character over time. However, it can be heavier and may require occasional conditioning to protect it from moisture.
- Nylon/Cordura: A modern, lightweight, and often more affordable option. These synthetic fabrics are highly durable and water-resistant. Some models can be a bit noisy if arrows scrape against the material, so look for ones with a soft inner lining.
- Suede: Often used for its quiet properties, suede is a great choice for hunters. It’s a type of soft leather that doesn’t produce much noise when brushed against branches or clothing.
Capacity: How Many Arrows Do You Really Need?
Think about what you’ll be doing. For a day of target archery or stump shooting, a quiver that holds a dozen or more arrows is convenient. For hunting, you might only need to carry three to six arrows. A smaller, more compact quiver will be lighter and less cumbersome in the field. Some quivers have separate compartments to prevent fletchings from rubbing together.
Fit and Adjustability: The Most Important Factor
This is non-negotiable. A quiver that you can’t adjust to fit your body will never be comfortable or quiet. Look for a quiver with:
- An Adjustable Shoulder Strap: This allows you to set the height of the quiver on your back. You want the opening to be just over your shoulder, within easy reach.
- A Stabilizing Strap: Many modern back quivers include a smaller strap that goes around your chest or waist. This is a game-changer! It locks the quiver in place, preventing it from swinging, bouncing, or shifting as you move.
A good fit means the quiver stays put whether you’re walking, climbing, or drawing your bow. It’s the secret to a silent, hassle-free experience.
Arrow Protection: Keeping Your Gear Safe
Your arrows are a critical part of your setup. Your quiver should protect them.
- Fletching Protection: A wider opening or a flared top can help prevent your feathers or vanes from getting crumpled as you put arrows back in.
- Broadhead Compatibility: If you’re a hunter, this is crucial. Never use a quiver that isn’t designed for broadheads. A proper hunting quiver will have a shielded base made of durable foam or ballistic material to safely contain the sharp blades and prevent them from cutting through. For more information on hunter safety, you can always check resources from your local wildlife agency, like the Hunter-Ed safety courses, which are approved by state agencies.
Here’s a quick comparison of different quiver types to see where the back quiver fits in:
| Quiver Type | Best For | Key Advantage | Key Disadvantage |
|---|---|---|---|
| Back Quiver | Traditional archery, hunting, roving | Freedom of movement | Requires practice to draw quietly |
| Hip/Side Quiver | Target archery, competitions | Easy and fast arrow access | Can get in the way while walking |
| Bow Quiver | Bowhunting, convenience | Arrows are always ready | Adds weight and imbalance to the bow |
Step-by-Step: How to Wear and Use Your Back Quiver
You’ve picked out the perfect quiver. Now it’s time to learn how to use it like a pro. This isn’t about just slinging it over your shoulder; it’s about a series of small adjustments and movements that add up to a smooth, silent, and effective system.
Step 1: Adjust the Straps for a Snug Fit
This is the foundation for everything else. A loose quiver is a noisy, annoying quiver. Take your time with this step.
- Put the Quiver On: Sling the main strap over your shooting-arm shoulder (e.g., if you’re a right-handed shooter, the strap goes over your right shoulder). The quiver should rest on your back, angling down toward your non-shooting side.
- Adjust the Main Strap: Lengthen or shorten the main strap so the top opening of the quiver is just below the crest of your shoulder. You should be able to comfortably reach back and grab an arrow nock without straining or contorting your body.
- Secure the Stabilizer Strap: If your quiver has a second strap, buckle it around your chest. Cinch it down until the quiver feels locked against your back. It should be snug, but not so tight that it restricts your breathing.
- Test the Fit: Jump up and down a few times. Walk around. Bend over. Does the quiver stay in place? Or does it swing and bounce? If it moves, go back and tighten the straps until it feels stable.
Step 2: Position the Quiver for Easy Access
The angle and height of your quiver make a huge difference in how easily you can draw an arrow. For a right-handed archer, the quiver should sit over the right shoulder blade, with the arrows angled down toward the left hip. The fletchings should be easily reachable with your right hand.
- For Target Practice: A more vertical position is fine, as you’ll be standing still.
- For Hunting/Roving: A more horizontal angle is often better. This keeps the arrows lower and less likely to snag on branches. It also helps prevent them from falling out when you bend over.
Experiment to find the sweet spot that works for you. It should feel natural and repeatable.
Step 3: Load Your Arrows for Silence and Speed
How you place arrows in the quiver matters. Don’t just dump them in. For maximum quietness, you want to prevent them from clattering against each other.
- Spread Them Out: If your quiver is wide enough, try to arrange the arrows so they aren’t all touching. Some quivers have built-in dividers to help with this.
- Fletchings Up: This is the standard and safest way. It keeps the points contained at the bottom of the quiver.
- Add a Muffling Layer: A small piece of sheepskin, fleece, or foam at the bottom of your quiver can do wonders for dampening noise from arrow points.
Step 4: Master the Art of Drawing an Arrow
This is where practice pays off. The goal is a fluid, silent motion that you can do without thinking. Let’s break it down for a right-handed archer:
- Reach Back: With your right hand, reach over your right shoulder. Your elbow should be pointing up.
- Find an Arrow: Let your fingers find the nocks of the arrows. Don’t grab; just feel for one.
- Secure Your Grip: Grasp a single arrow between your thumb and index finger, right below the nock.
- Draw it Out Smoothly: Pull the arrow straight up and out of the quiver. Don’t jerk it. The motion should be deliberate and controlled. Lift it high enough for the point to clear the quiver opening.
- Bring it Forward: In one continuous motion, bring the arrow forward, rotating it so the nock is ready to be placed on the bowstring.
Practice this motion over and over again. Do it in your living room (with no arrow, or a practice arrow with the point removed) until it becomes second nature. Muscle memory is your best friend here.
Step 5: Move Silently in the Field
A well-fitted quiver shouldn’t make much noise, but you can take extra steps to be stealthy.
- The “Hunter’s Hunch”: When walking, slightly hunching your shoulders can help keep the quiver pressed against your back, reducing movement.
- Navigating Thick Brush: If you need to crawl or push through dense vegetation, you can reach back and place a hand over the top of your quiver to keep arrows secure and silent.
- Use Your Stabilizer Strap: This is the number one tool for silent movement. Make sure it’s snug before you start walking.
Common Problems and Easy Solutions
Even with the right setup, you might run into a few common issues. Here’s how to troubleshoot them quickly.
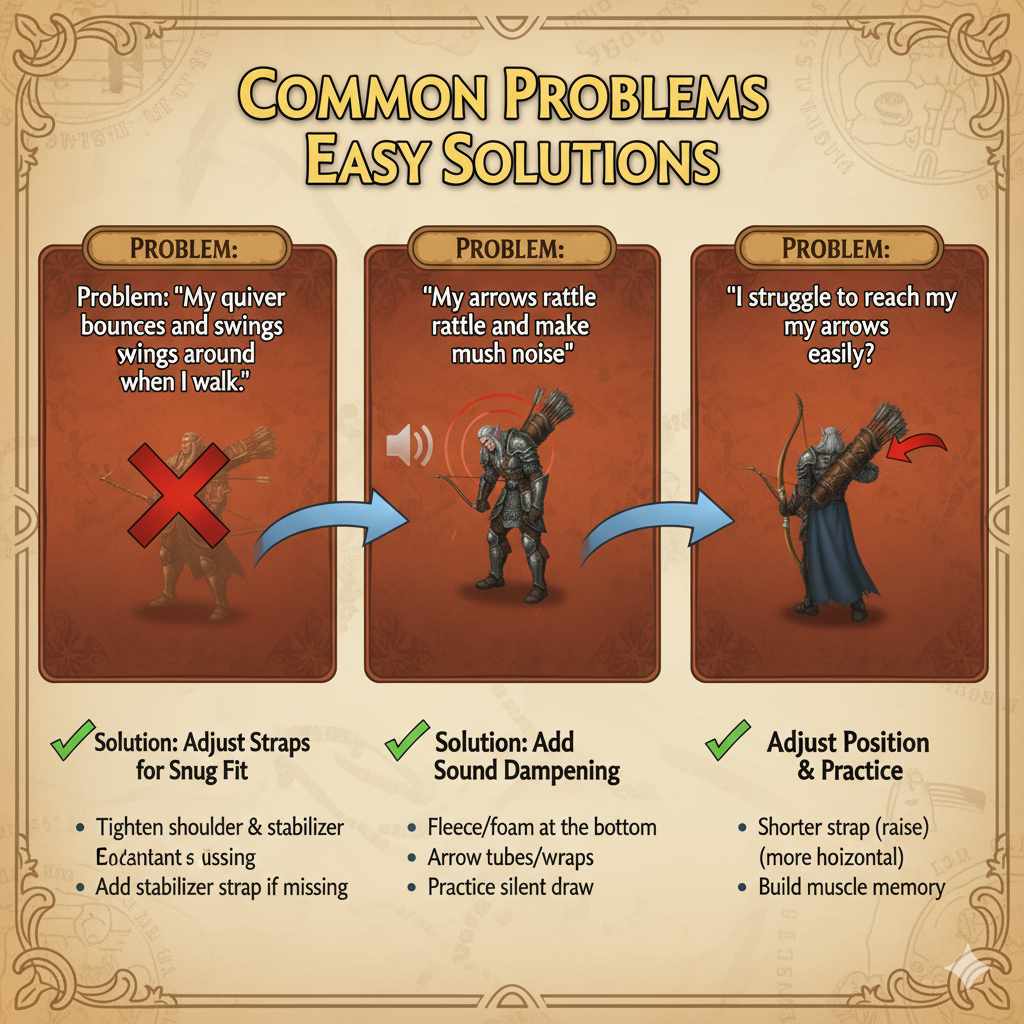
Problem: “My quiver bounces and swings around when I walk.”
Solution: This is almost always a fit issue. Your straps are too loose. Go back to Step 1 and tighten both the main shoulder strap and the stabilizer strap. If your quiver doesn’t have a stabilizer strap, consider adding one or choosing a model that does. A snug fit is a quiet fit.
Problem: “My arrows rattle and make too much noise.”
Solution: There are a few fixes for this. First, make sure the quiver is snug against your back. Second, add a sound-dampening material like fleece or foam to the bottom. Third, if your arrows are rattling against each other, you can use arrow tubes or wraps to quiet them down. Finally, practice drawing your arrow without bumping it against the quiver’s rim.
Problem: “I struggle to reach my arrows easily.”
Solution: The quiver’s position needs adjustment. It’s likely sitting too low or at the wrong angle. Shorten the main strap to raise the quiver higher on your back. You can also try adjusting the angle to be more horizontal, which can make the nocks easier to grab. Practice the drawing motion to build flexibility and muscle memory in your shoulder.
Frequently Asked Questions (FAQ)
Are back quivers good for beginners?
Yes, they can be, but they come with a learning curve. A hip quiver is often easier for a complete beginner to use during lessons, as it allows for easy arrow access without learning a new motion. However, with practice, a back quiver is an excellent and comfortable option for any archer.
How do I stop my arrows from falling out when I bend over?
The best way is to wear the quiver at a more horizontal angle and ensure it fits snugly. A deep quiver also helps. When you know you need to bend down significantly, you can get in the habit of placing a hand over the quiver opening to keep the arrows secure.
Can you use a back quiver with a compound bow?
Absolutely! While often associated with traditional bows, a back quiver works perfectly fine with a compound bow. It’s a great choice for compound bowhunters who don’t want the extra weight of a bow-mounted quiver affecting their aim. Just be sure to get a quiver deep enough for your longer arrows.
What’s the difference between a side quiver and a back quiver?
A back quiver is worn on the back with a strap over the shoulder. A side quiver (or hip quiver) attaches to your belt and rests on your hip. Side quivers offer faster access to arrows, which is why they are popular in competitions. Back quivers offer better mobility for walking through woods or difficult terrain.
How many arrows should I carry in my back quiver?
For hunting, 3 to 6 arrows are usually plenty. For target practice or roving, carrying 12 to 24 arrows can save you a lot of walking. Don’t overfill your quiver, as this can make arrows noisy and difficult to draw. Carry only what you need for the day’s activity.
Are leather or synthetic quivers better?
It comes down to personal preference. Leather is traditional, quiet, and durable, but heavier. Synthetics like nylon are lightweight, weather-resistant, and often more affordable. For a hunter focused on silence, a high-quality leather or suede quiver is often the top choice.
How do I safely carry broadheads in a back quiver?
Only use a quiver specifically designed for broadheads. These quivers have a reinforced, hooded bottom with a dense foam insert that completely covers the blades. This prevents the broadheads from cutting through the quiver and protects you and your gear. The U.S. Fish and Wildlife Service’s Hunter Education program heavily emphasizes equipment safety like this.
Conclusion: Practice Makes Perfect
Wearing a back quiver is more than just carrying arrows—it’s about connecting with a timeless tradition of archery. It’s a skill that combines the right gear with the right technique. Remember, the three keys are choosing a well-fitting, adjustable quiver, positioning it correctly on your back, and dedicating time to practice the drawing motion until it’s smooth and effortless.
Don’t be discouraged if it feels awkward at first. Every great archer started right where you are. Keep practicing, make small adjustments, and soon your back quiver will feel like a natural extension of yourself. You’ll be able to move through the woods silently and have an arrow ready whenever you need one. Now, get out there and enjoy the journey!