How to Make a Fondant Bow Stand Up Without Falling
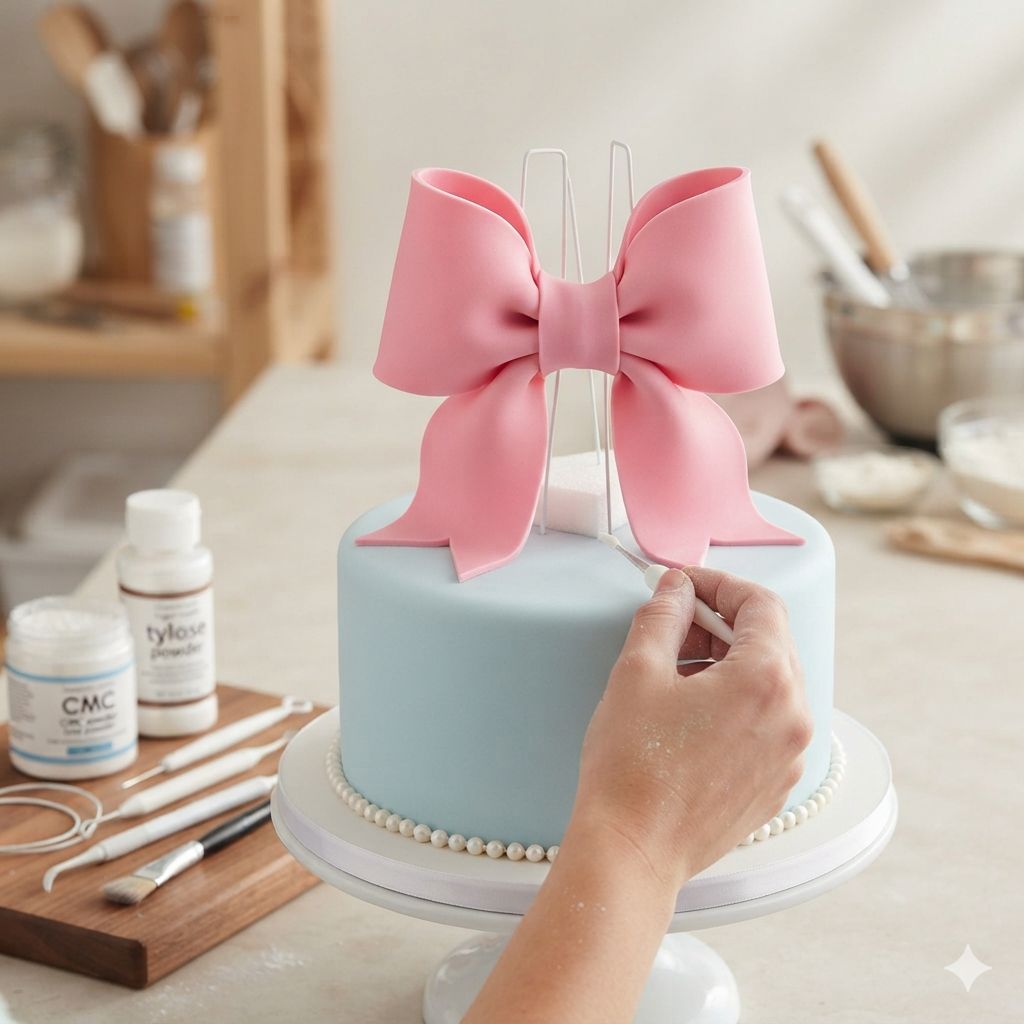
Making a fondant bow stand up without it collapsing can seem like a daunting task for bakers, but with the right techniques and a little patience, you can achieve stunning, gravity-defying edible decorations for your cakes. This guide will walk you through the essential steps, from choosing the right fondant to employing clever support methods, ensuring your delicate bows remain perfectly poised and beautiful.
Simply put, to make a fondant bow stand up, you need to use the correct fondant consistency, proper shaping and drying techniques, and effective internal or external supports to maintain its structure as it hardens.
Key Takeaways
- Achieve structural integrity by using fondant with a good amount of tylose powder or gum paste mixed in.
- Properly shape and fold fondant loops, ensuring they are well-defined and not too thick.
- Allow ample drying time in a controlled environment to let the fondant harden sufficiently.
- Utilize internal supports like skewers or dowels, or external supports like modeling chocolate bases for taller bows.
- Consider the ambient humidity, as high moisture can significantly hinder fondant drying and support.
What is the Right Fondant Consistency for Structural Decorations?
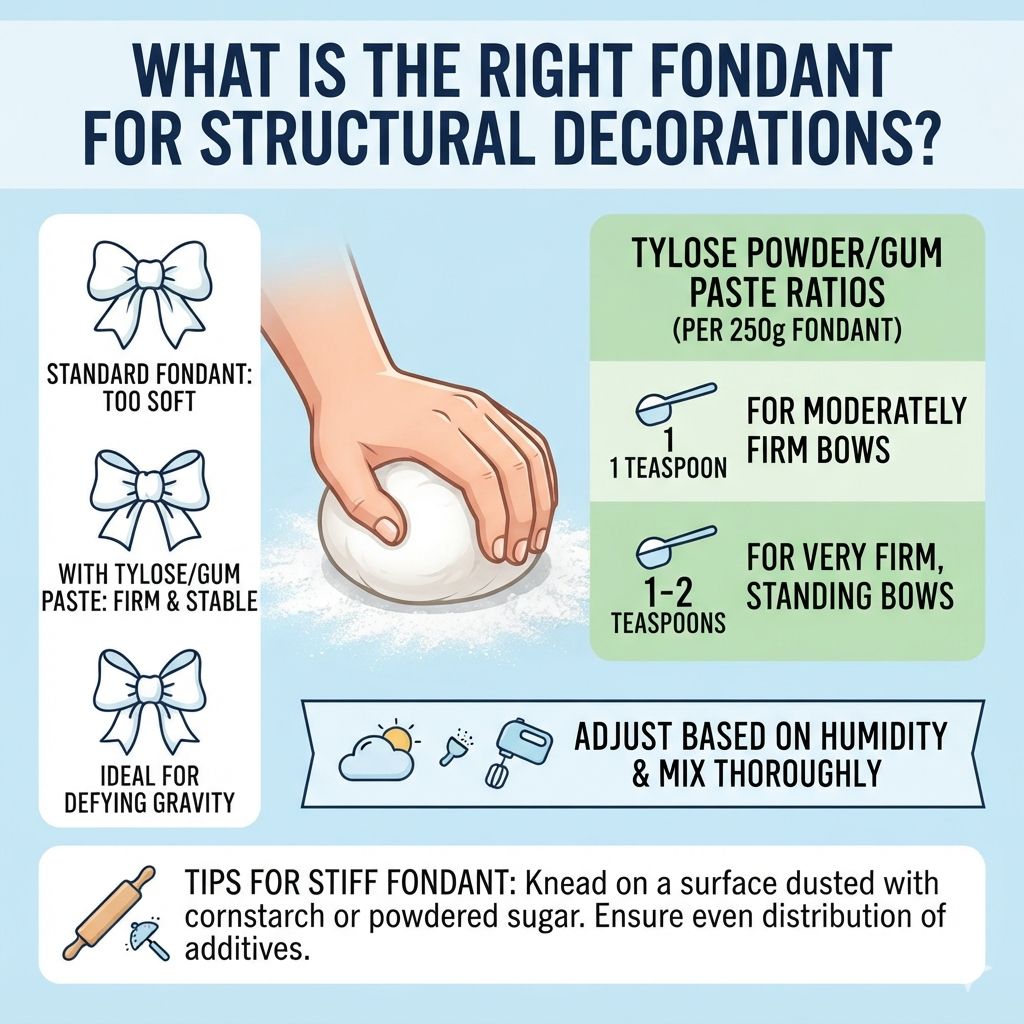
The foundation of any stable fondant decoration lies in its composition. For bows that need to defy gravity, a standard fondant might be too soft and pliable. You need a material that firms up and holds its shape once dry.
This is where additives come into play.
Incorporating a hardening agent like tylose powder or gum paste into your fondant is crucial. These ingredients work by absorbing moisture from the fondant, making it stiffer and more resilient. The amount you add will depend on the humidity in your area and how firm you need the bow to be.
It’s always best to start with a smaller amount and gradually add more until you achieve the desired consistency.
- Tylose Powder/Gum Paste Ratios:
- For moderately firm bows: 1 teaspoon of tylose powder per 250g of fondant.
- For very firm, standing bows: 1-2 teaspoons of tylose powder per 250g of fondant.
- Adjust based on humidity; more tylose in humid conditions.
- Mix thoroughly until fully incorporated for even hardening.
When working with a stiffer fondant, you might find it a bit more challenging to knead and roll. It’s helpful to knead it on a surface lightly dusted with cornstarch or powdered sugar to prevent sticking. Ensure the tylose or gum paste is evenly distributed to avoid pockets of softness.
How to Shape Fondant Bow Loops for Maximum Support
The way you shape and assemble the individual loops of your fondant bow is critical to its final standing power. Each loop needs to be well-defined, with crisp edges, and a consistent thickness to dry uniformly. Overly thin areas will be weak, while excessively thick parts may crack as they dry.
When cutting out your bow pieces, aim for an even thickness. A fondant roller with guide rings is excellent for achieving this consistency. For the loops, you’ll typically cut out petal-like shapes.
These are then folded or creased to create the characteristic bow shape. The key is to create a slight internal tension or curve in each loop that helps it hold its position.
| Shaping Technique | Best For | Considerations |
|---|---|---|
| Creasing Folded Loops | Classic bow appearance, good rigidity. | Ensure creases are sharp; avoid crushing the fondant. |
| Curved Petal Shapes | Modern, softer-looking bows; can be self-supporting with careful shaping. | Maintain consistent curve for even drying. |
| Layered Petals | Adds dimension and strength; good for larger, more complex bows. | Secure layers well with edible glue or water. |
After shaping each loop, gently place it on a piece of parchment paper or a non-stick mat. You can use a tiny bit of edible glue or a water-based paste to secure the overlapping sections. Avoid using too much liquid, as excess moisture can soften the fondant.
Warning: Overworking the fondant once tylose is added can make it tough and difficult to shape. Knead just enough to incorporate the powder evenly.
The Critical Role of Drying Time and Environment
Patience is a virtue when it comes to drying fondant decorations. The drying process is where your fondant transforms from a pliable material into a rigid structure capable of standing on its own. Rushing this stage is one of the most common reasons for bowing failures.
The ideal drying environment is one with low humidity and good air circulation. High humidity is the enemy of drying fondant because it slows down the evaporation of moisture from the material. In humid climates, you may need to extend drying times significantly or consider using a dehumidifier in the room where your bows are drying.
Conversely, extremely dry environments can sometimes cause fondant to dry too quickly on the outside, creating a brittle shell that cracks.
- Initial Drying (6-12 hours): Place shaped loops and the center piece on parchment paper in a well-ventilated, low-humidity area. Let them dry undisturbed for at least half a day.
- Assembly and Further Drying (12-24 hours): Gently assemble the bow using edible glue or water. Allow the assembled bow to dry for another 12-24 hours.
- Full Hardening (48+ hours): For very tall or complex bows, or in humid conditions, full hardening can take 48 hours or more. Test the rigidity by gently pressing a non-visible part.
Avoid placing fondant decorations in the refrigerator or freezer to speed up drying. The cold and moisture from these appliances can cause condensation, which will make the fondant sticky and soft. A dry, room-temperature environment with gentle air movement is best.
Tip: Placing your shaped fondant pieces on a wire rack instead of parchment paper can improve air circulation around them, speeding up the drying process slightly.
Internal Support Strategies for Tall Fondant Bows
For bows that are intended to be larger or stand significantly higher than their base, internal support becomes non-negotiable. Relying solely on hardened fondant for very tall structures is risky. Internal supports provide the necessary skeletal strength to prevent the bow from bending or collapsing under its own weight.
The most common internal supports are food-safe skewers, dowels, or lollipop sticks. These can be inserted into the base of the bow or even through the center of the loops to provide rigidity. If you’re using skewers, ensure they are cut to the appropriate length so they don’t poke out of the top of the bow awkwardly.
For very grand designs, you might consider embedding thicker cake dowels into a solid base.
| Support Type | Ideal Use | Placement | Considerations |
|---|---|---|---|
| Food-Safe Skewers | Medium to tall bows, securing multiple loops. | Insert into the base or through center of assembled loops. | Cut to size; ensure they are firmly embedded. |
| Lollipop Sticks | Smaller, multi-tiered bows; adding height to individual elements. | Can be glued to the back of loops or inserted into the base. | Less rigid than skewers; best for lighter support. |
| Cake Dowels | Very large, heavy bows or tiered bow structures. | Embedded vertically into a secure cake board or base. | Requires precise placement and secure attachment to the cake board. |
When using internal supports, always consider how they will be hidden. Often, a central knot or the overlapping base of the bow can conceal the top of a skewer. If a skewer needs to extend higher, you can cover it with a small piece of fondant or modeling chocolate before attaching the final bow elements.
External Support and Base Construction for Stability
Sometimes, the best way to ensure a fondant bow stands tall and proud is to build a solid foundation for it. External supports, often incorporated into the base of the bow or the cake itself, provide a stable platform from which the delicate decoration can rise without leaning.
For elaborate bows, consider creating a small base from modeling chocolate or a thicker piece of hardened fondant. This base can be decorated to look like part of the bow or a floral element. You can then attach the main structure of the bow to this base.
If the bow is to be placed on a cake, ensure the cake surface is firm or that the base of the bow can be securely anchored into the cake’s frosting.
- Modeling Chocolate Base: Roll out modeling chocolate to create a flat, circular or shaped base. Allow it to firm up slightly before attaching the bow.
- Hardened Fondant Disc: Cut a thick disc of fondant mixed with tylose. Let it dry completely until hard, then attach the bow to its surface.
- Integrated Cake Support: For very heavy bows, you might need to insert a dowel through the cake itself, upon which the bow’s central support can rest.
The goal of external support is to distribute the weight of the bow evenly and provide a secure point of contact. For instance, a bow designed to stand upright at the side of a tiered cake might need a slightly flattened or angled base that can be firmly adhered to the side of the cake using royal icing or a strong edible glue.
Important: Always test the weight and balance of your finished bow with its supports before attaching it to the final cake.
Common Mistakes to Avoid When Making Standing Fondant Bows
Even with the best intentions, several common pitfalls can lead to a fondant bow that wilts or falls. Recognizing these mistakes beforehand can save you a lot of frustration and ensure your decorative efforts are successful.
One of the most frequent errors is using fondant that is too soft or too thick. Fondant that hasn’t had enough tylose powder or gum paste mixed in will struggle to hold its shape, especially in warmer temperatures. Conversely, making your fondant loops too thick can prevent them from drying evenly and thoroughly, leading to structural weakness from the inside out.
- Using Regular Fondant: Not adding tylose powder or gum paste, resulting in a bow that is too soft.
- Insufficient Drying Time: Assembling the bow before individual loops are firm, causing it to sag under its own weight.
- Working in High Humidity: Trying to dry fondant decorations in a humid environment where moisture prevents hardening.
- Over-Handling While Wet: Touching or manipulating the loops excessively while they are still pliable, distorting their shape.
- Too Much Edible Glue/Water: Using too much liquid to attach pieces, which softens the fondant.
- Ignoring Internal Support: For taller bows, neglecting to use skewers or dowels for internal reinforcement.
Another mistake is rushing the assembly process. Each component of the bow should be allowed to firm up individually before they are glued together. If you try to attach wet loops to each other, they will likely distort and lose their intended shape, compromising the final structure.
Warning: Do not place fondant bows in an airtight container for drying. This traps moisture and prevents the fondant from hardening properly.
Advanced Techniques for Intricate Fondant Bows
Beyond the basic loops, many advanced techniques can elevate your fondant bows while ensuring they remain structurally sound. These methods often involve more complex shaping or the strategic use of additional edible materials.
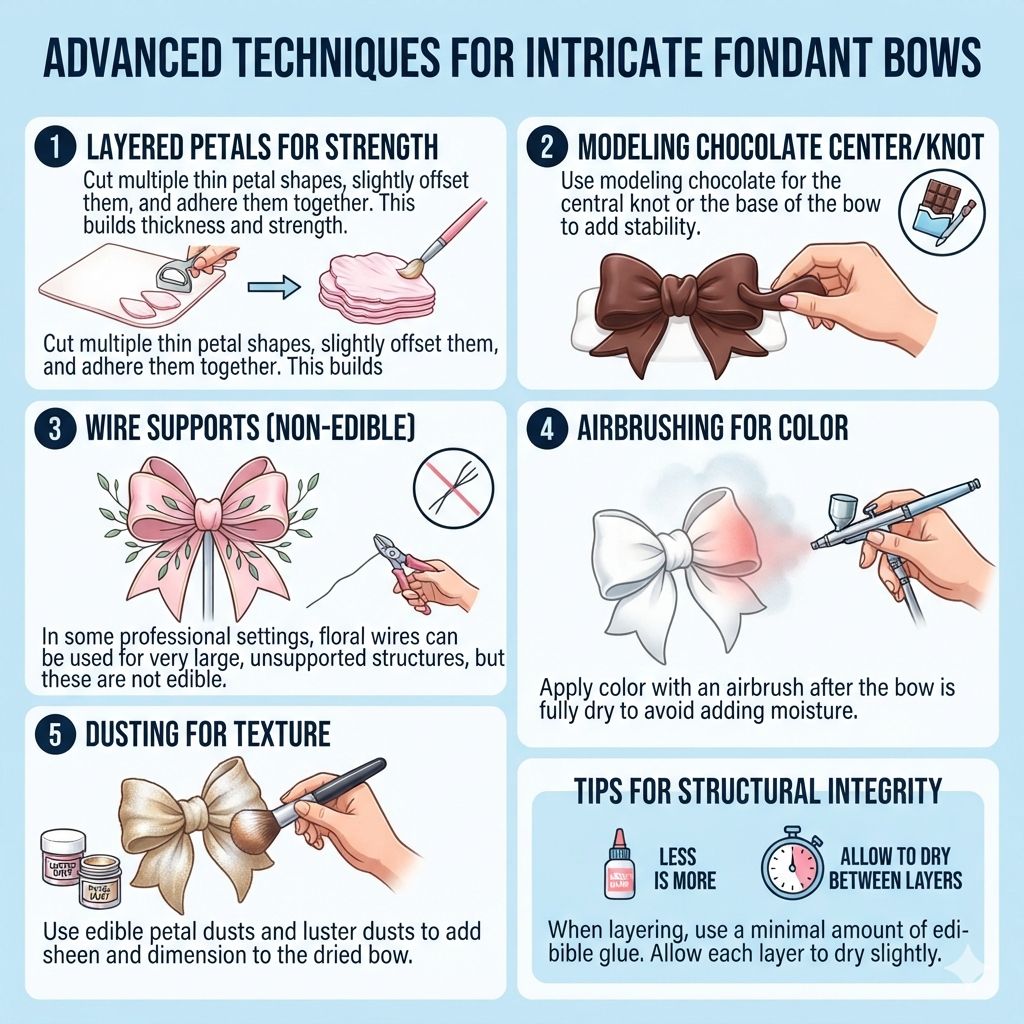
One such technique is layering. Instead of a single loop, you can create multiple thin layers of fondant that are glued together. This not only adds depth and visual interest but also creates a stronger, more rigid structure once dried.
Another method involves using modeling chocolate for certain parts of the bow. Modeling chocolate is inherently more stable and less prone to cracking than fondant, making it ideal for securing elements or creating a sturdy central knot.
- Layered Petals: Cut multiple thin petal shapes, slightly offset them, and adhere them together. This builds thickness and strength.
- Modeling Chocolate Center/Knot: Use modeling chocolate for the central knot or the base of the bow to add stability.
- Wire Supports (for non-edible, purely decorative elements): In some professional settings, floral wires can be used for very large, unsupported structures, but these are not edible.
- Airbrushing for Color: Apply color with an airbrush after the bow is fully dry to avoid adding moisture.
- Dusting for Texture: Use edible petal dusts and luster dusts to add sheen and dimension to the dried bow.
When layering, it’s essential to use a minimal amount of edible glue between each layer. Too much liquid will weaken the structure. Allow each layer to dry slightly before adding the next, if possible, to build up stability incrementally.
For truly gravity-defying designs, always consider a combination of internal and external supports.
Frequently Asked Questions
What is the difference between fondant and gum paste for bows?
Gum paste is naturally drier and sets harder and faster than fondant, making it ideal for delicate, standing decorations like bows. Fondant is softer and more pliable, usually requiring the addition of tylose powder or gum paste to achieve the necessary stiffness for a standing bow.
How long does a fondant bow typically take to dry?
Drying time varies greatly depending on the size of the bow, the thickness of the fondant, and environmental humidity. A small bow can take 12-24 hours to dry sufficiently, while larger, more complex bows with internal supports might require 48 hours or even longer to fully harden.
Can I make fondant bows ahead of time?
Yes, fondant bows can and should be made ahead of time. This allows ample drying and hardening time. Once fully dry and rigid, store them in a cool, dry place in a cardboard box to protect them from moisture and damage.
What should I do if my fondant bow starts to sag while drying?
If a bow begins to sag, it likely hasn’t dried enough or the fondant mixture was too soft. You can try to gently reposition it and reinforce it with additional supports if possible. If it’s a minor sag, a bit more drying time in a low-humidity environment might help.
For significant sagging, it might be necessary to remake the affected parts.
How do I attach a dried fondant bow to a cake?
Dried fondant bows are best attached to a cake using royal icing or a thick buttercream. For heavier bows, consider using a small amount of edible glue to attach the bow’s support structure to the cake board first, then securing the bow to the cake. Ensure the cake’s surface is stable for attachment.
Final Thoughts
Crafting a fondant bow that stands tall without faltering is a rewarding endeavor that significantly enhances cake artistry. By mastering the balance of fondant consistency, careful shaping, patient drying, and strategic support, you can create show-stopping edible decorations. Remember that practice makes perfect; each attempt will refine your technique for future fondant creations.