How to Make a Cello Bow Case: DIY Tutorial
Making a cello bow case yourself can be a rewarding project, offering a personalized and protective solution for your valuable instrument accessory. This tutorial will guide you through the process, ensuring your bow is safe and sound whether you’re traveling to a lesson, a performance, or just storing it. We’ll cover everything from selecting materials to the final assembly, making it accessible even for beginners.
Simply put, this DIY cello bow case tutorial provides step-by-step instructions using readily available materials to create a durable and custom-fitted case, protecting your cello bow from damage during transport and storage.
Key Takeaways
- DIY cello bow case construction involves careful material selection for durability and protection.
- Accurate measurements are crucial for a snug fit, safeguarding your cello bow.
- Key components include a sturdy outer shell, protective padding, and a secure closure mechanism.
- This project offers a cost-effective and personalized alternative to purchasing a commercial cello bow case.
- Proper construction ensures your cello bow remains safe from impacts and environmental factors.
What is a Cello Bow Case and Why You Need One
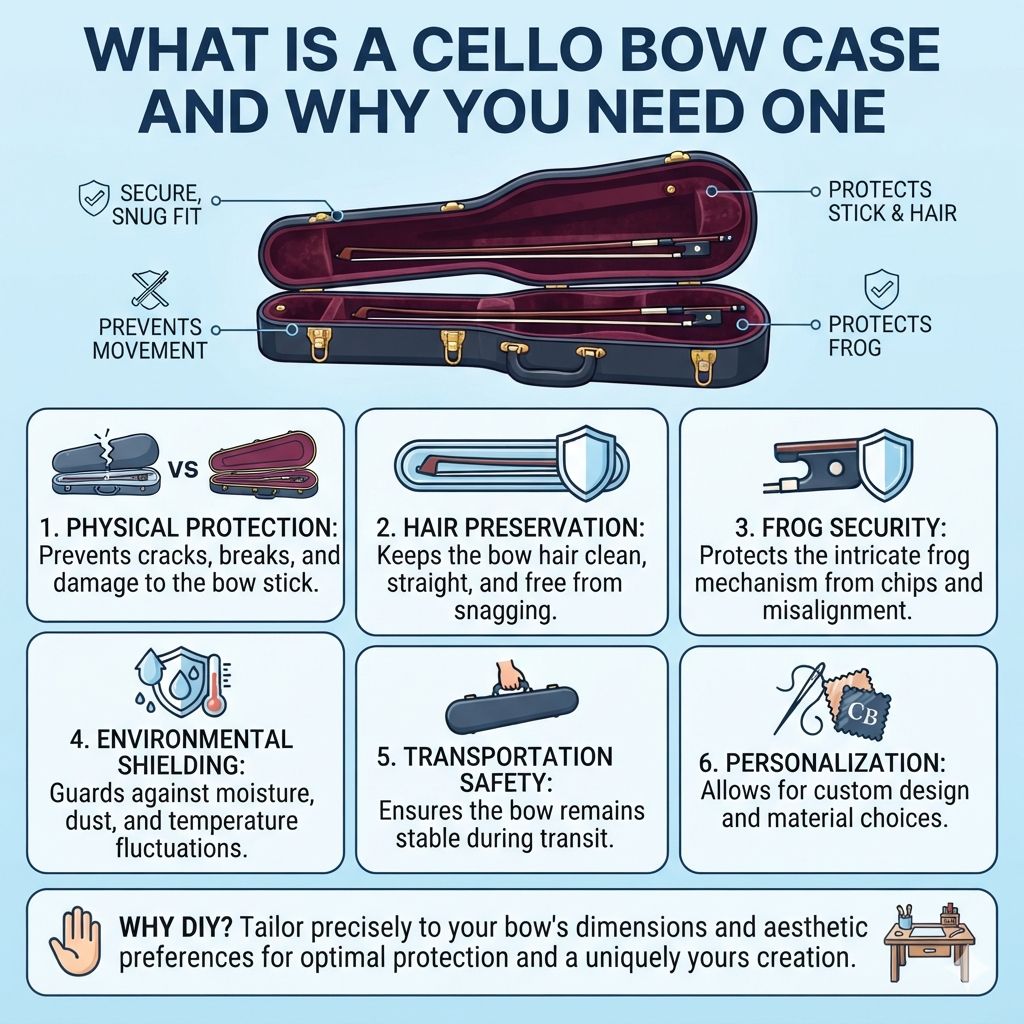
A cello bow case is specifically designed to house and protect a cello bow. Unlike a generic container, it offers a secure, snug fit that prevents movement, which is critical for maintaining the integrity of the bow’s stick, hair, and frog. These cases are essential for any cellist, from students to professionals, as a cello bow is a delicate and often expensive instrument accessory.
The primary function of a cello bow case is to shield the bow from physical damage. Impacts, drops, or even just rattling around in a larger instrument case can lead to a broken stick, damaged hair, or a compromised frog. Beyond physical protection, a good case also guards against environmental factors like extreme humidity or temperature changes, which can affect the bow’s performance and longevity.
Investing time in making your own cello bow case means you can tailor it precisely to your bow’s dimensions and your aesthetic preferences. It’s an opportunity to ensure optimal protection while creating something uniquely yours. This guide will break down the process into manageable steps.
- Physical Protection: Prevents cracks, breaks, and damage to the bow stick.
- Hair Preservation: Keeps the bow hair clean, straight, and free from snagging.
- Frog Security: Protects the intricate frog mechanism from chips and misalignment.
- Environmental Shielding: Guards against moisture, dust, and temperature fluctuations.
- Transportation Safety: Ensures the bow remains stable during transit.
- Personalization: Allows for custom design and material choices.
Materials Needed for Your DIY Cello Bow Case
Gathering the right materials is the first step toward successfully creating your cello bow case. The goal is to find items that offer both structural integrity and sufficient cushioning. Think about durability, weight, and ease of working with each material.
For the outer shell, you’ll want something rigid enough to withstand bumps. Options like thin plywood, sturdy cardboard, or even a pre-made hard case that you can modify can work well. The interior padding is crucial for absorbing shock, so consider high-density foam, felt, or even thick fleece.
For lining, a soft fabric like velvet or satin will prevent scratches and add a touch of luxury.
Finally, you’ll need a reliable closure system. Zippers, Velcro straps, or sturdy clasps are common choices. Don’t forget essential tools like a strong adhesive, scissors or a craft knife, a measuring tape, and possibly some decorative elements to personalize your case.
- Outer Shell Material: 1/8 inch plywood, heavy-duty cardboard, or a modified hard case shell.
- Interior Padding: High-density foam (e.g., EVA foam), thick felt, or multiple layers of fleece.
- Lining Fabric: Soft velvet, satin, or a dense cotton fabric.
- Adhesive: Strong fabric glue, E6000, or a hot glue gun (use with caution).
- Closure Mechanism: Heavy-duty zipper, strong Velcro strips, or metal clasps.
- Cutting Tools: Sharp scissors, craft knife, ruler, and a cutting mat.
- Measuring Tools: Measuring tape or a flexible ruler.
- Optional Decorative Elements: Fabric paint, decorative trim, or patches.
Step-by-Step Guide to Building Your Cello Bow Case
Let’s get started with the construction process. Accuracy and patience are your best friends here. We’ll begin by creating the main structure and then move to the finer details of padding and closure.
Step 1: Measure Your Cello Bow
This is perhaps the most critical step. You need precise measurements to ensure a perfect fit. Measure the total length of your cello bow, from the tip of the stick to the end of the frog.
Also, measure the widest part of the frog and the diameter of the stick.
Take multiple measurements at different points to account for any variations in the bow’s shape. Record these dimensions carefully. It’s also wise to add a small margin (about 1/4 to 1/2 inch) to the length and width to allow for the padding and lining without making the case too tight.
- Measure the total length of the bow from tip to frog.
- Measure the width of the frog at its widest point.
- Measure the diameter of the bow stick.
- Add a small tolerance (0.25 – 0.5 inches) to length and width for padding.
- Record all measurements precisely.
Step 2: Cut the Outer Shell
Based on your measurements, cut two identical pieces for the outer shell. If you’re using plywood, a jigsaw or a sturdy craft knife can be used. For heavy-duty cardboard, a sharp craft knife on a cutting mat is best.
Ensure the edges are as straight and clean as possible.
If you opt for a hinged design, you might want to cut one piece slightly shorter than the other to accommodate the hinge. For a two-piece design that zips together, the pieces should be the same size, with an overlap allowance for the zipper. Think about how the case will open and close when deciding on the dimensions.
- Cut two identical rectangular pieces for the main body of the case.
- Ensure dimensions account for bow length plus padding allowance.
- If using plywood, sand the edges smooth after cutting.
- If using cardboard, reinforce edges with tape for added durability.
- Consider adding a slight curve to the ends if your bow has a curved shape.
Step 3: Prepare the Interior Padding and Lining
Now, it’s time to prepare the protective interior. Cut foam or felt to fit snugly inside each of the two outer shell pieces. The padding should be thick enough to cushion the bow effectively, typically at least 1/2 inch thick.
You might need to layer thinner pieces to achieve the desired thickness.
Once the padding is cut, cover it with your chosen lining fabric. Cut the fabric larger than the padding so you can wrap the edges around and secure them to the back of the padding or the outer shell. Use fabric glue or a hot glue gun to attach the fabric, ensuring it’s smooth and free of wrinkles.
Pay attention to corners to make them neat.
| Padding & Lining Preparation | Tips |
|---|---|
| Cut foam/felt to match inner dimensions of the shell pieces. | Ensure padding is uniform in thickness for even support. |
| Cut lining fabric about 1-2 inches larger than padding on all sides. | Smooth out fabric carefully to avoid bulges or creases. |
| Wrap fabric edges around padding and secure with glue. | Neatly fold corners for a professional finish. |
Applying the fabric smoothly is key to a professional look and feel for your finished cello bow case.
Step 4: Create a Bow Slot or Holder
To prevent the bow from shifting inside the case, creating a dedicated slot or holder is highly recommended. This can be achieved by shaping the padding. For a slot, cut a groove into the foam that matches the diameter and length of your bow stick.
Alternatively, you can create a simple fabric holder. Cut a strip of fabric, fold it in half lengthwise, and sew along the raw edges to create a tube. This tube can then be glued onto the padded interior where the bow stick will rest.
Ensure it’s snug enough to keep the bow secure but not so tight that it’s difficult to insert or remove.
- Shaped Slot Method:
- Carve a groove into the foam padding that matches your bow stick’s diameter.
- Ensure the groove runs most of the length of the stick.
- Test fit the bow to ensure it sits securely.
- Fabric Tube Holder Method:
- Cut a fabric strip (length of bow + hem allowance, width double bow diameter + hem allowance).
- Fold in half lengthwise, right sides together, and sew along the long edge.
- Turn tube right side out and attach to padded interior with glue.
- Position so the bow is held snugly.
Step 5: Assemble the Case Halves
Now, attach the padded and lined interior pieces to their corresponding outer shell pieces. Apply a generous amount of strong adhesive to the inside of the outer shell pieces, avoiding the edges where the closure will be attached. Carefully press the padded interior into place, ensuring it’s centered and smooth.
Allow adequate drying time according to the adhesive manufacturer’s instructions.
If you are using a zipper, you’ll need to attach it along the edges of the two halves before or during the final assembly. For clasps or Velcro, you’ll attach them to the exterior of the case once the halves are joined. Ensure the placement of these closures allows for easy access and a secure seal.
| Assembly Steps | Considerations |
|---|---|
| Apply adhesive to the inside of outer shell pieces. | Use an adhesive suitable for your materials (wood/cardboard to fabric/foam). |
| Carefully position and press the padded interior into the shell. | Ensure no wrinkles or gaps between padding and shell. |
| Allow ample drying time for the adhesive to cure fully. | Avoid stressing the glued areas until fully dry. |
The bond between the shell and the padding needs to be robust for long-term durability of your cello bow case.
Step 6: Attach the Closure Mechanism
This step secures your cello bow inside the case. If using a zipper, carefully stitch or glue it along the seam where the two halves meet. Ensure the zipper runs smoothly and has a pull tab for easy opening and closing.
For Velcro, attach one side to the edge of one case half and the other side to the corresponding edge of the other half. Make sure the Velcro strips are long enough to create a strong bond when pressed together. Clasps can be screwed or riveted onto the exterior edges, providing a more traditional and robust closure for your DIY cello bow case.
- Zipper Attachment:
- Align the zipper teeth with the edges of the case halves.
- Stitch or glue the zipper tape securely to the exterior.
- Ensure the zipper can be opened and closed without snagging.
- Velcro Attachment:
- Cut Velcro strips to desired length.
- Attach one set of strips to the closing edges of both halves.
- Ensure strong adhesion for a secure closure.
- Clasp Attachment:
- Position clasps on the exterior edges for optimal alignment.
- Secure with screws or rivets, ensuring they are firmly attached.
- Test the clasp mechanism for ease of use and security.
A well-attached closure system is vital for the security of your cello bow within its case.
Alternative Design: The Hinged Cello Bow Case
Instead of a two-piece design that zips or clasps together, you can opt for a hinged cello bow case. This design functions more like a traditional violin or viola case, with a lid that opens from one side.
To create a hinged case, you’ll typically use one slightly larger piece of material for the base and a slightly smaller piece for the lid. A sturdy hinge (metal or strong fabric) will connect the two pieces along one edge. The interior padding and lining would be applied similarly, but you’d need to ensure the lid piece has sufficient padding to protect the bow when closed.
| Hinged Case Elements | Details |
|---|---|
| Base Piece | Slightly larger than lid, forms the main compartment. |
| Lid Piece | Slightly smaller, covers the bow when closed. |
| Hinge | Metal piano hinge or durable fabric hinge for flexibility. |
| Closure | Typically a clasp or latch on the opposite side of the hinge. |
A hinged design can offer a classic look and easy access, making it a popular choice for many instrument cases.
Customization and Personalization
The beauty of a DIY project is the ability to customize it. Once the basic structure is complete, you can add personal touches to make your cello bow case unique. Consider the lining fabric – a bright pattern or a luxurious material can elevate the case’s aesthetic.
The exterior offers another canvas for creativity. You could paint your name or initials, add decorative trim along the edges, or even attach patches that reflect your musical journey. If using plywood, wood stains or varnish can provide a beautiful, finished look.
For cardboard, fabric paint or decoupage techniques can be used.
- Interior Fabric Choices: Velvet, satin, patterned cotton, fleece.
- Exterior Decoration Options:
- Fabric paint or acrylic paints.
- Decorative trim (e.g., braid, ribbon).
- Appliqué patches or embroidery.
- Wood stain or varnish for plywood cases.
- Decoupage with paper or fabric.
- Personalization Details: Initials, musical symbols, or custom designs.
Personalization not only makes your cello bow case visually appealing but also helps in easily identifying your belongings.
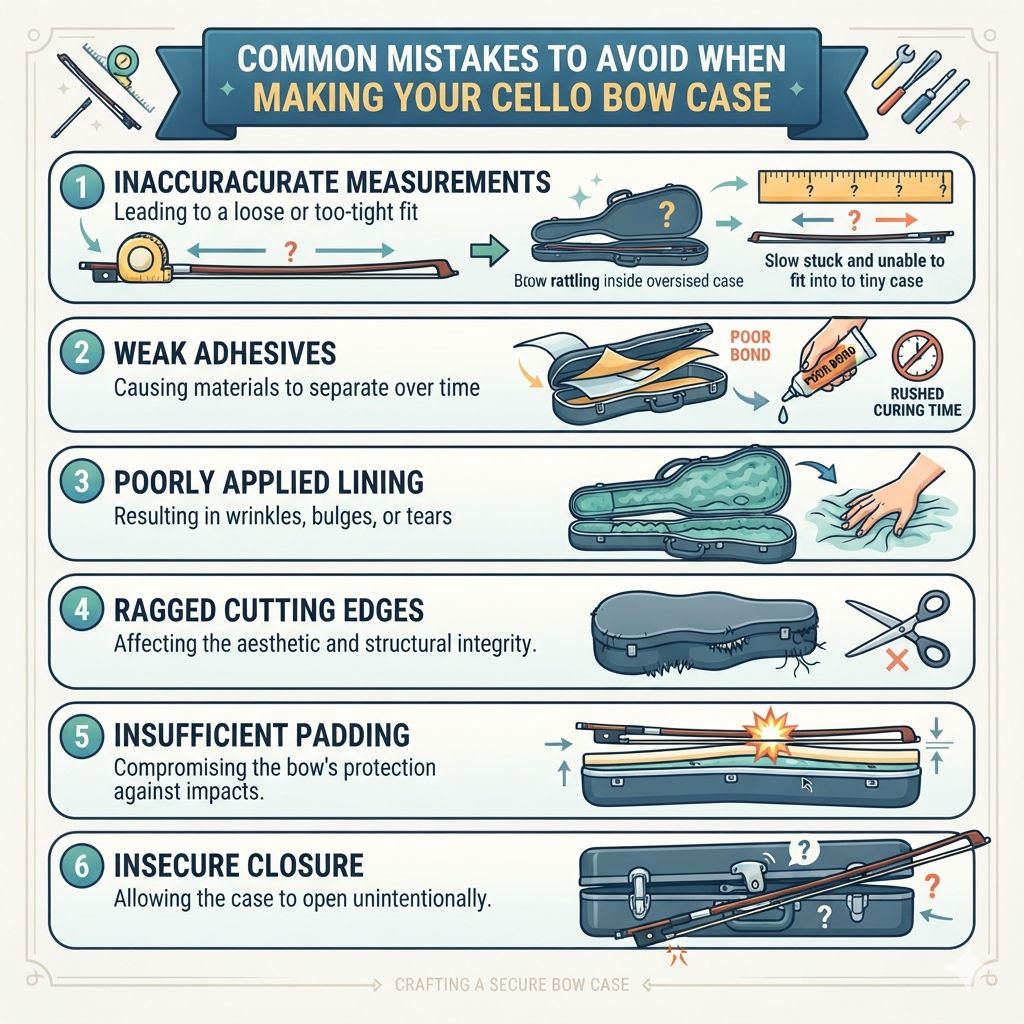
Common Mistakes to Avoid When Making Your Cello Bow Case
Even with careful planning, certain pitfalls can arise. One common mistake is not measuring accurately. This can lead to a case that’s too big, allowing the bow to move around, or too small, making it difficult or impossible to fit the bow.
Another frequent error is using inadequate adhesive. A weak bond between the shell and the padding, or between the lining fabric and the padding, will result in a case that quickly deteriorates. Ensure you use a strong, fabric-compatible adhesive and allow it to cure fully before handling the case extensively.
Also, be mindful of the sharpness of your cutting tools to avoid ragged edges on the outer shell.
Warning: Rushing the drying time of adhesives can lead to weak joints and a prematurely damaged cello bow case. Always wait the recommended curing time.
- Inaccurate Measurements: Leading to a loose or too-tight fit.
- Weak Adhesives: Causing materials to separate over time.
- Poorly Applied Lining: Resulting in wrinkles, bulges, or tears.
- Ragged Cutting Edges: Affecting the aesthetic and structural integrity.
- Insufficient Padding: Compromising the bow’s protection against impacts.
- Insecure Closure: Allowing the case to open unintentionally.
Frequently Asked Questions
What is the best material for the outer shell of a DIY cello bow case?
For durability and protection, thin plywood (around 1/8 inch) is an excellent choice for the outer shell. High-density, rigid cardboard can also work for a lighter-duty case. The key is a material that provides structure and can withstand some pressure without bending or breaking.
How thick should the padding be inside a cello bow case?
The padding should typically be at least 1/2 inch thick. For maximum protection against significant impacts, consider layering foam or using thicker high-density foam. It needs to be substantial enough to absorb shock effectively if the case is dropped or bumped.
Can I use a regular zipper for my cello bow case?
Yes, a heavy-duty zipper works well for many DIY cello bow cases. Ensure it’s long enough to run along the entire opening and that it operates smoothly. For added durability, look for zippers designed for upholstery or luggage.
What kind of fabric is best for lining a cello bow case?
A soft, dense fabric like velvet or satin is ideal for lining. These materials are gentle on the bow hair and stick, preventing scratches and providing a smooth surface. A tightly woven cotton can also be a good alternative if velvet or satin is not readily available.
How do I ensure my bow doesn’t rattle inside the case?
To prevent rattling, the bow needs to fit snugly. This is achieved through accurate measurements and sufficient padding. Creating a dedicated slot or a fabric holder that cradles the bow stick is the most effective way to keep it stationary and secure within the case.
Final Thoughts
Crafting your own cello bow case is a practical and fulfilling endeavor. By following these steps and paying attention to detail, you can create a protective and personalized case that safeguards your valuable cello bow. Enjoy the process and the satisfaction of using something you made yourself.