How to Make a Simple Self Bow: Step-by-Step Beginner’s Guide
Making your own self bow is a rewarding experience. You only need basic tools and a single piece of wood. Many people think building a bow is difficult, but a simple self bow is the perfect place to start. This type of bow has been used for thousands of years in many cultures. Today, it’s a favorite for traditional archers and anyone who enjoys working with their hands.
In this guide, you’ll learn exactly how to make a simple self bow, from choosing the right wood, to shaping and finishing, to stringing and shooting. Even if you’ve never worked with wood before, you can make a working bow with patience and care.
Plus, you’ll discover tips, common mistakes, and answers to questions you may not have thought to ask. Let’s get started and turn a single stick into a tool for fun, sport, or even survival.
What Is A Self Bow?
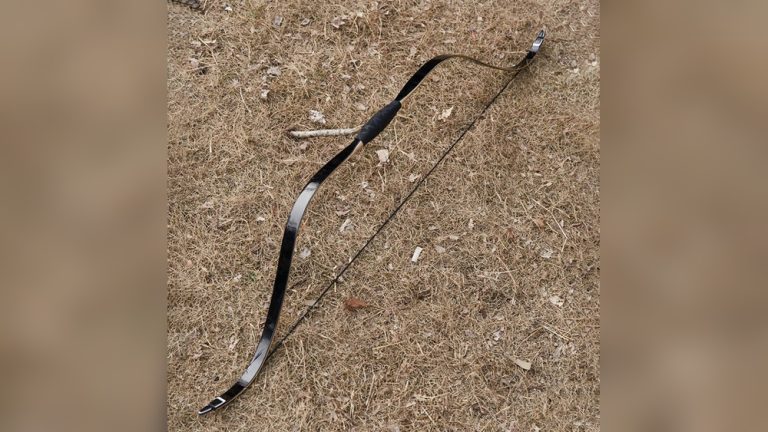
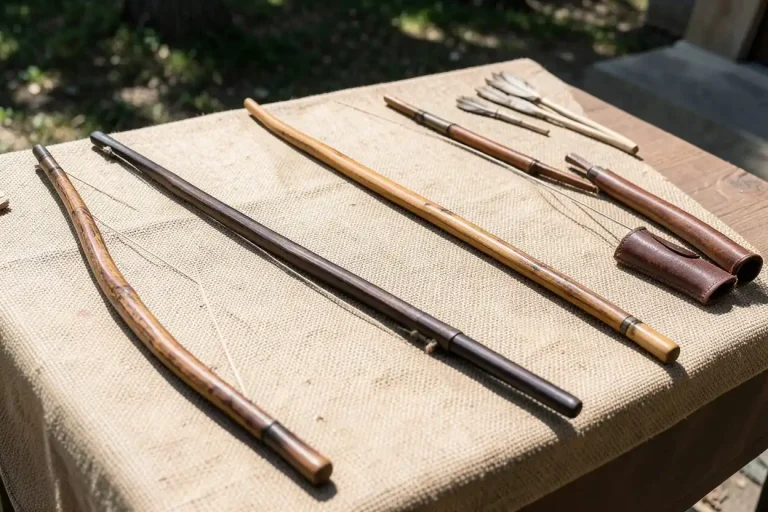
A self bow is a bow made from a single piece of wood. It does not use any extra materials like fiberglass, laminates, or extra reinforcement. Many famous traditional bows, such as the English longbow, are self bows. The design is simple, but effective. A well-made self bow can shoot arrows as well as many modern bows.
Self bows are usually between 5 and 6 feet long. They have a simple, elegant shape: wide in the middle, and tapering toward the ends. The grip may be only a slight bulge or even just the natural wood.
Key features of a self bow:
- Made from one solid piece of wood
- No backing or lamination
- Simple, traditional design
Why choose a self bow?
- Easy to build with basic tools
- Teaches essential bow-making skills
- Connects you with ancient traditions
Self bows are great for learning and for practical use. Many bushcrafters, survivalists, and hobbyists choose self bows because they are reliable and easy to repair.
Choosing The Right Wood
The most important part of making a bow is selecting the right piece of wood. Not all woods are suitable. The wood must be strong, flexible, and free of major knots or twists.
Best Types Of Wood For Self Bows
Here are some common types of wood used for self bows:
| Wood Type | Pros | Cons |
|---|---|---|
| Osage Orange | Very strong, high performance | Hard to find, expensive |
| Yew | Flexible, classic bow wood | Can be expensive, needs careful selection |
| Hickory | Widely available, tough, forgiving | Heavier, sometimes less efficient |
| Maple | Easy to find, good for beginners | Can be brittle if not selected well |
| Elm | Strong, flexible, resists breaking | Can twist as it dries |
If you’re just starting, hickory and maple are the easiest to find and work with. If you can get osage orange or yew, you’ll make a bow with more power and better efficiency.
What To Look For In A Bow Stave
A bow stave is the piece of wood you’ll turn into a bow. Here’s what to look for:
- Length: At least as tall as you (60, 72 inches is ideal).
- Straight grain: The lines in the wood should run straight from one end to the other.
- Few knots: Small knots are okay if they’re not in the working limbs.
- No major twists: The stave should not be corkscrewed or bent sharply.
- No cracks: Avoid wood with deep splits.
Pro Tip: In my experience, choosing a stave with even a slight bend can make tillering (shaping the bow) much harder. Start with the straightest piece you can find.
Seasoning And Preparing The Wood
Freshly cut wood (called “green” wood) has too much moisture. It must be dried or “seasoned” before use. This can take several months.
- Best: Let the stave dry indoors for 6, 12 months.
- Faster method: Seal the ends with glue or wax and let dry in a warm place for at least 2, 3 months.
Check the wood by weighing it once a week. When it stops losing weight, it’s ready.
Warning: Using wood that is too wet can cause the bow to warp or break.
Tools And Materials Needed
You don’t need many tools to make a simple self bow. Here’s what you need:
- Axe or hatchet: For rough shaping
- Drawknife or large knife: For shaving wood
- Rasp or file: For smoothing and fine shaping
- Sandpaper: For finishing
- Measuring tape or ruler
- Pencil or marker
- String: For making a bowstring (see later section)
- Clamps: For holding the stave while you work (optional)
- Knife: For cutting notches
- Wood glue: For sealing the ends of the stave (optional)
All these tools can be found at most hardware stores. If you only have a knife and sandpaper, you can still make a basic self bow, it will just take longer.
Shaping The Bow Stave
Now comes the hands-on part: turning your raw stave into a bow. This process is called “roughing out” and “tillering”.
Marking The Bow Shape
Lay your stave on a flat surface. Mark the following:
- Center: Mark the midpoint of the stave. This will be the grip.
- Limbs: Mark out the limbs, each should be about half the bow’s total length.
- Width: Mark the width at the grip (about 1.5, 2 inches wide), tapering to about 0.5 inch at the tips.
Pro Tip: Symmetry is important. Take your time marking both sides evenly.
Rough Shaping
Use your axe or drawknife to remove wood outside your lines. Work slowly and check your progress often.
- Remove bark: Peel off all bark and the outermost layer of wood (except for yew, where you keep the sapwood).
- Shape the belly: The belly is the side facing you when you shoot. This should be flat or slightly rounded.
- Leave the back: The back is the side facing the target. Do not cut into this layer, as it holds the bow together.
Example: If using hickory, you can safely remove the bark and outer wood. With yew, leave a thin layer of white sapwood on the back.
Tapering The Limbs
Each limb should taper from the grip to the tips. This makes the bow bend evenly.
- From the grip, gradually remove wood so the limbs are narrowest at the tips.
- Make both limbs as close to identical as possible.
Tillering: Getting The Perfect Bend
Tillering is the process of shaping the bow so it bends evenly when drawn. This is the most important and delicate part of making a self bow.
How To Tillering
- Start shallow: Leave the limbs thick at first. You can always remove more wood, but you cannot put it back.
- Check the bend: Use a tillering stick or hang the bow from a nail and gently pull the string a few inches.
- Remove wood slowly: Shave small amounts from any stiff spots (areas that don’t bend as much as the rest).
- Repeat: Pull, check, and shave again. Work both limbs equally.
Pro Tip: Beginners often remove too much wood from one spot. Always check the bend after each cut. If the bow is uneven, it may break.
Signs Of Good Tillering
- Both limbs bend smoothly and evenly
- The bend is strongest in the middle, tapering toward the tips
- No sudden angles or flat spots
If you see a flat spot (not bending), carefully remove wood from that area. If you see a sharp angle, you may have taken off too much.
Measuring Draw Weight
A bow’s draw weight is how much force is needed to pull the string back a certain distance (usually 28 inches for adults).
To measure:
- Hang a luggage scale or spring scale on the string
- Pull to 28 inches and note the weight
Most beginner self bows should be around 30, 40 pounds at 28 inches. Heavier bows are harder to shoot and can break more easily.
Cutting Nocks And Finishing The Bow
Once the bow bends evenly and reaches your desired draw weight, it’s time to finish.
Cutting String Nocks
Nocks are the small grooves at each tip that hold the bowstring. They must be smooth and even.
- Use a small round file or knife
- Cut a shallow groove on each side of the tip, about 1/2 inch from the end
- Angle the nock slightly away from the back of the bow
Be careful not to cut too deep, or the tip may break.
Sanding And Smoothing
- Use coarse sandpaper (80, 100 grit) to remove tool marks
- Finish with fine sandpaper (220 grit) for a smooth surface
- Wipe with a damp cloth to remove dust
Sealing The Bow
To protect the wood from moisture:
- Wipe on boiled linseed oil, tung oil, or a commercial wood finish
- Let dry completely before use
This step helps prevent cracks and keeps the bow looking good.
Adding A Grip
Some self bows have no grip at all. If you want more comfort, wrap the center with leather, cord, or athletic tape.
Making The Bowstring
A bowstring must be strong, light, and just the right length. There are several ways to make one:
Materials For Bowstrings
- Dacron B-50: Most common synthetic string for beginners
- Linen, hemp, or flax: Traditional natural fibers
- Paracord: Can be used in an emergency, but stretches more
For a bow about 6 feet long, make a string about 4, 5 inches shorter than the bow.
How To Make A Simple Bowstring
- Cut strands: For Dacron, use 8, 12 strands, each about 6 inches longer than your bow.
- Twist or braid: Twist the strands together, or use a simple three-strand braid.
- Make loops: Tie a small loop at one end for the top nock. The other end can have a larger loop (called a “slip knot”) so you can adjust the string.
If you want a fast, easy string, you can buy a pre-made bowstring from an archery shop.
Stringing Your Bow
Stringing a self bow for the first time requires care. You don’t want to twist or damage the limbs.
Step-by-step Stringing
- Attach the top loop: Place the small loop in the upper nock.
- Slide the bottom loop: Slide the larger loop down the lower limb.
- Bend the bow: Using your leg or a bow stringer, gently flex the bow and slip the bottom loop into the lower nock.
Warning: Never “step through” the bow (putting your leg between the limbs) with a new bow. This can twist and break the limbs.
Checking The Brace Height
Brace height is the distance from the bowstring to the grip when strung. For self bows, 5, 7 inches is typical.
- Too low: The string may slap your wrist or the bow may not shoot well.
- Too high: The bow loses power.
Adjust by twisting the string (to shorten) or untwisting (to lengthen).
Shooting And Adjusting Your Bow
Now the fun part, shooting your self bow! But start slow to avoid damage.
First Shots
- Use light arrows (25, 35 pounds draw weight)
- Draw slowly, only about halfway at first
- Listen for cracking sounds, stop immediately if you hear any
Pro Tip: Many new bows break the first time because the wood was too dry, too wet, or tillered unevenly. Go slow and check your bow after each shot.
Adjusting And Maintaining
- If the limbs bend unevenly, you can carefully sand or shave a little more wood from stiff spots.
- Oil the bow every few months to keep the wood flexible.
- Store in a cool, dry place, never leave in a hot car or direct sunlight.
Common Mistakes And How To Avoid Them
New bowyers often make the same mistakes. Here’s how to avoid them:
- Removing too much wood: Always remove less than you think. You can take off more, but can’t put it back.
- Poor wood selection: A twisted or knotty stave is much harder to work with and less likely to succeed.
- Cutting into the back: The back of the bow (facing away from you) must stay unbroken. Cutting or nicking it weakens the bow.
- Not checking the bend: Skipping tillering steps leads to uneven bending and likely breakage.
- Using a wet stave: If the wood is not fully dried, it may warp or crack when it dries out later.
Example: When I first started, I rushed the tillering and ended up with one limb much weaker than the other. The bow shot poorly and eventually broke. Taking your time makes a huge difference.

Credit: sensiblesurvival.org
Cost Comparison: Self Bow Vs. Modern Bows
Building your own self bow can save money and give you a unique tool. Here’s how the costs compare:
| Bow Type | Average Cost | Durability | Skill Required |
|---|---|---|---|
| Self Bow (DIY) | $10, $50 | Moderate (depends on wood and care) | Beginner, Intermediate |
| Modern Recurve Bow | $100, $400 | High | Beginner |
| Compound Bow | $250, $1000+ | Very High | Beginner |