How to Braid a Paracord Bow Sling Easily
Braiding a paracord bow sling is a rewarding DIY project that can enhance your archery experience by providing a secure and comfortable grip. This guide will walk you through the essential steps, from selecting the right materials to mastering a common braiding technique, ensuring you can create a functional and stylish sling for your bow. Understanding the basics of paracord manipulation and following a structured approach will lead to a durable and reliable accessory.
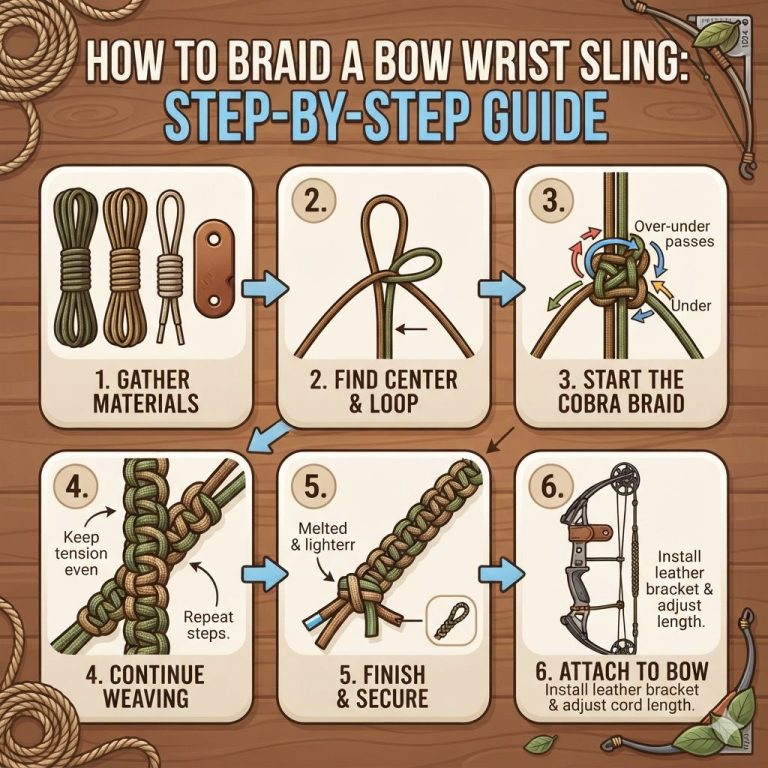
For another bow accessory project, How to Braid a Bow Wrist Sling gives readers a useful follow-up.
Simply put, braiding a paracord bow sling involves preparing your cord, selecting a braiding pattern like the cobra weave, and methodically knotting the paracord to form a strong, adjustable loop attached to your bow. It’s a practical skill for archers seeking personalized gear.
Key Takeaways
- Braiding a paracord bow sling starts with gathering quality materials and tools.
- The Cobra weave is a popular and effective method for creating a durable bow sling.
- Properly preparing and measuring your paracord is crucial for success.
- Attention to detail during the braiding process ensures a secure and functional sling.
- A well-made paracord bow sling offers both utility and a personalized touch to your archery equipment.
What You Need to Create Your Paracord Bow Sling
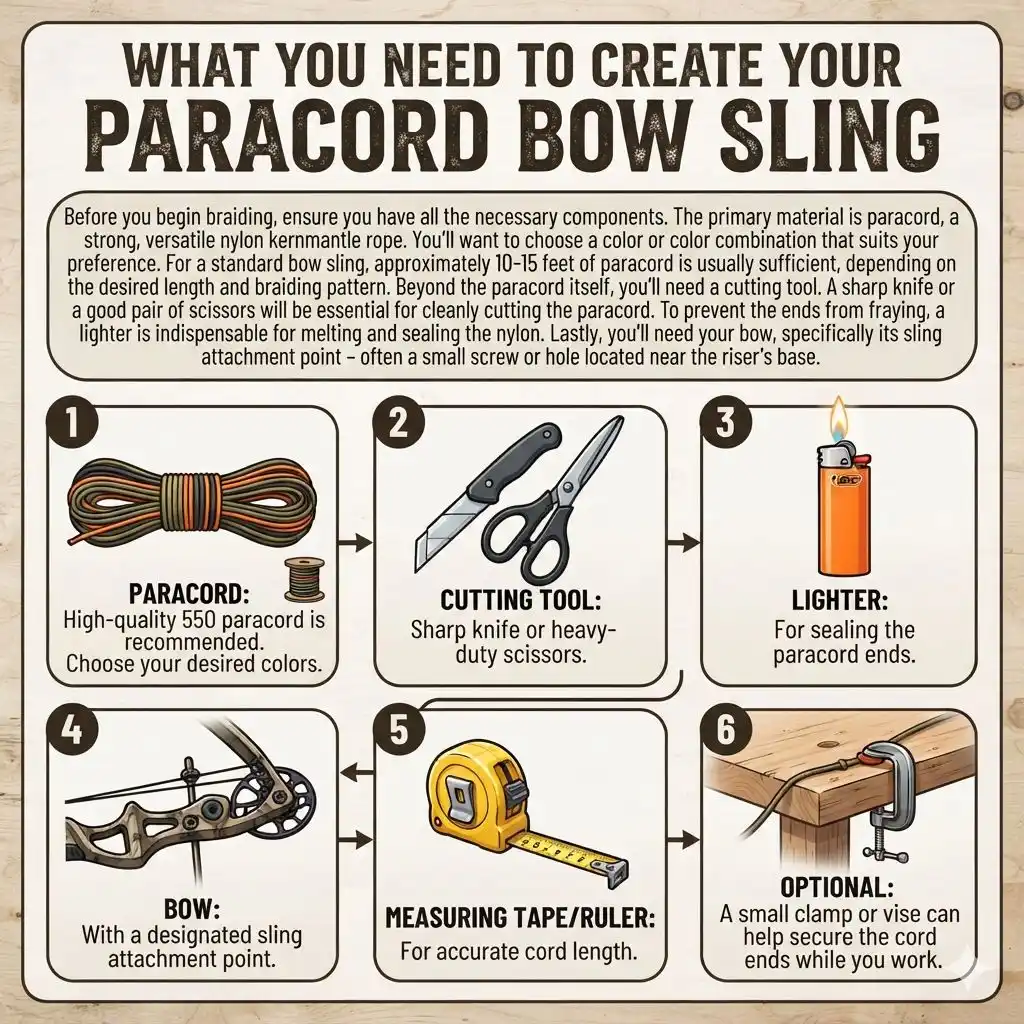
Before you begin braiding, ensure you have all the necessary components. The primary material is paracord, a strong, versatile nylon kernmantle rope. You’ll want to choose a color or color combination that suits your preference.
For a standard bow sling, approximately 10-15 feet of paracord is usually sufficient, depending on the desired length and braiding pattern.
Beyond the paracord itself, you’ll need a cutting tool. A sharp knife or a good pair of scissors will be essential for cleanly cutting the paracord. To prevent the ends from fraying, a lighter is indispensable for melting and sealing the nylon.
Lastly, you’ll need your bow, specifically its sling attachment point – often a small screw or hole located near the riser’s base.
- Paracord: High-quality 550 paracord is recommended. Choose your desired colors.
- Cutting Tool: Sharp knife or heavy-duty scissors.
- Lighter: For sealing the paracord ends.
- Bow: With a designated sling attachment point.
- Measuring Tape/Ruler: For accurate cord length.
- Optional: A small clamp or vise can help secure the cord ends while you work.
Preparing Your Paracord for Braiding
The first critical step in braiding a paracord bow sling is preparing your paracord. Measure and cut two lengths of paracord. A common starting point for a medium-length sling is about 5-7 feet for each cord.
It’s always better to have a little extra cord than not enough, as you can always trim excess later. These two cords will form the core of your sling’s structure.
Once cut, you need to prepare the ends. For each piece of paracord, carefully use your lighter to melt the very end. Press the melted end flat with the side of the lighter or a metallic object to create a clean, sealed tip that won’t fray.
Repeat this process for all four ends of your two paracord lengths. Ensure the melt is thorough but doesn’t burn the cord to the point of weakness.
Next, find the exact center of each of your paracord lengths. This is where your main braiding will begin. You can fold each cord in half and mark the center, or simply hold them at their midpoint.
These center points will eventually attach to your bow.
- Measure and cut two equal lengths of paracord (e.g., 5-7 feet each).
- Use a lighter to carefully melt and seal one end of each paracord.
- Melt and seal the second end of each paracord.
- Fold each paracord in half to find and mark its center point.
- Keep the two cords organized; you’ll often work with them side-by-side.
Mastering the Cobra Weave for Your Bow Sling
The Cobra weave, also known as the ‘King Cobra’ or ‘solomon bar’ weave, is a highly popular and robust method for creating paracord accessories, including bow slings. It produces a tight, attractive, and very strong braid. You will be using two main strands for the core and two working strands to create the knots.
To start the Cobra weave, lay your two prepared paracord lengths side-by-side, finding their center point. This center point will loop around your bow’s attachment point. For now, hold these two core strands together.
Take one of your other paracord lengths (this will be your working cord) and lay it over the two core strands. Fold the other working cord under the two core strands. You should now have your two core strands held together, with two working strands forming a loop around them.
The Cobra weave involves making two half-hitches, alternating sides. First, take the working cord that is on the left and bring it over the top of the two core strands. Then, take the working cord on the right and bring it up through the loop created by the left cord and under the two core strands.
Pull both working cords tight to form the first knot. Now, reverse the process: take the right working cord, bring it over the top of the core strands. Take the left working cord, bring it up through the loop created by the right cord and under the core strands.
Pull tight again.
- Core Strands: The two main paracords that will form the loop.
- Working Strands: Additional paracords used to tie the knots.
- Starting Point: Use the center of the core strands.
- First Knot: Left cord over core, right cord through loop and under core.
- Second Knot: Right cord over core, left cord through loop and under core.
- Alternating Knots: Repeat this sequence to build the weave.
Building the Sling Body: Step-by-Step Cobra Weave
Now, let’s get into the detailed process of actually braiding your bow sling. Remember, consistency is key for a neat and strong weave. You’ll be working with two core cords and two working cords.
The core cords will form the main loop that attaches to your bow, and the working cords will be braided around them.
Begin by folding your two core paracords in half. This creates a loop at one end, which will be the part that goes around your bow’s attachment point. You’ll attach your working paracords to this looped section.
Secure the looped end of your core cords with a clamp or by tying a temporary knot to keep them together. Now, take your two working cords. Lay one working cord over the top of the paired core cords, starting from the left.
Lay the second working cord under the paired core cords, starting from the right. You should have a shape where the working cords cross over the core cords.
To form the first ‘knot’ of the Cobra weave, take the left working cord and bring it over the top of the core cords and then pass it underneath the core cords and up through the loop created on the right side. Pull this working cord snug. Next, take the right working cord and bring it over the top of the core cords and then pass it underneath the core cords and up through the loop created on the left side.
Pull this working cord snug. You have now completed one full cycle of the Cobra weave. This might feel a bit awkward at first, but with practice, it becomes intuitive.
- Secure the Core Loop: Fold your two core paracords in half and secure the loop formed.
- Position Working Cords: Lay one working cord over the core cords (left side), and the other under (right side).
- First Half-Hitch: Take the left working cord, pass it over the core, then under and up through the right loop. Pull snug.
- Second Half-Hitch: Take the right working cord, pass it over the core, then under and up through the left loop. Pull snug.
- Repeat and Alternate: Continue alternating the left and right working cords to create the Cobra weave pattern. Ensure each knot is pulled tightly and consistently.
- Continue Braiding: Keep braiding until the sling reaches your desired length, leaving enough cord at the end to finish.
Finishing Your Paracord Bow Sling
Once you’ve braided the paracord to your desired length, it’s time to finish the sling and make it ready for use. You’ll need to create a secure loop at the end opposite the initial loop that attaches to your bow. This is often done by passing the working cords back through the braid a short distance to anchor them, or by creating a simple knot.
A clean way to finish is to take the ends of your working cords and tuck them back into the braid for about an inch or two. Use a small tool, like a fid or a straightened paperclip, to help push the ends back into the woven section. Once tucked, carefully trim any excess cord that might stick out.
Then, use your lighter to carefully melt and seal these trimmed ends to prevent them from unraveling. This creates a very clean and professional-looking finish.
Before you attach it to your bow, inspect the entire length of the sling. Check for any loose knots, uneven tension, or frayed ends. Ensure the loop that attaches to your bow is strong and that the braided section is uniform.
The total length of the sling will depend on your preference, but typically it’s around 8-12 inches from the main attachment loop to the end where it secures.
- Trim excess working cord ends.
- Carefully melt and seal the trimmed ends with a lighter.
- Tuck the sealed ends back into the braid for added security.
- Inspect the entire sling for uniformity and strength.
- Ensure the attachment loop is secure and the braided section is tight.
- Trim the core cords to a suitable length and melt their ends if desired, or incorporate them into a final stopper knot.
Customization and Variations for Your Sling
While the Cobra weave is a fantastic starting point, there are numerous ways to customize your paracord bow sling. Color combinations are the most straightforward customization. You can use two contrasting colors for the core and working strands, or even incorporate multiple colors into the weave itself using more complex patterns.
This allows for a highly personalized aesthetic.
Beyond colors, you can alter the weave pattern. While the Cobra weave is robust, other paracord knots and weaves can be used, such as the Fishtail braid, which creates a wider, flatter sling, or even more intricate patterns if you’re experienced. Each weave offers a different look and feel.
Experimentation is part of the fun and allows you to tailor the sling to your specific needs and style.
The length of the sling is also a customizable factor. Some archers prefer a shorter, snugger sling, while others like a bit more slack. You can adjust the length of the core cords and the amount of braiding accordingly.
Additionally, you can incorporate other small paracord knots or decorative elements along the length of the sling for added flair. Remember to always prioritize strength and functionality over pure aesthetics; the sling must be reliable under tension.
| Customization Option | Description | Considerations |
|---|---|---|
| Color Combinations | Use multiple colors for core and working strands. | Enhances visual appeal; ensure colors complement each other. |
| Weave Patterns | Explore Fishtail, Diamond, or other complex weaves. | Alters texture and width; some weaves require more cord. |
| Sling Length | Adjust core cord length and braiding extent. | Affects how the bow hangs; aim for comfort and stability. |
| Added Knots/Beads | Incorporate decorative knots or beads at ends. | Adds aesthetic detail; ensure they don’t snag or add unnecessary weight. |
Choosing the right customization options can make your paracord bow sling uniquely yours.
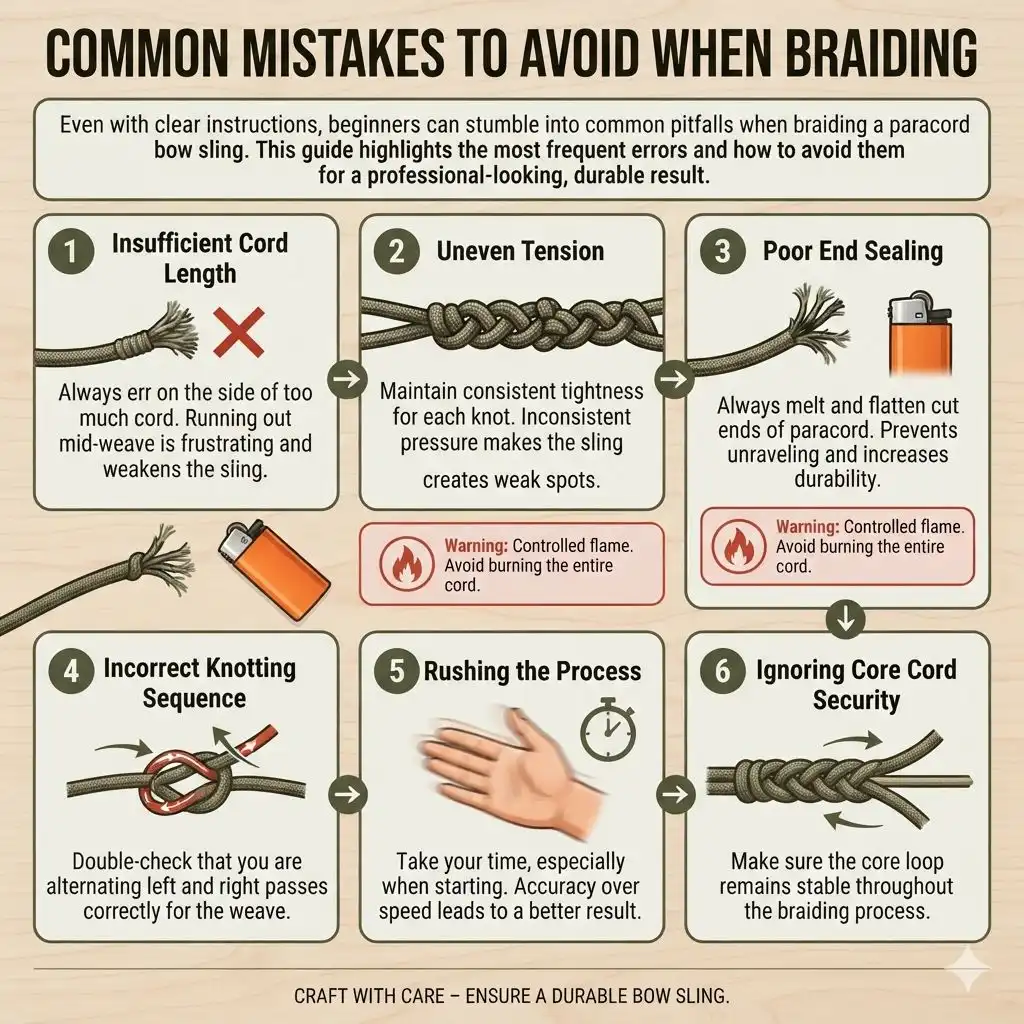
Common Mistakes to Avoid When Braiding
Even with clear instructions, beginners can stumble into common pitfalls when braiding a paracord bow sling. One of the most frequent mistakes is not using enough paracord. It’s always better to cut longer lengths than you think you’ll need.
Running out of cord mid-weave can be incredibly frustrating, and piecing together new cords rarely looks good or is as strong.
Another common error is inconsistent tension. When you pull your knots tight, you need to maintain a fairly uniform pressure. If some knots are very loose and others are pulled extremely tight, the sling will look uneven and may develop weak spots.
Try to develop a consistent rhythm for pulling your working cords snug with each step of the weave.
Failing to properly seal the ends of the paracord is also a mistake that can lead to premature wear. Nylon frays easily when cut. Always take the time to carefully melt and flatten the ends with a lighter.
This simple step significantly increases the durability and longevity of your bow sling, preventing it from unraveling over time.
Warning: Ensure your lighter use is controlled to avoid burning or melting the entire cord end, which weakens it. A light touch is best for sealing.
- Insufficient Cord Length: Always err on the side of too much cord.
- Uneven Tension: Maintain consistent tightness for each knot.
- Poor End Sealing: Always melt and flatten cut ends of paracord.
- Incorrect Knotting Sequence: Double-check that you are alternating left and right passes correctly for the weave.
- Rushing the Process: Take your time, especially when starting. Accuracy over speed leads to a better result.
- Ignoring Core Cord Security: Make sure the core loop remains stable throughout the braiding process.
Frequently Asked Questions
What is the best type of paracord for a bow sling?
For a bow sling, high-quality 550 paracord is generally recommended. This type of paracord has a minimum breaking strength of 550 pounds and typically consists of an inner sheath and multiple inner strands (cores). Its durability and strength make it ideal for the demands of archery.
How long should a paracord bow sling be?
The ideal length for a paracord bow sling can vary based on personal preference and the type of bow. Typically, a sling will be between 8 to 12 inches long from the attachment point to the end of the braid. It should be long enough to comfortably secure your bow without being excessively long and getting in the way.
Can I use a different braiding technique than the Cobra weave?
Yes, absolutely. While the Cobra weave is popular for its strength and appearance, other braiding techniques like the Fishtail braid or even simpler woven patterns can be used. The key is to choose a method that creates a strong, secure connection and is comfortable for you to hold or for the bow to rest on.
How do I attach the paracord sling to my bow?
Most bows have a dedicated sling attachment point, usually a small screw or threaded insert located on the riser near the base. You typically create a loop at the end of your paracord sling that threads through this attachment point and then secures back onto itself, forming a strong, reliable connection.
What if my paracord sling unravels?
If your paracord sling starts to unravel, it’s usually due to improperly sealed ends or a loose knot in the weave. Inspect the ends of the paracord first. If they are frayed, you’ll need to trim them cleanly, melt them with a lighter to seal them, and potentially tuck them back into the weave.
If the weave itself is loose, you might need to re-braid that section more tightly.
Final Thoughts
Braiding a paracord bow sling is an accessible and rewarding project for any archer looking to add a personal touch to their gear. By following these steps and paying attention to detail, you can create a durable, functional, and stylish sling. Remember that practice makes perfect, so don’t be discouraged if your first attempt isn’t flawless.
The satisfaction of using a hand-made accessory for your passion is well worth the effort.