How to Adjust a Scott Longhorn Hex Release Aid
Adjusting a Scott Longhorn Hex release aid is a crucial step for archers looking to fine-tune their equipment for optimal accuracy and consistency. This guide will walk you through the process, ensuring your release functions perfectly for your unique shooting style and bow setup. Proper adjustment can significantly impact your shot execution, reducing inconsistencies and improving your overall archery performance.
We’ll cover everything from basic tension settings to more advanced customizations, helping you unlock the full potential of your Scott Longhorn Hex.
Simply put, adjusting your Scott Longhorn Hex involves setting the trigger tension and ensuring smooth activation, using the provided Allen wrenches to turn the adjustment screws. Start with lighter tension, test fire, and gradually increase until you achieve a comfortable, consistent trigger break that aligns with your shooting preferences and allows for predictable shot release.
Key Takeaways
- Adjusting a Scott Longhorn Hex requires using the correct Allen wrenches to modify trigger tension and travel.
- Start with the lightest tension setting and progressively increase it during testing for a consistent trigger break.
- Proper adjustment ensures a predictable release, minimizing target panic and improving shot accuracy.
- Regular checks and fine-tuning are recommended as equipment and shooting conditions change.
- Familiarize yourself with all adjustment screws and their functions before making significant changes.
What is the Scott Longhorn Hex Release Aid?
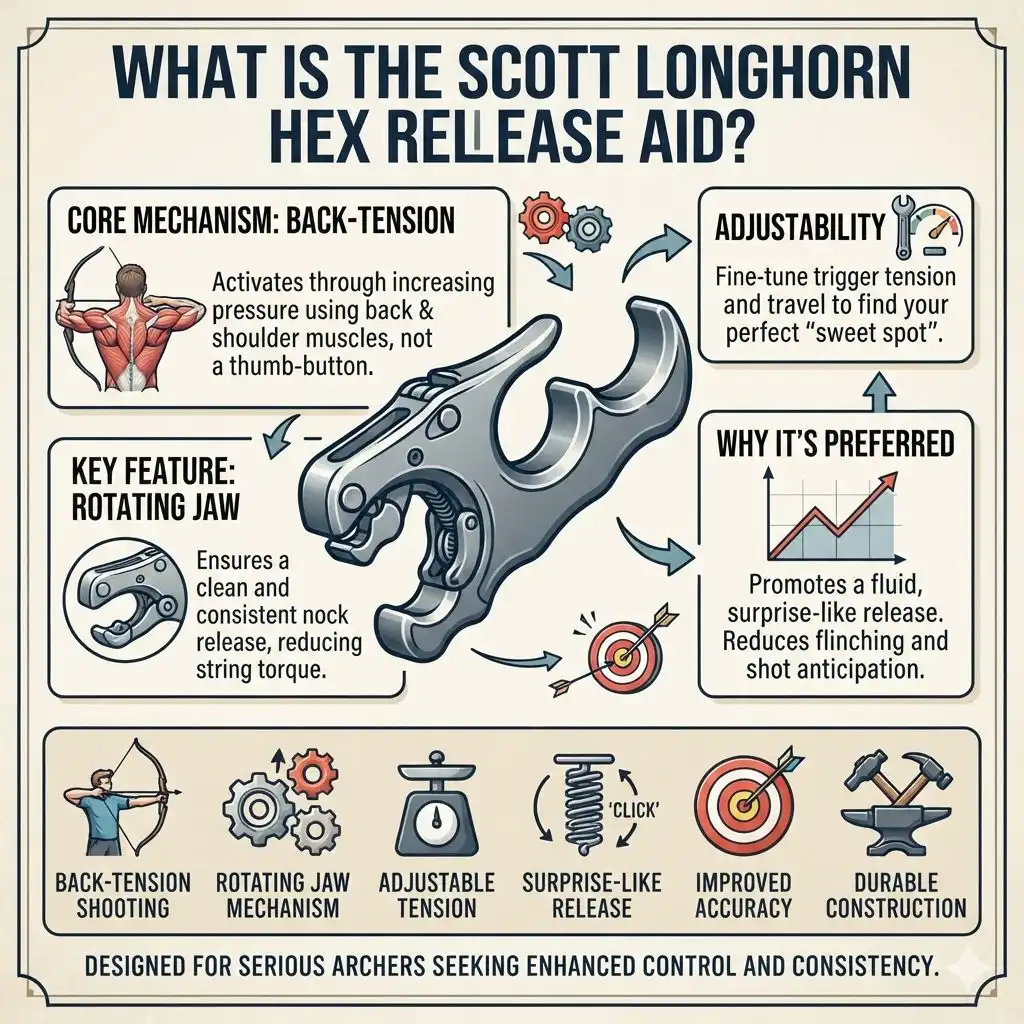
The Scott Longhorn Hex is a popular back-tension release aid designed for serious archers seeking enhanced control and consistency. Its core mechanism relies on a sear system that allows for fine-tuning the trigger sensitivity. Unlike thumb-button releases, back-tension models activate when the archer applies increasing pressure to the trigger mechanism, using the muscles in their back and shoulder.
This method is often preferred for its ability to promote a more fluid and surprise-like release, reducing the tendency for archers to anticipate the shot and flinch.
The Hex model specifically incorporates a rotating jaw design, which contributes to a cleaner and more consistent nock release. The adjustable nature of the trigger makes it highly adaptable to individual preferences. Whether you’re a seasoned competitor or a dedicated hunter, understanding how to properly adjust this release can be the difference between a good shot and a great one.
It’s engineered for durability and precision, making it a reliable tool for consistent performance on the range or in the field.
This release aid typically comes with a range of adjustment capabilities. The primary adjustments revolve around trigger tension and, on some models, trigger travel. The goal of adjustment is to find a sweet spot where the trigger is sensitive enough to engage with steady back tension but not so light that it fires accidentally.
Achieving this balance is key to developing a repeatable shot sequence, which is fundamental to archery success.
- Designed for back-tension archery shooting.
- Features a rotating jaw mechanism for a clean release.
- Allows for adjustable trigger tension and sometimes travel.
- Promotes a surprise-like shot execution through back tension engagement.
- Aims to improve accuracy and consistency for archers.
- Built with durable materials for long-term use.
Understanding the Adjustment Screws
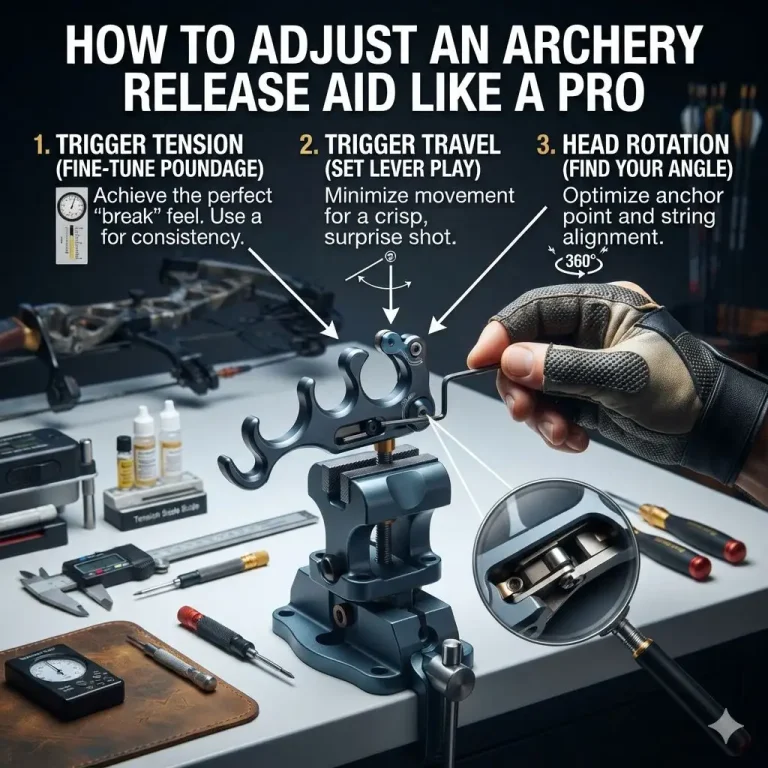
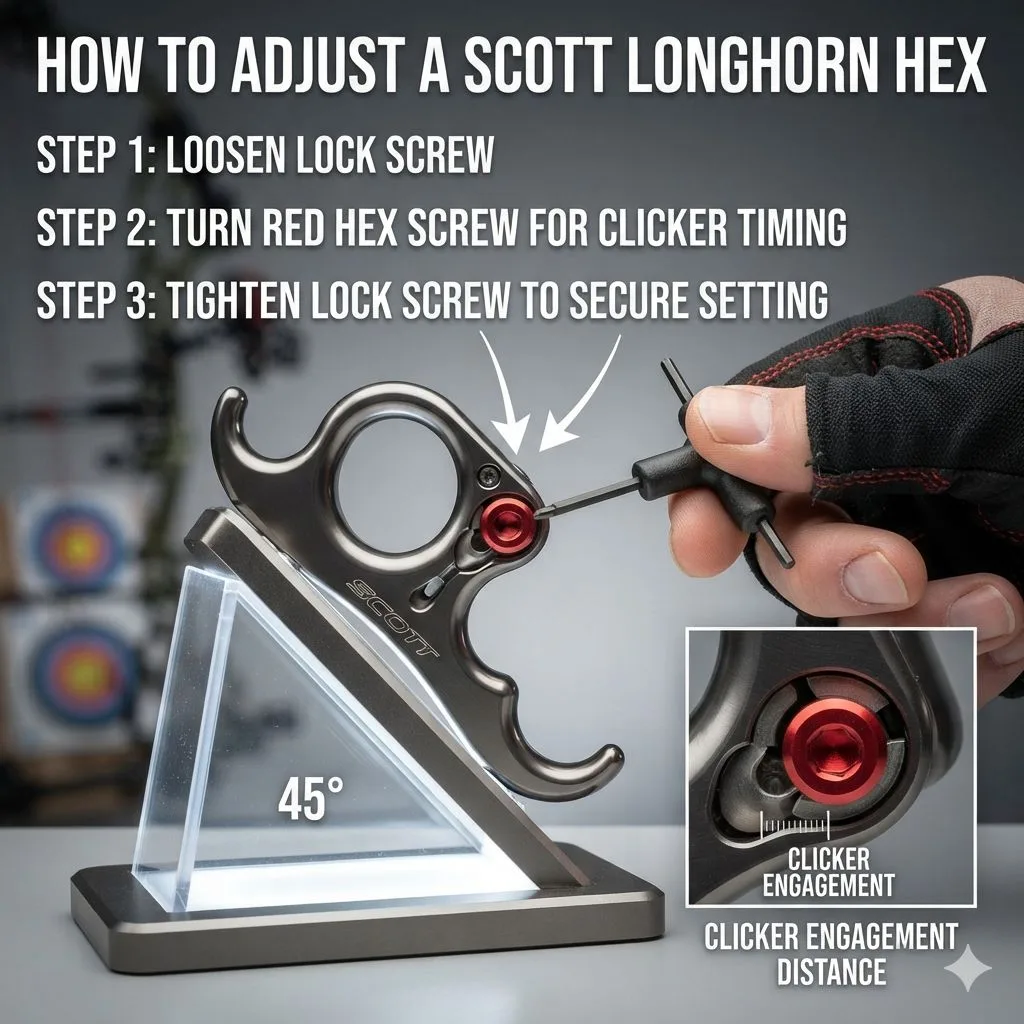
The Scott Longhorn Hex features several key adjustment points, but two are paramount for tailoring the trigger feel: the tension screw and the travel screw (though not all Hex models have an adjustable travel screw, the tension adjustment is universal). The tension screw dictates how much force is required to engage and fire the release. Turning this screw typically requires a small Allen wrench, often included with the release.
Clockwise rotation generally increases tension, while counter-clockwise rotation decreases it. It’s crucial to make small adjustments and test frequently to avoid over-tightening or loosening too much.
The travel screw, if present on your specific Hex model, adjusts the distance the trigger moves before the sear is released. Adjusting travel can influence the feel of the trigger break. Longer travel can give a more gradual engagement, while shorter travel provides a crisper, more immediate break.
However, shortening travel too much can lead to accidental discharges, so this adjustment requires extreme caution. Always refer to the manufacturer’s manual for the exact location and function of each screw on your particular model.
It’s vital to understand that these adjustments are interconnected. Changing the tension can subtly affect the perceived travel, and vice versa. Therefore, a systematic approach is best.
Most archers begin by setting their desired tension and then fine-tuning the travel if necessary. Remember that consistency is key; once you find a setting you like, note it down so you can replicate it if you ever need to disassemble or reassemble the release.
Tension Adjustment
The primary tension adjustment screw is usually located on the body of the release, often accessible through a small hole. This screw directly influences the force needed to activate the firing mechanism. When you begin, it’s recommended to back this screw out (counter-clockwise) to its loosest setting.
This ensures that you can safely test the release without accidental discharge.
From the loosest setting, you will incrementally tighten the screw (clockwise) in small increments, typically one quarter or half a turn at a time. After each adjustment, you should attach the release to your string loop, draw your bow to full draw (without actually shooting), and apply steady back tension. Feel how the trigger engages and how much pressure it takes to break.
The goal is to find a setting where the trigger fires crisply and predictably as you continue to apply back tension, without it feeling too heavy or too light and prone to accidental firing.
Travel Adjustment (If Applicable)
If your Scott Longhorn Hex has an adjustable travel screw, this offers another layer of customization. This screw typically controls the distance the trigger lever moves from its resting position to the point of firing. Some archers prefer a longer travel for a more progressive feel, while others like a shorter, crisper travel for a more immediate break.
If you choose to adjust travel, do so very cautiously.
Start with the travel screw set to a moderate position. As you test your tension, you can experiment with shortening or lengthening the travel. Shorter travel can make the release feel more sensitive once tension is achieved, while longer travel can provide a more deliberate engagement.
Be extremely careful not to shorten the travel to the point where the release can fire with minimal pressure or even by bumping the trigger.
Step-by-Step Adjustment Process
To properly adjust your Scott Longhorn Hex, follow these systematic steps. This process prioritizes safety and ensures you achieve a consistent, personalized trigger feel. It’s best to perform these adjustments in a safe environment where you can draw your bow without shooting or in a controlled manner where you can shoot the arrow safely.
- Initial Setup and Safety Check: Before making any adjustments, ensure the release is in good working order. Check that the jaw mechanism closes properly and that the trigger lever is functioning smoothly. For safety, it’s advisable to disconnect the release from your bow string loop when making initial adjustments, especially if you are significantly altering tension.
- Loosen the Tension Screw: Using the appropriate Allen wrench, turn the tension adjustment screw counter-clockwise until it is at its absolute loosest setting. This ensures you have a safe starting point and can gradually build up to your desired tension.
- Attach to Bow and Draw (Safely): Securely attach the release to your bowstring loop. Draw your bow to full draw, maintaining control and ensuring your safety. Do NOT shoot the bow at this stage if you are concerned about the current tension. Focus on the feel of the trigger mechanism as you apply steady back tension.
- Test for Trigger Engagement: As you hold at full draw with consistent back tension, gently try to engage the trigger. Feel for any engagement or “take-up” before the sear is about to release. If it’s too loose, it might feel like it could fire at any moment, which is unsafe.
- Gradually Increase Tension: Begin to turn the tension adjustment screw clockwise in small increments (e.g., a quarter turn). After each adjustment, draw your bow again and apply back tension to feel the change. Repeat this process until you reach a tension level that feels secure yet responsive to your back tension.
- Evaluate the Trigger Break: The ideal tension is one where the trigger breaks crisply and predictably as you continue to apply increasing back tension. You should feel a distinct release without a jarring sensation or having to consciously “pull” the trigger. The shot should feel like it “happens to you.”
- Adjust Travel (If Necessary): If your model has a travel adjustment screw, and you feel the trigger movement is too long or too short for your preference, make very small adjustments. Again, draw the bow and test the feel. Shortening travel should make the break feel more immediate after tension is achieved.
- Fire a Test Shot: Once you are satisfied with the feel, draw your bow, aim at a target, and execute a shot. Pay close attention to the release. Did it feel consistent? Was it a surprise break? Repeat this process, making minor adjustments as needed, until you achieve a satisfying and repeatable shot.
- Fine-Tuning and Practice: Fine-tuning may take several practice sessions. Shoot a variety of arrows, focusing on your form and the release. As you become more accustomed to the feel, you may want to make tiny adjustments to dial it in perfectly.
| Adjustment Point | Function | Adjustment Method | Impact on Feel |
|---|---|---|---|
| Tension Screw | Controls the force needed to fire the release. | Clockwise increases tension; Counter-clockwise decreases tension. | Heavier or lighter trigger pull. Affects when the sear releases under back tension. |
| Travel Screw (If applicable) | Adjusts the distance the trigger moves before firing. | Turning affects the length of the trigger’s movement. | Crisper or more gradual trigger break. Influences the engagement feel. |
This table outlines the primary adjustment points and their effects. Remember to make changes incrementally and test thoroughly.
Common Mistakes to Avoid
When adjusting your Scott Longhorn Hex, certain pitfalls can lead to frustration or, worse, unsafe shooting conditions. One of the most common mistakes is making drastic changes to the tension screw all at once. This can lead to settings that are too light, causing accidental discharges, or too heavy, making it difficult to achieve a consistent release.
Always start at the lowest setting and increase in small increments.
Another frequent error is not performing adequate testing. Simply adjusting the screw without drawing and feeling the trigger, or without firing shots, means you won’t truly know how the release behaves under shooting conditions. Each adjustment requires testing to confirm its effect.
Furthermore, forgetting to check the release’s condition before adjusting can lead to issues; a dirty or damaged mechanism might not respond predictably to adjustments.
Ignoring the travel adjustment (if applicable) or over-adjusting it is also a common problem. If travel is set too short, the release can become overly sensitive. Conversely, too much travel can make the trigger feel mushy.
Lastly, failing to practice with the new settings is a mistake. Muscle memory needs time to adapt to a new trigger feel, so patience and consistent practice are key to fully integrating the adjusted release into your shot routine.
Warning: Never adjust the tension screw to a point where the release fires with minimal pressure or by simply touching the trigger. Always test in a safe environment, and when in doubt, consult the manufacturer’s guide or a qualified archery professional. Over-loosening the tension screw can lead to accidental discharges.
- Making large, sudden adjustments to the tension screw.
- Failing to test the release after each minor adjustment.
- Not dry-firing the bow (if safe to do so) to feel the trigger break.
- Over-adjusting or ignoring the trigger travel (if applicable).
- Neglecting to practice with the new settings to build muscle memory.
- Not ensuring the release is clean and in good working order before adjusting.
Achieving the Perfect Trigger Break
The “perfect” trigger break is subjective and depends entirely on the archer. However, the principle behind achieving it with the Scott Longhorn Hex is universal: a surprise release that happens as a natural consequence of applied back tension. You shouldn’t have to consciously “pull” the trigger.
Instead, as you increase tension in your back muscles, the trigger should smoothly and crisply disengage.
To achieve this, start by setting the tension to a point where you can comfortably draw your bow and hold at full draw without the trigger firing prematurely. Then, as you focus on increasing back tension, the trigger should release. If you find yourself anticipating the break, the tension might still be too light, or you might be inadvertently “plucking” the trigger with your finger rather than letting the back tension do the work.
This is where practice with proper form is paramount.
For some, a slightly heavier tension provides a more secure feeling, preventing accidental firings. For others, a lighter, more sensitive trigger allows for a more fluid engagement. Experimentation is key.
The travel adjustment can also influence the break; a shorter travel often feels crisper, while a longer travel can feel more deliberate. The ultimate goal is consistency. When you can replicate the same clean, surprise break shot after shot, you’ve achieved your perfect trigger adjustment.
The Role of Back Tension
It’s impossible to discuss adjusting a back-tension release without emphasizing the role of proper back tension technique. The release aid is designed to work with your back muscles, not your finger alone. When you draw the bow, you should primarily use the muscles between your shoulder blades.
As you reach full draw, you continue to increase tension in these muscles.
This steady, increasing pressure eventually causes the sear in the release to disengage, firing the arrow. If you rely on finger pressure to “pull” the trigger, you’re defeating the purpose of a back-tension release. This often leads to target panic and inconsistent shots.
Therefore, when adjusting your Hex, practice drawing and holding, focusing solely on your back muscles. The trigger should break as a result of this consistent pressure, not from a deliberate finger movement.
Important: Understanding and practicing proper back tension is as crucial as the release aid’s adjustment. The two go hand-in-hand for achieving a surprise shot. If your release is firing consistently, but you feel you are pulling the trigger, focus on your form and back tension technique first.
Maintaining Your Release Aid
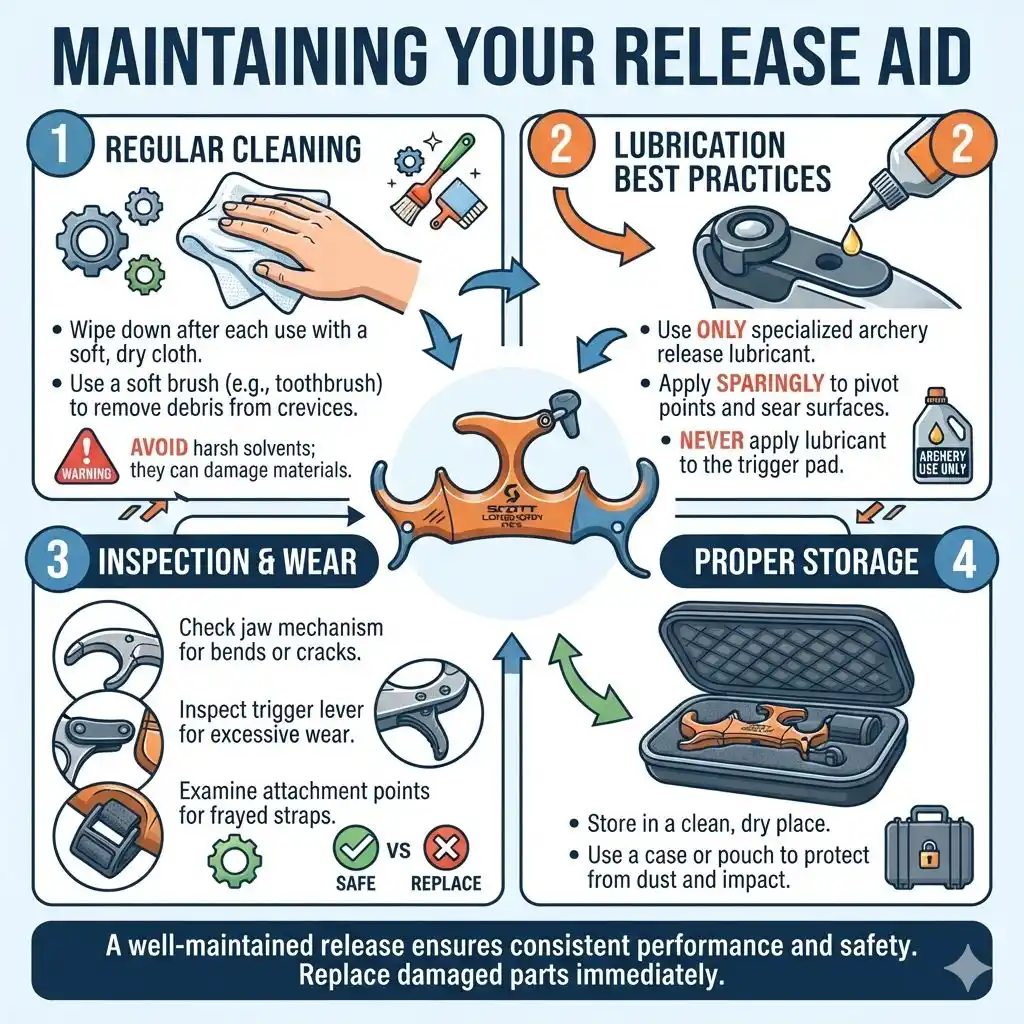
Regular maintenance ensures your Scott Longhorn Hex release aid continues to function optimally and safely. Keeping the release clean is fundamental. Dust, dirt, and debris can interfere with the sensitive sear mechanism, leading to inconsistent trigger performance.
After shooting, especially in dusty or damp conditions, wipe down the release with a clean, dry cloth.
Periodically, you may want to apply a very small amount of a specialized archery release lubricant to the moving parts. Be extremely cautious not to over-lubricate, as this can attract dirt and gum up the mechanism. A tiny drop on the sear surfaces or pivot points is usually sufficient.
Always use lubricants specifically designed for archery equipment; household lubricants can degrade plastic or rubber components.
Inspect the release for any signs of wear or damage regularly. Check the condition of the jaw mechanism, the trigger lever, and the attachment point for your wrist strap. If any parts appear bent, cracked, or excessively worn, it’s time to consider replacing them or the entire release.
A worn mechanism can compromise safety and accuracy.
Cleaning and Lubrication Tips
- Wipe down the release with a soft, dry cloth after each use.
- For deeper cleaning, use a soft brush (like a toothbrush) to gently remove debris from crevices.
- Avoid using solvents or harsh cleaning agents, as they can damage the materials.
- If lubricating, use a specialized archery release lubricant sparingly.
- Apply lubricant to pivot points and sear surfaces only, never to the trigger pad itself.
- Store your release in a clean, dry place, preferably in a case or pouch to protect it.
- Check for any frayed or damaged strings or straps.
Frequently Asked Questions
What are the main adjustment points on a Scott Longhorn Hex?
The primary adjustment points are the tension screw, which dictates the force needed to fire, and sometimes a travel screw, which alters the distance the trigger moves. Both are typically adjusted with small Allen wrenches.
How do I know if my Scott Longhorn Hex tension is set correctly?
Your tension is set correctly when you can comfortably draw your bow and hold at full draw with steady back tension, and the release fires crisply and predictably without you consciously pulling the trigger. It should feel like a surprise break.
Can I adjust the Scott Longhorn Hex without a bow?
While you can technically turn the adjustment screws without a bow, it is not recommended for testing the actual trigger feel. You need to feel how the mechanism engages under simulated drawing pressure to determine if the settings are appropriate and safe.
My Scott Longhorn Hex is firing too easily. What should I do?
If the release is firing too easily, it is likely set too light. You need to increase the tension by turning the tension adjustment screw clockwise in small increments until it feels secure yet responsive to back tension.
How often should I check and adjust my release aid?
It’s good practice to check your release aid’s settings periodically, especially if you notice any changes in its feel or performance. Significant environmental changes (like extreme temperatures) or after travel might warrant a quick check. Always reassess after making any repairs or modifications.
Final Thoughts
Mastering the adjustment of your Scott Longhorn Hex release aid is a journey toward greater archery precision. By understanding the function of each screw, following a systematic adjustment process, and avoiding common errors, you can achieve a personalized and consistent trigger feel. Remember that proper back tension technique is the crucial partner to a well-adjusted release, ensuring every shot is a clean, surprise break.
Regular maintenance and practice will solidify your confidence and elevate your performance.