How to Adjust an Archery Release Aid Like a Pro
Adjusting an archery release aid is a crucial step in refining your shot consistency and accuracy. A properly tuned release ensures a clean, repeatable anchor point and a smooth trigger pull, which are fundamental for any archer looking to improve their performance. This guide will walk you through the essential steps and considerations for fine-tuning your release aid, making sure it fits your hand and shooting style perfectly.
In short, properly adjusting your archery release aid involves setting the trigger tension, adjusting the strap for a snug fit, and ensuring the D-loop rests correctly. Fine-tuning these elements reduces hand shock, improves consistency, and ultimately leads to more accurate shots downrange, making it a vital skill for serious archers.
Key Takeaways
- Adjusting an archery release aid requires careful attention to trigger tension, strap length, and overall fit for optimal performance.
- A correctly adjusted release aids in achieving a consistent anchor point and a clean, surprise break, crucial for accuracy.
- Understanding the different types of release aids (back-tension, mechanical, hinge) can help in selecting the best adjustment strategy.
- Regular checks and adjustments are necessary, especially after equipment changes or to adapt to changing shooting conditions.
- Properly setting up your release can significantly reduce hand shock and improve shot-to-shot consistency.
What is an Archery Release Aid and Why Adjust It?
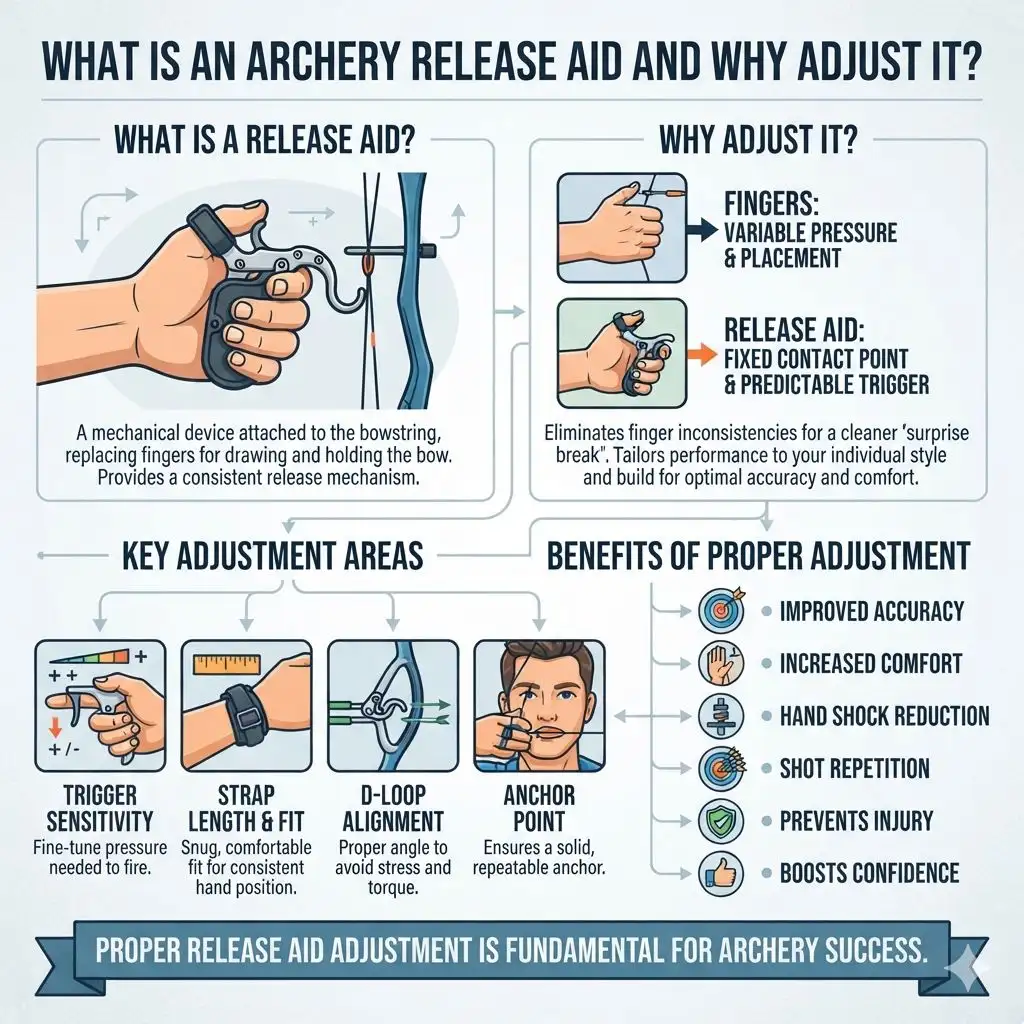
An archery release aid is a mechanical device that attaches to your bowstring and allows you to draw and hold your bow at full draw without relying solely on your fingers. It’s designed to improve accuracy and comfort by providing a consistent release mechanism. The primary reason for adjusting your release aid is to achieve optimal performance and comfort tailored to your individual shooting style and physical build.
Fingers on a bowstring can introduce inconsistencies due to variations in pressure and placement. A release aid, when properly adjusted, mitigates these inconsistencies by offering a fixed point of contact and a predictable trigger function. This leads to a cleaner shot execution, often referred to as a “surprise break,” where you don’t consciously anticipate the arrow leaving the bow.
Adjusting the release aid encompasses several key areas: trigger sensitivity, strap length and fit, and the alignment of the release with the D-loop on your bowstring. Each of these elements plays a role in the overall feel and performance of your shot. Neglecting these adjustments can lead to poor accuracy, discomfort, and even potential injury.
- Trigger Sensitivity: This refers to how much pressure is needed to activate the release. Some archers prefer a light trigger, while others like a heavier one for more control.
- Strap Adjustment: The strap connects the release to your wrist. It needs to be snug enough to prevent the release from slipping but not so tight that it restricts blood flow or movement.
- D-Loop Alignment: The release’s jaws or hook must engage the D-loop on your bowstring cleanly and without undue stress or angle.
- Anchor Point Consistency: A well-adjusted release helps establish a solid, repeatable anchor point against your face.
- Hand Shock Reduction: Proper setup can absorb or redirect some of the bow’s vibration, leading to a more comfortable shot.
- Shot Repetition: The goal is to make every shot feel and perform identically, which is directly influenced by release aid settings.
Understanding Different Types of Release Aids
Before you can effectively adjust a release aid, it’s essential to understand the basic types available, as their adjustment mechanisms and best practices can vary significantly. Each type is designed to offer a different feel and release characteristic, catering to individual preferences and shooting disciplines.
The most common categories include hinge releases, back-tension releases, and mechanical (trigger) releases. Each has unique features that influence how you draw, hold, and execute a shot. Knowing these differences will help you appreciate why specific adjustments are recommended for each.
For example, a back-tension release fires by applying steady pressure to the back of your neck or shoulder, rather than a traditional trigger. A mechanical release, conversely, has a distinct trigger that you press. Hinge releases often function on a similar back-tension principle but might incorporate more moving parts or specific release styles.
1. Mechanical (Trigger) Release Aids
Mechanical release aids are perhaps the most popular and intuitive for beginners and many experienced archers. They feature a distinct trigger that you press with your finger to release the string. The key adjustment points here are the trigger tension and the length of the trigger travel.
These releases are often straightforward to set up and use, making them a great entry point into archery. The variety in trigger design—from thumb buttons to trigger-pull styles—means there’s a wide range of options to suit different hand sizes and preferences.
The main advantage is the clear, tactile feedback when the shot breaks. This can help newer archers develop a sense of when the arrow is about to leave the bow. However, it can also lead to target panic if the archer anticipates the shot and “jerks” the trigger.
- Trigger Types: Thumb button, trigger-pull (often front or back finger), caliper releases.
- Primary Adjustments: Trigger tension (how much force to pull), trigger travel (how far the trigger moves before firing).
- Pros: Intuitive to use, clear shot feedback, wide variety of options.
- Cons: Can contribute to target panic if not used properly, requires consistent trigger pressure.
2. Back-Tension Release Aids
Back-tension release aids, sometimes called resistance releases, operate on a different principle. Instead of a trigger you press, these releases are activated by drawing the bowstring further, applying increasing pressure that eventually causes the release to fire. The “shot” is initiated by back tension in your drawing muscles, not a finger movement.
This method promotes a much cleaner, surprise break because your conscious effort is focused on drawing the bow smoothly, not on manipulating a trigger. The release mechanism is designed to be sensitive to the continuous pressure applied. Many competitive archers prefer this style for its potential to eliminate anticipation.
Adjustments for back-tension releases typically involve setting the release point (how much back tension is required) and sometimes the smoothness of the rotation or click mechanism. These are often more complex and require a learning curve, as the drawing and release process is less intuitive than with a mechanical trigger.
- Mechanism: Fires through continuous increase in back tension.
- Primary Adjustments: Release point sensitivity (amount of pressure needed), sometimes rotation smoothness.
- Pros: Encourages a surprise break, reduces target panic, promotes proper form.
- Cons: Steep learning curve, can be less intuitive for beginners, requires precise muscle control.
3. Hinge Releases
Hinge releases are a subset of back-tension releases, often characterized by their rotating head and sear mechanism. They typically fire through a drawing motion that rotates the release head, causing it to “hinge” open and release the string. Some models also incorporate adjustable clickers or delays for added control.
These releases are highly regarded for their ability to promote a surprise break and minimize target panic. The smooth, continuous drawing motion is key to their operation. They are favored by many serious hunters and competitive target archers who prioritize shot consistency.
Adjusting a hinge release can be intricate, often involving setting the sear engagement, the travel of the hinge, and sometimes the speed of the rotation. Many modern hinge releases allow for fine-tuning of these parameters to match an archer’s draw cycle and muscle control.
- Mechanism: Rotational firing driven by drawing motion.
- Primary Adjustments: Sear engagement, hinge travel, sometimes clicker/delay settings.
- Pros: Excellent for surprise breaks, minimizes anticipation, highly customizable.
- Cons: Complex to adjust and master, requires significant practice, can be unforgiving to inconsistent form.
How to Adjust Trigger Tension and Travel
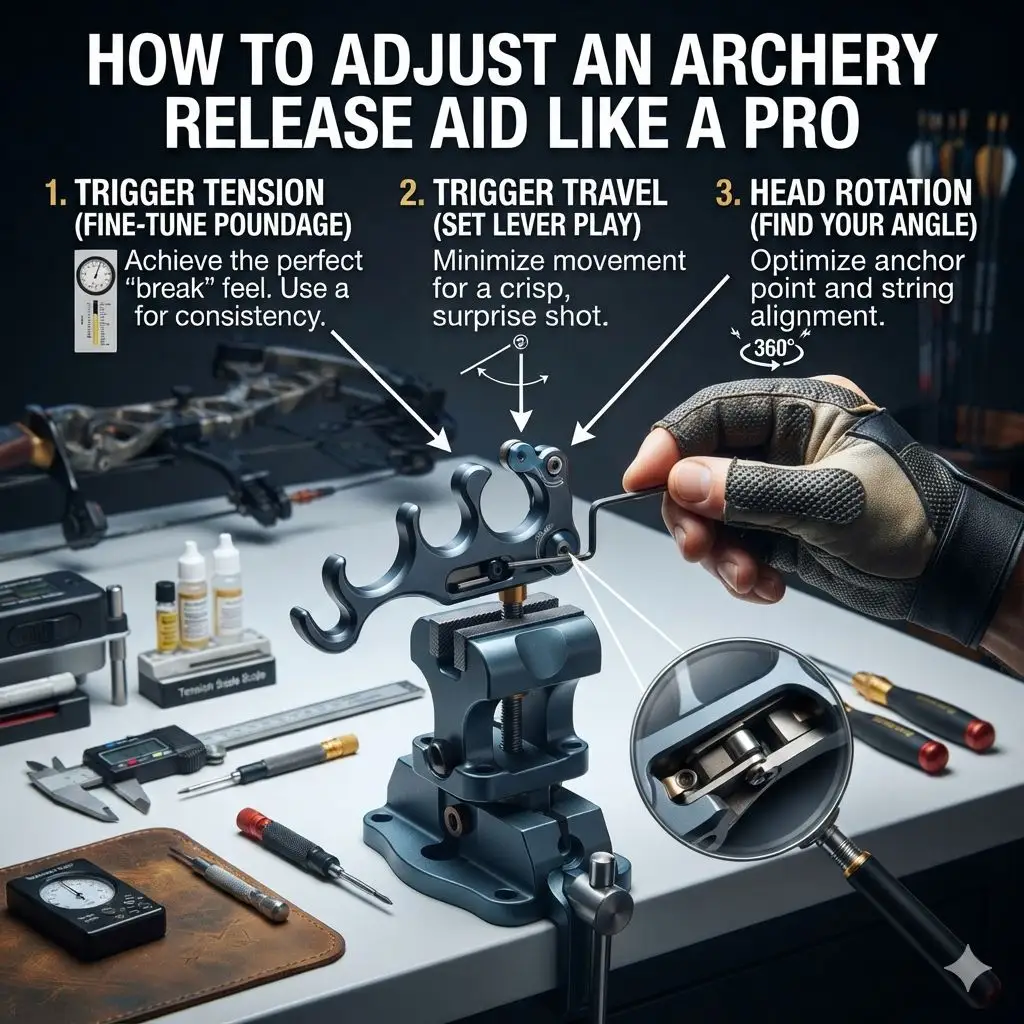
For mechanical release aids, adjusting the trigger tension and travel is paramount to achieving a comfortable and consistent shot. Trigger tension refers to the amount of force required to activate the release, while travel is the distance the trigger moves before the release fires.
Most mechanical releases come with a small adjustment screw, often located on the trigger mechanism itself. Using the correct tool (usually a hex key that came with the release or is a standard size) allows you to increase or decrease tension. Turning the screw clockwise generally increases tension, while turning it counter-clockwise decreases it.
It’s crucial to make these adjustments incrementally and test after each change. A trigger that is too light can lead to accidental discharges, while one that is too heavy can cause you to anticipate the shot or pull away from the target. Finding the sweet spot is key.
| Adjustment Type | Description | How to Adjust | Key Considerations |
|---|---|---|---|
| Trigger Tension | The amount of force needed to activate the trigger. | Use the adjustment screw (usually Allen key). Clockwise = tighter, Counter-clockwise = lighter. | Start heavy and gradually lighten. Avoid extremely light triggers. |
| Trigger Travel | The distance the trigger moves before the release fires. | Some releases have screws for pre-travel (before engagement) and post-travel (after engagement). | Minimize post-travel for a cleaner break. Pre-travel can be adjusted for comfort. |
For trigger travel, some releases allow you to adjust the pre-travel (the initial movement before the sear engages) and post-travel (the movement after the sear engages and before the release fires). Minimizing post-travel is often recommended for a crisper, more consistent break.
Warning: Never set your trigger tension so light that the release fires accidentally when you bump it or draw the bow. Always test adjustments in a safe environment, preferably with the bow uncocked or in a secure rest.
How to Properly Fit and Adjust the Release Aid Strap
The strap is your direct connection to the release aid, and its fit is critical for comfort and control. A strap that’s too loose can lead to slippage, inconsistent hand placement, and a loss of control. Conversely, a strap that’s too tight can restrict blood flow, cause discomfort, and negatively impact your grip.
Most modern release aids use a Velcro strap or a buckle system. The goal is to achieve a snug fit that keeps the release secure on your wrist without causing any pressure points. You should be able to comfortably wear it for extended periods.
When adjusting the strap, consider how it interacts with your clothing. If you wear bulky sleeves, you might need to adjust the strap differently than if you’re shooting in minimal clothing. The strap should feel firm and consistent.
- Placement: Position the release aid so it sits comfortably on the back of your wrist, typically aligned with your forearm.
- Snugness: The strap should be tight enough so the release doesn’t move around, but not so tight that it cuts off circulation or causes numbness.
- Velcro vs. Buckle: Velcro offers quick adjustments but can wear out. Buckles are more durable but less forgiving for micro-adjustments.
- Comfort Test: Wear the release for a few minutes off the bow. You should not feel any pinching or discomfort.
- Draw Cycle Check: Once on the bow, draw it slowly. The strap should remain in place throughout the draw and hold.
- Consistency: Aim for the same strap tightness every time you put on the release.
Tip: For a more secure fit, consider a release with a more substantial strap, especially if you tend to wear thicker clothing or find standard straps insufficient. Some aftermarket straps offer enhanced padding and durability.
Ensuring Proper D-Loop Alignment and Release Engagement
The interface between your release aid’s jaws or hook and the D-loop on your bowstring is critical for a clean release. Proper alignment ensures that the jaws close around the D-loop smoothly and that the release doesn’t torque the string as it’s drawn or breaks.
The D-loop is a crucial component, typically made of strong braided cord, tied directly to your bowstring. The release aid’s jaws grip this loop. Misalignment can cause erratic arrow flight, nock pinch, and uneven wear on both the D-loop and the release.
When the release is attached to the D-loop, the jaws should engage it squarely. The angle at which the release connects to the D-loop should be as straight as possible. This is often influenced by the length of your release’s head and the positioning of the D-loop on the string.
| Alignment Aspect | Description | Impact of Misalignment | How to Check/Fix |
|---|---|---|---|
| Jaw Engagement | How the release jaws fit around the D-loop. | Uneven wear, string damage, inconsistent release. | Ensure jaws open wide enough to accept D-loop smoothly. Check for wear on jaws. |
| Angle of Pull | The angle at which the release pulls on the D-loop. | String torque, poor arrow flight, inconsistent anchor. | Aim for a direct, inline pull. May require D-loop adjustment or release positioning. |
| Release Head Positioning | The orientation of the release head relative to the D-loop. | Can affect string angle and cause torque. | Ensure the release head is not twisted or angled awkwardly. |
You can often adjust the D-loop position on the string slightly to correct minor angle issues. Some release aids also offer adjustable heads or swivels that can help fine-tune the alignment. The goal is a straight, consistent pull that minimizes torque on the bowstring.
Adjusting for Back-Tension and Hinge Releases
Adjusting back-tension and hinge release aids requires a different approach than mechanical triggers. The focus shifts from a finger-actuated pull to controlling draw weight through body tension and a smooth drawing motion.
For back-tension releases, the primary adjustment is often the sensitivity of the release mechanism. This determines how much continuous pressure is needed to initiate the firing sequence. You want enough resistance to prevent accidental firing but not so much that it requires excessive strain or causes you to tense up unnaturally.
Hinge releases are more complex. They involve setting the sear, which is the internal component that holds the jaws closed. The sear engagement can be adjusted to make the release fire more or less readily as you apply back tension.
Some models also have adjustable clickers, providing a tactile and audible cue before the release fires, simulating a “surprise break” with a more controlled feel.
- Setting Sensitivity (Back-Tension): Most back-tension releases have an adjustment screw to modify the force required to fire. Increase sensitivity for a lighter feel, decrease for more resistance.
- Adjusting Sear Engagement (Hinge): This controls how much pressure is needed to disengage the sear. A common approach is to set it to require a steady, increasing back tension.
- Pre-Travel vs. Post-Travel (Hinge): Similar to mechanicals, some hinge releases allow adjustment of internal travel. Minimize post-travel for a clean break.
- Clicker/Delay Settings: Some advanced hinge releases offer adjustable clicker delays. This allows you to customize the “lead-up” to the shot.
- Practice Draw Cycle: With these releases, drawing the bow smoothly and consistently is key. Practice drawing and holding, feeling how the tension builds.
- Test Shots: Fire a series of shots, focusing on using only back tension and breathing. Adjustments should be subtle and tested thoroughly.
Important: When adjusting hinge or back-tension releases, it’s vital to have a secure way to hold the bow at full draw while making adjustments. A bow vise or a trusted archery shop can be invaluable. Never attempt to adjust while holding the bow at full draw without proper support.
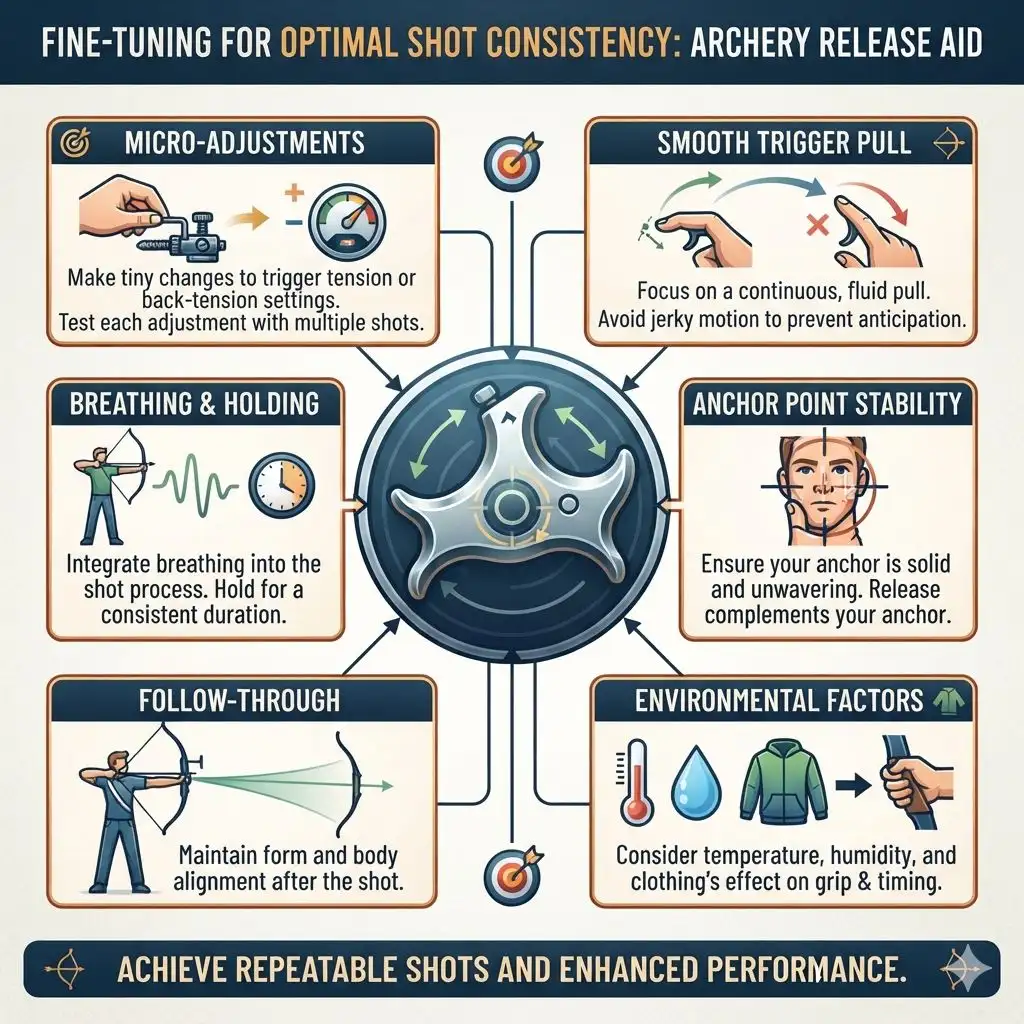
Fine-Tuning for Optimal Shot Consistency
Once the basic adjustments for trigger, strap, and alignment are made, the next step is fine-tuning to achieve optimal shot consistency. This phase is less about fundamental setup and more about subtle tweaks that enhance your feel and performance.
Consistency comes from repetition, and your release aid is the primary tool for ensuring that repetition. Even minor adjustments can make a difference in how you perceive the shot and how the bow responds.
This often involves making small changes to trigger tension or even the angle at which you pull the trigger. For back-tension releases, it might mean finding the precise amount of pressure that feels natural without causing tension elsewhere in your body.
- Micro-Adjustments: Make very small changes to trigger tension or back-tension settings. Test each adjustment with multiple shots.
- Smooth Trigger Pull: Focus on a smooth, continuous pull rather than a jerky motion. This is especially important for mechanical triggers to avoid anticipation.
- Breathing and Holding: Integrate your breathing into the shot process. Hold at full draw for a consistent amount of time before initiating the release.
- Anchor Point Stability: Ensure your anchor point is solid and doesn’t waver. The release should complement, not compromise, your anchor.
- Follow-Through: Maintain your form and follow-through after the shot breaks. This indicates a clean release and proper body alignment.
- Environmental Factors: Consider how temperature, humidity, or different clothing might affect your grip and release timing.
Troubleshooting Common Release Aid Issues
Even with careful adjustments, archers can encounter common problems with their release aids. Knowing how to diagnose and fix these issues can save you time and frustration on the range or in the field.
One frequent issue is inconsistent trigger breaks. This can stem from dirt or debris in the mechanism, worn-out internal parts, or improper trigger tension settings. Another problem is hand shock, which can be exacerbated by a release that isn’t properly seated or aligned.
Target panic, characterized by an inability to hold at full draw and a tendency to punch the trigger, is also heavily influenced by release aid setup. While not solely a release issue, the release can either exacerbate or help alleviate it.
| Problem | Potential Causes | Solutions |
|---|---|---|
| Inconsistent Trigger Break | Dirt/debris, improper tension, worn sear, incorrect alignment. | Clean mechanism, re-adjust tension, check alignment, consider professional service. |
| Excessive Hand Shock | Poor grip, release misalignment, bow balance issues, improper draw. | Check grip, D-loop alignment, bow accessories, practice smooth draw. |
| Accidental Trigger Fire | Trigger set too light, mechanical failure, unexpected bump. | Increase trigger tension immediately, inspect mechanism for damage. |
| Difficulty Achieving Surprise Break | Anticipation (target panic), trigger set too heavy/light, lack of practice. | Consider back-tension release, practice smooth draw, focus on breathing. |
| Nock Pinch/String Wear | Release misalignment, D-loop worn or improperly tied. | Correct release angle, inspect and replace D-loop if worn. |
According to a study by the Archery Trade Association, proper equipment tuning, including release aid adjustment, can improve archery accuracy by up to 15% for intermediate archers. This highlights the significant impact that fine-tuning can have on overall performance.
Frequently Asked Questions
What is the ideal trigger tension for an archery release?
There’s no single “ideal” trigger tension, as it’s highly personal. Most archers find a balance between a trigger that’s light enough for a surprise break and heavy enough to prevent accidental firing. It’s often recommended to start with a slightly heavier tension and gradually lighten it until it feels comfortable and consistent.
How often should I adjust my archery release aid?
You should check your release aid adjustments regularly, especially if you notice any changes in your shooting performance or comfort. A good practice is to check it at the beginning of a new season or after significant changes to your bow setup. Routine maintenance and occasional fine-tuning are key.
Can adjusting my release aid help with target panic?
Yes, properly adjusting your release aid, especially by switching to or properly setting up a back-tension or hinge release, can significantly help combat target panic. These types of releases encourage a focus on drawing and holding with back tension, rather than anticipating a trigger pull, which is a common cause of target panic.
What does it mean to have a “surprise break” from a release aid?
A surprise break is when the arrow leaves the bowstring without you consciously “making” it happen. Your focus is on drawing, anchoring, and holding, and the release fires seamlessly as a result of continued tension. This minimizes conscious muscle movement at the moment of release, leading to greater accuracy.
How tight should my release aid strap be?
Your release aid strap should be snug enough to keep the release securely in place on your wrist without shifting during the draw cycle. However, it should not be so tight that it restricts blood flow, causes discomfort, or impedes your natural wrist movement. It should feel firm and consistent, never loose or constricting.
Final Thoughts
Mastering the adjustment of your archery release aid is a continuous journey that pays dividends in shot consistency and accuracy. By carefully tuning trigger tension, ensuring a perfect strap fit, and achieving flawless D-loop alignment, you unlock the full potential of your archery equipment.
Remember that patience and iterative testing are key. Small adjustments can lead to significant improvements. Always prioritize safety and consider consulting with experienced archers or a professional at your local pro shop for personalized guidance.