How To Adjust Pin Sights On A Bow
Fine-tuning your pin sights on a bow can dramatically elevate your archery accuracy, whether you’re a seasoned bowhunter or a recreational target shooter. While modern compound bows and sights have brought precision to new heights, the process of adjusting pin sights remains a blend of art, science, and methodical practice. For many, that first moment when a well-placed arrow hits the bullseye is unforgettable, and it often starts with a properly tuned sight.
Pin sight adjustment can be intimidating for newcomers, but with the right approach, anyone can master it. From selecting the right tools to understanding windage and elevation, every detail matters. This comprehensive guide is designed to demystify the process, provide actionable steps, and ensure your bow is sighted in for maximum performance.
You’ll learn not just the *how*, but the *why* behind each adjustment, reinforced by real-world examples and expert advice.
Key Takeaways
- Pin sight adjustment is crucial for achieving consistent accuracy in both hunting and target archery.
- The process involves aligning your sight’s pins with your arrow’s point of impact at various distances.
- Key steps include securing your equipment, adjusting for windage (left/right) and elevation (up/down), and systematically sighting in at multiple ranges.
- Regular maintenance and fine-tuning are essential, as equipment and environmental factors can affect accuracy over time.
- Real-world examples illustrate how proper sight adjustment directly impacts shooting performance.
- Safety and patience are paramount, rushing the process can compromise results and equipment.

Credit: accubow.com
Understanding Pin Sights: Types And Functions
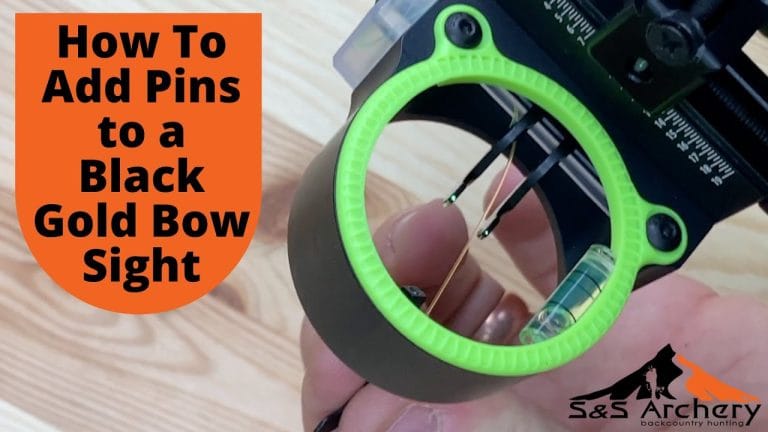
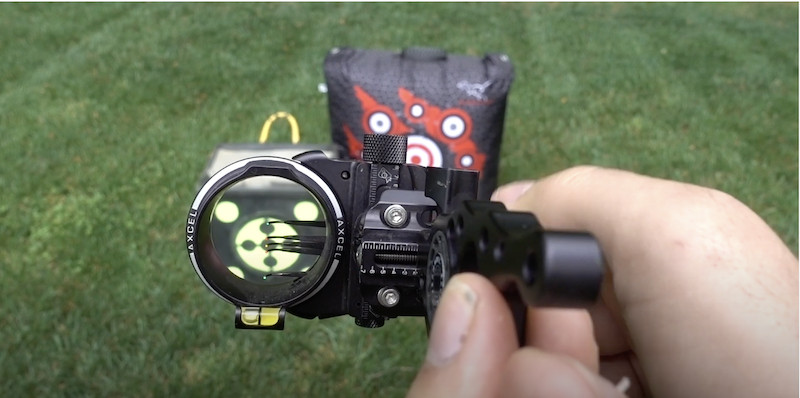
Before diving into the adjustment process, it’s essential to understand the basic types of pin sights and how they function. Pin sights are mechanical devices attached to the riser of your bow, designed to provide a visual reference for aiming.
Fixed Pin Sights
Fixed pin sights are the most common choice for both beginners and experienced archers. Each pin is set for a specific distance (e.g., 20, 30, 40 yards), allowing quick reference while aiming. Fixed sights offer simplicity and speed but can become cluttered with multiple pins.
Advantages:
- Quick target acquisition
- Reliable for hunting and 3D archery
Drawbacks:
- Limited flexibility at unmarked distances
- Risk of pin confusion under pressure
Movable/single-pin Sights
Movable or single-pin sights feature one adjustable pin, which can be set to different distances using a slider mechanism. These are favored by archers who shoot at varying ranges, such as in competitive target archery.
Advantages:
- Unobstructed sight picture
- Infinite adjustability for precise distances
Drawbacks:
- Requires time to adjust between shots
- Not ideal for rapidly changing hunting scenarios
Hybrid And Digital Sights
Hybrid sights combine fixed and movable pins, while digital sights use electronic displays for range finding and aiming. Although advanced, these options typically require more maintenance and higher investment.
Example: A hybrid sight might feature three fixed pins for common ranges and a fourth movable pin for long shots, maximizing versatility.
Key Functions Of Pin Sights
Regardless of style, all pin sights share core functions:
- Aiming reference: Aligns the bow with the target
- Distance compensation: Adjusts for arrow trajectory drop at various ranges
- Windage and elevation adjustment: Enables horizontal and vertical corrections
Understanding these fundamentals ensures you can choose and adjust the right sight for your needs.
Credit: archery360.com
Essential Tools And Preparation For Pin Sight Adjustment
Proper preparation is the foundation of effective sight adjustment. Having the right tools and ensuring your equipment is in top condition will streamline the process and prevent errors.
Must-have Tools For Sight Adjustment
- Allen wrenches: Most bow sights use hex bolts for pin and housing adjustments.
- Bow square: Ensures your sight is mounted perpendicular to the arrow rest.
- Level: A bubble or string level helps confirm your bow and sight are plumb.
- Target face and backstop: Use a clear, safe target with visible bullseyes.
- Rangefinder: For precise distance measurement during sight-in.
Preparing Your Bow And Sight
- Inspect your bow: Check for loose screws, frayed strings, or worn components. Address any issues before starting.
- Mount the sight securely: Attach the sight to the riser using manufacturer instructions, ensuring it’s tight but not over-torqued.
- Initial pin alignment: Center the pins within the sight housing, so you have room to adjust in both directions.
- Level the sight: Use your bow square and level to ensure the sight is not canted.
Pro Tip:
Take a photo of your sight setup before making adjustments. This makes it easier to revert if something goes wrong.
Safety Considerations
- Always point your bow in a safe direction.
- Use a reliable backstop to catch missed arrows.
- Wear arm guards and safety glasses if possible.
Example: Preparing For Success
When I prepared to sight in my first compound bow, I spent extra time checking the tightness of each screw and verifying the level. This attention to detail prevented issues later and made the actual sighting process much smoother.
Step-by-step Process: How To Adjust Pin Sights On A Bow
The process of adjusting pin sights requires patience and a systematic approach. Here’s a detailed, step-by-step guide to ensure consistent and repeatable results.
Establishing A Baseline
Start by choosing a short distance (10 or 20 yards) to minimize the impact of errors. Shoot a 3, 5 arrow group, aiming with the top pin. Record the point of impact.
Key actions:
- Aim for the bullseye using your top pin.
- Maintain consistent anchor point and form.
- Observe where the group lands relative to the aim point.
Adjusting Windage (left/right)
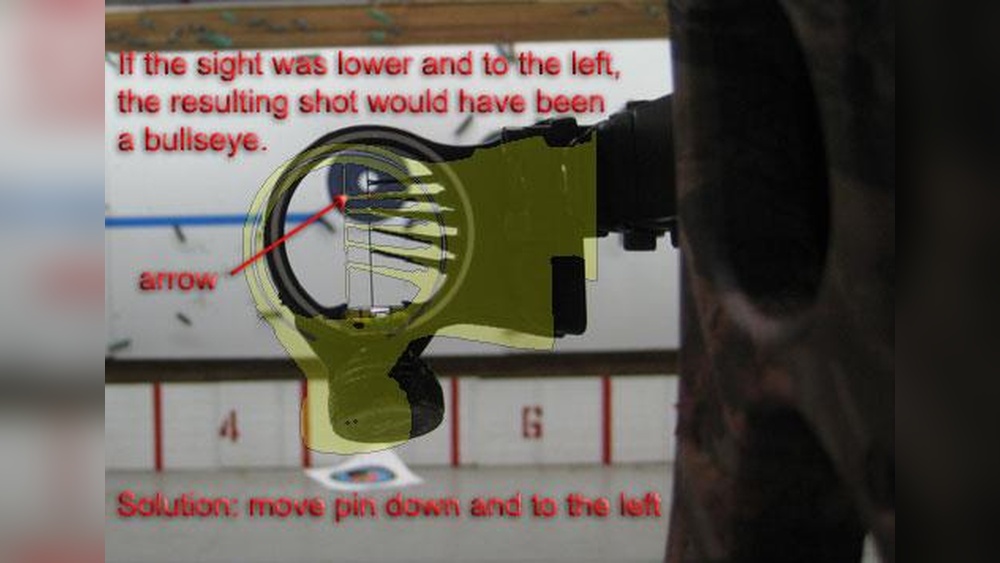
If your arrows consistently land left or right of the bullseye, adjust the windage.
- Arrows hitting left: Move the sight housing or pin to the left.
- Arrows hitting right: Move the sight housing or pin to the right.
Example:
If your arrows are 3 inches left of center, make a small adjustment (about 1/16″) and shoot again. Repeat as needed until the group centers horizontally.
Adjusting Elevation (up/down)
If your arrows are above or below the bullseye, adjust the elevation.
- Arrows hitting high: Move the sight housing or pin up.
- Arrows hitting low: Move the sight housing or pin down.
Warning: Always move the sight in the direction you want your arrows to go.
Sighting In Additional Pins
After the top pin is dialed in at 20 yards, repeat the process for subsequent pins at longer distances (e. g. , 30, 40, and 50 yards).
- Move back to the next distance.
- Shoot a group using the second pin.
- Adjust windage and elevation for that pin only.
- Repeat for each pin, ensuring the previous pins remain accurate.
Fine-tuning And Validation
- Shoot multiple groups at each distance to confirm accuracy.
- Mark pin positions after each successful adjustment.
- Test at varying distances and under different lighting conditions.
Pro Tip:
Make only one adjustment (windage or elevation) at a time. This isolates the effect and prevents confusion.
Data Table: Pin Adjustments And Results
| Distance (Yards) | Initial Impact | Adjustment | Final Group Center |
|---|---|---|---|
| 20 | 2″ Left, 1″ Low | Sight right 1/16″, up 1/32″ | Centered |
| 30 | 3″ Right, 2″ High | Sight left 1/16″, down 1/16″ | Centered |
| 40 | 4″ Low | Sight down 1/8″ | Centered |
Credit: www.bowhunter.com
Common Mistakes And How To Avoid Them
Even experienced archers can make errors when adjusting pin sights. Recognizing these mistakes can save time and improve your shooting experience.
Over-adjusting Pins
Making large adjustments instead of small, incremental changes often leads to over-correction and frustration. Always move pins in small increments, then retest.
Inconsistent Shooting Form
Changing your anchor point, grip, or stance between shots creates variable results. Prioritize consistency in your form before blaming the sight.
Ignoring Equipment Variables
Worn strings, loose screws, or improper arrow spine can all impact accuracy. Regularly inspect your equipment and address issues before adjusting your sight.
Neglecting Environmental Factors
Wind, lighting, and target angle can influence arrow flight. Adjust sights during typical shooting conditions for best results.
Example: The Cost Of Rushing
A competitive archer once shared with me how rushing the sight-in process before a tournament led to missed shots and a disappointing score. By slowing down and focusing on one variable at a time, his next season was far more successful.
Advanced Tips For Precision Sight Adjustment
For archers seeking maximum accuracy, advanced techniques can further refine your pin sight adjustment and overall performance.
Micro-adjustable Sights
Many modern sights feature micro-adjustment knobs, allowing for extremely fine tuning. These are invaluable for competitive archers or those seeking to maximize precision.
- Allows for minute changes in windage/elevation without loosening screws.
- Reduces the risk of over-adjustment.
Sight Leveling And Third Axis
Most pin sights include second and third axis adjustments. These help maintain accuracy when shooting on uneven ground or at steep angles.
- Second axis: Levels the sight left to right.
- Third axis: Ensures the sight remains vertical when aiming up or down.
Proper axis leveling is especially important for bowhunters in mountainous terrain.
Bubble Level Integration
Many sights come with a built-in bubble level to ensure the bow is not canted during the shot. Consistently using this feature improves long-range accuracy.
Using Rangefinders And Ballistics Apps
Combining a laser rangefinder with a ballistics app can provide precise pin settings for various distances, especially useful for hunters who encounter unpredictable shot ranges.
Data Table: Advanced Features Comparison
| Feature | Standard Sight | Advanced Micro-Adjustable Sight |
|---|---|---|
| Micro-Adjustment | No | Yes |
| Second/Third Axis | Second Only | Second & Third |
| Bubble Level | Optional | Standard |
| Quick Detach | No | Yes |
Example: Precision Pays Off
A bowhunter using a micro-adjustable sight and properly leveled axes was able to consistently hit a 6-inch target at 60 yards, demonstrating the value of advanced features for challenging shots.
Real-world Applications: Case Studies In Sight Adjustment
The effectiveness of proper sight adjustment is best demonstrated through concrete, real-world examples.
Case Study 1: Target Archer At Competition
A competitive target archer struggled with erratic arrow groups at 40 yards. After a systematic pin sight adjustment, starting with windage, then elevation, and checking form, her average group size shrank from 6 inches to less than 3 inches. This improvement translated to higher scores and greater confidence on the line.
Case Study 2: Bowhunter In Variable Terrain
A bowhunter preparing for elk season recognized the need for third axis leveling due to steep mountain shots. By fine-tuning his sight’s third axis, he maintained accuracy even when shooting at 45-degree angles, resulting in a successful hunt and a clean ethical shot.
Case Study 3: Recreational Shooter’s First Sight-in
A new archer, frustrated by inconsistent results, realized he was making adjustments too quickly and failing to maintain a consistent anchor point. By slowing down and methodically adjusting one variable at a time, he quickly found his groups centering at all ranges.
Data Table: Case Study Summary
| Shooter | Challenge | Adjustment Made | Outcome |
|---|---|---|---|
| Target Archer | Erratic groups | Systematic windage/elevation | Group size halved |
| Bowhunter | Steep shots | Third axis leveling | Accurate at angles |
| Recreational Shooter | Inconsistent anchor | Consistent form, slow adjustment | Centered groups |
Maintaining And Troubleshooting Your Pin Sights
Regular maintenance and troubleshooting are key to long-term accuracy and equipment reliability.
Routine Maintenance
- Check screws and bolts: Vibrations from shooting can loosen hardware.
- Clean sight housing: Dust and debris can obscure pins or levels.
- Inspect pins for damage: Bent or broken pins should be replaced immediately.
Troubleshooting Common Issues
Pins drift over time: This can indicate loose hardware or mounting issues. Re-tighten all screws and verify sight alignment.
Sight doesn’t hold adjustments: Low-quality sights or worn threads can slip. Upgrade to higher-quality hardware if persistent.
Difficulty seeing pins: In low light, consider installing fiber optic pins or using a sight light if legal in your jurisdiction.
When To Seek Professional Help
If you consistently struggle with sight adjustment despite careful technique, consult a certified archery technician. They can diagnose equipment issues or provide personalized coaching.
Example: I once assisted a friend whose groups remained erratic despite repeated adjustments. A visit to a pro shop revealed a warped riser, a problem no amount of sight tuning could fix.
External Resource:
For more maintenance tips and sight adjustment techniques, visit the Archery 360 Bow Sight Guide.
Optimizing Pin Sight Performance For Hunting And Target Archery
Adjusting pin sights is not a one-size-fits-all process. The ideal approach varies based on your primary activity, hunting or target archery.
Customizing Pins For Hunting
- Set pins for typical hunting distances (e.g., 20, 30, 40 yards).
- Prioritize rapid target acquisition and minimal pin clutter.
- Test in low-light conditions, as many hunts occur at dawn or dusk.
Customizing Pins For Target Archery
- Use more pins for precise distance increments (e.g., every 10 yards up to 60).
- Fine-tune for consistent lighting and flat terrain.
- Consider single-pin or adjustable sights for maximum precision.
Training And Practice
- Practice regularly at all pin distances.
- Simulate real-world conditions (e.g., shooting from elevated stands for hunters).
- Record your results and adjust as needed.
Pro Tip:
Shooting under varied conditions (wind, angle, light) will reveal weaknesses in your setup and help you make smarter adjustments.
External Resource:
For advanced tuning and archery tips, the Wikipedia Archery Guide provides a comprehensive overview.
Frequently Asked Questions
How Often Should I Re-adjust My Pin Sights?
Pin sights should be checked and fine-tuned at the start of each shooting season and after any significant equipment change, such as new arrows or a new string. If you notice your groups drifting, re-check your sight immediately.
Can I Adjust Pin Sights For Different Arrow Weights?
Yes, different arrow weights will have different trajectories. Heavier arrows tend to drop more quickly, so you may need to adjust your pins lower for proper elevation. Always sight in using the specific arrows you plan to use in the field.
What’s The Difference Between Adjusting Pins And Moving The Entire Sight Housing?
Adjusting pins changes the aiming reference for a specific distance, while moving the sight housing shifts the whole sight’s position. Housing movement is used for larger corrections or when initially mounting the sight, while pin movement fine-tunes for individual ranges.
Are There Electronic Or Digital Pin Sights, And Do They Require Special Adjustment?
Yes, electronic sights use digital displays and often integrate rangefinding features. Adjustment procedures vary by manufacturer and may include software calibration. Always consult your owner’s manual for specific steps.
What Should I Do If My Pins Are Difficult To See In Low Light?
If your pins are dim or hard to see in low light, consider upgrading to fiber optic pins, adding a sight light (if legal), or using larger-diameter pins. Practice in various lighting to ensure your setup works under all conditions.
A bow with well-adjusted pin sights can transform your accuracy and confidence, whether on the range or in the field. The process is both a science and an art, requiring patience, precision, and a willingness to learn from each shot.
By following the steps outlined here and maintaining your equipment diligently, you’ll enjoy consistent results and the satisfaction of arrows that fly true. Remember to practice regularly, stay safe, and always consult professionals for complex issues or major equipment changes.
Happy shooting!