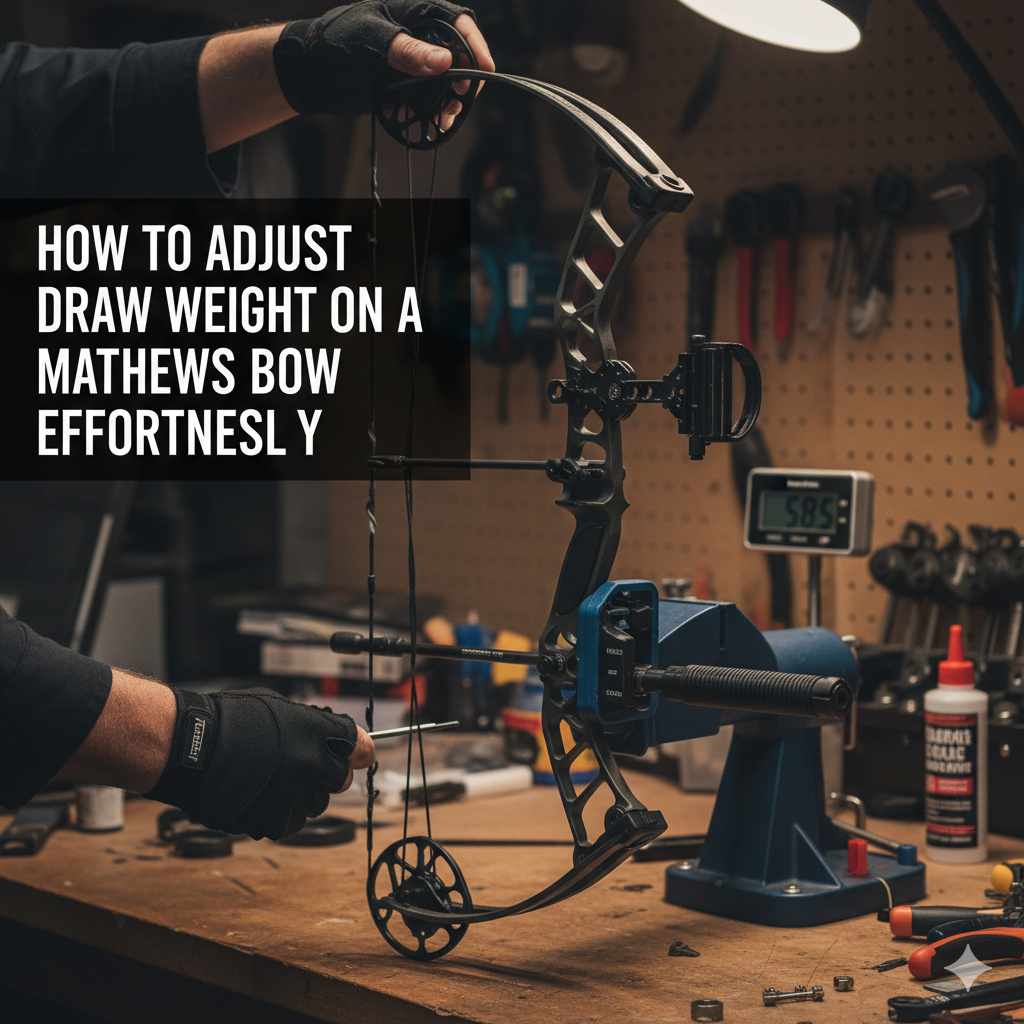
To adjust the draw weight on a Mathews Mission bow, use an Allen wrench to turn the limb bolts, which are located where the limbs meet the riser. Turn them clockwise to increase the weight and counter-clockwise to decrease it. Always turn the top and bottom bolts an equal number of times to keep the bow’s tiller balanced for accuracy.
Hello, fellow archers! Salman Arfeen here. If you’ve ever felt like pulling back your Mission bow is a bit too tough, you’re not alone. Many new archers struggle with a draw weight that’s too high. This can make shooting feel like a chore instead of a joy. It can also hurt your accuracy and form.
But I have great news! Adjusting the draw weight on your Mathews Mission bow is one of the easiest and most rewarding things you can learn. You don’t need a fancy bow press or a trip to the pro shop. With just one simple tool and a few minutes, you can make your bow a perfect fit for you.
In this guide, I’ll walk you through every step, making it simple and safe. Let’s get that bow feeling just right so you can focus on hitting the bullseye!
Why Adjusting Your Draw Weight is a Game-Changer
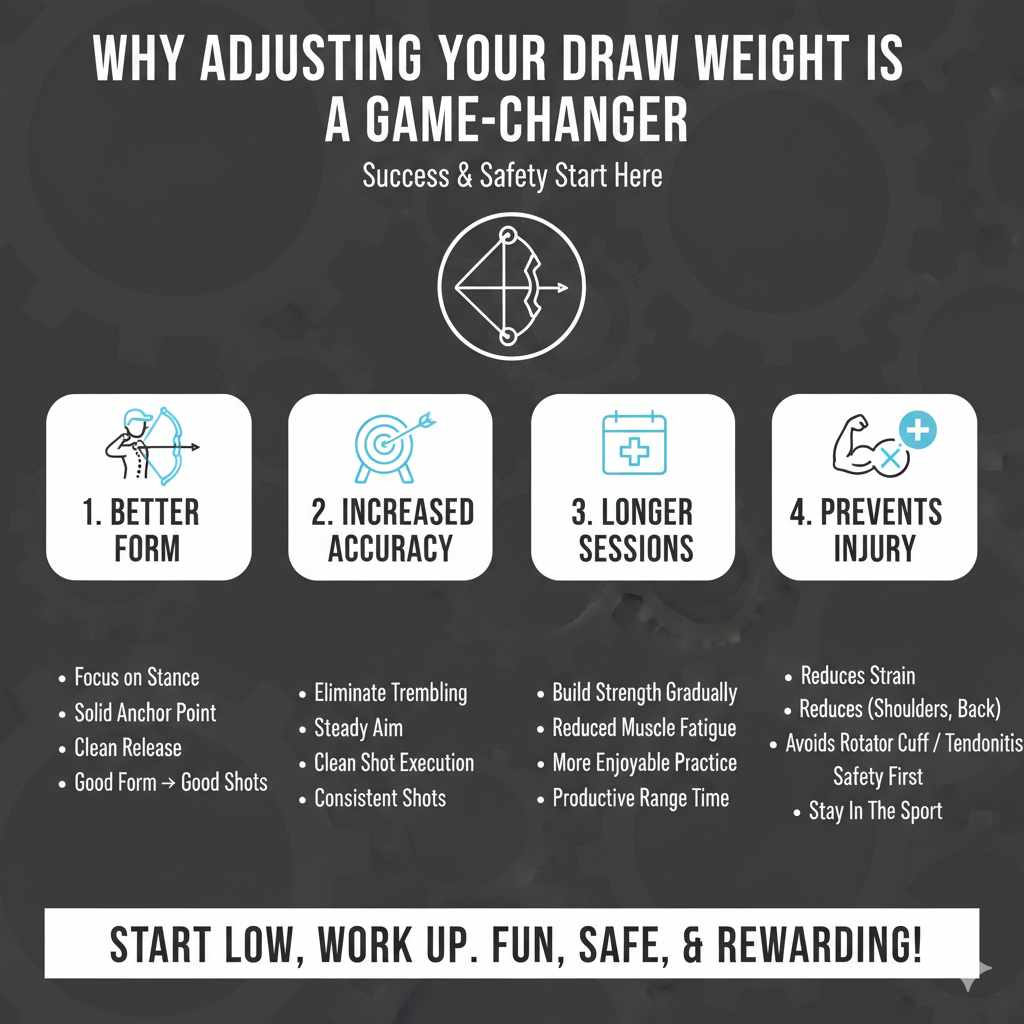
You might wonder why a few pounds of draw weight matter so much. Think of it like lifting weights at the gym. If you try to lift something too heavy, your form suffers, and you risk injury. The same is true in archery. A comfortable draw weight is the foundation for good shooting.
Here’s why getting it right is so important:
- Better Shooting Form: When you’re not struggling to pull the string, you can focus on your stance, your anchor point, and your release. Good form leads to good shots.
- Increased Accuracy: A heavy draw weight can cause you to tremble or shake, sending your arrow off target. A comfortable weight allows for a steady aim and a clean shot.
- Longer Practice Sessions: If your muscles get tired after just a few shots, you won’t want to practice for long. Lowering the draw weight helps you build strength over time and enjoy longer, more productive sessions at the range.
- Prevents Injury: Trying to pull too much weight can strain your shoulder, back, and arm muscles. This can lead to injuries that keep you from shooting altogether. Safety and comfort should always come first.
For beginners, it’s always better to start low and work your way up. As your muscles develop, you can gradually increase the weight. This simple adjustment ensures archery remains fun, safe, and rewarding.
Before You Begin: Safety First!
Before we touch a single bolt, let’s talk about safety. Your bow is a powerful piece of equipment, and we need to treat it with respect. Following these simple safety rules will protect both you and your bow.
- Never “Dry Fire” Your Bow: This is the number one rule of archery. Dry firing means releasing the bowstring without an arrow nocked. The energy has nowhere to go and can cause the limbs to crack or the string to snap, which is incredibly dangerous.
- Inspect Your Bow: Take a quick look at your bow. Check the string, cables, limbs, and riser for any signs of damage like fraying or cracks. If you see anything concerning, it’s best to take it to a pro shop.
- Work in a Clear, Well-Lit Area: Make sure you have plenty of space to work. You don’t want to be bumping into things while handling your bow. Good lighting helps you see exactly what you’re doing.
- Point Your Bow in a Safe Direction: Even when you’re just making adjustments, get into the habit of always pointing your bow in a safe direction. Treat it as if it were loaded at all times.
Tools You’ll Need
The best part about adjusting a Mission bow is how few tools you need. You likely already have what’s required. Here’s a simple list of what to grab.
| Tool | Purpose |
|---|---|
| Allen Wrench Set (Hex Keys) | This is the main tool you’ll use to turn the limb bolts. Most Mission bows use a standard size, often 3/16 inch, but it’s good to have a full set just in case. |
| Bow Scale (Optional but Recommended) | A handheld bow scale tells you the exact draw weight. It’s great for knowing exactly where you started and where you end up. If you don’t have one, you can still make adjustments based on feel. |
| Owner’s Manual (Optional) | Your bow’s manual is a great resource. It will tell you the specific adjustment range for your model (e.g., 50-70 lbs) and the maximum number of turns you can make. |
Step-by-Step Guide to Adjusting Your Mission Bow’s Draw Weight
Ready to get started? I’ll break this down into simple, easy-to-follow steps. We’ll take our time and do it right. Remember, the goal is to make your bow feel perfect for you.
Step 1: Locate and Understand Your Limb Bolts
First, let’s find the parts we’ll be adjusting. Look at your bow. You have the main handle part, called the riser. Then you have the two flexible parts at the top and bottom, called the limbs.
Where the limbs connect to the riser, you will see a large bolt head on each end. These are the limb bolts (sometimes called weight adjustment bolts). One is at the top, and one is at the bottom. These are the only two bolts you need to touch. Turning them changes the pressure on the limbs, which adjusts the draw weight.
Step 2: Measure Your Current Draw Weight (Optional)
If you have a bow scale, now is a great time to use it. Hook the scale onto your bowstring’s D-loop and pull back just like you’re drawing the bow. Pull smoothly until the bow reaches its full draw. The scale will show you the peak weight. Note this number down. This gives you a baseline, so you know exactly how much you’ve changed the weight later.
If you don’t have a scale, don’t worry! You can adjust based on feel. The goal is comfort and control.
Step 3: Choose Your Allen Wrench and Secure Your Bow
Find the Allen wrench that fits snugly into the limb bolts. For most Mission bows, this is a 3/16″ wrench. Make sure it’s a good fit. A loose wrench can strip the bolt head, which is a problem you don’t want.
You can make this adjustment with the bow resting on your lap or on a soft surface like a carpet or towel. Just make sure it’s stable and won’t slip around.
Step 4: The Golden Rule: Equal Turns!
This is the most important step in the entire process. To keep your bow balanced and shooting straight, you must turn the top limb bolt and the bottom limb bolt the exact same amount.
If you turn the top bolt one full revolution, you must also turn the bottom bolt one full revolution. If you turn one a half turn, you must turn the other a half turn. This is called keeping the “tiller” even. An unbalanced tiller will make your arrows fly inconsistently.
My advice? Go slow. Make one adjustment to the top bolt, then immediately make the exact same adjustment to the bottom bolt. Don’t try to do all your turns on one bolt before moving to the other.
Step 5: Loosening the Bolts to Decrease Draw Weight
To make the bow easier to pull, you need to loosen the limb bolts. This is the most common adjustment for beginners.
- Insert your Allen wrench into the top limb bolt.
- Turn the wrench counter-clockwise (to the left, like you’re unscrewing something). I recommend starting with just one full turn.
- Now, move to the bottom limb bolt.
- Turn it counter-clockwise one full turn as well.
That’s it! You’ve just lowered your draw weight. On most bows, one full turn equals about 3-4 pounds of draw weight. So you’ve likely just reduced it by that much.
Step 6: Tightening the Bolts to Increase Draw Weight
As you get stronger, you might want to increase your draw weight for more speed and power. This is especially important if you plan to hunt, as many states have minimum draw weight requirements. For example, some regulations, like those historically referenced by the Pennsylvania Game Commission, specify a minimum draw weight for hunting certain game.
To increase the weight, you’ll tighten the bolts:
- Insert your Allen wrench into the top limb bolt.
- Turn the wrench clockwise (to the right, like you’re tightening a screw). Again, one full turn is a good start.
- Move to the bottom limb bolt.
- Turn it clockwise one full turn.
You’ve now increased your draw weight. When tightening, you’ll feel the bolt stop when it’s fully tightened, or “bottomed out.” Never try to force it past this point.
Step 7: Check Your Work and Test the Feel
After making an adjustment, it’s time to see how it feels. Safely pick up your bow (without an arrow) and draw it back. Does it feel better? Is it easier to hold at full draw?
If it still feels too heavy, repeat Step 5, making another full turn (or even a half turn) on each bolt. If you’re increasing the weight and want more, repeat Step 6. Keep making small, equal adjustments until it feels just right—strong but comfortable.
If you have a bow scale, measure the weight again. This will confirm how much change each turn makes on your specific bow.
Understanding Your Mission Bow’s Limits
Every Mission bow has a specific draw weight range, like 40-60 pounds or 50-70 pounds. You can find this information on a sticker on one of the limbs or in your owner’s manual. It’s important to stay within this range.
The maximum weight is achieved when the limb bolts are fully tightened. The minimum weight is achieved by backing the bolts out. However, never back the limb bolts out more than the manufacturer recommends. Most Mission bows allow for about 5 to 8 full turns from the fully tightened position. Loosening them too much can be dangerous, as the limb could detach from the riser.
Here’s a general guide for how adjustments affect draw weight. Note that this is an estimate and can vary slightly by bow model.
| Counter-Clockwise Turns (From Max) | Estimated Draw Weight Reduction | Example (On a 70 lb Bow) |
|---|---|---|
| 1 Full Turn | ~3-4 lbs | 66-67 lbs |
| 2 Full Turns | ~6-8 lbs | 62-64 lbs |
| 3 Full Turns | ~9-12 lbs | 58-61 lbs |
| 4 Full Turns | ~12-16 lbs | 54-58 lbs |
| 5 Full Turns | ~15-20 lbs | 50-55 lbs |
Always check your bow’s manual for its specific limits. If you’re unsure, it’s better to be safe and stop a turn or two short of the maximum recommended turns.
Common Mistakes to Avoid
Adjusting the draw weight is simple, but a few common mistakes can cause problems. Here’s what to watch out for:
- Uneven Adjustments: This is the biggest one. Forgetting to turn both bolts the same amount will mess up your bow’s timing and accuracy. Always adjust the top, then immediately adjust the bottom by the same amount.
- Loosening the Bolts Too Far: Backing the limb bolts out beyond the manufacturer’s limit is a serious safety risk. If you hear any creaking or see the limbs shifting in their pockets, you’ve gone too far. Tighten them back a bit.
- Forgetting to Re-Sight Your Bow: Changing your draw weight changes the speed of your arrow. A faster or slower arrow will hit the target at a different height. After you find your perfect draw weight, you will need to shoot a few groups at the range to see if you need to adjust your sight pins.
- Using the Wrong Size Wrench: A poorly fitting Allen wrench can strip the head of your limb bolt. Make sure it’s snug before you apply any force.
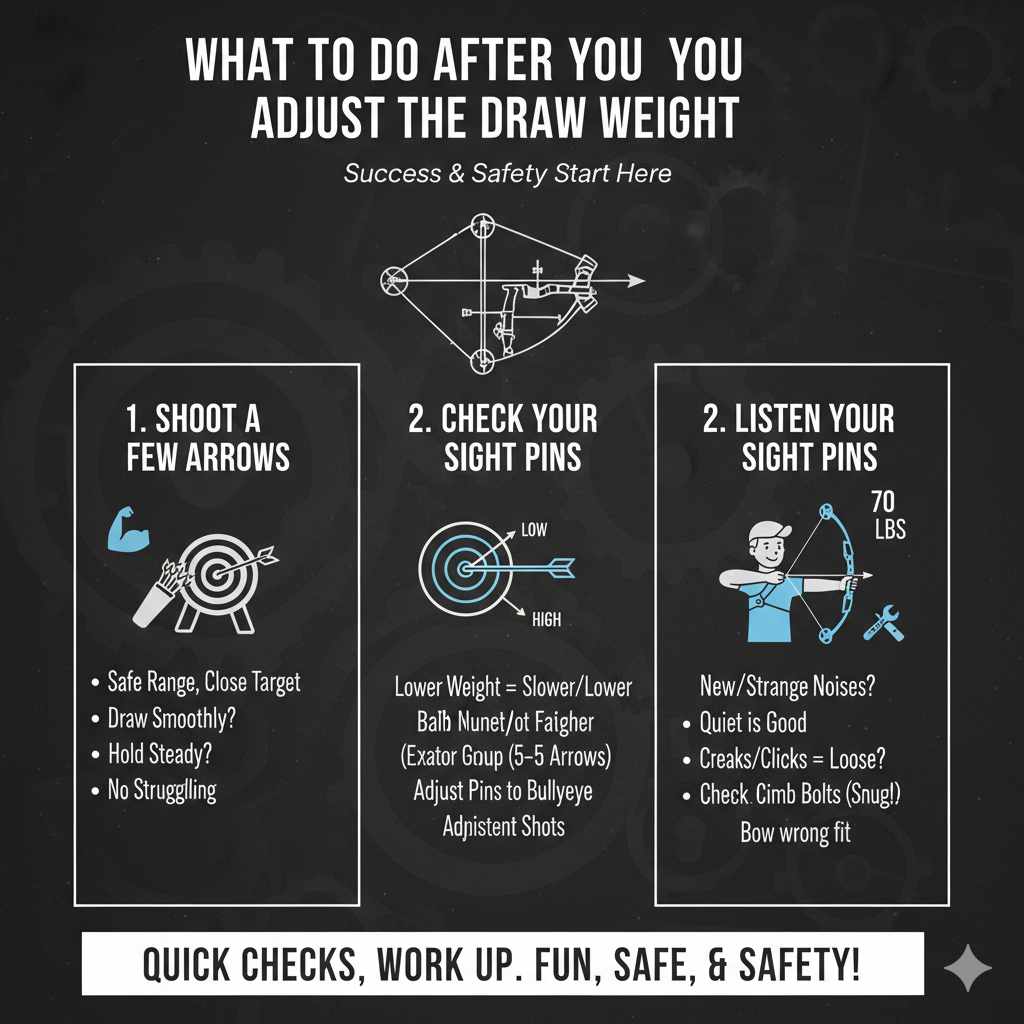
What to Do After You Adjust the Draw Weight
You’ve adjusted your bow, and it feels great! What’s next? Don’t just head out to the field. There are a couple of quick but important follow-up steps.
- Shoot a Few Arrows: Head to a safe range and shoot a few arrows at a close target (around 10 or 20 yards). Pay attention to how the bow feels. The goal is to be able to draw smoothly and hold steady without struggling.
- Check Your Sight Pins: If you lowered your draw weight, your arrow will fly a bit slower and may hit lower on the target. If you increased it, your arrow will be faster and may hit higher. Shoot a group of 3-5 arrows and see where they land. You’ll likely need to make small adjustments to your sight pins to get back to the bullseye.
- Listen to Your Bow: When you shoot, listen for any new or strange noises. A well-tuned bow is quiet. Any creaks or clicks could be a sign that something is loose. A quick check of the limb bolts to ensure they are snug (but not over-tightened) is a good idea.
Taking these extra few minutes will ensure your bow is not only comfortable but also accurate and safe to shoot.
Frequently Asked Questions (FAQ)
1. How do I know what draw weight is right for me?
The right draw weight is one you can pull back smoothly and hold steady for at least 10 seconds without excessive shaking or straining. You should be able to draw your bow while sitting down. If you can only draw it by pointing it at the sky and pulling with all your might, the weight is too high.
2. Do I need a bow press to adjust the draw weight on a Mission bow?
No! That’s one of the best features of Mathews Mission bows. You do not need a bow press to adjust the draw weight within its specified range. You only need an Allen wrench.
3. How often should I check my draw weight?
You don’t need to check it constantly. A good practice is to check it at the beginning of a season or if you feel like your shooting is off. If you are actively trying to increase your strength, you might adjust it every few months.
4. Will changing my draw weight affect my draw length?
On most modern compound bows like the Mission series, adjusting the draw weight does not change the draw length. Draw length is adjusted separately, usually by rotating a module on the cam.
5. Can I lower the draw weight below the manufacturer’s minimum rating?
No, you should never try to go below the recommended minimum. For example, if your bow is rated for 50-70 lbs, you should not try to lower it to 45 lbs. Doing so involves backing the limb bolts out too far, which can be very dangerous and could damage the bow.
6. What happens if I turn the bolts unevenly?
Turning the bolts unevenly throws off the bow’s tiller, which is the balance between the top and bottom limb. This will cause poor arrow flight and make it very difficult to shoot accurately. If you think you’ve done this by accident, tighten both bolts all the way down (to the max weight) and then start over, backing them out with equal turns.
Conclusion: Enjoy Your Perfectly Tuned Bow
There you have it! Adjusting the draw weight on your Mathews Mission bow is a simple, quick, and empowering skill for any archer to have. It’s all about making the bow work for you, not the other way around. By taking a few minutes to get the weight just right, you’re setting yourself up for more accurate shooting, longer and more enjoyable practice, and a safer archery experience.
Remember the golden rule: always turn the top and bottom limb bolts an equal amount. Start with small adjustments, listen to your body, and don’t be afraid to experiment until you find that sweet spot where the bow feels like a natural extension of you.
Now, go enjoy that perfectly tuned bow. Happy shooting!