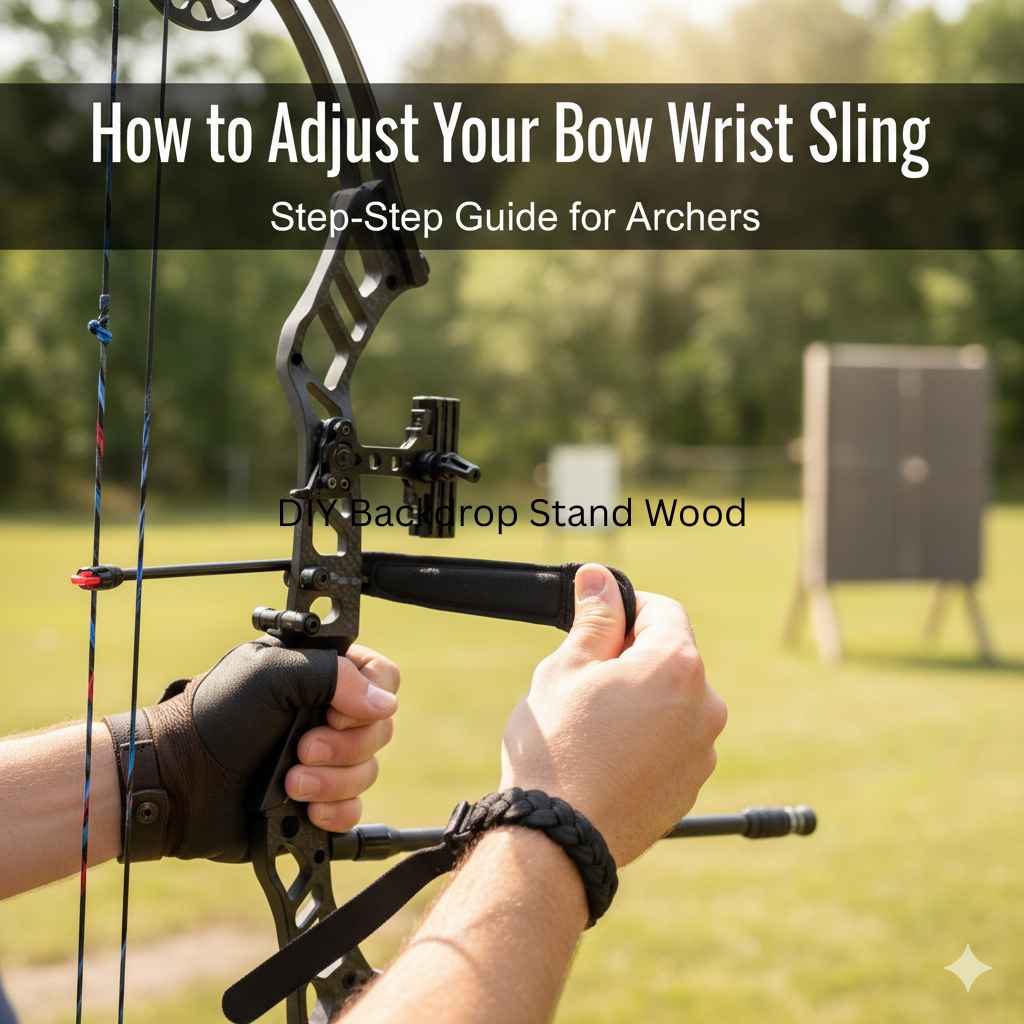
Struggling with your bow wrist sling? This guide shows you exactly how to adjust your bow wrist sling for a secure, comfortable fit, improving your shooting form and consistency. Proper adjustment prevents torque and enhances accuracy, making your archery sessions more enjoyable. Learn the simple steps to get yours fitted perfectly today!
Hey there, fellow archers! Salman Arfeen here. Ever feel like your bow is fighting you instead of being an extension of your will? A common culprit for beginners is a poorly adjusted bow wrist sling. It might seem like a small detail, but getting it just right can make a world of difference in your comfort, control, and accuracy. Too tight, and it digs into your wrist. Too loose, and it’s ineffective, potentially even getting in the way. Don’t worry, it’s not complicated! Today, we’re going to break down exactly how to adjust your bow wrist sling, step-by-step, so you can focus on hitting that target with confidence. Let’s make your archery experience smoother and more rewarding!
Why Your Bow Wrist Sling Matters
Your bow wrist sling is more than just a strap; it’s a crucial piece of equipment designed to enhance your shooting experience. Its primary job is to prevent your bow from dropping forward when you release the arrow. This might seem simple, but it has several important benefits:
- Improved Consistency: By preventing the bow from dropping, the sling helps maintain a consistent anchor point and release. This means fewer variables affecting your shot, leading to tighter groups.
- Reduced Torque: A well-adjusted sling takes some of the pressure off your bow hand. This allows you to relax your grip slightly, reducing the chances of imparting torque (twisting force) on the bow riser as you shoot. Torque is a major enemy of accuracy.
- Safety: It’s a safety net! If your grip slips or you stumble, the sling keeps the bow attached to your arm, preventing it from falling and potentially being damaged or posing a hazard.
- Comfort: A properly fitted sling distributes the bow’s weight and prevents it from digging into your wrist, making longer practice sessions much more comfortable.
Think of it this way: your wrist sling is like a handshake with your bow. It needs to be firm enough to support it, but not so tight that it’s uncomfortable or restricts movement. Finding that sweet spot is key.
Understanding Your Bow Wrist Sling
Before we start adjusting, let’s get familiar with the parts of a typical bow wrist sling. Most slings consist of a few key components:
- Attachment Loop/Connector: This is what secures the sling to your bow. It usually screws into a dedicated port on the bottom of the bow riser (often called a wrist sling mount or stabilizer mounting hole).
- Strap/Cord: This is the main part that goes around your wrist. It’s typically made of durable material like leather, nylon, or paracord.
- Adjuster: This is the mechanism that allows you to change the length of the strap, enabling you to customize the fit. It can be a buckle, a sliding knot, or a specific tensioning device.
- Wrist Pad (Optional): Some slings have a padded section where it contacts your wrist for added comfort.
Different types of slings exist, from basic paracord versions to more complex adjustable designs. However, the core principle of adjustment remains the same: finding a snug but not constricting fit.
Tools You Might Need
For most standard bow wrist slings, you won’t need a whole toolbox. Here’s what’s typically helpful:
- Your Bow: The most important tool, of course!
- Your Wrist Sling: Make sure it’s the one you intend to use.
- A Mirror (Optional but Recommended): Helps you see what you’re doing with your bow hand and wrist.
- A Small Screwdriver or Coin (Sometimes): If your sling’s attachment uses a screw that needs tightening. Many just loop through a hole.
Step-by-Step Guide: How to Adjust Your Bow Wrist Sling
Let’s get down to business! Follow these steps carefully to adjust your bow wrist sling for the best fit and performance.
Step 1: Attach the Sling to Your Bow
First, you need to connect the sling to your bow. Locate the dedicated mounting hole on your bow’s riser. This is usually at the bottom, often where you’d screw in a stabilizer. Some slings have a screw-in attachment, while others might use a small loop that threads through the hole and secures.
If it’s a screw-in type:
- Gently screw the attachment into the riser’s mounting hole.
- Tighten it until it feels snug, but don’t over-tighten, as you could strip the threads on your bow or the sling attachment.
- Ensure it’s securely fastened and won’t wiggle loose.
If it’s a loop-through type:
- Thread the loop through the mounting hole.
- Secure it according to the sling’s design (e.g., through a buckle, a grommet, or a sliding knot).
- Pull it snugly to ensure it won’t slip out.
Step 2: Place the Sling Around Your Wrist (Initial Fit)
Now, put the sling on your bow hand wrist. Do this before you nock an arrow or draw the bow. You want to find a comfortable position that feels natural.
Where to place it: Most archers prefer to position the sling slightly above the hand, closer to the elbow, on the fleshy part of the forearm, just beyond the wrist bone. This area provides a good balance of support and flexibility.
Initial Tension: Don’t worry about perfect tightness yet. Just get it loosely around your wrist so you can feel where it sits.
Step 3: Adjust the Length for Proper Support
This is the core of the adjustment process. The goal is to have the sling snug enough to catch the bow when you relax your hand, but loose enough that it doesn’t restrict your normal grip or cause tension while shooting.
Method 1: The “Relax and Catch” Method (Recommended for Beginners)
- With the sling loosely around your wrist, hold your bow in a relaxed shooting position, as if you were about to draw.
- Now, draw the bow back (without an arrow, or with a practice arrow and a safe backstop).
- At full draw, relax your grip slightly on the bow handle. You don’t need to let go completely, just relax the muscles in your hand and fingers.
- The bow should begin to tilt forward. The wrist sling should catch the bow, preventing it from dropping more than a few inches. It should feel supportive but not tight or pulling unnaturally.
- If the bow drops too far, the sling is too loose. If it feels like it’s pulling back on your hand or restricting your natural release, it’s too tight.
- Make small adjustments to the sling’s length using its adjuster mechanism. Shorten it if the bow drops too much. Lengthen it if it feels too tight or restrictive.
Method 2: The “Comfort and Grip” Method
- Loosely place the sling around your wrist, ensuring it won’t impede your grip.
- Tighten the sling until it feels snug and secure, but not constricting. You should be able to comfortably clench your fist without feeling the sling dig in or pull.
- Imagine you are holding the bow; the sling should feel like it’s supporting the weight without adding extra pressure to your grip.
Table: Common Sling Adjustment Issues and Solutions
| Problem | Sling Setting | How to Fix |
|---|---|---|
| Bow drops too much on release | Too Loose | Shorten the sling. Make it slightly tighter until the bow is caught at a comfortable angle. |
| Sling feels too tight, restricts grip, or causes discomfort | Too Tight | Lengthen the sling. Loosen it until you can grip the bow naturally without feeling pressure from the sling. |
| Sling digs into wrist/forearm | Incorrect Position or Too Tight | Adjust the position slightly higher on the forearm. Loosen the sling. Ensure the wrist pad (if any) is properly positioned. |
| Inconsistent bow drop | Variable Tension | Ensure consistent relaxation of your grip. Re-adjust the sling for a stable, repeatable catch. |
Step 4: Test with a Draw Cycle
Once you’ve made an adjustment, it’s time to test it. This is crucial. You don’t want to discover a poorly adjusted sling during actual shooting.
- Nock an arrow (if you have a safe target and backdrop).
- Draw the bow back to your anchor point.
- At full draw, gently relax your grip on the bow. Don’t yank your hand away, just let your fingers and hand muscles loosen.
- Observe how the bow falls forward and how the sling catches it.
- Does it feel balanced? Does the bow fall to a natural, repeatable position? Does the sling feel like it’s helping, not hindering?
- If it’s not quite right, repeat Step 3, making small adjustments until it feels good.
Step 5: Fine-Tuning and Comfort Check
Archery is all about feel, so a final comfort check is important. With the bow drawn and released, how does your wrist feel? Does the sling cause any pinching or rubbing?
- Positioning: Experiment with placing the sling slightly higher or lower on your forearm. Sometimes a millimeter makes a difference.
- Tightness: You’re looking for a balance. The sling should be tight enough to catch the bow reliably, but loose enough that you can forget it’s there during the shot. When you fully relax your grip, the bow should tilt forward about 45 degrees and be caught by the sling.
- Grip: Ensure the sling isn’t forcing you to alter your natural bow grip. Your grip should remain relaxed and consistent. A good resource for understanding relaxed grip is from the USA Archery “Archery 101”.
It might take a few draws and minor adjustments to get it perfect. Be patient with yourself – finding that ideal fit is part of the learning process.
Advanced Adjustments and Considerations
Once you’ve got the basic fit dialed in, here are a few extra points to consider for optimizing your wrist sling:
Bow Type Differences
- Recurve Bows: For recurve archers, especially those shooting barebow or Olympic recurve, a very minimalist sling is often preferred. The focus is on allowing maximum freedom of movement for the hand while still preventing the bow from falling. Torque isn’t as much of an issue as with compound bows, but safety is still paramount.
- Compound Bows: Compound bows are heavier and produce more kinetic energy, making a secure and properly adjusted sling even more critical. It helps manage the bow’s inertia upon release and reduces shooter-induced torque. Compound archers often use slightly wider or padded slings for better comfort.
Material of the Sling
The material of your sling can affect comfort and how it interacts with your clothing:
- Leather: Durable, can be very comfortable, but might require a break-in period.
- Nylon/Polyester: Strong, lightweight, often water-resistant, and easy to clean.
- Paracord: Very strong and versatile, often used in DIY slings. Can sometimes be a bit stiff.
- Neoprene/Padded slings: Offer extra cushioning and can be more comfortable for extended use.
Ensure the material doesn’t snag on your clothing, which could affect your release. Some archers wear a long-sleeved shirt or a shooting sleeve to ensure a smooth interface between the sling and their arm.
The “Perfect” Drop Angle
There’s no single, universally “correct” angle for how far your bow should tilt forward when you relax your grip. It’s largely personal preference and dependent on your drawing technique and bow.
However, a common guideline is that the bow should tilt forward roughly 30-45 degrees. This angle allows the bow to fall away from your hand naturally, without tugging on your fingers or affecting your follow-through, while still being securely held by the sling.
If your bow falls too far forward (almost parallel to the ground), your sling might be too loose or you might be gripping the bow too hard and releasing it too abruptly. If it barely moves, the sling is likely too tight.
Sling Maintenance
Like any piece of gear, your wrist sling needs a little care:
- Check for Wear: Regularly inspect the sling for fraying, cracks, or any signs of damage, especially near the attachment points and the adjuster. A worn sling is a safety risk.
- Clean it: If it gets dirty, wipe it down with a damp cloth. For leather, use a leather conditioner occasionally.
- Retighten: Metal screws can sometimes loosen with vibration. Periodically check that your sling’s attachment to the bow is still secure.
For more insights on bow maintenance, including accessories like slings, the Archery Trade Association (ATA) often provides excellent resources on equipment care.
Common Beginner Mistakes with Wrist Slings
As a coach, I see a few common slip-ups when beginners first get to grips with their wrist slings. Avoiding these can save you a frustration or two:
- Mistake 1: Making it too tight. This is probably the most frequent error. Archers think the sling needs to be like a handcuff to be effective. This creates tension in the bow arm and can lead to inconsistent shooting. Remember, it’s there to catch, not to grip.
- Mistake 2: Making it too loose. On the flip side, if the sling is so loose that the bow actually tumbles out of your hand when you release, it’s not doing its job and can be dangerous.
- Mistake 3: Forgetting about it. Some archers wear the sling so tightly or in such a way that they are constantly aware of it. The goal is to adjust it so it supports the bow properly upon release and then becomes almost unnoticeable until it performs its function.
- Mistake 4: Incorrect positioning on the wrist. Not all parts of the wrist are created equal for sling support. Too far down on the hand can be uncomfortable; too high can feel awkward. Finding that sweet spot on the forearm, just past the wrist bone, is key.
- Mistake 5: Not testing and re-adjusting. What feels right at first might not be perfect after a few shots. Archery is about refinement. Don’t be afraid to tweak the adjustment until it feels absolutely right for your shot.
Taking a little time to get this right will pay dividends in your shooting. Think of it as setting up your foundation.
Frequently Asked Questions about Bow Wrist Slings
Q1: How tight should my bow wrist sling be?
Your bow wrist sling should be snug enough to catch the bow when you relax your grip, but not so tight that it restricts your natural hand and finger movement or causes discomfort. When you draw and relax your grip, the bow should tilt forward about 30-45 degrees and be held by the sling. You should be able to make a fist comfortably without the sling digging in.
Q2: Where exactly on my wrist should the sling sit?
The most common and comfortable position is on your forearm, just above the prominent wrist bone closest to your elbow. This area provides good support without interfering with the grip or the natural pivoting motion of your hand upon release.
Q3: What happens if my bow drops too far forward after I shoot?
If your bow drops significantly forward when you relax your grip, your wrist sling is likely too loose. You’ll need to shorten the sling to make it tighter. Make small adjustments and test again until the bow is caught at a comfortable, consistent angle.