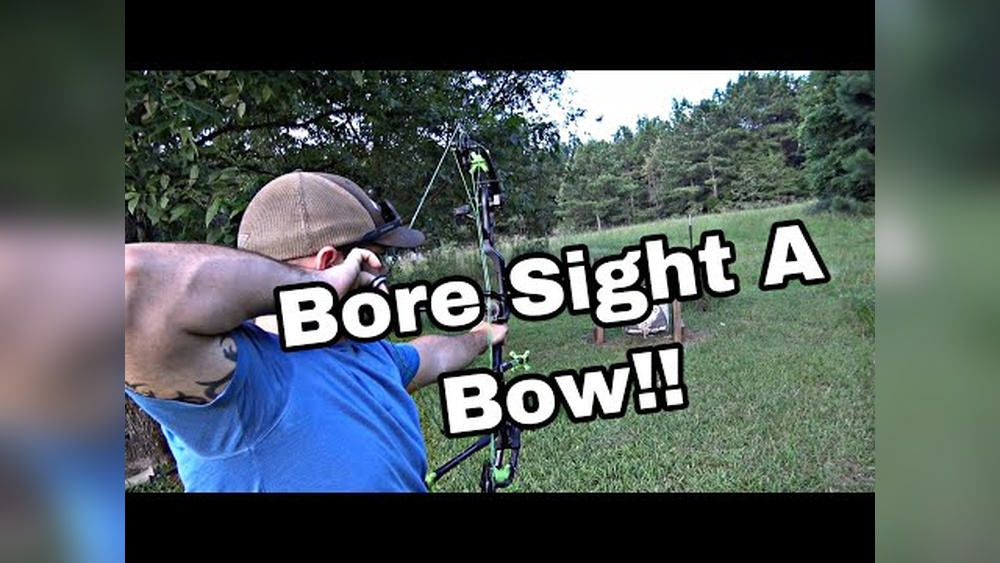
How To Bore Sight A Bow
Mastering the art of archery requires more than just strength and skill, it demands precision, consistency, and a deep understanding of your equipment. For both novice and seasoned bowhunters, ensuring your bow is accurately sighted can be the difference between a clean shot and a missed opportunity. Bore sighting a bow, while a term more commonly associated with firearms, has become increasingly relevant in the archery world as modern compound bows and advanced sighting systems have emerged. By learning how to bore sight a bow properly, archers can dramatically reduce sight-in time, conserve arrows, and achieve tighter groupings right from their first shots.
The process of bore sighting a bow involves aligning the physical axis of the arrow (the “bore”) with the bow sight before live shooting. This initial alignment acts as a crucial baseline, enabling rapid fine-tuning and minimizing frustrating trial and error.
Whether you’re setting up a bow for the first time, swapping out sights, or troubleshooting erratic arrow flight, understanding and applying effective bore sighting techniques will enhance both accuracy and confidence. This comprehensive guide explores every aspect of bore sighting a bow, including essential tools, step-by-step instructions, troubleshooting tips, and advanced methods for compound, recurve, and even crossbows.
Key Takeaways
- Bore sighting a bow aligns the arrow’s path with the bow sight before live shooting, saving time and arrows.
- Proper setup requires the right tools, a stable shooting environment, and attention to detail.
- Different bow types and sighting systems (fixed pin, single pin, peep sights) require tailored bore sighting methods.
- Troubleshooting and fine-tuning are essential for achieving perfect arrow flight and groupings.
- Real-world examples and expert tips help you avoid common mistakes and accelerate the sight-in process.
Understanding Bore Sighting In Archery
Bore sighting in archery isn’t as widespread or standardized as in firearms, but its principles are invaluable for ensuring your first shots are close to the mark. The core goal is to visually align the arrow’s path with the bow sight, reducing the need for major sight adjustments after shooting.
What Is Bore Sighting?
Unlike firearm bore sighting, which uses a laser or visual device to align a gun’s barrel with its sights, archery bore sighting leverages the visible axis of the arrow. This is typically done by mounting an arrow on the rest, visually lining it up with the sight pin, and adjusting the sight or rest so the pin sits directly above the arrow’s centerline.
Why Is Bore Sighting Important?
Proper bore sighting:
- Reduces wasted arrows and time during initial sight-in.
- Minimizes large sight adjustments after your first shots.
- Provides a consistent baseline for fine-tuning.
- Helps diagnose and correct misalignment issues (e.g., if your sight or arrow rest is significantly off-center).
For competitive archers and bowhunters, these advantages can directly impact performance and confidence in the field.
Historical Context And Modern Relevance
While traditional longbow and recurve shooters relied on instinct and repetition, today’s compound bows and advanced sights demand greater mechanical precision. Bore sighting has become an essential setup step for archers using:
- Multi-pin sights
- Single-pin slider sights
- Peep sights and scopes
- Drop-away and fixed arrow rests
As archery grows in both recreational and competitive arenas, the demand for repeatable accuracy has made bore sighting a foundational practice.
Essential Tools And Preparation For Bore Sighting A Bow
Before you begin, assembling the right equipment and setting up a controlled environment is critical for effective and safe bore sighting.
Must-have Tools And Accessories
The following items will streamline your bore sighting process:
- Bow press (for compound bows, if adjusting cam timing or draw length)
- Bow square (T-square) for nocking point alignment
- Allen wrenches (for sight and rest adjustments)
- Leveling device (bubble level or string level)
- Paper or laser alignment tool (optional but useful for visualizing arrow path)
- Stable bow vise or shooting platform
- Target (at 10, 20 yards for post-bore sight validation)
- Sharpie or marker (for reference marks)
Setting Up Your Workspace
A controlled environment helps eliminate variables:
- Select a well-lit indoor space with minimal distractions.
- Ensure the shooting lane is clear and safe.
- Use a sturdy table or bow vise to keep the bow upright and stable during adjustments.
- Have your tools within easy reach to avoid unnecessary movement.
Preparing Your Bow
Before bore sighting:
- Inspect all components for wear, damage, or loose screws.
- Install the arrow rest and sight according to manufacturer instructions, but don’t fully tighten screws yet.
- Mount a practice arrow on the rest (use a non-damaged arrow to avoid safety risks).
- Double-check the draw length and draw weight are set to your preference.
Pro Tip: Always work with an unstrung or uncocked bow when making mechanical adjustments to avoid injury.

Credit: www.amazon.com
Step-by-step Guide: How To Bore Sight A Bow
With preparation complete, you’re ready to align your bow’s mechanical axis with your sight. The following step-by-step process applies to both recurve and compound bows, with minor adjustments for each type.
Step 1: Establish Center Shot
Center shot refers to aligning the arrow rest so the arrow sits directly in line with the bowstring and riser window.
- Nock an arrow and place it on the rest.
- Stand behind the bow and look down the string towards the sight.
- Adjust the arrow rest left or right (using micro-adjust knobs or Allen screws) until the arrow is centered with the string and the sight window.
- For compound bows, ensure the arrow’s shaft bisects the limb bolts when viewed from behind.
Example: In my experience, compound shooters who skip center shot adjustments often find their groupings consistently left or right, regardless of sight pin position.
Step 2: Level The Bow And Sight
Proper leveling prevents vertical misalignment.
- Attach a bubble level to the riser or use a string level on the arrow shaft.
- Adjust the bow until perfectly vertical.
- Confirm the sight housing is also level using the built-in bubble (if available).
Step 3: Align Sight Pin With Arrow
For fixed pin sights:
- Move the top (20-yard) pin so it sits directly above the arrow’s shaft when the bow is at full draw.
- Visually check from behind to ensure the pin covers the arrow point.
For single-pin sights:
- Set the pin to its “home” position (typically 20 yards).
- Align the pin with the arrow as above.
Step 4: Secure All Components
Once satisfied with alignment:
- Gradually tighten all sight and rest screws.
- Re-check alignment after tightening, hardware can shift during this process.
- Mark the rest and sight positions with a Sharpie or reference sticker for future troubleshooting.
Step 5: Validate With A Test Shot
Move to a safe distance (10, 20 yards) and shoot a group of arrows. Your group should land close to the sight’s point of aim, requiring only minor adjustments. If your arrows consistently hit off-center, revisit the previous steps.
Bore Sighting Techniques For Different Bow Types
The basic principles of bore sighting apply to all bows, but each type has unique considerations.
Compound Bows
Compound bows with advanced cams, drop-away rests, and multi-pin sights require meticulous alignment. Cam timing and nock point height can affect arrow flight, so use a bow press and T-square for initial setup.
- Ensure the cable guard does not torque the string sideways.
- For drop-away rests, check for full clearance at release.
Recurve Bows
With recurve bows, especially those used for Olympic target archery:
- Focus on aligning the plunger button and rest.
- Sight pins are often smaller, so precision is key.
- Use a bow square to set nock point height and check tiller (distance between limb and string).
Crossbows
Bore sighting for crossbows involves aligning the rail, scope, and string. Use a laser bore sighter (commonly available for firearms) to project a dot at a set distance, then adjust the scope’s reticle accordingly.
Table: Bore Sighting Differences By Bow Type
| Bow Type | Main Sighting Device | Unique Steps | Common Issues |
|---|---|---|---|
| Compound | Multi-pin/Single-pin Sight | Cam timing, drop-away rest setup | Torque, nock point misalignment |
| Recurve | Simple Sight Pin | Plunger button, tiller adjustment | Rest height, inconsistent nock point |
| Crossbow | Scope/Red Dot | Laser bore sighter, rail alignment | Scope mounting, string stretch |
Advanced Methods And Fine-tuning After Bore Sighting
Once you’ve completed basic bore sighting, advanced techniques and fine-tuning will enhance your bow’s performance and your confidence at longer distances.
Paper Tuning
Paper tuning involves shooting an arrow through a suspended paper sheet at close range. The resulting tear pattern indicates whether your arrow is flying straight or fishtailing.
- A bullet hole tear means perfect flight.
- Horizontal or vertical tears indicate rest, nock point, or fletching issues.
Make incremental adjustments (rest, nocking point, fletching) and repeat until you achieve a clean hole.
Walk-back Tuning
This method tests your sight’s accuracy at increasing distances.
- Place a vertical tape line on your target.
- Shoot arrows from 10, 20, 30, and 40 yards, aiming at the same spot.
- Arrows should land along the tape line; if not, adjust the windage or rest.
Walk-back tuning is ideal for multi-pin sights and confirms the bore sighting baseline holds across distances.
Micro-adjustable Sights And Rests
Modern sights and rests often feature micro-adjustment knobs for windage and elevation. Small, precise changes can have a dramatic effect at longer ranges.
- Move the rest left/right for group center.
- Adjust sight pins for elevation and windage.
Using A Laser Alignment Tool
Some archers use a laser alignment tool (available from archery shops) that attaches to the riser or arrow shaft. The laser projects the arrow’s path, making sight alignment easier, especially in low light.
Pro Tip: Don’t rely solely on laser tools; always validate with live shooting, as arrow flight can differ due to spine, fletching, and bow tuning.
Real-world Examples And Case Studies
Understanding bore sighting in action can help you avoid pitfalls and optimize your process. Here are some concrete, real-world examples.
Example 1: Tournament Archer’s Quick Reset
A competitive archer at a regional tournament noticed her arrows grouping 8 inches left at 20 yards after replacing her sight. She used the bore sighting technique to realign her top pin directly above the arrow shaft, then fine-tuned with paper tuning.
Within 10 minutes, her groups were centered, and she regained confidence for the event.
Example 2: Bowhunter’s Field Repair
A bowhunter dropped his compound bow, knocking the sight out of position. Without access to a bow press, he performed a visual bore sight in the field, aligning the sight pin with the arrow at full draw. His first test shot at 15 yards was only 2 inches off target, requiring just a minor sight adjustment before resuming the hunt.
Example 3: Crossbow Scope Alignment
A crossbow user mounting a new scope used a laser bore sighter to align the reticle with the string’s axis before firing any bolts. This reduced the initial adjustment time and saved wear on his target and bolts.
Table: Results Comparison Before And After Bore Sighting
| Scenario | Initial Grouping (inches off center) | Post-Bore Sighting Adjustment (inches) | Final Group Center |
|---|---|---|---|
| Tournament Archer | 8″ Left | 3″ Right | Centered |
| Bowhunter | Unusable | 2″ Low | Centered |
| Crossbow User | 6″ High | 1″ High | Centered |
These examples highlight how bore sighting can rapidly correct major misalignments and set the stage for precision shooting.
Troubleshooting Common Bore Sighting Issues
Even with careful attention, bore sighting can reveal or create new challenges. Understanding and troubleshooting these common issues can save frustration and ensure consistent accuracy.
Consistently Off-target Groups
If your arrows consistently group left, right, high, or low after bore sighting, check:
- Arrow spine (stiffness) compatibility with bow draw weight.
- Nocking point height, too high or low nock points cause vertical stringing.
- Arrow rest or sight movement, ensure all screws are tight.
- Incorrect peep sight height for your anchor point.
Wide Or Scattered Groupings
Wide groups may indicate:
- Inconsistent anchor point or grip.
- Loose sight hardware.
- Damaged or mismatched arrows.
Pro Tip: Mark your anchor point on your face or use a kisser button to maintain repeatability.
Sight Or Rest Won’t Adjust Far Enough
If you run out of adjustment range on your sight or rest:
- Check for incorrect installation, sight or rest may be mounted too far off-center.
- Inspect for bent or damaged components.
- On compound bows, verify that the limbs and cams are not twisted or out of alignment.
Table: Troubleshooting Quick Reference
| Problem | Likely Cause | Solution |
|---|---|---|
| Consistent Left/Right Groups | Rest misalignment, arrow spine | Adjust rest, check arrow specs |
| Vertical Stringing | Nocking point too high/low | Move nocking point, verify level |
| Sight Maxed Out | Incorrect mounting, hardware issue | Reinstall sight/rest, inspect parts |
| Wide Groups | Poor form, loose hardware | Check anchor, tighten screws |
Safety Considerations And Best Practices
While bore sighting is a low-risk process compared to live shooting, maintaining safety is paramount.
Always Check For Obstructions
Before drawing or firing, ensure the arrow rest is clear of debris and that the arrow is properly seated. Obstructions can cause unpredictable arrow flight or equipment damage.
Use The Correct Arrow
Only use arrows matched to your bow’s draw weight and draw length. An incorrect arrow can shatter upon release, causing injury.
Wear Eye And Arm Protection
While adjusting, wear an arm guard and safety glasses to prevent injury from string slap or accidental dry fires.
Never Dry Fire
Never draw and release a bow without an arrow (“dry fire”). This can cause catastrophic limb or cam failure, damaging the bow and risking injury.
Consult Professional Bow Technicians
If you’re unsure about any adjustments, consult a certified bow technician. They can assist with complex tasks like cam timing, limb alignment, or sight installation.
Frequently Asked Questions
How Does Bore Sighting A Bow Differ From Bore Sighting A Rifle?
Bore sighting a bow involves visually aligning the arrow’s path with the bow sight, whereas rifle bore sighting uses a laser or optical tool to align the barrel with the rifle’s sights or scope. Bow bore sighting is more manual, relying on the visible axis of the arrow, while firearm bore sighting is often aided by dedicated devices.
Can I Use A Laser Bore Sighter With My Bow?
Laser bore sighters are primarily designed for firearms, but specialized laser alignment tools for archery do exist. These tools attach to the riser or arrow shaft and project a dot to help align the sight. They’re particularly useful for crossbows or when making fine adjustments in low-light conditions.
For more information, check reputable archery retailers or manufacturers.
Do I Need To Re-bore Sight My Bow After Changing Arrows?
Yes. Different arrows can have varying spine, weight, and length, all of which can impact the flight path. If you switch to a different arrow model or weight, it’s advisable to check your bow’s bore sight alignment and make necessary adjustments for optimal accuracy.
What Should I Do If My Bow Sight Won’t Adjust Far Enough Left Or Right?
This is often caused by incorrect mounting or a misaligned arrow rest. Double-check that the sight and rest are installed according to the manufacturer’s guidelines. If you still can’t achieve center shot, consult a professional to inspect for bent or damaged components or consider upgrading to a sight with a wider adjustment range.
How Often Should I Bore Sight My Bow?
Bore sight your bow whenever you install a new sight, change the arrow rest, switch arrow types, or after any significant impact or equipment change. Regular checks, especially before hunting season or tournaments, will ensure your setup remains accurate.
For more technical guidance and advanced tuning advice, visit the official USA Archery site or check detailed tutorials on Wikipedia.
Setting up your bow for precision shooting starts with effective bore sighting. By following the methods and troubleshooting tips outlined here, you’ll reduce guesswork, conserve arrows, and develop the confidence to achieve consistently tight groups. Whether you’re a seasoned archer or just beginning, investing the time to bore sight your bow pays dividends every time you nock an arrow and draw the string.